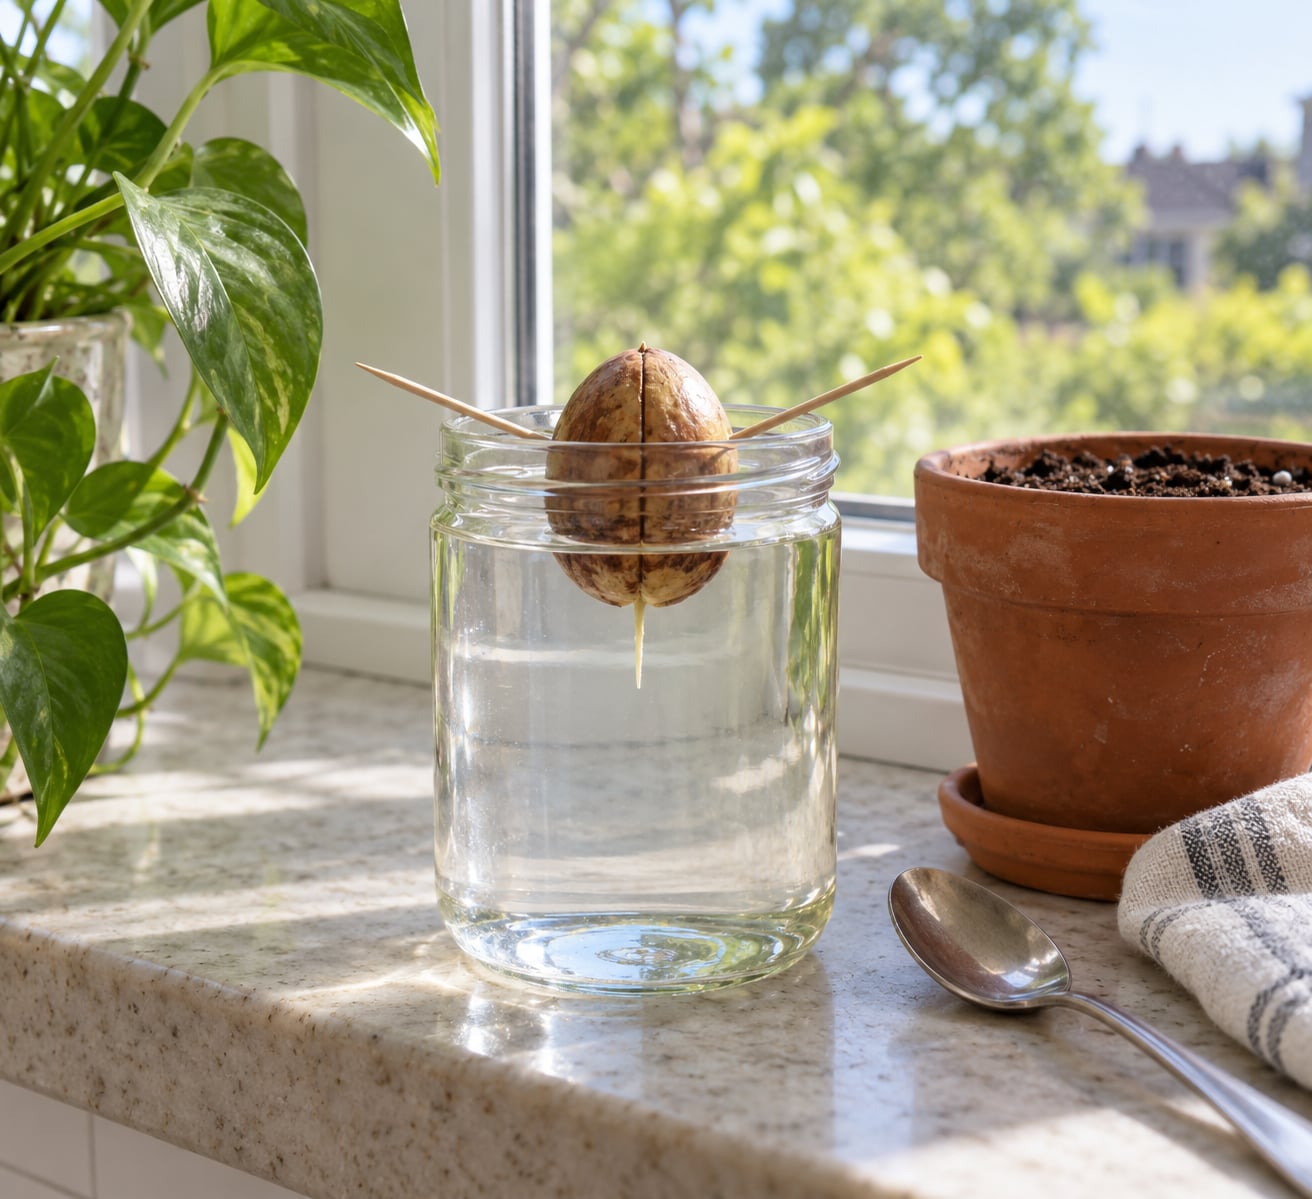
To plant an avocado seed with kids, wash the pit, push three toothpicks into its sides, and suspend it over a jar so the wide, flat bottom end sits in the water. Change that water every five to seven days, keep the jar in a warm spot with bright indirect light, and expect a root in two to six weeks. Once the stem reaches four to six inches, plant the seedling in soil.
This is one of those projects that costs almost nothing because the main ingredient was probably in the fruit bowl already. It also stretches far longer than one afternoon: there is a seed to check, a jar to refill, and a plant to measure every week for a month or two. That wait is where the learning actually happens, and where most parents get antsy.
My honest expectation setting up front: the plant you end up with is a handsome houseplant with big glossy leaves, and it will not give you avocados. Commercial avocado trees are grafted, and a tree grown from a seed is genetically different from the fruit it came from. More on that later, because it is the question I get asked most.
Table of Contents
- What You Need
- How to Plant an Avocado Seed with Kids Step by Step
- How to Plant an Avocado Seed with Kids: Prepare the Seed
- Step 2: Start the Seed in Water
- Step 3: Transfer It to Soil
- Step 4: Watch and Measure the Growth
- Common Mistakes and How to Fix Them
- Will It Ever Give Us Avocados?
- Frequently Asked Questions
- How long does it take for an avocado seed to sprout with kids?
- Do I need toothpicks to plant an avocado seed?
- Which end of an avocado seed should point down?
- Can I grow an avocado seed in soil instead of water?
- Why is my avocado seed not sprouting?
- Will an avocado seed grow into a full-sized tree?
- Conclusion
What You Need
The whole setup fits in a kitchen drawer. For the water method you need a ripe avocado, a jar or glass narrow enough that the seed cannot fall through the mouth, three toothpicks, water, a spoon or knife for prying the pit out, and a paper towel for drying.
For the part that comes later, add a small pot with drainage holes, a bag of potting soil, and a ruler or measuring tape. If your winters are dark and your windows face away from the sun, a small grow light helps in the months after the seedling is established.
A few things people treat as required that are not. You do not need toothpicks if you use the paper towel method, and you do not need a whole extra avocado for science, though starting three seeds at once is a good idea since not every pit germinates. Peeling the brown skin is optional too, and some people skip it entirely.
Two setups work well for a family project:
- Water and toothpicks. The seed stays whole, so you can see every change happening to it. This is the better option when the point is watching.
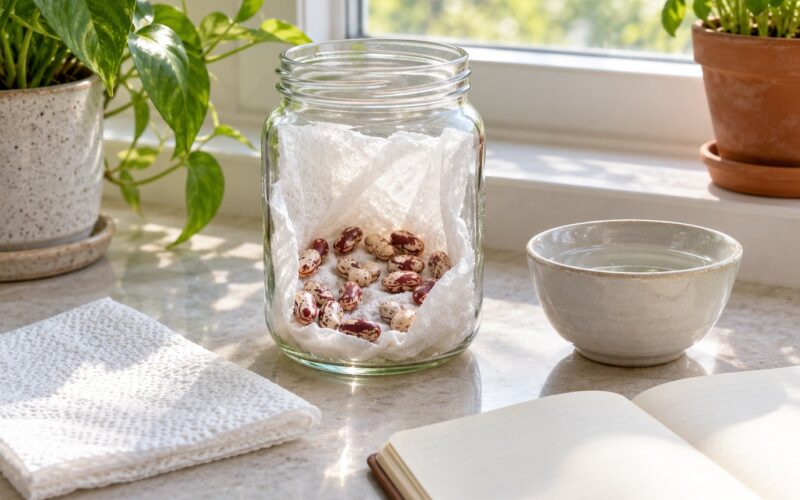
- Damp paper towel in a zip bag. Wrap the seed in a wet towel, seal the bag, leave it partly open, and keep it in a dark drawer. Fewer spills, more kid-friendly, and parents often report better success from it.
You can also skip both and push the seed straight into soil. It works about half the time, and because the root grows hidden you lose the part children enjoy most.
How to Plant an Avocado Seed with Kids Step by Step
How to Plant an Avocado Seed with Kids: Prepare the Seed
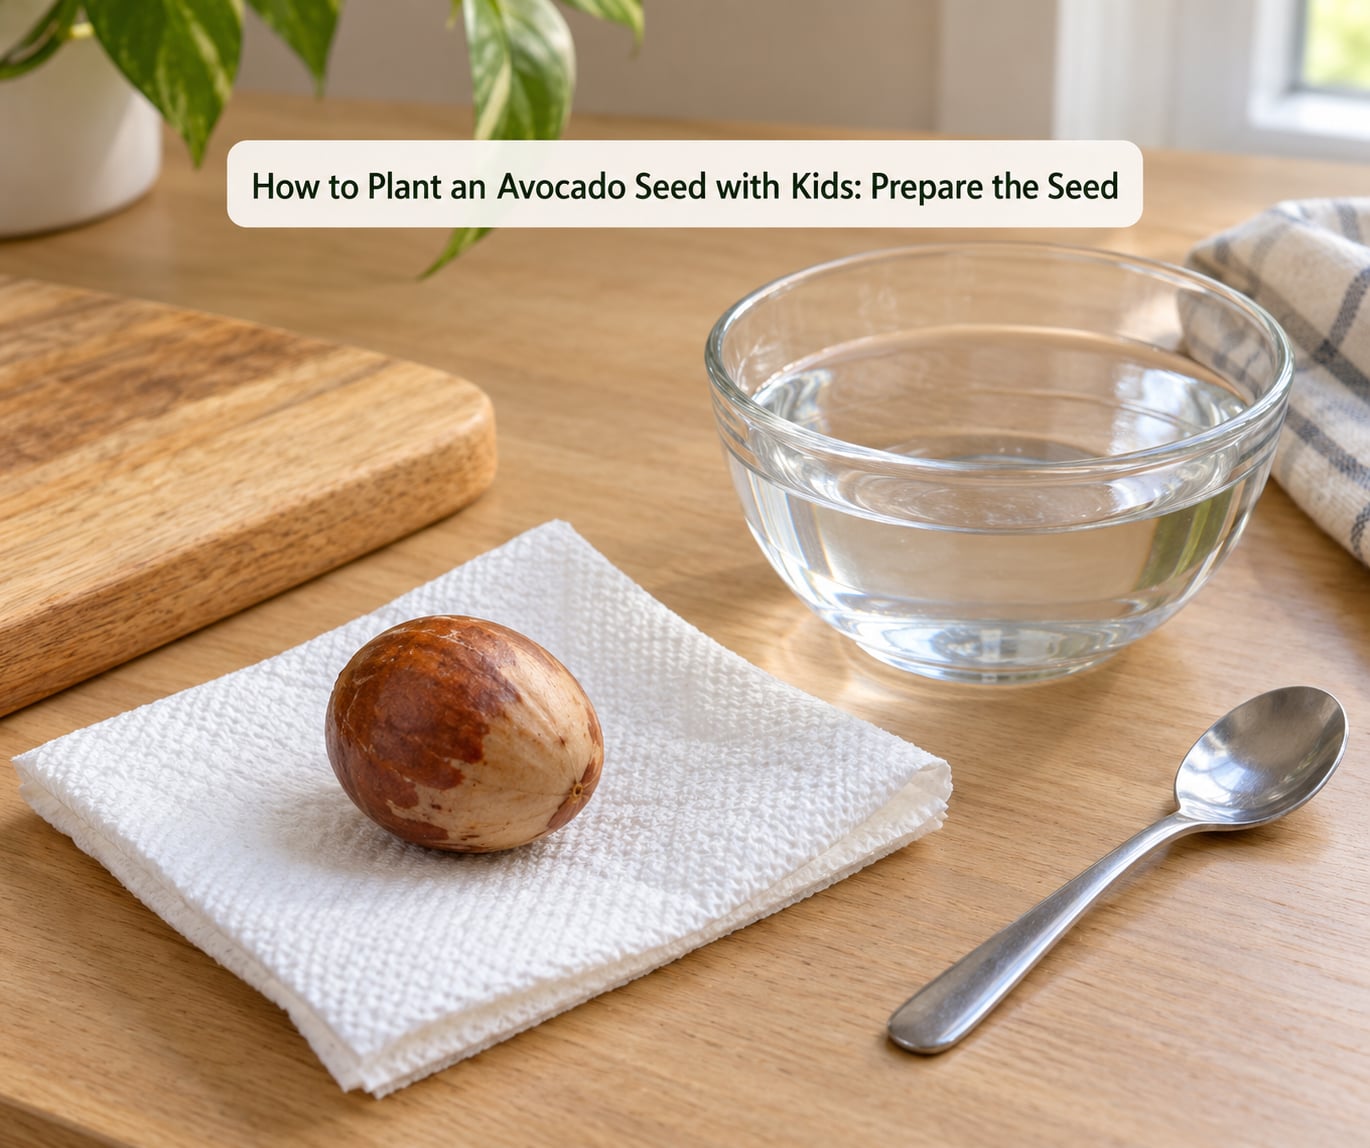
Cut the avocado in half around the stone and twist the halves apart. Work a spoon around the pit until it pops free. Cutting straight through the seed damages it, and damaged seeds rot instead of germinating, so this is the step worth doing slowly.
Rinse off every bit of green flesh, then pat the pit dry and look it over. Check for cracks, soft spots, or a bad smell. A solid pit with no soft patches is worth planting; a squishy one is not.
Find the bottom end next. It is wider and flatter, and often has a slightly rough, lighter circle where the stem was attached. That flat end is the bottom, and it is the end that grows the root. The pointed top end pushes up the stem. Round pits are the tricky case, so put the seed on a flat surface and pick whichever end keeps it from wobbling. If it rocks either way, use the toothpick jar method and check which end grew the root; if it is the wrong one, turn the seed over.
Some people peel the thin brown skin to let moisture in faster. It can help, but a child can peel a whole seed in about five minutes and lose the germination window, so I would leave it on for a first attempt.
For the paper towel method, wrap the seed in a damp towel, put it in a zip bag, leave a finger-width gap at the top, and check every two or three days. It should feel like a damp sponge, not wet.
Step 2: Start the Seed in Water
Fill the jar with water. Push three toothpicks into the middle of the seed, spaced evenly around its sides, then rest the seed on the rim so the flat bottom end hangs in the water. About half an inch to an inch of the seed should be submerged. Set the jar somewhere warm with bright indirect light, away from a radiator or a hot windowsill that bakes in afternoon sun.
Pouring the water out is how pit halves break, so the safer habit is to change it without separating anything. Tip the old water down the sink with the seed held back by the toothpicks, or use a small syringe to pull the old water out from the side. That single habit prevents the most common avoidable disaster.
Change the water every five to seven days and refill to the same level. Rinse the seed under the tap while it is suspended, which also washes off fuzzy white mold.
Germination, meaning the seed waking up and starting to grow, shows up in stages. Most seeds do nothing visible for two to three weeks, and that is not a failure. The first sign is usually a split along the bottom or side, then a white tap root pushing downward. Roots can grow for weeks with no stem above, because the root has to build before the shoot can push up.
A warm kitchen speeds things along. In a cool room the same seed can take seven weeks. If nothing has happened by week eight, start a fresh pit rather than waiting on it.
Step 3: Transfer It to Soil
Move the seed once the stem is four to six inches long and the tap root is around the same length. Plant it so the seed sits about half above the soil line, which keeps the part that can rot out of wet soil. Make a hole with your finger or a pencil, lower the seed in, and firm the soil around the root without packing it down.
The transition shocks the plant for a few days. Leaves often droop, go pale, or drop entirely. Keep the pot in bright indirect light and water only when the top inch of soil is dry. If the stem goes soft and dark at the soil line, you buried it too deep.
From there, care is simple. Water deeply when the top inch dries out and let the pot drain fully. Turn the pot a quarter turn each week so the plant grows even instead of leaning toward the window. Once the stem passes a foot, pinch the newest leaves or cut the stem back about an inch above a leaf node, which pushes the plant to grow bushier rather than tall and thin.
Avocados are tropical and sulk below roughly 45F, so a tree that came inside for winter will often drop leaves and look miserable until it warms up again. Repot every year or two, stepping up one pot size, since a root-bound plant is the most common reason an older avocado starts declining.
Step 4: Watch and Measure the Growth
This is the section that turns the project into something a child remembers. Set up a simple system before the first sprout appears, and the waiting weeks fill up with reasons to check on the jar.
A few things that work well:
- Grow a growth journal. One page per week with the date, a drawing, the stem length in inches, the leaf count, and one sentence about what changed. My kids remember their own drawings better than they remember anything I told them.
- Keep a photo log. Put a coin or a ruler next to the seed every week so the change in size is visible in the picture.
- Use a chart. A piece of tape on the wall or a column of marks on the door with the date beside each height works as well as anything more official.
- Ask questions instead of quizzing. Try: where do you think the root went? Which part of the seed makes the leaves? What would happen if we forgot to change the water? Why do you think this one is growing faster than the others?
A week-by-week timeline gives you a fair picture of what normal looks like:
- Days 1 to 7. Nothing at all, maybe a faint crack. Check the water level twice a week.
- Weeks 2 to 4. A split and a white tap root pointing down. Change the water every five to seven days.
- Weeks 4 to 6. The root lengthening and the stem starting at the top. Start a weekly measurement and photo.
- Weeks 6 to 8. A stem with the first two or three leaves. Move to a pot once the stem hits four inches.
- Week 8 and beyond. Leaves widening and darkening. Bright light, and water when the top inch dries out.
Week by week, children who did not fuss with the seed still end up checking on it. A plant that grows slowly is more interesting to keep up with than one that springs up overnight.
Common Mistakes and How to Fix Them
Most failures come down to four things: a wet seed, a cold seed, a damaged seed, or too short a wait.
- The pit goes slimy or moldy. The water went too long between changes. Rinse the seed, scrub off the fuzzy growth, and refill with fresh water. Set a repeating weekly reminder, because two or three weeks of neglect cannot be fixed by topping the jar up.
- Nothing happens by week eight. Start over. Old pit, cold room, seed damaged at extraction, or the root went the wrong way and never found the water. A fresh seed in warm water usually cracks within two to four weeks.
- Lots of root, no stem. This is normal and not a failure. Roots come first, sometimes three to four weeks before the shoot appears. Keep the seed in water until you see a stem.
- The pit split into two halves during a water change. Not dead, in most cases. Hold both halves together in the water with the toothpicks, and if a stem and root are already growing, they usually keep going. It can reopen into two separate halves as the plant grows.
- The seedling droops right after potting up. Transplant shock, usually for a week. Keep it out of direct sun and hold off on fertilizer. If the stem is soft at the base, replant it higher so more seed stays above the soil.
- Leaves turn brown or yellow indoors. Usually light, temperature, or watering rather than disease. Move the plant closer to the window, keep it away from cold glass and heating vents, and check that the pot drains.
Pruning worries me too, because parents assume cutting the stem is damaging. It is the opposite: pinching the newest growth sends the plant to branch instead of stretching into one tall thin stem, and the plant handles it easily.
Will It Ever Give Us Avocados?
Almost certainly not. Avocados sold in stores are grafted, meaning a fruiting branch is joined onto a rootstock from a different tree. A seed-grown plant is genetically unique and usually does not match the fruit it came from.
Even in the ground outdoors, seed-grown trees often take fifteen years or more before they might fruit, and they may never do it. Indoors, in a pot, in a house with windows, fruit is realistically out of reach.
None of this makes the project a waste. Seed-grown plants make glossy, healthy foliage for years as houseplants, and the process itself is the point. Tell your kids the honest version up front and they tend to like it more than the version where the tree gives you a harvest.
Frequently Asked Questions
How long does it take for an avocado seed to sprout with kids?
Most avocado seeds show a split and a white tap root between two and four weeks, and a visible stem within six to eight weeks. Cooler rooms push that out to seven weeks or more, so warmth matters more than anything else you do. If eight weeks pass with no split at all, discard the pit and start a fresh one rather than waiting on it.
Do I need toothpicks to plant an avocado seed?
No. Toothpicks are only for suspending the seed in a jar of water, which is a suspension job, not a planting requirement. The toothpick-free route is a damp paper towel wrapped around the seed inside a partly open zip bag, kept in a dark drawer until a root appears. You can also skip both and push the seed straight into soil, though you will not get to watch the root grow.
Which end of an avocado seed should point down?
The wide, flat end goes down into the water, and the pointed end goes up. The flat end usually has a lighter, slightly rough circle where the stem was attached, and that is the end that produces the tap root. On a perfectly round pit, rest it on a flat surface and pick the end that stops it wobbling. If it sprouts from the wrong end, turn it over while the root is still short.
Can I grow an avocado seed in soil instead of water?
Yes, and it works roughly half the time. Push the pit into moist, well-draining potting soil with the pointed end up and keep it in bright indirect light, watering whenever the surface dries. The trade-off is that the root grows out of sight, so children lose the part they enjoy most about this project. Growing in water first also tells you which seeds are actually viable before you commit them to a pot.
Why is my avocado seed not sprouting?
The usual causes are a damaged or dried-out pit, a cold room, water left unchanged long enough to turn slimy, or simply giving up too early. Seed viability drops fast, so a pit that has been sitting around for a month is unlikely to start. Check the water level and freshness first, then try again with a seed from a ripe avocado and keep the jar warm and in bright indirect light.
Will an avocado seed grow into a full-sized tree?
In a pot indoors, it stays a houseplant, usually topping out around one to three feet depending on the pot and light. In warm ground it can become a genuine tree, though a seed-grown avocado rarely reaches the size of a grafted one. Avocados are tropical and damaged by frost, so a tree started on a windowsill needs a warm spot and should stay inside through cold weather.
Conclusion
Start tonight: take one ripe avocado from the kitchen, pop the pit out with a spoon, rinse it, and drop it into a jar of water with three toothpicks. That takes ten minutes and costs nothing.
The rest of the project is attention, not effort. Keep the water fresh, measure the stem every Sunday, and write down what changed. If you want to hedge your chances, start three pits at once and let the kids keep the best one. And set the expectation early that this is a houseplant project, not an orchard. It turns out the trade is a good one.