Screen free activities for kids at home are play-based, non-digital activities that use no TV, tablet, phone, or computer. Most need nothing more than cardboard, paper, tape, a few cushions, and whatever is already in the kitchen cupboard. This list covers twelve ideas that work for children roughly three to ten years old, each with a setup, a materials list, and a note on prep time and mess.
The reason parents search for this is rarely boredom alone. It is the third rainy Saturday in a row, a sick day when going outside is off the table, or the after-school window between school ending and dinner. Whatever the trigger, the same problem shows up: most activity lists online are written for four-year-olds, while your kid is nine and unimpressed.
Every idea below lists the age band it actually lands with, how long setup takes, and what kind of mess you are signing up for. Activities needing no store run are marked as such, so you can start one while the coffee is still brewing.
Table of Contents
- 12 Screen Free Activities for Kids at Home at a Glance
- 1. Make and Decorate Paper Airplanes
- How to turn folding into a screen-free afternoon
- 2. Create a DIY Floor Puzzle
- 3. Set Up a Pretend Restaurant
- 4. Build a Small Cardboard Fort
- 5. Make a Treasure Hunt at Home
- 6. Draw a Family Comic Strip
- 7. Play a No-Screen Science Lab
- 8. Create a Living Room Obstacle Course
- How to build one of the screen free activities that actually burns energy
- 9. Make a Memory Matching Game
- 10. Have a Family Dance Party
- 11. Bake or No-Bake Simple Treats
- Safety notes before you start
- 12. Start a Home Collage Challenge
- Frequently Asked Questions
- What are the best screen-free activities for toddlers at home?
- How can I keep kids busy without screens for a whole afternoon?
- What materials do I need for screen-free activities at home?
- How do I choose an activity for a child who gets bored quickly?
- Can screen-free activities work in a small apartment?
- How do I make these activities educational without making them feel like school?
- Where to Start With Your Next Screen-Free Afternoon
12 Screen Free Activities for Kids at Home at a Glance
| Activity | Best age | Prep time | Materials | Mess level |
|---|---|---|---|---|
| Paper airplanes | 4–10 | 5 min | Paper, crayons, ruler | None |
| DIY floor puzzle | 3–8 | 15 min | Cardboard, marker, scissors | Low |
| Pretend restaurant | 3–8 | 20 min | Boxes, paper, dress-up clothes | Low |
| Cardboard fort | 3–10 | 25 min | Boxes, blankets, tape | Low |
| Treasure hunt | 3–9 | 10 min | Clue slips, small objects | None |
| Family comic strip | 5–10 | 5 min | Paper, pencils | None |
| Science lab | 4–10 | 10 min | Baking soda, vinegar, food coloring | Medium |
| Obstacle course | 3–10 | 15 min | Cushions, painter’s tape, soft balls | None |
| Memory matching game | 3–9 | 15 min | Index cards, old magazine scraps | None |
| Family dance party | 3–10 | 10 min | Speakers, paper for dance cards | None |
| Bake or no-bake treats | 4–10 | 20 min | Simple baking staples | Medium |
| Collage challenge | 3–10 | 10 min | Scraps, fabric, glue | Medium |
1. Make and Decorate Paper Airplanes
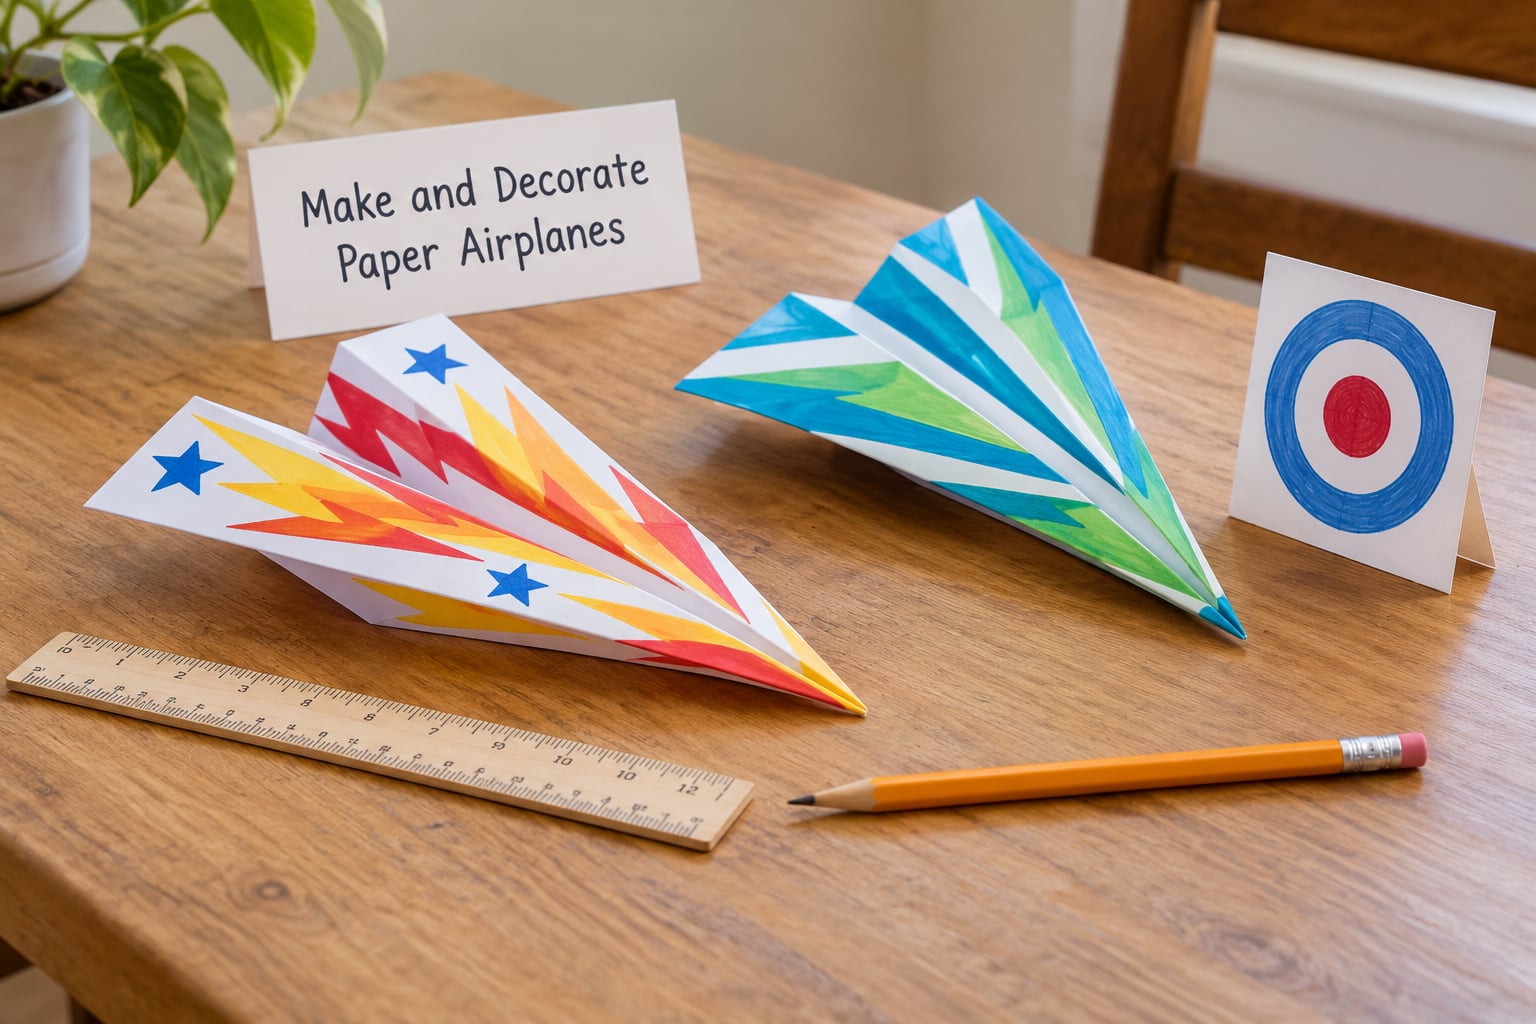
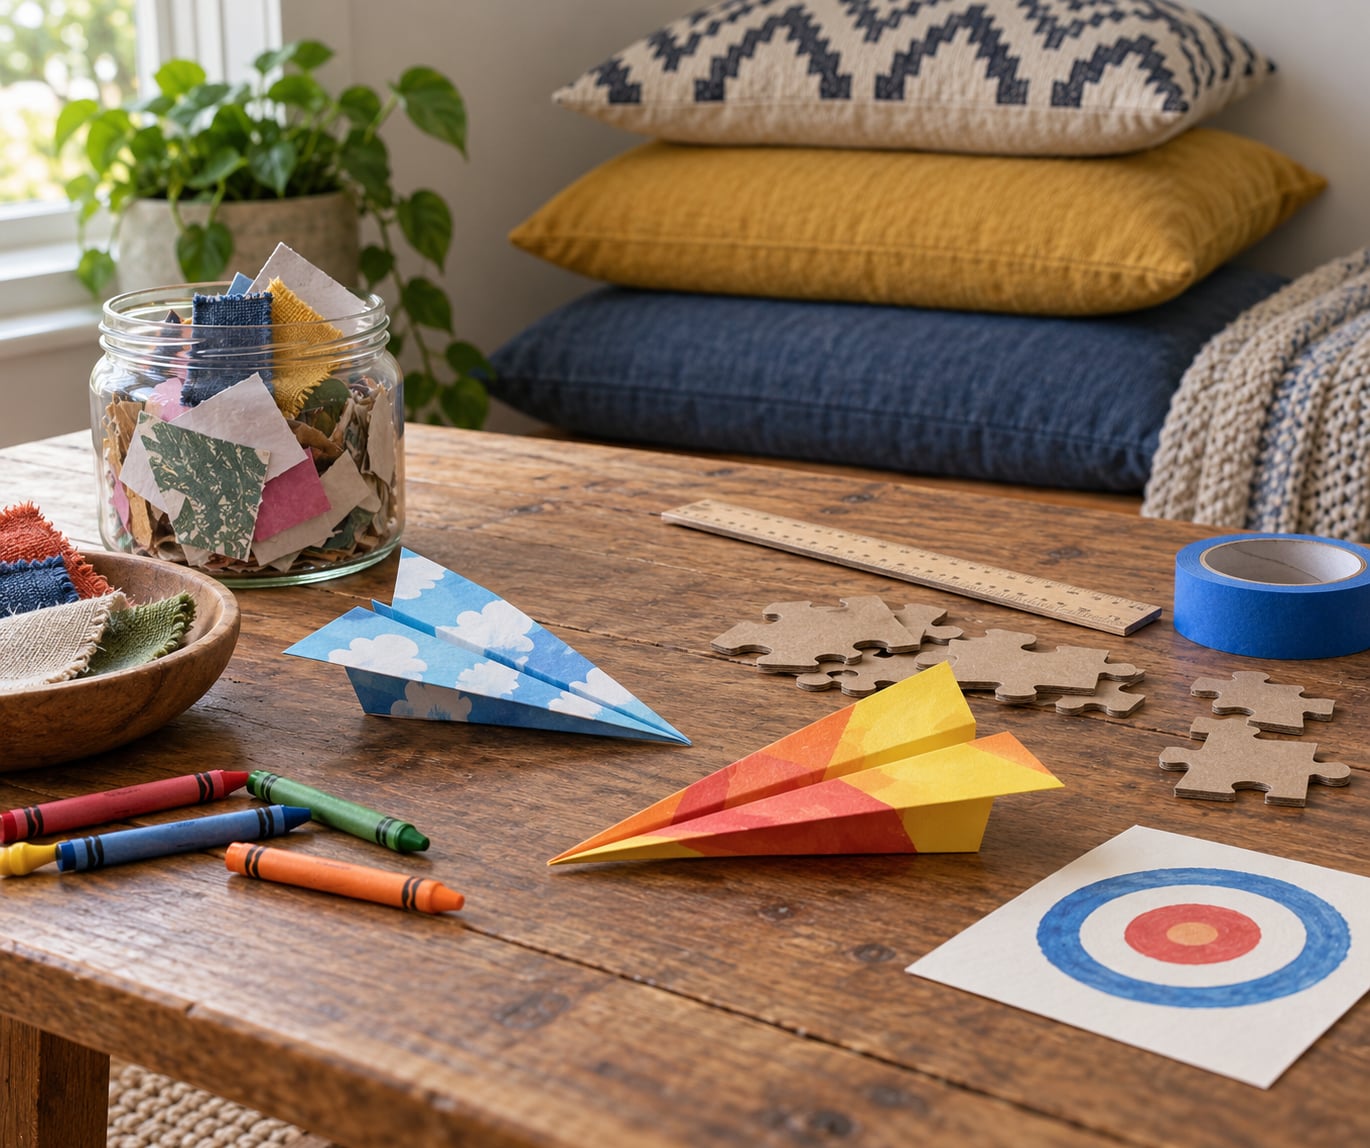
Fold a sheet of paper in half the long way, unfold it, push the corners to the center crease, and fold again. That is the whole flight school. What turns a two-minute craft into a two-hour afternoon is turning it into a competition with a real measurement attached.
How to turn folding into a screen-free afternoon
Draw a target on the floor with painter’s tape, or tape a piece of paper to a door. Each child makes three planes and picks the one that flies straightest. Measure the distance with a step count first, then a tape measure, since step counts are usually wildly inaccurate and produce better arguments.
Then change one variable at a time: heavier paper, a longer fold, a slit cut into the tail. Kids form real hypotheses fast, which is the point. A single sheet of printer paper and a crayon buys you an hour without a single screen.
Best for: ages 4 and up, because the testing conversation needs some reading ability. Younger kids can fold, decorate and throw, which is equally satisfying.
2. Create a DIY Floor Puzzle
Cut a large cardboard rectangle into a grid of pieces, roughly six squares across, then push one square free so the child has a starting edge. Cutting a small notch or bump into each piece turns a grid into something that feels like a real jigsaw, and it takes about fifteen minutes with a craft knife or sturdy scissors.
Once it is solved, the puzzle becomes raw material again. Flip it over and let the kids paint it, use the pieces as bookmarks, or tape them back together into a mosaic for the wall. The repurpose step is the whole reason homemade puzzles get played more than once: solving it is not the end, it is the halfway point.
For a bigger challenge, cut a second cardboard shape with an irregular outline, so the pieces follow a picture rather than a grid. Add a cotton ball with a loop of yarn taped to it for younger children, and keep the pieces large enough that small hands do not frustrate them.
Best for: ages 3 to 8. A three-year-old will finish in five minutes with help; an eight-year-old will want a harder grid.
3. Set Up a Pretend Restaurant
A menu, a serving counter, and one dish worth ordering is enough. Cut a cardboard box into a counter, write three menu items on index cards, and price nothing at all, because a seven-year-old handling pretend money is a problem for a future week. Paper foods made from folded newspaper or torn tissue paper work better than plastic toys.
The part that keeps this running is the role assignment. One child takes orders on a pad, one cooks, one delivers. Adults can join as a difficult customer who changes the order twice, which reliably produces laughter and a lot of improvised problem solving. Pretend play also outlasts other indoor options more often than not, but only once the roles are settled rather than left open.
Best for: ages 3 to 8, especially siblings close in age. It also adapts down for one child, who simply plays both roles and narrates loudly.
4. Build a Small Cardboard Fort
Set the rules before the first box opens: no standing on furniture, no sharp edges, nothing that blocks a door or a smoke detector. Then drape a blanket over two dining chairs pushed together, cut windows with a craft knife from the adult’s hand, and let the kids fill the inside with cushions, a reading lamp, and whatever they decide a fort requires.
Cardboard gives you more structural options than blankets alone. A flat box taped to the floor makes a garage or a spaceship bay. Smaller boxes stacked and taped become a castle wall or a bank vault. Kids who receive a fully decorated fort lose interest quickly, so hand over raw materials and let them run with it.
For small spaces, a single-box hideaway works better than a sprawling build. A shoebox with a door cut in one end becomes a reading nook for a child who is not ready to give up the living room.
Best for: ages 3 to 10. The youngest love the hiding; the oldest get absorbed in designing the interior.
5. Make a Treasure Hunt at Home
Write clues on slips of paper and hide them in sequence, so each one points to where the next lives. “Look where the family gets towels” beats “somewhere in the kitchen,” because a four-year-old can actually act on it. The treasure itself can be small: a sticker, a coin from the jar, a new bookmark, a piece of cereal in a sealed container.
Adjust the difficulty rather than the prize. Three-year-olds need pictures on the clues, and they need the trail to end within three rooms. Eight-year-olds can decode a written riddle and follow it to a spot they have never looked in. Under-twos need a container they can tip out rather than a hunt with steps to remember.
Outdoors, the same structure works with natural objects: a hunt for something round, something rough, something green, and something that smells sharp. Collect them in a bag and sort at the end, which turns a walk into a scavenger hunt plus a classification game.
Best for: ages 3 to 9. It is also the strongest pick for a child who claims to be bored of everything, because the outcome arrives on its own.
6. Draw a Family Comic Strip
Fold a sheet of paper into four or six boxes and go panel by panel. The classic beginner structure works well: who is in this story, what do they want, what gets in the way, how does it end. Start with a real family moment, since children have more to say about the argument over the last slice of pizza than about any fantasy they have to invent from scratch.
Speech bubbles are the part kids skip, so prompt for them. Ask what each character would say at that exact moment, and write those lines inside the bubbles for them if handwriting is the barrier. Characters who say nothing are the easiest thing to fix in a comic and the biggest improvement to readability.
Once the first strip is done, the obvious extension is a series. Stack the finished strips in order with a paper clip and let the same characters come back in a second story. Drawing is also one of the quietest options when a child has decided they are too old for anything at all.
Best for: ages 5 to 10. It scales naturally, since a three-year-old can dictate the story to an adult who does the drawing.
7. Play a No-Screen Science Lab
Set a tray on a low table, put out three or four safe materials, and let the child run the tests. Food coloring in water for color mixing takes two minutes and produces genuinely surprising results. The float test, using a bowl of water and a range of safe household objects, answers a question kids ask constantly: why does this thing sink and that one float?
A classic volcano works with baking soda, vinegar, dish soap, food coloring, and a tray to catch the overflow. The foam volume matters more than the eruption speed, and letting the child measure the baking soda in a spoon first turns it into a real procedure rather than a demonstration. Expect more than one round.
Keep an eye on ingestion and eyes. Baking soda, vinegar, and food coloring are safe in small amounts under supervision, but a five-year-old experimenting unsupervised will drink the vinegar. For the float test, skip anything small enough to be a choking risk for the under-threes in the room.
Best for: ages 4 to 10. Sit on the floor with them for the first round, then step back and let the record-keeping take over.
8. Create a Living Room Obstacle Course
How to build one of the screen free activities that actually burns energy
Move the coffee table out of the way first. Build the rest from things already in the room: cushions on the floor to crawl over, painter’s tape lines for a balance beam you can walk along, a soft ball to throw at a laundry basket, and a stack of books to jump over. A stopwatch and a paper score sheet keep everyone arguing about who was faster.
Tape lines are the trick to making it feel custom. A single strip across two chairs makes a bridge, three parallel strips on the floor make a slalom, and a taped square on the carpet makes a hopscotch that works without a driveway. Nothing about this needs to be permanent, and the tape peels up clean.
Scale it by age without rebuilding anything. Three-year-olds get four stations and a stuffed animal to carry. Six-year-olds get the full course plus a hop on one foot at the end. Ten-year-olds get a stopwatch and the job of designing the next station, which usually produces something better than what you set up.
Couch-cushion courses get reused more than any other version, mostly because they take about eight minutes to build and leave no tape behind. Skip anything involving hanging from things you have not checked with a load limit.
Best for: ages 3 to 10 and any indoor energy emergency.
9. Make a Memory Matching Game
Fold twelve index cards in half, cut a pair of identical shapes on each, and you have a matching game sized exactly for small hands. Simple shapes are best: circles, squares, triangles, stars. Give older children old magazine scraps to cut into more detailed images, which makes the pairs harder to match on sight and the game much longer to play.
Three-year-olds need eight cards, not twelve, and they will flip two at a time rather than one at a time. That’s fine, let them. The point is turn-taking and sustained attention, not a memory score.
Once the base version is worn out from overplaying, change the rule instead of the cards. Sort them by color rather than match them, which turns the deck into a preschool color game. Or flip two cards and find something in the room that matches both, which becomes a scavenger game for the whole family.
Best for: ages 3 to 9, and it survives being handed to two different children.
10. Have a Family Dance Party
Build the playlist before the dancing starts, not during it. A dozen songs is plenty, and mixing slow ones with fast ones prevents the two-year-old from quitting by minute three. Speakers beat a phone on a table, and a phone left face-down across the room keeps the screen out of sight rather than in hand.
Dance cards solve the boredom that hits when children run out of ideas about how to move. Give each child a stack of index cards with movements written on them, like spin, tiptoe, stop, shake, crawl, jump, and levels to try: “do a slow move.” Drawing the cards gives kids authority, which is half the fun.
The living room concert version takes about five minutes of setup: one child sings badly on stage, one plays an imaginary instrument, one holds the microphone that is a hairbrush. Record it if you have a device handy, because they will ask to watch it for a week. Just keep it a treat, not the point of the afternoon.
Best for: ages 3 to 10 and any household where someone has energy to burn.
11. Bake or No-Bake Simple Treats
No-bake options remove the main objection to kitchen activities, which is heat. Oat bars, yogurt fruit cups with granola pressed on top, and chilled fruit salad all work at room temperature or in the fridge. Most of these need only a spoon and a bowl, so a three-year-old can take a real job at the mixing stage.
For baking, keep the recipe to three steps and let the child own one of them completely. Measuring dry ingredients with a cup and level is a genuine math session. Spooning batter into a muffin tin builds hand strength for writing later. Decorating is the reward, and it is the step most worth leaving completely to them.
Safety notes before you start
Adults handle ovens, hot trays, and anything sharp. A rolling pin counts as a blunt object; a knife handed to a five-year-old mid-task does not. Ask about food allergies in the house before serving anything, and treat cinnamon, nuts, and honey as items to check first for younger children.
Keep in mind the cleanup is part of the time. Baking works best as a scheduled event, not a rescue mission, since the half-hour of scrubbing afterward is what makes parents avoid it on weeknights.
Best for: ages 4 to 10, and best as a weekend activity with a plan.
12. Start a Home Collage Challenge
Put a jar of scraps out where it is visible: magazine pieces, fabric offcuts, torn paper, bread wrappers, feathers, leaves, buttons, packing paper. The visible jar does the work. A craft box that lives inside a closet gets skipped, and children will not ask for supplies they cannot see.
Give a theme rather than a subject. “Only blue things,” “everything from the kitchen,” “the texture of the house,” and “make it bigger than the paper” each produce something completely different from “make a collage.” The constraint is what turns it into a decision rather than a craft project.
Collaborative wall art works well with siblings who fight over supplies. Assign one square each, then let everyone add to the borders. The two-year-old can add stickers to the shared section, which keeps a mixed-age household from splitting into separate activities.
Glue sticks work better than liquid glue for most ages, since they do not need a surface to dry on and they do not glue fingers shut. For scraps, a thick layer is fine; too thin is what makes paper peel up.
Best for: ages 3 to 10 and mixed-age siblings.
Frequently Asked Questions
What are the best screen-free activities for toddlers at home?
Toddlers do best with activities that take under five minutes to set up and involve their hands. Good picks are a treasure hunt ending in a container they can tip out, paper airplanes they can throw, a box of dress-up clothes, coloring, and mixing water with food coloring in the sink. Keep the pieces large, skip anything with small parts, and let them repeat the same thing twenty times rather than moving on to the next idea.
How can I keep kids busy without screens for a whole afternoon?
One activity rarely covers an afternoon, so plan two and keep them in different rooms. Start with something absorbing, like an obstacle course or a cooking project, then follow with a quiet one such as a comic strip or a memory game. Set out materials before you sit down, and involve kids in the second activity’s setup so they are not waiting for entertainment to arrive.
What materials do I need for screen-free activities at home?
You need very little: paper, cardboard, painter’s tape, crayons or pencils, a pair of scissors, some cushions or blankets, and a jar of household scraps. Most of the twelve activities here use only those items. Avoid activities that need a craft-supply run unless you are already at the store, since parents consistently name the trip itself as the reason they skip an idea.
How do I choose an activity for a child who gets bored quickly?
Match the activity length to the child’s actual attention span rather than their age, and pick something with a visible finish line: a treasure hunt that ends, a measured airplane competition, a puzzle that gets solved. Skip open-ended craft projects for quick-bored children and give them a job instead of an invitation, such as writing the clue slips or setting out the measuring tape.
Can screen-free activities work in a small apartment?
Yes, with a few adjustments. Forts and obstacle courses scale down: a single cardboard box becomes a hideaway, and one taped line on the floor becomes a balance beam. Keep loud games like the dance party and flashlight tag for times when noise is fine. Treasure hunts, comic strips, cooking, and collages need almost no floor space at all.
How do I make these activities educational without making them feel like school?
Keep the learning incidental rather than announced. Folding paper airplanes quietly practices measurement and cause and effect, and mixing colored water teaches primary blending, without either being called a lesson. If a child asks why or how, answer honestly, but skip the quiz afterward. Telling them they are doing science is the fastest way to end the interest.
Where to Start With Your Next Screen-Free Afternoon
Pick the one idea that matches your child’s energy rather than your hoped-for outcome. An active kid on a rainy afternoon gets the obstacle course. A child who is withdrawn after a long week gets the comic strip or the memory game. A kitchen-confident kid gets to cook, and one who is restless gets the treasure hunt, since it delivers a result without you having to entertain anyone.
Honest prep times matter more than ambition here. Six activities on this list take under fifteen minutes to set up and use nothing you do not already own, so there is no reason to skip one because you just sat down.
Start today with paper airplanes. It costs one sheet of paper, needs no cleanup, and the folding alone buys you fifteen quiet minutes while the kids argue about the nose angle.