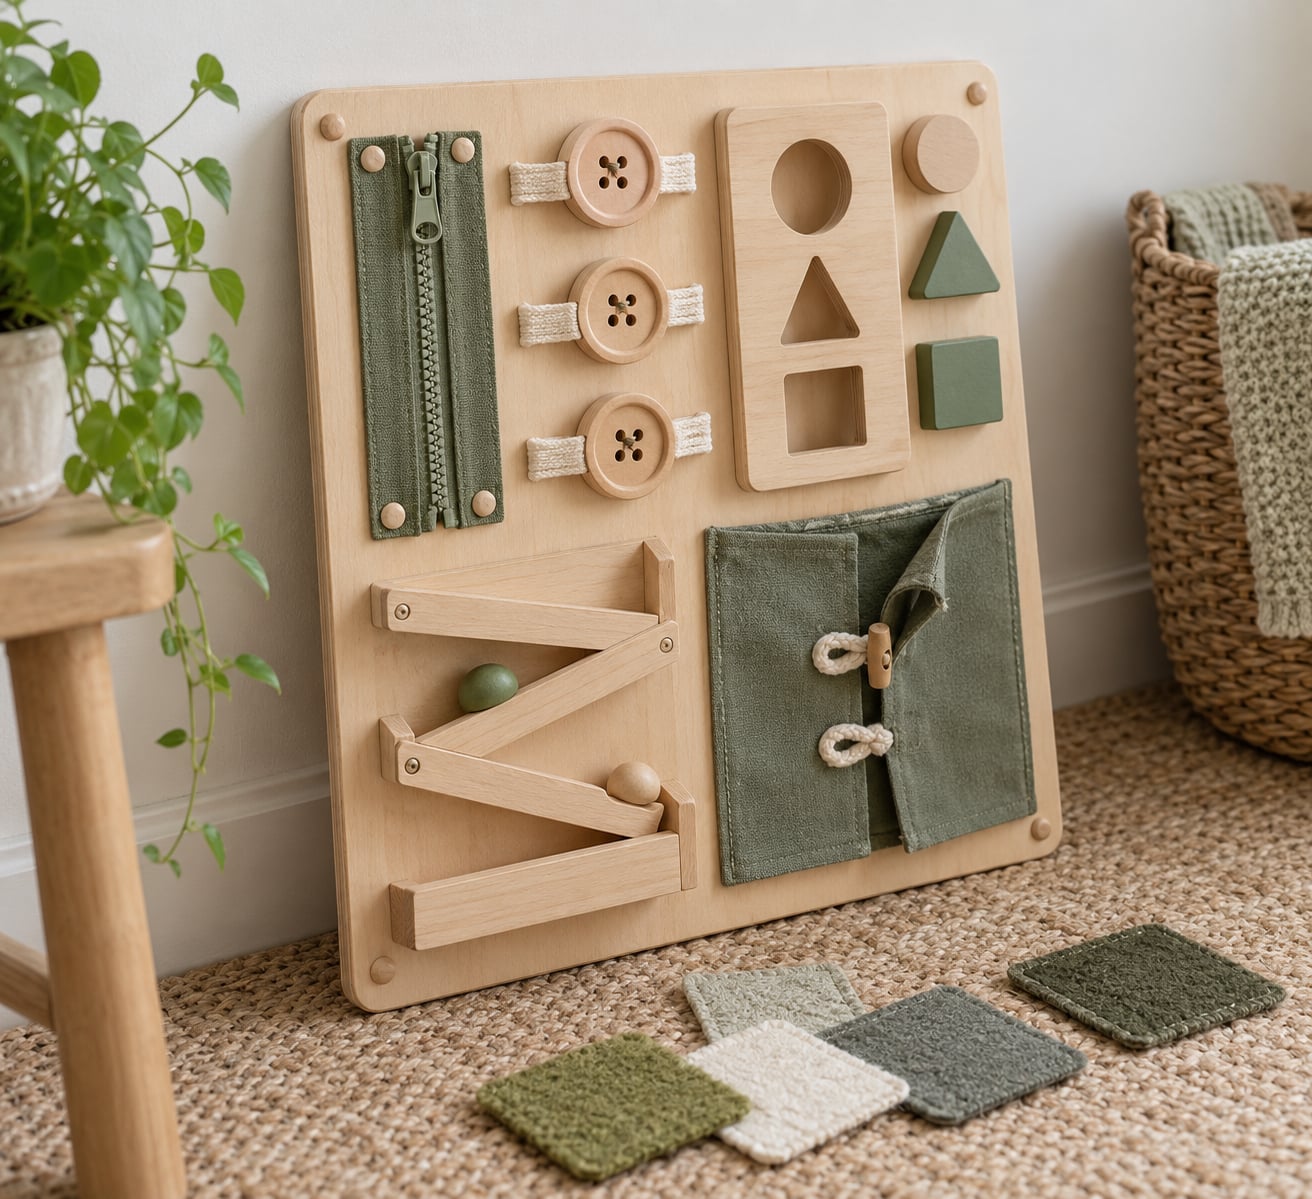
A toddler busy board is a wooden panel with everyday items fixed to it — a zipper, big buttons, a latch, a switch, textured fabric squares — so a young child can practise opening, closing, fastening and problem-solving on their own. Building one takes an afternoon and a short hardware store trip, and no power tools if you’d rather skip them.
The trick is that the parts stay attached. It’s the opposite of a toy bin: nothing comes off the board, so nothing ends up in a toddler’s mouth, and the same zippers and clasps stay there long after the novelty wears off. Most parents who build one add three or four activities first, then keep going as their child grows into harder ones.
You need very little to start. A scrap of plywood, a handful of hardware-store finds, and an hour of gluing or screwing is genuinely enough for a first board.
Table of Contents
- What You Need
- The base
- The activity pieces
- Fasteners and finishing
- How to Make a Toddler Busy Board: 7 Simple Activity Ideas
- Step 1: Plan the Board Layout
- Step 2: Prepare and Secure the Base
- Step 3: Add the Easy Activities
- Step 4: Test Every Part
- Common Mistakes
- How to Use and Maintain the Board
- Frequently Asked Questions
- What age is a toddler busy board suitable for?
- What materials are best for making a toddler busy board?
- What activities are too hard for a toddler?
- How do I keep the activities secure and child-safe?
- How often should I clean or change the busy board activities?
- A Simple Board Is a Better First Project
What You Need
The exact list depends on which activities you want, but the categories never really change. Pick your activities first, then gather — otherwise you’ll come home with a bag of hinges and no board.
The base
- A piece of plywood or a thick cutting board, roughly 18 by 24 inches
- A pre-cut board from a craft store or a piece of an old crib slat panel, if you’d rather not cut wood yourself
- Masking tape and a pencil for marking positions before anything goes on
- Sandpaper in the 120 to 150 grit range, plus a small hand sander or just a folded sheet
- Non-toxic paint, stain or clear sealant if the board is unfinished
Thin sheet goods work but need support underneath, or the whole panel flexes when your child leans on it. Half-inch plywood is the sweet spot for a board that takes some hauling up and down from a toddler.
The activity pieces
- A large chunky zipper, the kind sewn onto jackets
- Big wooden buttons or fixed hooks and fabric loops
- A wooden shape-sorter or puzzle, with the pieces tethered
- A light switch, a doorbell button and a small bell or buzzer
- A cabinet knob or drawer pull, mounted upside down for pulling
- Fabric swatches in different textures: velvet, burlap, corduroy, felt, terry cloth
- A key ring with two or three keys on a short leash
- Elastic loops or Velcro strips for a dressing task
- A small mirror, a wheel from an old toy, a buckle from an old backpack strap
Most of these come out of a junk drawer or the back of a closet. Old phone handsets, retired bike horns and calculators that still work all earn their place here.
Fasteners and finishing
- Wood screws in two lengths, so short ones sit flush and long ones reach thicker pieces
- Metal latches, barrel bolts, buckles and a small hook-and-eye
- Hook-and-loop squares if you want anything swappable
- A strong adhesive for non-porous pieces, plus a hot glue gun with plenty of sticks
- Staples, if you have a stapler that takes them
- Rubber bumpers or felt pads for the feet
Everything you attach has to stay attached. A toddler will pull on every single piece of hardware within a week, so plan on reinforcing anything that feels even slightly loose.
A no-power-tools version is completely doable: glue and staple everything to a foam core or thin plywood panel, and skip the drill. It’s quieter, lighter and travels better, which makes it the right call for a car seat or a restaurant waiting room.
How to Make a Toddler Busy Board: 7 Simple Activity Ideas
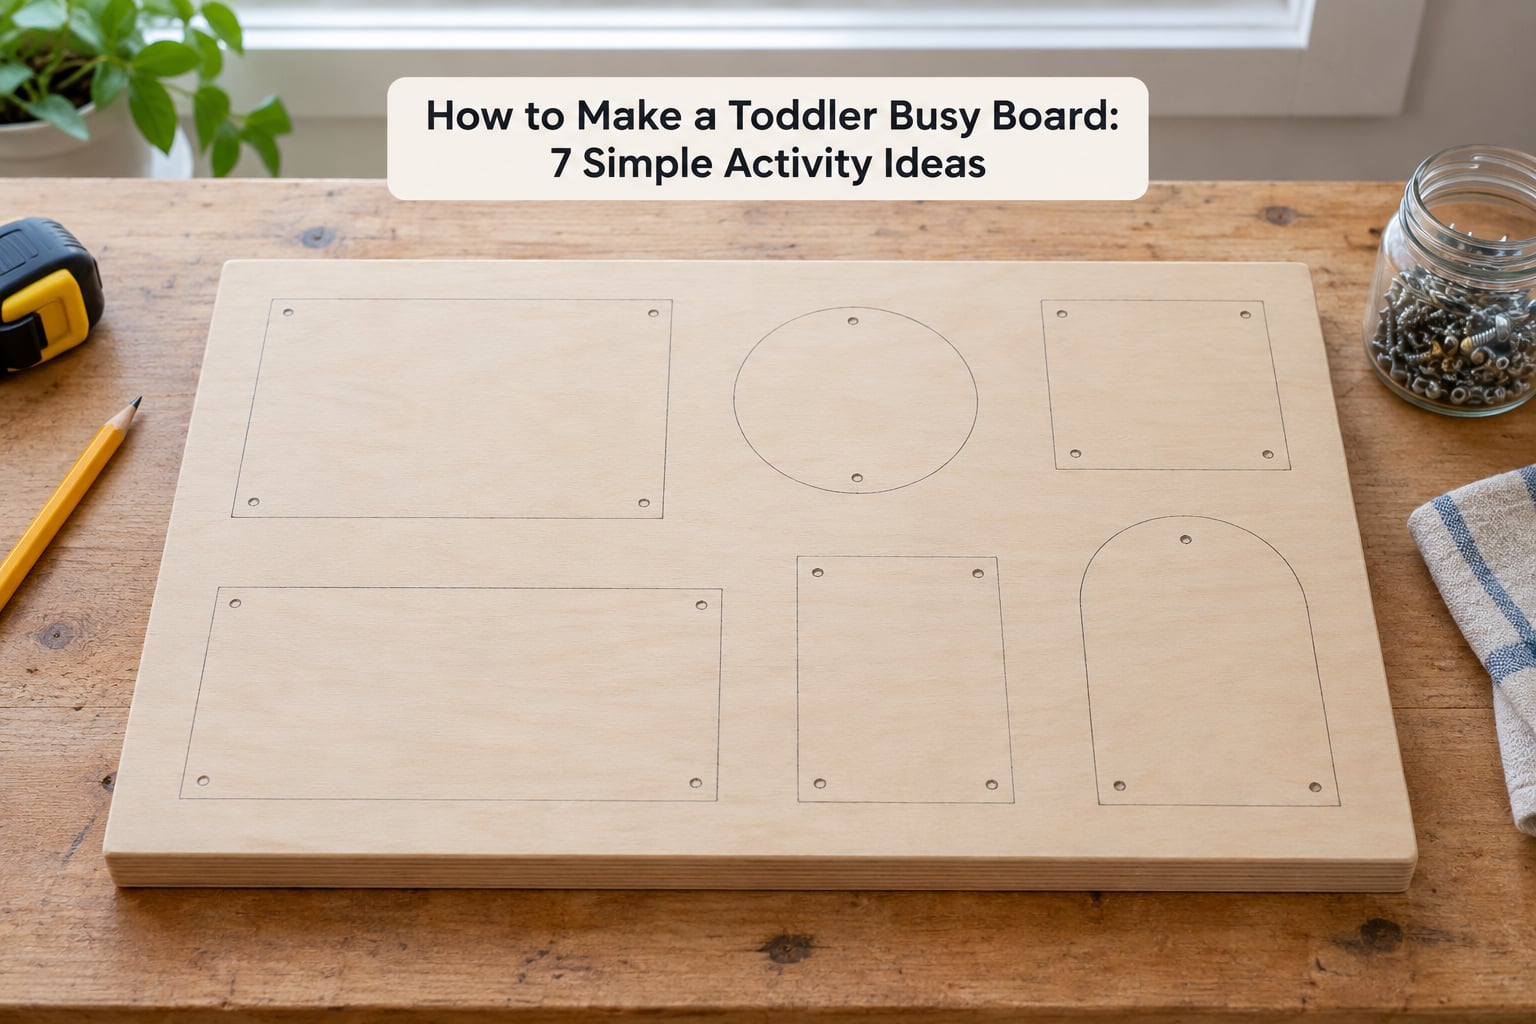
Before you drill a single hole, decide how many activities the board actually holds. Four well-spaced pieces beat twelve crammed ones, because a crowded board frustrates a toddler who wants to work on one thing at a time.
Choose tasks that match the child’s current stage. At around 12 to 18 months, a board should hold two or three simple things: a chunky zipper, big buttons through loops, maybe one texture strip. Between 18 months and two years you can add a shape board and a pull switch. By two and a half, most parents add latches, a key ring and a ball track.
Notice something the busy board does not do: it does not teach a specific skill in a directed way. It’s repetitive self-directed practice, and it works precisely because the child decides what to open, in what order, for as long as they like.
Step 1: Plan the Board Layout
Lay your pieces on the bare board before fixing anything, then move them around until you like the spacing. Mark each position lightly with a pencil or a strip of masking tape so you have a map while you work.
Leave genuine gaps between activities. A toddler’s hand needs room to approach a latch without bumping the zipper next to it, and you need room to get your own fingers in to check that a screw is tight. Crowding also makes the board look finished, which is not the goal.
Put the easier tasks together in one area and the harder ones in another. That way a child who is still mastering buttons does not have to squeeze past a key ring to reach them, and the challenge sits at the far end as something to grow into.
Keep the tallest pieces at the top and the flat ones near the bottom, so the board stays stable when leaned on. And leave one section deliberately empty — you’ll want somewhere to add the next activity when the current ones get easy.
Step 2: Prepare and Secure the Base
If you are cutting your own board, make sure any cut edge is sanded properly. This is the step people rush, and it’s the one that matters most, because a toddler’s hands will be all over that surface.
Sand the whole panel, not just the cut edges, then round every corner and edge. Stand the board on its corner and run your fingers down each edge; anything that feels sharp or catches your fingernail gets another pass. A child’s palm finds splinters faster than you ever will.
Seal the wood before attaching anything. Paint, stain or a clear water-based sealant works, and letting it cure fully means the board wipes clean later instead of holding onto grime and marker scribbles.
Now transfer your layout marks onto the board itself. Mark centre points rather than outlines — for a knob, the mark tells you where the screw goes; for a zipper panel, it tells you where the tape runs.
Finish with stability. Add rubber bumpers or felt pads to the back so it sits flat and doesn’t skate when pushed, and prop it against a wall or lay it on the floor with the activities facing up. A board that slides across a hard floor teaches your child to chase it instead of using it.
Step 3: Add the Easy Activities
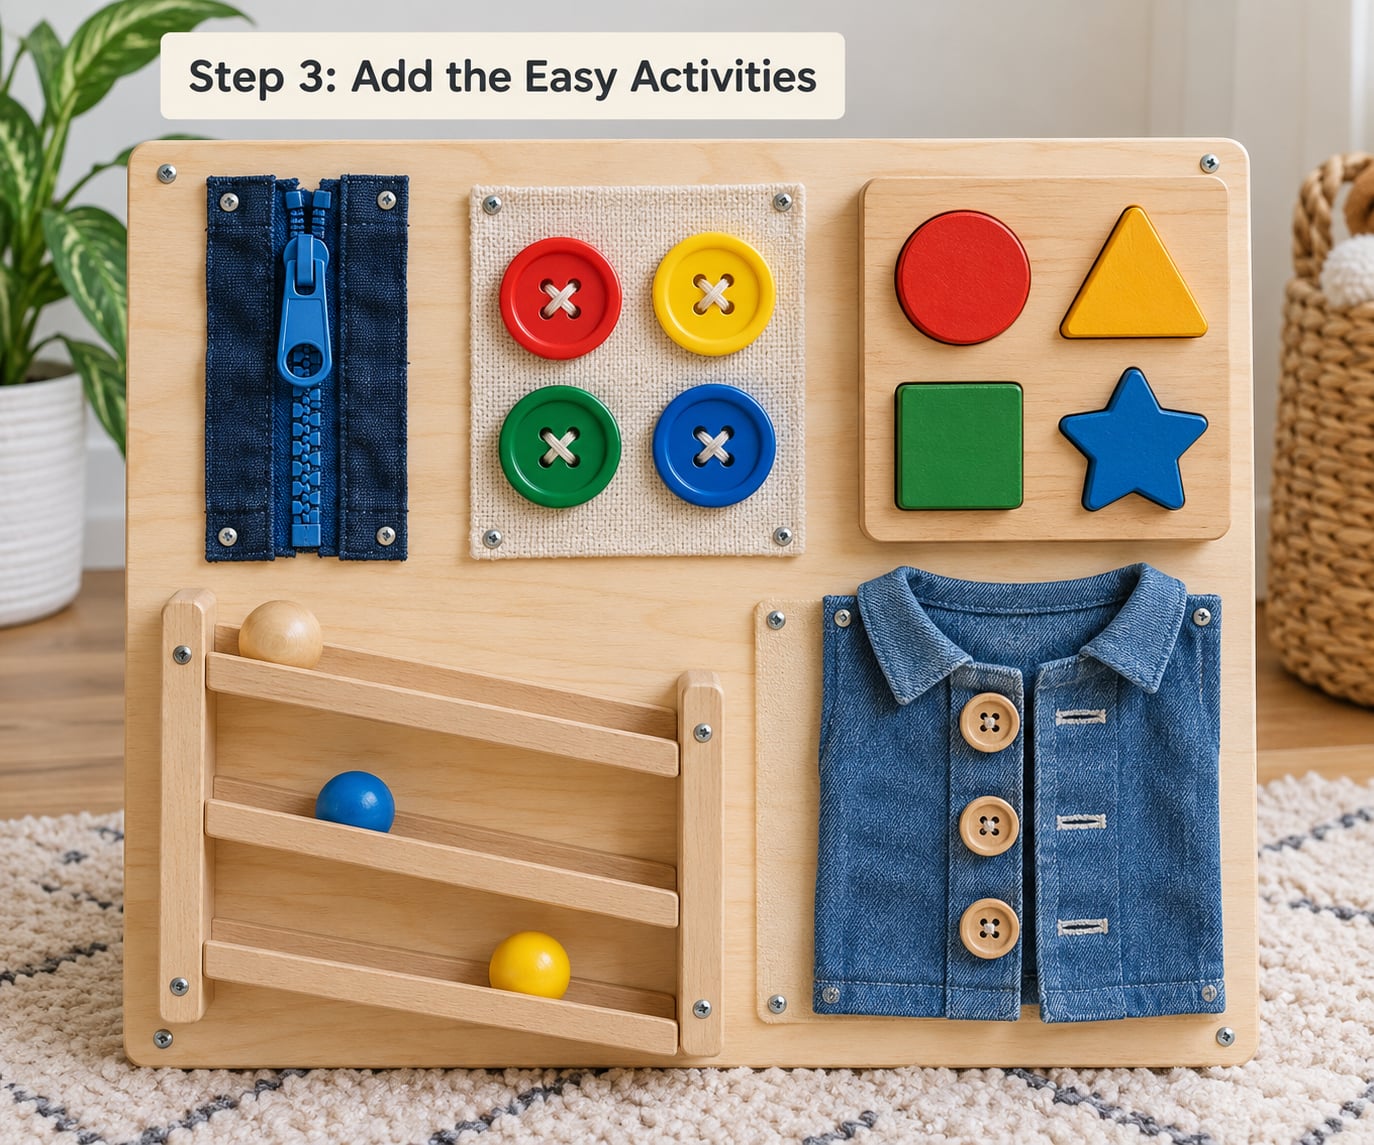
Here are seven activity types that work well and are straightforward to attach. Each one is deliberately simple, because the interest comes from the repeated action, not from the complexity of the toy.
- Zipper activity. Take a large jacket zipper and sew or glue its tape onto a wide strip of sturdy fabric, then fix that strip to the board with screws or heavy adhesive around the outside edge. Keep a generous stop at each end so the pull can’t travel off the fabric.
- Large buttons and loops. Glue short fabric loops to the board and fasten big wooden buttons through them, or use fixed hooks with buttonholes. Threading one through takes real concentration, and it transfers directly to getting shoes and coats on.
- Chunky puzzle. Use a wooden shape sorter and tether the pieces to the board with a short length of cord or a washer, so they can be lifted but not carried off. Without the tether, the puzzle becomes a set of small parts in about nine minutes flat.
- Shape board. Mount a wooden shape sorter or a set of large blocks into a recessed frame, with a low lip around the edge. A single deep hole per shape works better than a flat printed board, because the shape has to be turned to fit.
- Ball or cup track. Cut a shallow channel in the board or build one from two narrow wooden strips and a strip of fabric tape running between them. A single ball, no larger than a golf ball, can roll the full length.
- Reusable sticker or drawing area. Glue a piece of clear contact paper or a wipe-clean sheet onto a small section and give it a dry-erase pen on a short cord. This is the activity that changes the most over the years — wipe it down and there’s a fresh surface again.
- Cloth or Velcro dressing task. Sew or glue a flap of fabric over an elastic waistband, add a large buckle, and line up two or three big hook-and-loop tabs down one side. A loose button placket is fine too, as long as the buttons are attached and the buttonholes are big enough to be an obvious target.
For anything that swings, rings or slides, add a physical stop. A short length of cord between the piece and the board stops a bell from disappearing without limiting the motion the child enjoys.
Step 4: Test Every Part
Treat this like a product you’d buy, because that’s exactly what it is. Pull, twist and lift every single component using more force than feels reasonable for a two-year-old. If anything moves, it gets tightened, re-glued or removed.
Check the underside of the board for screw points and staples that poke through, and make sure any hardware on the back is domed or covered. A stub of screw pointing at a palm is the most common complaint parents end up with.
Trim or remove loose cords, ribbons and any string long enough to loop around a neck. If you want the pull feature of a zipper or key ring to keep working, cut the retaining tab off an old phone plug so a caregiver can release it in a second — a detail most guides skip.
Then set the board down, press on it hard with your whole weight, and make sure it does not shift or tip. Sit your toddler down in front of it and stay close for the first several sessions. Most early frustration comes from an activity set slightly beyond current ability, not from the board itself.
Common Mistakes
Nearly every disappointing busy board comes down to one of a handful of avoidable problems. Each has a simple fix.
Using small detachable pieces. A toddler’s board is a toy that will be chewed on, so anything that fits through a toilet paper roll is a choking hazard. Use big wooden shapes, tether the small ones, and take anything with a removable screw or button off the board entirely.
Crowding the layout. Twenty activities in a small area means a frustrated child and a board nobody can inspect. Cut the list in half. Four activities used daily beat twelve that get ignored.
Making tasks too difficult. A three-year-old’s first button should go through a loop with no precision required. If your child walks away within a minute, the task is too hard, not the board. Swap it for something easier and put the original back in a few months.
Using sharp or breakable materials. Skip thin plywood, glass, thin plastic switches that crack, and anything with a spring strong enough to snap. Sand until the edges are genuinely smooth, and check again after a few weeks of use as the wood dries and can feel different.
Neglecting cleaning and storage. Wipe the board down every week or two and check the attachments while you’re at it. Store it flat or leaning against a wall, out of reach when it is not being used, because a toddler who climbs on it unsupervised will pull hard enough to dislodge anything.
Expecting it to replace supervision. A busy board buys you ten or twenty focused minutes. It is not a baby sitter, and it cannot be handed over on its own while you leave the room.
How to Use and Maintain the Board
Introduce the board when your child can sit steadily and shows interest in opening things — drawers, cabinets, your bags. Most children are ready somewhere around a year old, and a board with only two or three simple activities suits them far better than a full one they can’t read yet.
Show one activity, once, then stop talking. Demonstrate the zipper, let them take over, and don’t narrate while they work. The value of a busy board is the repetition of self-directed action, and an attentive adult turns it back into a lesson.
Expect the interest to fade. Around four to six weeks in, children often lose interest in whatever piece they mastered first. That’s the moment to swap it, not the moment to add to it — a rotation keeps the board useful without rebuilding it.
The easiest way to rotate is to attach removable pieces with hook-and-loop squares rather than screws, so you can swap one activity for another in a minute. The trade-off is that the corners of hook-and-loop wear out first, so check them every few weeks and replace any that have stopped gripping. Thread things onto hook-and-loop with a washers-and-cord loop at the top rather than pressing the fabric straight onto the board; the washer spreads the load and keeps it attached.
For the version that gets used in the car or a quiet room, go soft: felt or fabric panels, no bells, no hard edges. It travels rolled up in a bag and weighs almost nothing.
Once a month, put the board on a table, check every fastener, and look for rough spots developing where the wood has been handled a lot. Re-glue anything that has started to move. Boards that get patched as they loosen tend to keep going for years, and plenty of families report the same board still in use by an older sibling.
Frequently Asked Questions
What age is a toddler busy board suitable for?
Most children are ready between about 12 and 18 months, once they can sit steadily and show interest in opening drawers, cabinets and containers. Start with two or three easy activities such as a chunky zipper, big buttons through fabric loops and one texture strip, then add harder pieces as skills develop. By two and a half, most parents add a shape board, a key ring and a ball track.
What materials are best for making a toddler busy board?
A piece of plywood or a thick cutting board works as the base, and most of the activities come from a hardware store bin or a junk drawer: latches, knobs, buckles, switch plates, big wooden buttons and fabric swatches in different textures. Add wood screws in two lengths, a strong adhesive and a hot glue gun. Sand every edge round and seal the wood before attaching anything.
What activities are too hard for a toddler?
Anything needing a precise pinch or a strong pull is too hard at the earliest stage. Multi-step tasks such as a zipper with a small slider or several buttons on a tight placket usually frustrate a child under two. Start with one motion per piece: pull, twist, slide or push. If your child walks away within a minute of starting, the task is too difficult rather than the board being a failure.
How do I keep the activities secure and child-safe?
Pull, twist and lift every component using more force than feels reasonable, and treat anything that moves as unfinished. Choose pieces too large to fit through a toilet paper roll, tether small parts to the board with short cord, check the underside for screw points and staples poking through, and trim any loose cords or ribbons. Stay close during the first several sessions while your child learns the board.
How often should I clean or change the busy board activities?
Wipe the board down every week or two with a damp cloth and take the chance to check the fasteners while you’re there. Expect to change activities every four to six weeks, because children move on from whatever they mastered first. Attaching removable pieces with hook-and-loop squares makes swapping quick, though check the grip regularly and replace squares that have started to let go.
A Simple Board Is a Better First Project
Start smaller than feels satisfying. Three or four sturdy activities, spaced properly and tested hard, will get used every week — while a crowded board built in a rush usually ends up in a closet by month two.
Sand the edges, secure every piece, and stay within arm’s reach the first few times. Add the next activity when your child outgrows what is already on there. That is the whole method behind how to make a toddler busy board that keeps working as they grow.