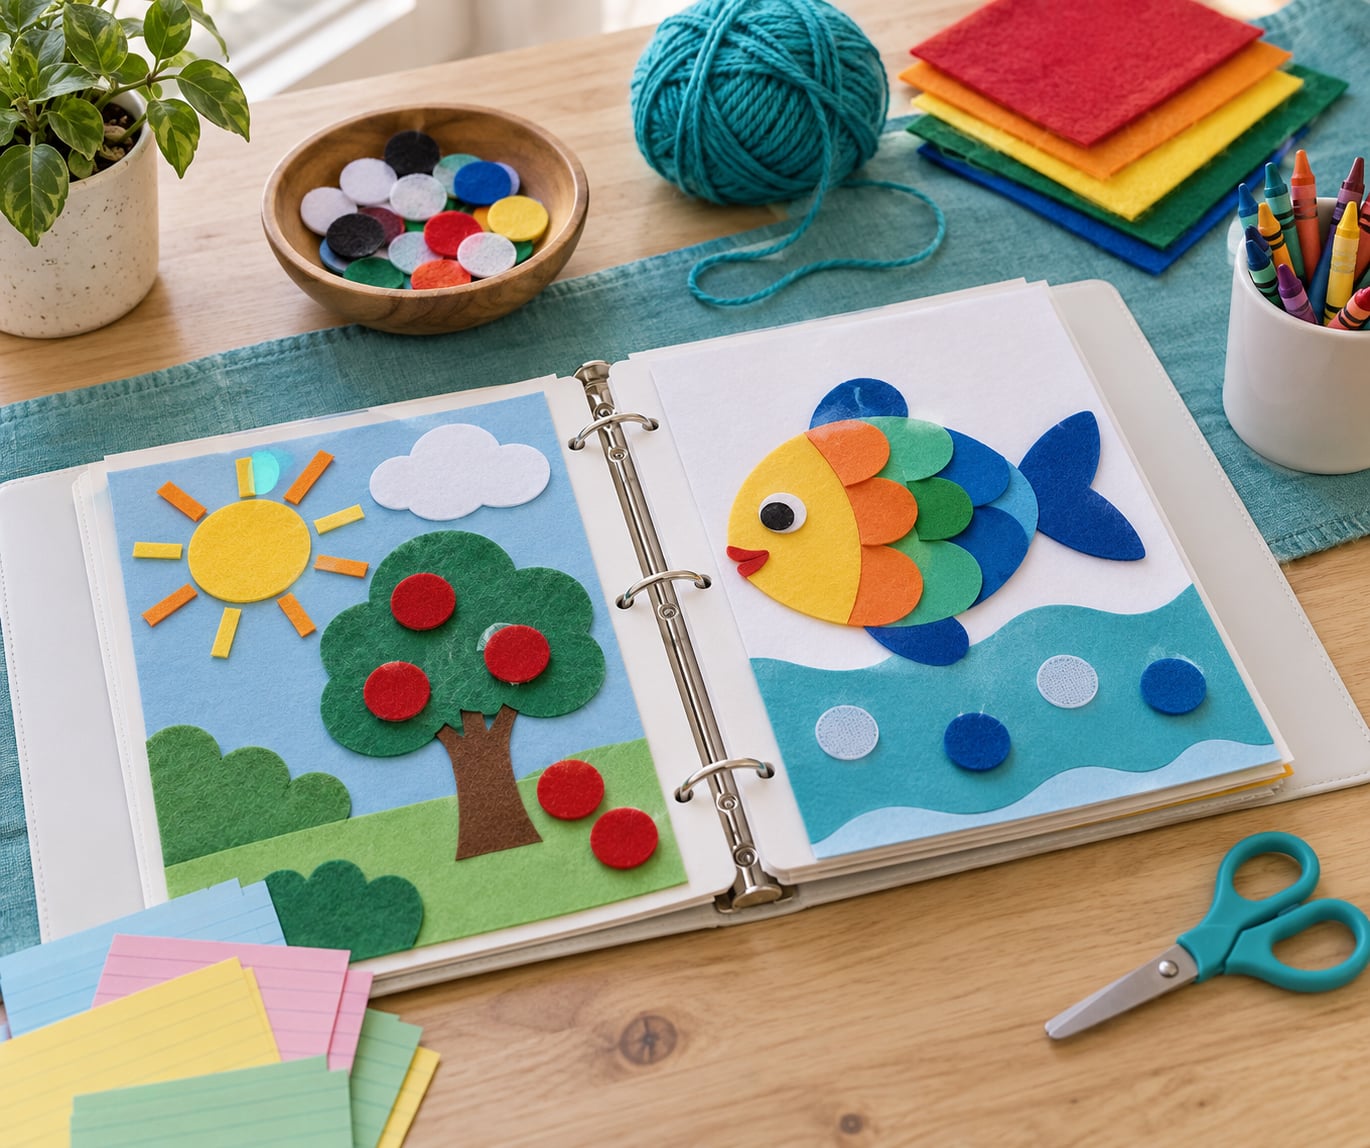
A busy book is a homemade activity book whose pages hold things a toddler can lift, stick, match, trace, thread or zip, so they can play with it on their own instead of asking for a screen. Shoppers also meet it under other names: quiet book, activity book, interactive learning binder, or file folder games.
Building one is mostly cutting, sticking and punching, and a ten-page book takes about an hour and a half for a first-timer. The cutting is the slow part, not the creativity. Last check for this guide was 2026, and nothing in the method has changed.
This guide covers the printable binder method that most families end up using, plus the no-printer route for households without one and the no-sew felt route for children who chew everything they hold. It also tells you which pages suit a one-year-old and which ones a three-year-old will actually finish.
Table of Contents
- What You Need
- How to Make a Busy Book for Toddlers: Step-by-Step
- Step 1: Plan a Variety of Toddler-Friendly Pages
- Step 2: Cut the Pages and Reinforce the Edges
- Step 3: Add Simple Matching and Coloring Activities
- Step 4: Create Hands-On Fine-Motor Pages
- Step 5: Add Sensory, Sorting, and Pretend-Play Pages
- Step 6: Decorate and Label Each Activity
- Step 7: Bind, Test, and Finish the Busy Book
- Common Mistakes
- Frequently Asked Questions
- What age is a busy book appropriate for?
- What is the best binder size for a toddler busy book?
- How many pages should a homemade busy book have?
- What materials are best for a durable busy book?
- Can toddlers use a busy book independently?
- How can I add new pages as my child grows?
- Conclusion
What You Need
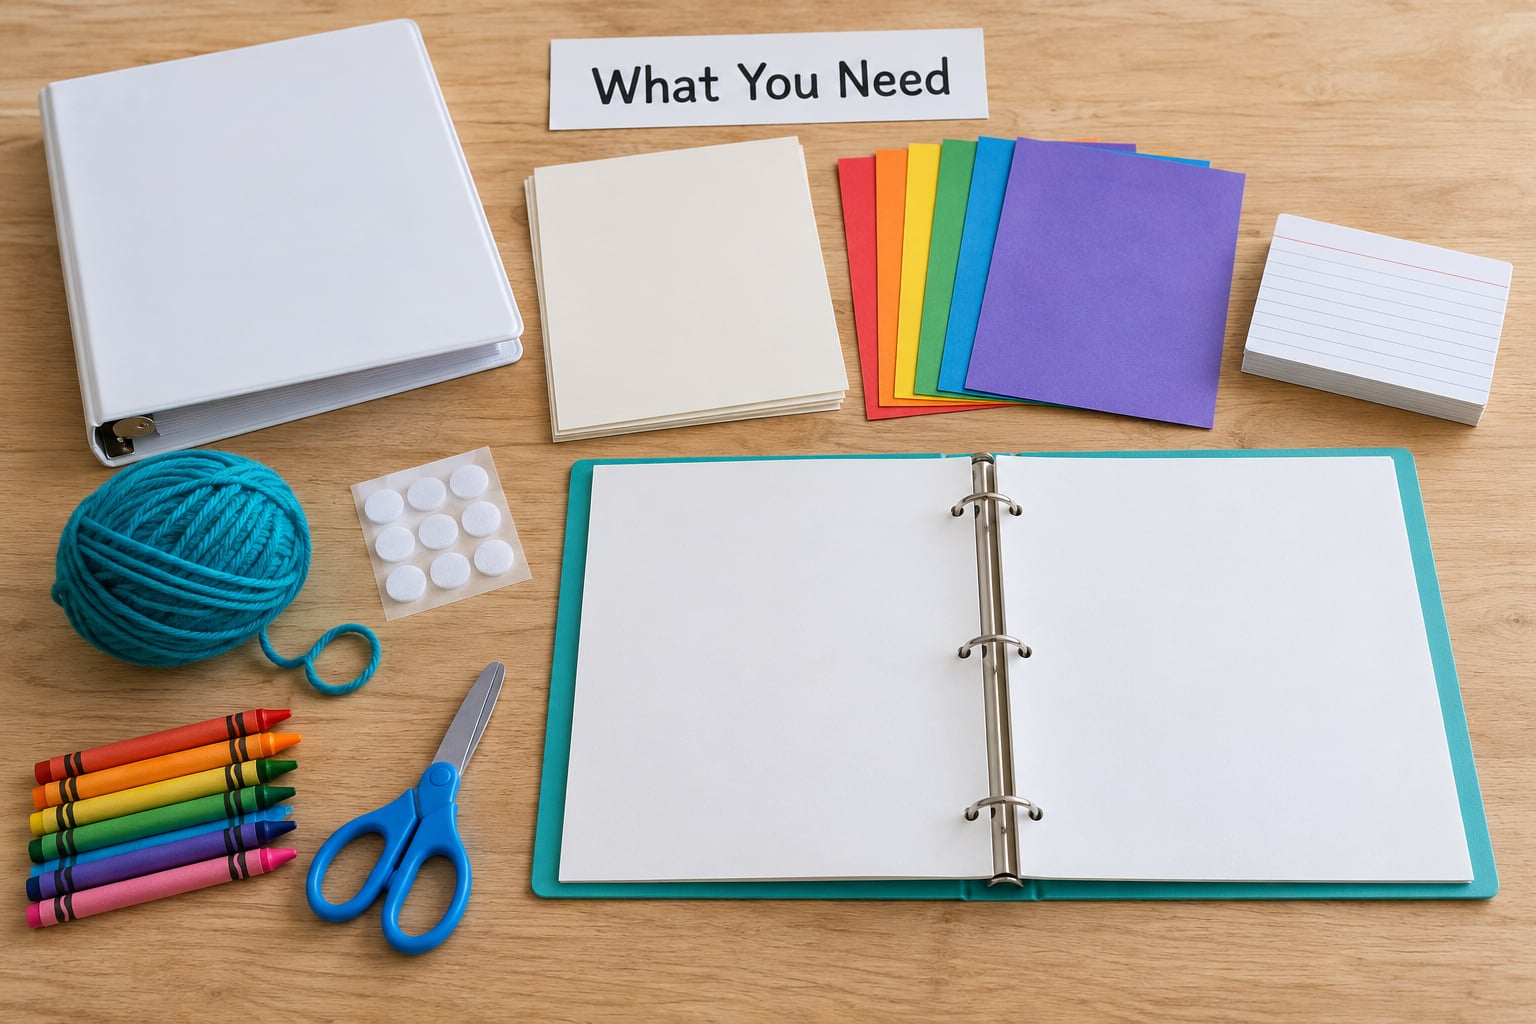
Everything below comes from a craft cupboard, a dollar shop or the recycling bin. Buy nothing until you have read the list and looked at your own child, because a book that ignores their current obsession gets ignored back.
- The binder. A one-inch three-ring binder with a clear pocket on the front, wide external rings, and a back pocket. External rings matter: open them, slide a page in, close them. Standard internal rings force you to unthread the whole stack to add anything.
- Page materials. Cardstock for anything handled hard, white printer paper or cardstock for matte coloring pages, index cards cut in half for matching pieces, construction paper for labels and scenery, and clear sheet protector sleeves as a no-laminating option.
- Activity supplies. Self-adhesive hook-and-loop dots (Velcro), yarn or thick ribbon, blunt plastic lacing needles, large buttons, chunky crayons, a dry-erase marker, sticker sheets, a chunky zipper from a craft bag, and fabric scraps in two or three contrasting textures.
- Laminating kit, optional but recommended. A laminator plus 125 micron (5 mil) pouches, or self-adhesive laminating sheets if you do not own a machine. 125 micron resists curling and holds a rounded corner; thinner 80 micron pouches tear at the first chewed edge.
- Fasteners and finishing tools. A three-hole punch, a paper trimmer or a craft knife with an adult hand, a corner rounder or round-tip scissors, strong double-sided tape, a hot glue gun for adults only, fabric glue for felt, and a small stapler for backing loose pieces.
That is the whole kit. A laminator, a paper trimmer and a corner rounder are conveniences, not requirements, and a book built from felt and glue dots works just as well without any of them.
How to Make a Busy Book for Toddlers: Step-by-Step
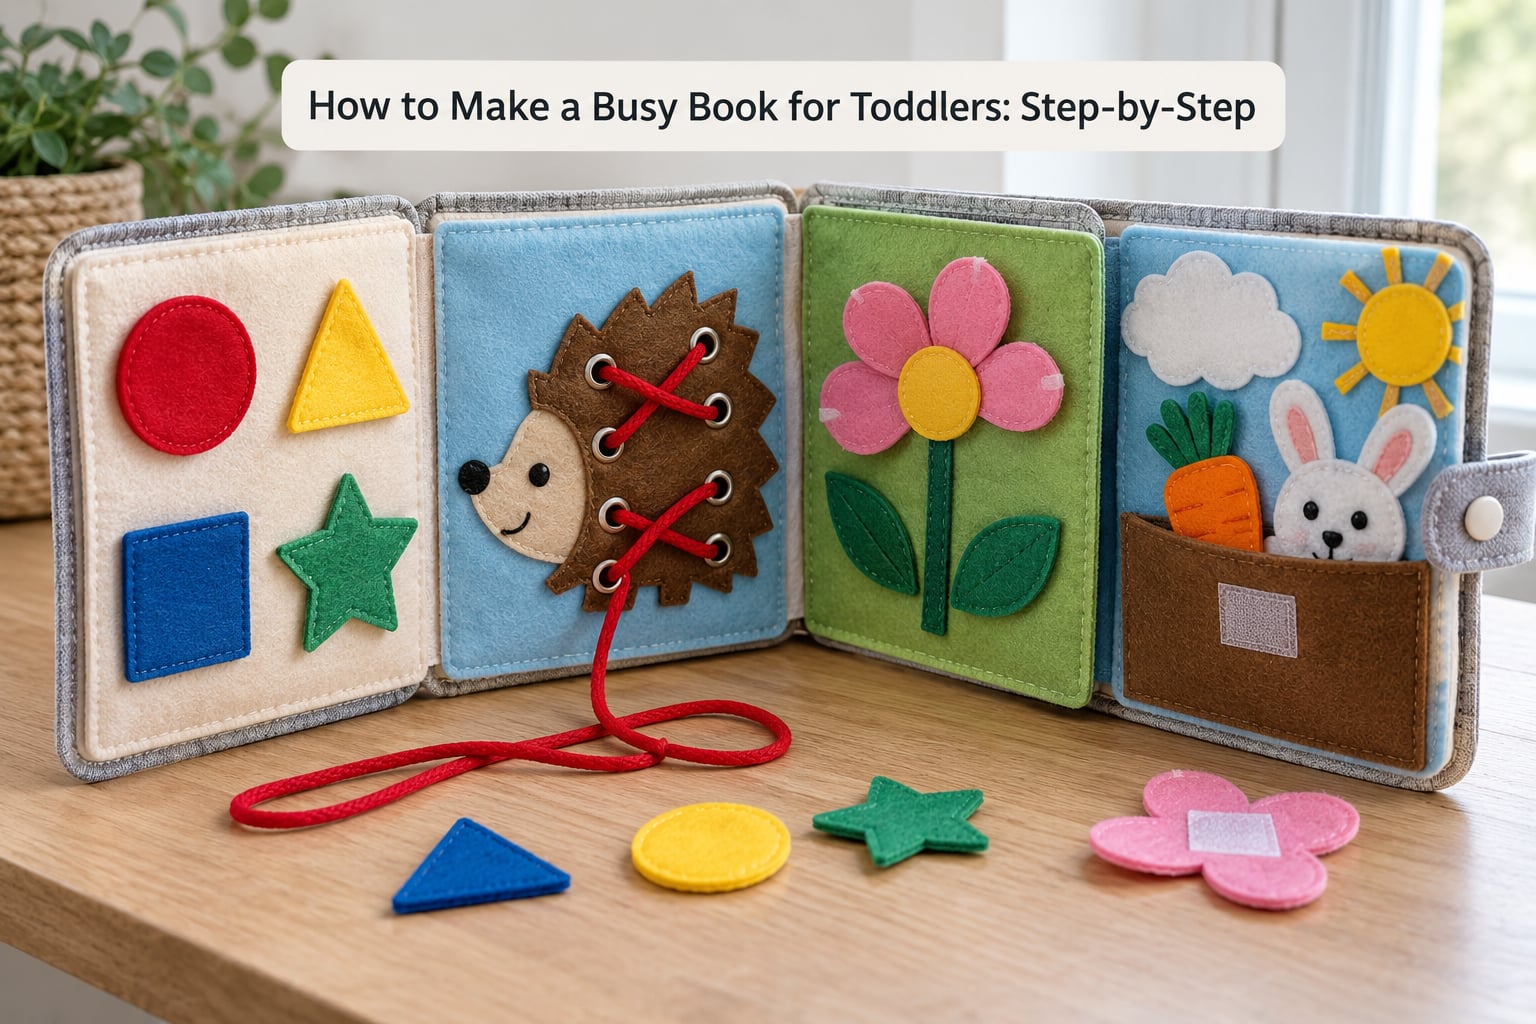
Seven stages take an empty binder to a finished book. Read the short version first, then open up the step that needs more detail.
- Plan a balanced set of activity pages.
- Cut and reinforce every page and piece.
- Build matching and coloring pages.
- Add fine-motor pages with pieces to move.
- Add sensory, sorting and pretend-play pages.
- Decorate and label each activity.
- Bind, test and finish the book.
Step 1: Plan a Variety of Toddler-Friendly Pages
Ten to twelve pages is a realistic first book, and the mix matters more than the count. Six matching pages in a row will bore anyone by page four, and a toddler who is bored pulls the whole book apart looking for something better.
Aim for a spread like this: two matching pages, one coloring page, two fine-motor pages with movable pieces, one sensory page, one sorting page, and one pretend-play scene. That is the balance most families land on after a couple of rebuilds.
Plan for your child’s age, too. A one-year-old wants big pieces, one obvious choice per page and no text to read. A two-year-old can manage three or four matching pairs and simple threading. A three-year-old will sit with tracing, counting to five and a dress-up page. If you are unsure how to make a busy book for toddlers at a specific age, build the easiest version first and add difficulty as they master each page.
Write the instruction for every page before you cut anything. Three or four words is plenty, such as “find the red one”. A page that needs a sentence of explanation is a page that will be handed back to you.
Step 2: Cut the Pages and Reinforce the Edges
Size each page to fit the pocket of a sheet protector or the face of your binder page, leaving a quarter-inch margin so lamination and reinforcement do not fight the ring holes. Punch the holes last, after every layer is stuck together.
Round every corner. A corner rounder does it in a second; round-tip scissors do it in five. Square laminate corners are the first thing to cut a toddler’s hand and the first place the laminate starts to lift.
Reinforce anything that will be handled daily. Back a coloring page with cardstock, and back lacing cards and dress-up pieces with cardstock or thin felt. If a page will be washed or wiped, laminate it; if it will be chewed, skip paper entirely and use felt.
One trick worth learning early: for curved or intricate pieces, cut first, laminate second, then trim the laminate back to the shape. Cutting finished laminate leaves a white cut line and lifts at the edge within weeks.
Step 3: Add Simple Matching and Coloring Activities
Matching is the workhorse of any busy book because it needs no reading and almost no language. Color matching, shape matching, picture matching and texture matching all work, and they can all be built from index cards and construction paper.
Keep pieces large. Anything smaller than the opening of a toilet paper roll is a choking hazard, and a piece a toddler cannot pinch will simply be ignored. One dot of hook-and-loop on the back of each piece and one matching dot on the page is all the glue you need.
Coloring pages need a laminated surface and thick crayons, or they will tear in a day. A dry-erase page in a clear sleeve lets the same page be used fifty times, which quietly turns one craft session into weeks of play. Leave a small cloth or dry-erase sponge in the pocket so the page can be wiped clean.
Add one page that works without any pieces at all: a tracing path, a dot-to-dot, or a maze for an older toddler. Pages with nothing to lose are the ones that survive the first month.
Step 4: Create Hands-On Fine-Motor Pages
This is the section where a busy book earns its name. Aim for at least three pages that require fingers rather than eyes alone.
- Lacing cards. Cardstock shapes with eight or ten punched holes and two yarn lengths with blunt plastic needles. Two holes are too easy; eight holes make toddlers work and still succeed.
- Button and sewing cards. Cardstock with two or three large holes and big buttons on yarn, plus a needle with a thick yarn tail. Sewing a button is a full fine-motor workout.
- Hook-and-loop pages. Cut-out shapes, letters, animals or food items that stick to a matching shape on the page. Use heavy-duty washable hook-and-loop, not the thin craft-store kind, which loses its grip after a few sessions of chewing.
- Zipper and fastening page. A craft-bag zipper taped to cardstock, plus hook-and-loop tabs for large snaps or ribbon ties. Dressing and undressing a paper doll teaches a real self-help skill.
- Sticker pages. A laminated sheet with a small sticker sheet in the pocket. Low effort for you, and stickers get pulled off and replaced for years.
Give every removable piece a home. A hook-and-loop dot on the back pocket of the page is the simplest answer, and loose pieces in a separate zip bag get mixed and lost within a week.
Step 5: Add Sensory, Sorting, and Pretend-Play Pages
Sensory pages are why parents end up building felt books. Swatch squares of crinkle fabric, cotton, corduroy and smooth felt, each clearly labeled by touch, give a toddler something to explore without any fine-motor precision.
A strip of acrylic mirror secured with double-sided tape catches attention for years. Follow it with a button page, a ribbon page and a page of textured fabric strips. Check edges carefully: fabric frays and torn felt is a small loose piece you did not plan for.
Sorting pages need very few, very large categories. Two or three bucket shapes and matching pieces are plenty: big and small, animals and food, warm colors and cool colors. Add a counting page with three objects per number for a two- or three-year-old, and keep it to one number per page.
Pretend-play scenes, such as a farm or a pet shop with movable pieces, are the pages most likely to be played with out loud and invented on. Build the background from construction paper, laminate it, and add the animals or people as pieces.
Seal small loose parts with a thin line of glue or double-sided tape across the back so nothing can be pulled off and swallowed. Then check the page with the small end of a toilet paper roll: if it passes through, it does not go in the book.
Step 6: Decorate and Label Each Activity
Bright does not mean busy. Use two or three colors per page, large uncluttered shapes and plenty of white space so a toddler’s eye lands on the task instead of the decoration.
Put one short instruction and one symbol on each page. A picture of a hand placing a piece does more work than three words, and it works before your child can read. High contrast between the background and the pieces helps low-contrast combinations, and rounded shapes are easier to handle than square ones.
Add navigation the child can manage: numbered pages, colored tabs by activity type, and a contents page with the same symbols repeated. Once a toddler can find the page they want alone, the book stops being a supervision task and starts being quiet time.
Step 7: Bind, Test, and Finish the Busy Book
Punch all pages on the binder margin, then file them with the widest external rings you can find. Add sheet protector sleeves over any page that is not laminated, and put the loose pieces in a pocket page or zip bag at the back.
Test every page yourself before it goes in. Run a finger along each cut edge, tug every attached piece, and open and close every hook-and-loop dot and zipper. Round anything sharp, glue down anything that lifts, and remove anything smaller than the toilet paper roll test.
Take the hook-and-loop dots off before the book goes into a bed. Hook-and-loop that detaches during sleep is the small-parts risk that catches experienced parents, and a strip of it stuck to a page is easy to peel off with a fingernail.
Finish with a cover: cardstock, the child’s name, and a pocket for a dry-erase marker or a small crayon pack. This is the point where how to make a busy book for toddlers becomes a finished object rather than a folder of craft attempts, and it is the version most likely to be handed to a sibling or a grandparent as a gift.
Two formats are worth knowing about before you start. A no-sew felt book solves chewing and washing: cut two felt shapes per page, glue the pieces to the front layer with fabric glue, and bind the stack with ribbon threaded through holes along the edge. It takes longer per page and it survives a teething toddler. The no-printer route solves a household without an inkjet: cut shapes from construction paper, cardboard and felt by hand, write the instructions yourself in large print, and mount everything on cardstock. Hand-cut pages are usually sturdier than printed ones anyway, because you control the cardstock weight.
Common Mistakes
Most disappointing busy books fail for reasons that have nothing to do with the crafts. These are the ones I would fix first.
Instructions that need a lecture. If you have to explain the page, your toddler cannot do it alone. Fix: one short label, one symbol, one obvious choice per page, and remove anything that is not strictly needed.
Loose parts and choking-sized pieces. Small cut-outs, detached buttons and peelable hook-and-loop are the three real risks. Fix: keep every piece larger than the opening of a toilet paper roll, seal the back of each piece, and check every page with the roll test before it goes into the binder.
Sharp or lifting edges. Square laminate corners, cut foil and stiff cardstock edges snag small hands. Fix: round every corner, cover exposed card edges with tape, and remember that laminate that lifts at a cut line can be peeled away by a determined toddler.
Laminate peeling where you cut it. This is the most repeated complaint in parent forums. Cutting finished laminate opens a seam that adhesive creeps into. Fix: cut the paper first, laminate the flat sheet second, then trim the laminate along the shape, or use the cut-laminate-cut-again method for curved pieces.
Pages torn or chewed in a week. Paper does not survive a teething child. Fix: laminate every page a wet or mouthy toddler will hold, back cards with cardstock, switch to felt for the worst offenders, and keep a spare sheet protector sleeve in the back pocket to slide a chewed page out of.
A binder you cannot open. Small internal rings turn adding one page into a two-minute puzzle. Fix: buy external rings or a lever-arch file, leave a quarter-inch margin, and never punch holes near the ring line.
One activity type for every age. A book of eight tracing pages is a book a one-year-old tears apart. Fix: keep a rough split, which is why Step 1 asks for a spread of page types rather than duplicates of your favorite one.
Too many pages, too fast. A twenty-page book finished in one weekend sounds generous and plays well for about three days. Fix: ten pages, built over two or three evenings, with the option to swap a page rather than add one.
On supervision: pediatric guidance for under-threes is that play should be supervised and that anything small enough to choke on stays out of reach. Treat that as the design constraint that shapes every page, not as a disclaimer at the bottom. If a sibling under three shares the room, an adult nearby and a book with no loose parts is the safer combination.
Frequently Asked Questions
What age is a busy book appropriate for?
Most homemade busy books work best from about 12 months to 3 years. At one year old, use big pieces, one obvious choice per page and no text. At two, add threading, simple buttons and three or four matching pairs. At three, add tracing, counting to five and a dress-up page. Most toddlers outgrow a busy book by age four and move on to sticker books.
What is the best binder size for a toddler busy book?
A one-inch three-ring binder is the practical choice for a toddler busy book. Bigger binders hold more pages but are heavy for small hands and waste space while your child is young. Choose one with external wide rings so you can add or swap a single page in seconds, plus a clear front pocket and a back pocket for loose pieces.
How many pages should a homemade busy book have?
Ten to twelve pages is the sweet spot for a first book, and parents consistently underestimate the cutting time. Build it over two or three evenings rather than one long session. Finish with a spread of page types, not duplicates, because a toddler moves through matching activities in days. You can always swap pages instead of adding more.
What materials are best for a durable busy book?
Laminated 125 micron cardstock pages last best for a paper book, paired with cardstock backing on anything handled daily. For a chewer, skip paper and build from felt or heavy card with fabric glue. Use heavy-duty washable hook-and-loop rather than thin craft-store dots, and always give every removable piece a pocket or a hook-and-loop home.
Can toddlers use a busy book independently?
Yes, with the right design. Independence comes from one short instruction, one symbol, large pieces and a clear place to put each piece. Start with two or three pages your child can finish alone, then add harder ones. Expect the first sessions to need you nearby; independence usually arrives within a couple of weeks of consistent use.
How can I add new pages as my child grows?
Use a binder with external rings and leave a quarter-inch margin on every page so nothing crowds the holes. Keep matching pieces in the back pocket with a note of which page they belong to, and store unfinished pages in a labeled folder. Swap out pages they have mastered rather than adding endlessly, and keep the old ones for a younger sibling.
Conclusion
The easiest starting point is one page, not ten. Make a single color-matching page from two index cards and one sheet of cardstock, put it in the binder, and hand it over. If your child finishes it and asks for more, you have your page plan and your page count.
Gather the basics, cut everything square, round every corner, and build a busy book for toddlers one activity at a time. Keep the pieces large, the labels short and the binder open, and the book will outlast the phase that made you build it.