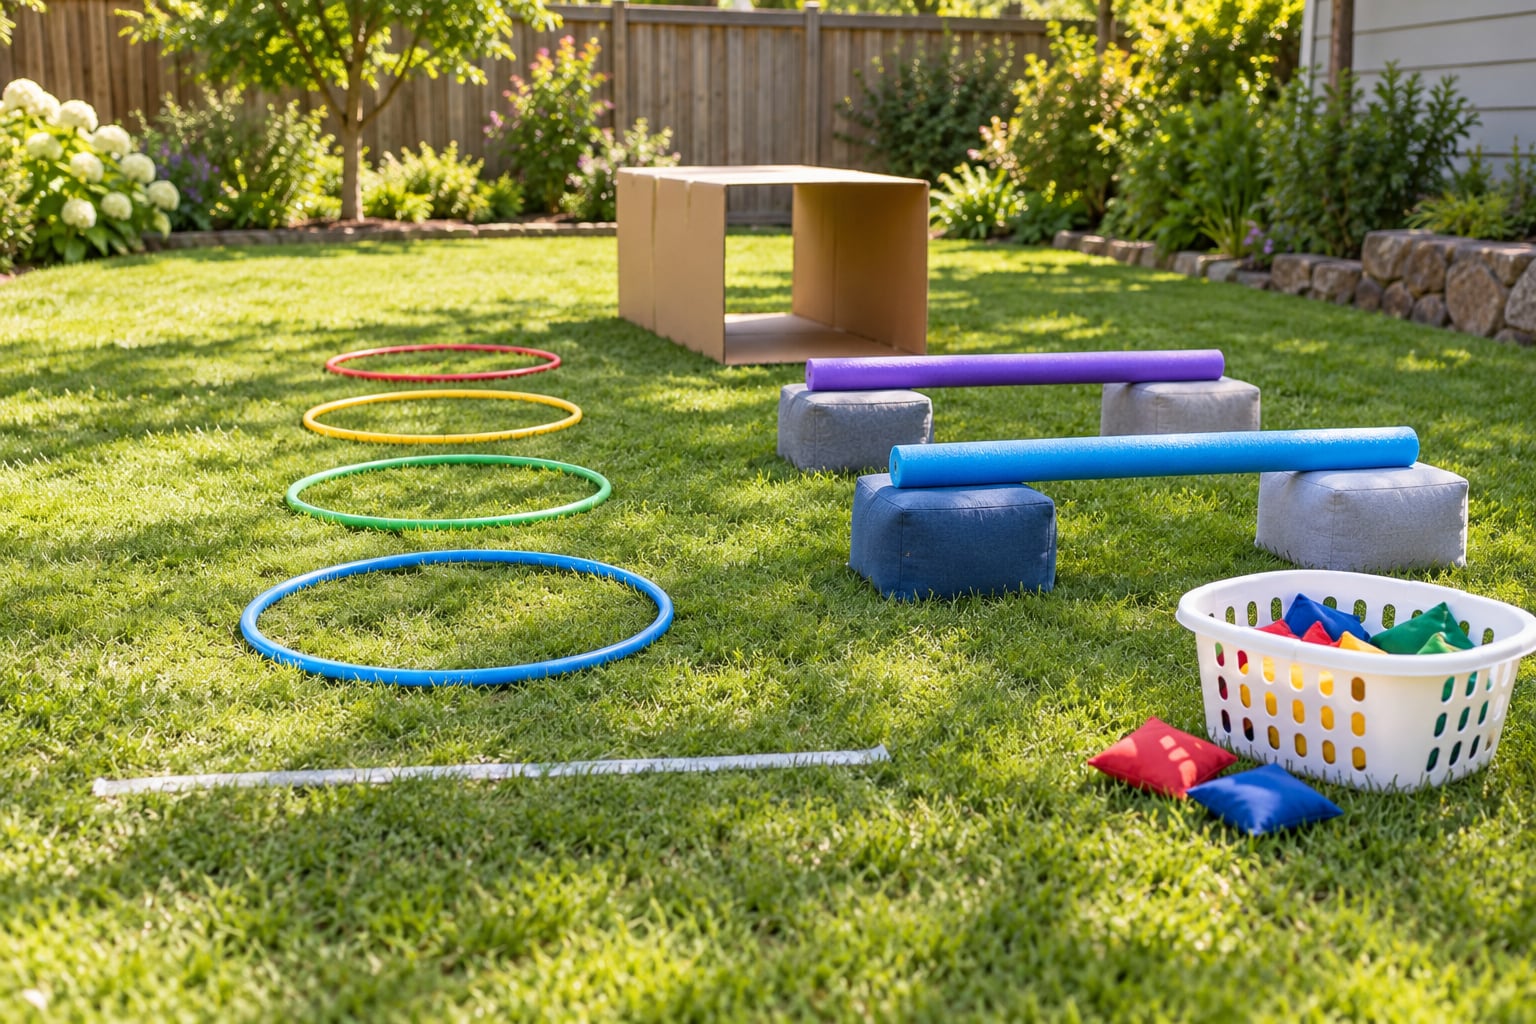
To make a backyard obstacle course for kids, tape a start and finish line on flat ground, then set out five or six stations using things you already own: a jump rope to hop over, a cardboard box to crawl through, cushions to walk across, a laundry basket to toss bean bags into. Most courses take about half an hour to build.
The obstacles matter less than the order. Run jump, then crawl, then balance, then throw, and a child switches focus at every stop instead of repeating the same skill six times. That is also why a three-station version holds a toddler’s attention far better than an eight-station run does.
The setup barely changes between a small patio and a big lawn. What changes is how much room you have, how much supervision you can give it, and how long the kids stay interested. Here is how to make a backyard obstacle course for kids that works in any of those situations.
Table of Contents
- What You Need
- Step-by-Step
- How to Make a Backyard Obstacle Course for Kids
- 1. Choose a Safe Location
- 2. Set Up Simple Movement Stations
- 3. Add Crawling and Crawl-Through Challenges
- 4. Create a Jumping and Agility Area
- 5. Add a Quiet Finishing Challenge
- 6. Test and Explain the Course
- Common Mistakes
- Frequently Asked Questions
- What age is a backyard obstacle course appropriate for?
- How much space do I need for a kids’ obstacle course?
- What household materials can I use to build one?
- How can I make the obstacle course easier for toddlers?
- Should children complete an outdoor obstacle course alone?
- What should I do if it rains or the grass is wet?
- Conclusion
What You Need
You can use painter’s tape, jump rope, a garden hose, hula hoops, chalk, a laundry basket, cushions, an old blanket, cardboard boxes, cones, bean bags and pool noodles. Most households already own half of that list.
Free things worth digging out first:
- Tape and chalk for lines, circles and station numbers. Painter’s tape lifts off grass and hard surfaces without leaving a stain.
- Rope, hose or extension cord laid in a wavy line for a walk-the-line station.
- Two chairs and a blanket for a crawl-through tunnel.
- Cushions, sofa pillows and folded towels for low jumps and soft landings.
- A laundry basket and a bag of bean bags for a throwing finish.
- Cardboard boxes with the ends folded down, used as hurdles or a tunnel.
- Old towels or yoga mat pieces as a narrow balance strip.
Worth buying only if your stash is empty: a pack of cones, a bag of plastic cups for bowling, a cheap stopwatch, or a second set of bean bags. None of it is essential.
Before anything goes down, walk the yard and remove rocks, branches, dog toys, sprinkler heads and anything a child could trip over. Check that the ground is level and firm, and pick the route before you lay out a single station.
Step-by-Step
How to Make a Backyard Obstacle Course for Kids
Map a one-way route through the yard first, then place stations along it. Leave six to ten feet of clear walking space between obstacles so kids can move without bumping into the next challenge, and keep every climbing, jumping or blind-turn station well away from fences, trees, pools, sheds and the street. Most families get six stations out of a lawn about 20 by 30 feet; a narrow side yard works fine as a straight line of three.
1. Choose a Safe Location
Inspect the route at child height. Look for slopes, roots, low branches, hard edges and anything that collects water after rain.
Dry grass or a flat paved area works best. Leave a clear walkway back to the house and pick a stopping point, like a bench or a chair, where children can sit and wait for their turn. Skip obstacles on slopes, near roads, or under tree limbs, since a fall there lands somewhere you did not plan for.
2. Set Up Simple Movement Stations
Make a walk-the-line first, because it needs almost nothing. Lay rope, a garden hose or a taped line in a shallow S-curve across the grass and have kids walk heel to toe along it without stepping off.
For balance, lay a board or a long scrap of wood across two stacks of bricks or stacked books, one end about six inches off the ground. Press down hard on each end before anyone uses it, and add a handrail of painter’s tape if it shifts.
If a raised beam feels wrong for your child, skip it. Flat stepping stations work just as well: lay out stones, flattened cardboard rounds or a scrap of rug and have kids cross one at a time, placing each foot only where the last one landed.
3. Add Crawling and Crawl-Through Challenges
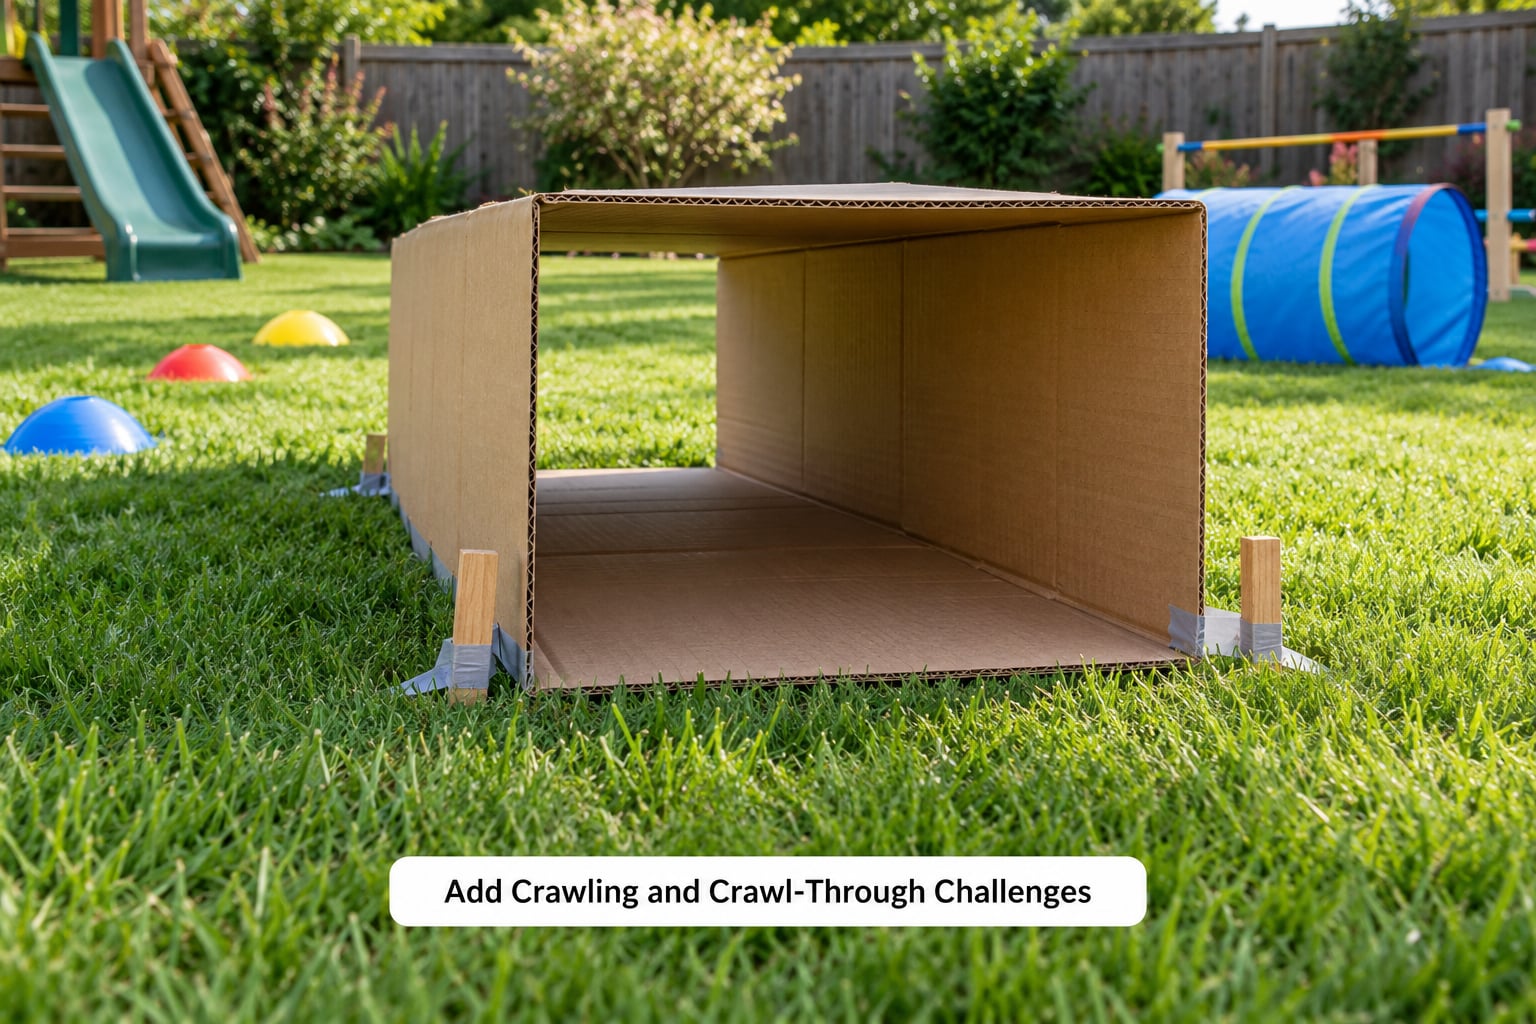
Three options work well for this station. Cut both ends off a large cardboard box and tape the edges smooth for a tunnel a child can crawl through on hands and knees. Set two chairs a few feet apart, drape a blanket over them and weigh each corner with a cinder block or a book.
The third option is the simplest and the best for younger kids: tape four or five floor markers in a scattered pattern and ask them to crawl from one to the next without using their knees off the tape.
Check every setup before play. Remove staples, tape over cut edges, and never prop a blanket or board on anything that can shift when a shoulder pushes against it. Crawl one station yourself on hands and knees before handing it over, because that is exactly how a child will test it.
4. Create a Jumping and Agility Area
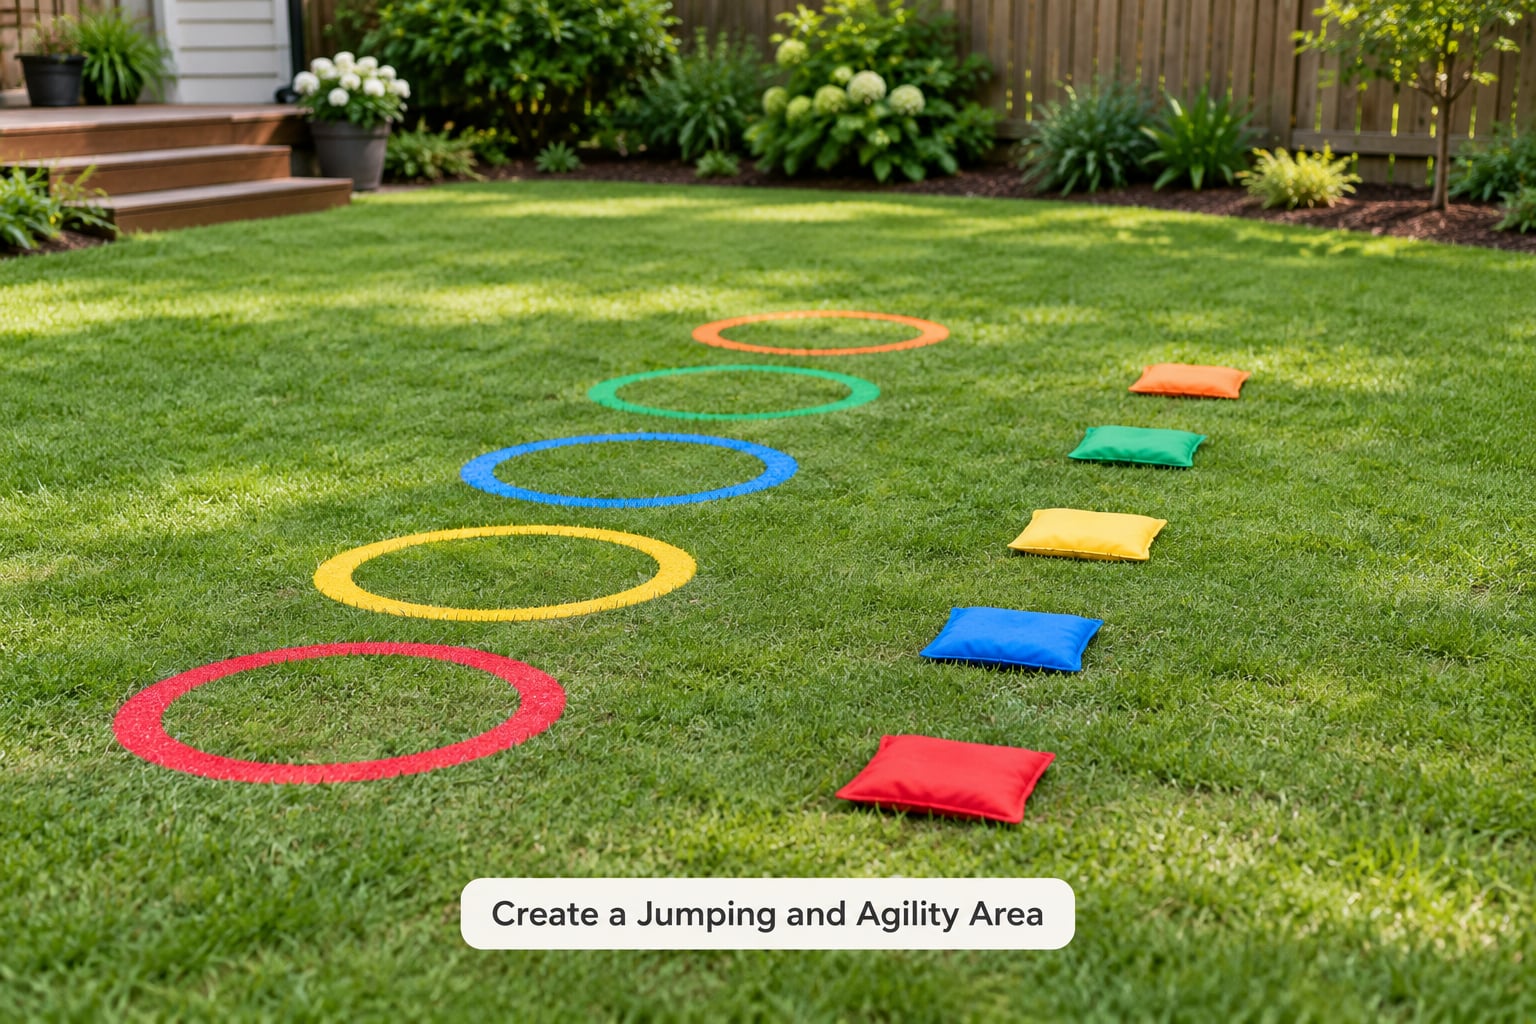
Build this station as a short sequence. Tape six to ten circles in a line, add low rope hurdles made from pool noodles laid across two cups, and finish with a few flat bean bags on the grass as targets.
Spacing is the whole game. Six inches apart works for a toddler, a foot and a half suits a preschooler, and two to three feet keeps a school-age child from mashing every jump into one longbound. Put cushions or folded towels under every landing spot, and never ask a child to jump down from anything raised.
Older kids can hop on one foot, or jump backward between the circles. That adds difficulty without adding height, which is the safer way to raise the bar.
5. Add a Quiet Finishing Challenge
End on something that is noisy-free and low-pressure, because the last station decides whether kids want a second run. A laundry basket toss works: prop the basket against a wall or lay it on its side, stand two or three feet back, and hand each child five bean bags to land inside.
Bucket bowling is another one. Fill an empty bucket or planter with a folded towel so it does not tip, and set plastic cups a few feet away to knock down.
Two more options: a bean bag transfer station where kids carry one bag at a time between marked spots, and a picture-match station where taped paper cards are shuffled and reordered on the ground. Whatever you pick, tape paper targets down or laminate them so the wind does not take them, and skip glass, ceramic or anything breakable.
6. Test and Explain the Course
Walk the entire route twice before the kids do, once at an adult’s pace and once at a four-year-old’s. Look for loose materials, sharp edges, confusing instructions and transitions that are hard to read from the far side.
Fix what you find, then demonstrate each station once and agree on two rules: one runner per station, and walk back along the side instead of cutting across the course. For anything involving climbing, balance or blind turns, stay within arm’s reach. Course safety depends on an adult watching, not on kids remembering to be careful.
Common Mistakes
Most problems with a homemade course come down to eight things, and each one has a simple fix.
- Raised or unstable obstacles. A beam wobbling on a stack of books invites a fall. Push down on every support with your full weight; if it moves, lower it or remove it.
- Too many stations. Six is plenty for a full course. More than eight and attention drops before the finish line.
- Crowding. Obstacles six feet apart turn into collisions. Space them so a child can walk between them without touching anything.
- Unclear instructions. A station with no obvious goal gets skipped. Show it once, and give each obstacle a name the kids can repeat.
- Rough competition. Older siblings charging through scares younger ones. Run the course together for the first three laps, then time them separately.
- Age mismatch. A four-year-old and a nine-year-old on the same course means one of them is bored or frightened. Run two lanes, an easy one and a harder one, side by side.
- No rest stop. Kids who keep moving without water quit early. Put a chair near the finish with water and shade.
- Ignoring weather. Wet grass is slippery and a sprinkler head is a trip hazard. Postpone after rain, or move the course to a flat paved area.
Once the basic course works, change it rather than rebuilding it. Swap the order so the same obstacles run in a new sequence, add a stopwatch for timed runs, and keep a simple version and a harder version on hand. For a small yard, build three stations and reuse them in different combinations, or make the course a loop around one central obstacle so kids can run it in either direction. For kids who are bothered by noise or surprises, keep the order fixed, cut out the blind turns and announce each station before they reach it.
Session length matters more than course length. Most kids do their best running for five to eight minutes at a time, so expect two or three short laps rather than one long run. Leave the course up for a few days if you can, store the cones in one bin and the tape on a card, and the second weekend takes five minutes instead of thirty.
Frequently Asked Questions
What age is a backyard obstacle course appropriate for?
Most children can join in around age 2 or 3, as soon as they can follow a simple rule and wait their turn. That age suits a three-station course: walk the line, crawl through a box, throw a bean bag. A full six-station course usually clicks around age 5 or 6, once a child can pace themselves and remember the sequence.
How much space do I need for a kids’ obstacle course?
You need roughly six to ten feet of clear walking space between stations, plus a fall zone of a few feet on each side of anything involving jumping or climbing. A lawn about 20 by 30 feet fits six stations comfortably. In a narrow side yard, a straight line of three stations works, and a patio can host a taped course in marker-friendly paint.
What household materials can I use to build one?
Painter’s tape, jump rope, a garden hose, an old blanket, two chairs, cushions, cardboard boxes, a laundry basket, bean bags, hula hoops, cones and old towels all work. Chalk on a driveway covers the stations that tape cannot reach. Most households already own enough to build six stations without buying anything at all.
How can I make the obstacle course easier for toddlers?
Cut it down to three stations and lower everything. Replace jumps with short hops over a rope, space taped circles six inches apart, and swap the crawl-through box for floor markers to crawl between. Skip anything that requires a leap, a blind turn or a balance beam, and keep an adult within arm’s reach the whole time.
Should children complete an outdoor obstacle course alone?
No. An adult should watch the whole course and stay within arm’s reach of any station involving climbing, balance, blind turns or height. Set one rule that matters: one runner per station, with everyone else waiting on the sideline. A second adult makes it practical to keep running laps with a group instead of stopping every time.
What should I do if it rains or the grass is wet?
Postpone until the ground is firm, because wet grass is slippery and soft ground hides holes and sprinkler heads. If you cannot wait, move the course indoors with painter’s tape on the floor, cushion the hallway turns, and drop the jumping and climbing stations in favor of a walk-the-line, a crawl-through tunnel and a bean bag toss.
Conclusion
Start by walking the yard and choosing a simple route, then put down three stations: something to move over, something to move under, and something to throw into. That is a complete course, and most kids will run it more than once.
Once those three feel easy, add a balance station and a jumping station, check the whole route once more on your hands and knees, and keep an adult close to anything involving height. Six good obstacles beat twenty rushed ones, and the course that stays up for a week gets used far more than the one built for an afternoon.