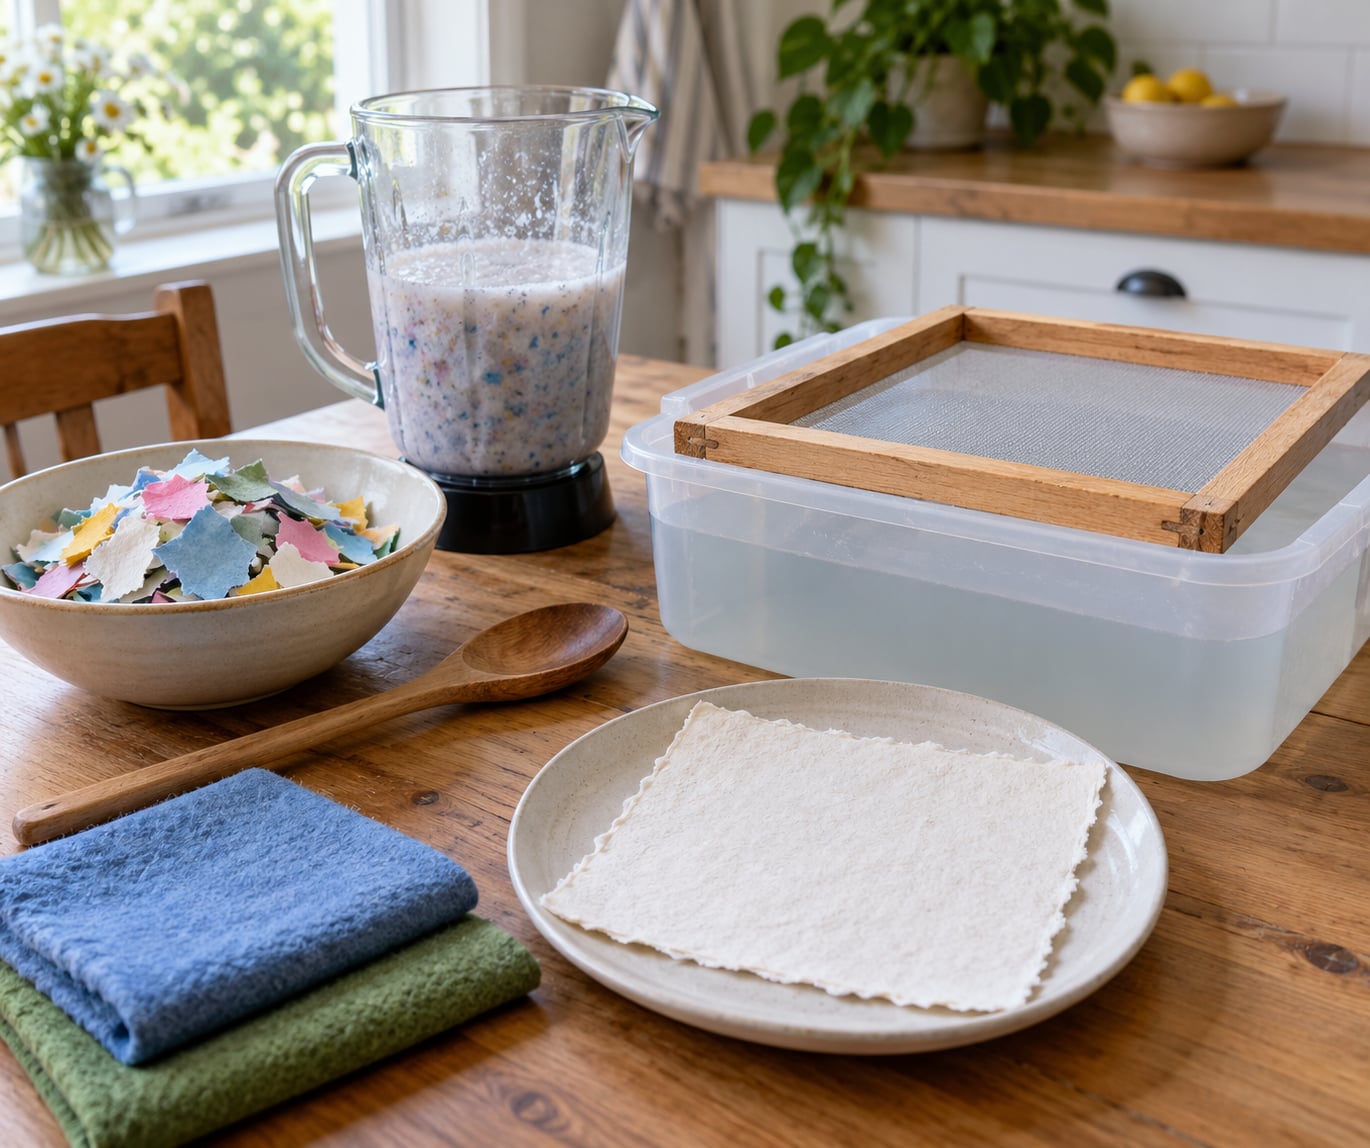
To make homemade paper from scraps, soak torn paper in water for one to two hours, blend it into pulp, scoop a thin layer onto a mesh screen, press out the water, and let it dry for 12 to 24 hours. Hands-on time is about 30 minutes, and the results are always a little lumpy, which is exactly the point.
Most families keep a jar of worksheets, junk mail and paper grocery bags that never get used. Pulped and pressed, they turn into thick, flecked sheets that take pencil and crayon beautifully and look nothing like store-bought paper. Kids notice every lump, and that is usually where the questions start.
The whole setup costs almost nothing, uses tools already in most kitchens, and cleans up with warm water and a little patience. As with any year-round craft on our site, we like a project that gives everyone in the room something to do.
Table of Contents
- What You Need to Make Homemade Paper from Scraps
- Step-by-Step: How to Make Homemade Paper from Scraps
- Prepare and Tear the Paper Scraps
- Soften the Scraps in Water
- How to Make Homemade Paper from Scraps: Blend the Pulp
- Add Color and Decorative Bits
- Form the Paper Sheet
- Dry and Finish the Homemade Paper
- Ways to Use Your Scrap Paper
- Common Mistakes and Easy Fixes
- Frequently Asked Questions
- Can I make homemade paper from printer paper?
- What types of paper scraps work best for homemade paper?
- How do I make homemade paper thicker?
- Can I make paper without a blender?
- How long does homemade paper take to dry?
- Is homemade paper suitable for writing and drawing?
What You Need to Make Homemade Paper from Scraps
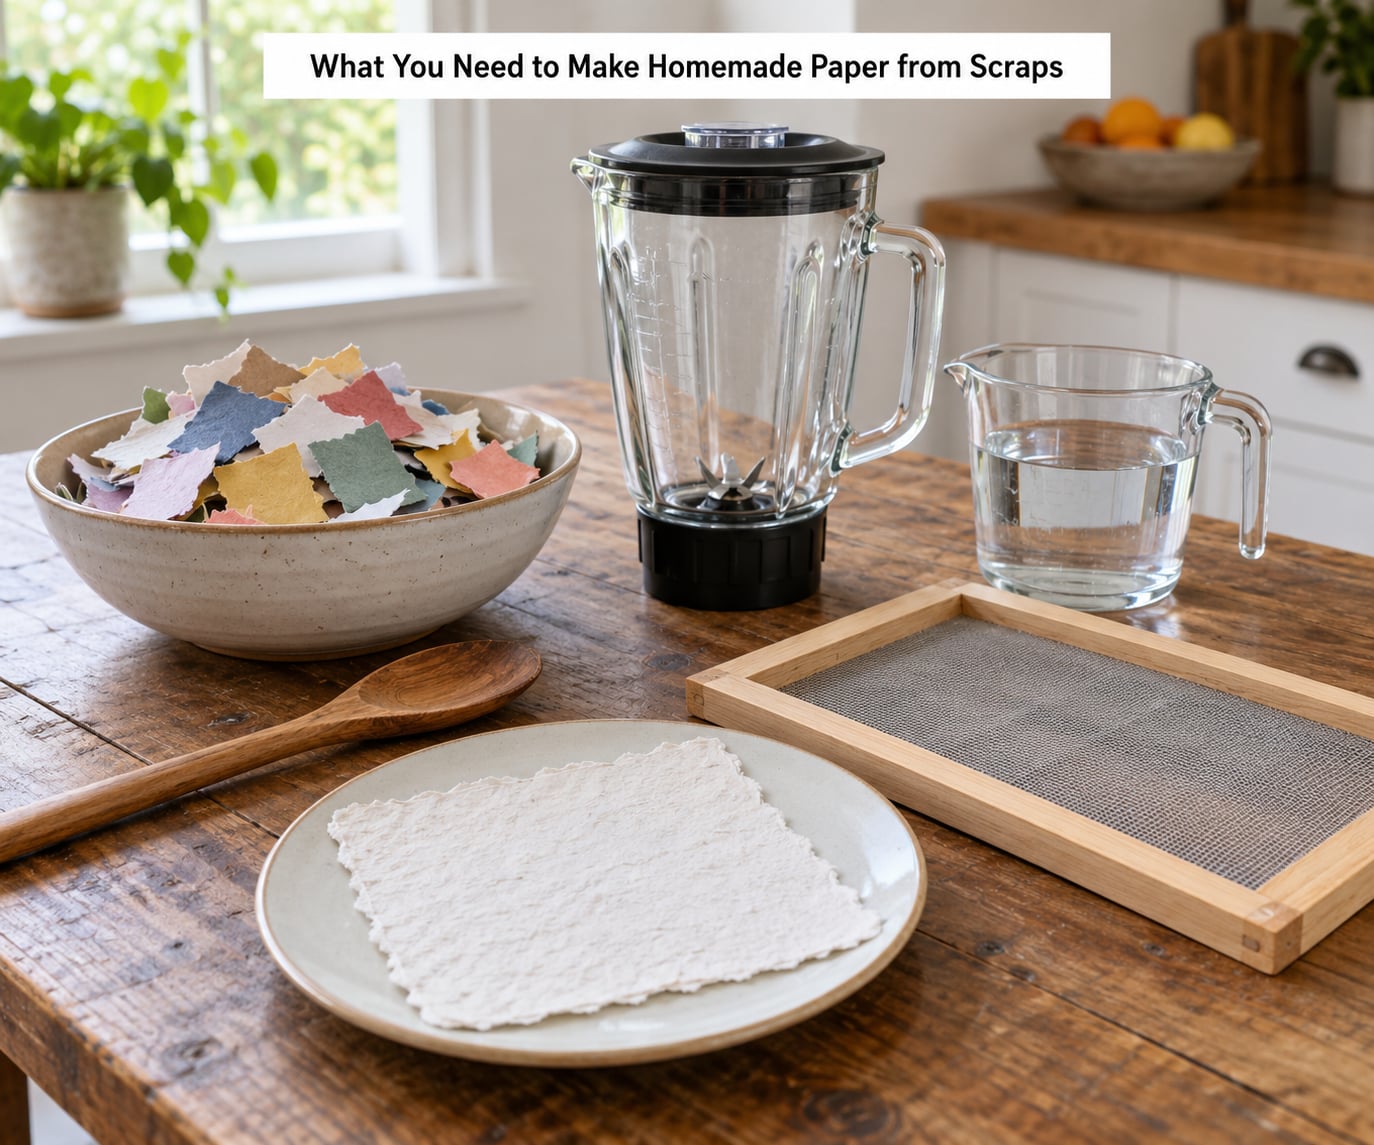
The core list is short enough that most people already own every item.
- Paper scraps about two cups worth to start, roughly half a gallon of loose paper
- Warm water for soaking, plus a tub, sink or large bowl for dipping
- Blender a regular blender works, and a food processor works too
- A screen a window screen, a splatter screen, or mesh stapled to a scrap wood frame
- Two felt or microfiber cloths for pressing and couching
- A wooden spoon, a plate or shallow tray, and a drying rack or clothesline
- Optional: food coloring, watercolor, dried petals, seeds, cotton rags, paper towel
What you skip matters just as much. Glossy and coated paper does not break down cleanly, and plastic laminations never break down at all. Pull those out of the pile before you start.
- Printer paper and worksheets pulp easily, because plain cellulose breaks up evenly
- Newspaper pulps fast and leaves a soft gray tint in the sheet
- Kraft paper and paper grocery bags have long fibers and make the thickest sheets
- Junk mail and envelopes work, but check each envelope for a window or coating first
- Tissue and crepe paper blend fast in small amounts and make the mix slippery
- Magazine pages are barely worth it, because the glossy coating clogs the mesh
- Thermal receipts cannot be pulped; the heat-sensitive coating turns to slime
- Laminated inserts never break down, since the plastic stays solid in water
- Staples, tape and clips come off first, because metal and glue stay trapped in the pulp
No store-bought mould and deckle needed. A picture frame with the backing removed, or four lengths of scrap wood nailed into a rectangle, both work. Stretch a piece of window screen across it and staple the edges.
A splatter screen from the kitchen aisle of any hardware store is the easiest ready-made option, though it costs a few dollars and the mesh is coarse. For a finer sheet, mesh fabric or a thrifted window screen gives you tighter weave and less pulp lost through the holes.
Step-by-Step: How to Make Homemade Paper from Scraps
Prepare and Tear the Paper Scraps
Fill a bowl with scraps, pull out every staple, paper clip, strip of tape and window envelope, then tear or cut the paper into pieces about one inch square. Smaller pieces soak faster, and anything much larger than that leaves dry lumps in the blender.
Cotton rags cut into roughly half-inch squares blend in well with paper scraps and give a softer sheet. Keep fillers to about 10 to 20 percent of the mix and paper at 80 to 90 percent, or the finished sheet will crumble in your hand.
You know it is ready when nothing larger than a thumbnail is still floating in the bowl.
Soften the Scraps in Water
Cover the pieces with warm water by an inch or two and leave them for one to two hours, or overnight if the paper is thick kraft or grocery bags. Printer paper softens in about an hour.
Test a piece by squeezing it between two fingers. If it gives and bends without springing back, the cellulose has loosened enough to blend. Pieces that still feel stiff go back in for another half hour. Soaking longer than this rarely helps, and paper left in standing water for a full day starts to smell.
How to Make Homemade Paper from Scraps: Blend the Pulp
Fill the blender about one-third with softened scraps and add water until everything is covered. If the mixture is not fully submerged, the motor strains and the blades grab dry corners.
Blend on medium speed for 30 to 60 seconds, pausing once to scrape the sides down. You want a smooth slurry with no visible pieces, similar to a thin smoothie. Extra water gives a thinner, more paper-like sheet; less water gives a thicker, textured one.
Aim for roughly one cup of pulp and two cups of water per batch, and repeat batches if you want more sheets. Pour the finished pulp into a pitcher so you can control the flow at the tub.
Add Color and Decorative Bits
Stir color into the pulp now, not later. Food coloring and diluted watercolor both work, and a few drops go a long way, though expect pastel results rather than the saturated color of construction paper. Dye added to the sheet after drying stains and flakes.
For decoration, add petals, leaves, seeds, coffee grounds or glitter during blending so the pieces get distributed and locked into the fibers.
- Dried petals and herbs look best in thin sheets where they show through
- Seeds turn the sheet into plantable paper, as long as seeds stay under 10 percent of the mix
- Glitter stays put but makes writing on the sheet harder
- Fresh plant matter fades and browns as it dries, sometimes to a surprising yellow
For watercolor, paint the dried sheet after it comes off the rack. The color sits on the surface and moves around, which kids enjoy far more than the pulp looks like it should.
Form the Paper Sheet
Fill the tub with 3 to 4 inches of water, then add one cup of pulp. Stir gently and lift from the bottom so the fibers stay suspended instead of settling into lumps.
Hold the screen flat at the surface, level with the water, and shake it side to side five or six times. Each shake lets water through and settles fibers into an even mat. More water in the slurry means a thinner sheet and a gentler shake; too little gives you a thick, patchy one with bare mesh at the corners.
Lift the frame straight up, level, without tilting. Press once, firmly and straight down, onto a felt cloth laid on a towel. This transfer is called couching, and it is where most torn sheets come from, because people shift the frame as they set it down. Press down, wait, then lift. Do not slide.
Roll the felt and sheet together and press with a rolling pin or the back of a spoon to squeeze out more water. Stack more couched sheets between dry felt and press the whole pile under a heavy book for an hour. The sheets come out flatter and slightly stiffer.
Dry and Finish the Homemade Paper
Peel the damp sheet off the felt and lay it on a screen, a rack or a towel, in a spot with moving air. Expect 12 to 24 hours, and longer in humid weather. A fan running nearby cuts drying time noticeably.
The sheet is ready when it feels dry all the way through and no longer cool to the touch. Peel it away from the cloth gently, trim the deckle edge with scissors if you want clean lines, and flatten anything bumpy under a heavy book overnight.
Keep the pulp water for a second scoop, then let it sit until the fibers settle. Scoop the settled fiber onto a towel or a compostable paper towel and compost it. Never pour pulp water down the drain, because the fines clog household plumbing.
Ways to Use Your Scrap Paper
Homemade paper is too absorbent for inkjet printers and usually too thick for a home printer, but pencil, crayon, colored pencil and marker all work on it. A light coat of glue size thinned with water helps if a sheet keeps feathering.
- Greeting cards fold a thick sheet, score the fold, and glue two layers together
- Scrapbook accents torn pieces make good mats and labels
- Seed paper skip the blender water, keep seeds under 10 percent, and plant it whole
- Collages the uneven surface takes glue stick and paper clay well
- Origami works only on the thinnest sheets, and origami paper is far easier
- Seasonal records families often embed the month’s flowers or leaves in the pulp each 2026
- Sensory play the slurry itself is a good water-table activity for toddlers
People repurpose wedding invitations, wrapping paper and holiday decorations into keepsake paper, which is the whole reason to start with meaningful scraps instead of printer paper.
Common Mistakes and Easy Fixes
The sheet tears when you lift it off the screen. It is thin and wet. Scoop less pulp, shake less, and press it onto felt straight from the tub rather than carrying it. Pressing a partially dry sheet onto cloth is what makes a stiffer card.
Holes and bald patches. You shifted the frame while pressing, or the pulp settled into clumps. Stir the slurry right before dipping, keep the frame level, and press straight down without moving it.
Pulp sticks to the mesh. The paper had glossy coating, or you pressed too long. Remove coated scraps, and lift the sheet the moment it is couchable. A drop of liquid dish soap in the rinse water releases the fibers a little more readily.
Uneven thickness. Too much pulp in the water, or the tub sat still too long. Add water between sheets, and stir between scoops. Corners often run thin, which is normal.
The blender struggles. The paper was not covered, or you used a full cup of dry scraps. Add water until the pieces float, and use half-cup batches.
The finished sheet is too thick to write on. Add more water to the blend and blend a little longer, or dip twice into the same tub and couch both layers onto one sheet to laminate them.
Frequently Asked Questions
Can I make homemade paper from printer paper?
Yes, and it is the easiest starting scrap. Office paper, printer paper and school worksheets have no coating, so they soften within an hour and blend into a smooth pulp. Tear a couple of cups into one-inch pieces, soak for an hour, blend with enough water to cover the pieces, then scoop and press as usual. Expect a thicker sheet than you get from store-bought copy paper.
What types of paper scraps work best for homemade paper?
Plain uncoated papers pulp easily: printer paper, worksheets, envelopes without windows, newspaper, kraft paper and paper grocery bags. Kraft gives the strongest fibers, while tissue blends quickly and softens the mix. Keep every embellishment under about 20 percent of the total weight, and stay well under it if you want a sheet that holds together instead of crumbling when you fold it.
How do I make homemade paper thicker?
Thicken a sheet three ways. Scoop more pulp into the tub water, shake the screen fewer times so more fiber stays on the mesh, or couch two thin sheets together before pressing. Tearing your scraps smaller also releases more fiber per batch, and blending longer breaks the cellulose down further, which means more of it stays trapped in the mat instead of washing through the screen.
Can I make paper without a blender?
Yes, though the fiber will be shorter and the sheet softer. Grate the soaked scraps into a fine pulp with a box grater or food processor, or mash them with a potato masher in a bucket. Both work; the masher takes longer and gives you uneven, rustic sheets. You can also skip the blender entirely for baby-safe paper made from cotton batting beaten with water, which needs no screen because the fibers are already long.
How long does homemade paper take to dry?
Usually 12 to 24 hours, and longer in humid weather. Lay the sheet on a screen, rack or towel where air moves across it, and a fan nearby will shorten the wait. Test by touching the center of the sheet: if it still feels cool or soft, keep going. Thick couched sheets take closer to a full day, so plan a batch the weekend before you need it.
Is homemade paper suitable for writing and drawing?
Yes for pencil, crayon, colored pencil, marker and most pens, and it takes ink more readily than printer paper because it is unbleached and textured. It is not printer-friendly, since most home printers struggle with thick, uneven sheets and a sheet with deckle edges jams. If ink feathers badly, brush on a thin coat of thinned glue size and let it dry before writing.
Start with the easiest sheet on your counter. Put a cup of torn printer paper in warm water now, leave it an hour, and read the forming and drying steps before you need them. That way the pulp is ready when you are, and your first sheet comes off the screen in one piece instead of three.
More recycled paper projects for kids are on the way, and every finished sheet is worth keeping.