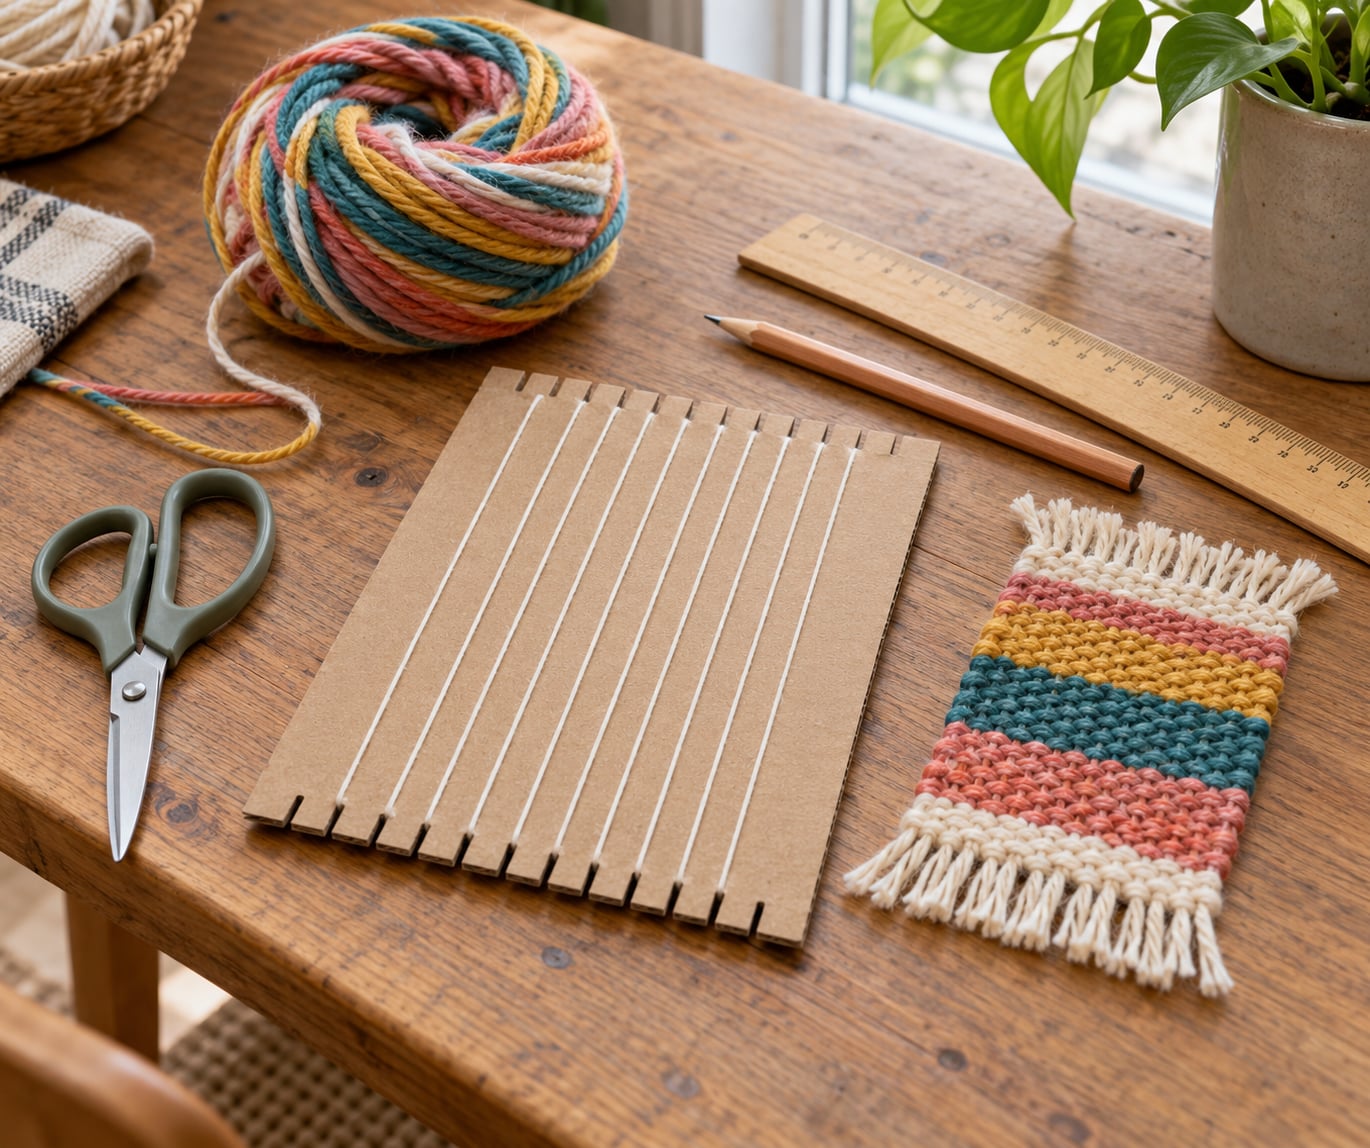
To make a cardboard loom for weaving, cut a rectangle from a sturdy box, mark small notches along two opposite edges, wrap yarn around them to create the warp threads, then pass a second yarn over and under those threads row by row. The build takes 20 to 30 minutes, the only real skill is cutting straight notches, and it costs nothing but a few scraps you were going to throw out.
It is also the cheapest way to teach weaving. Kids learn over, under, tight and loose in about ten minutes of warping, and a first project turns into a coaster, a placemat or a small wall hanging.
Table of Contents
- What You Need to Make a Cardboard Loom for Weaving
- Step-by-Step
- How to Make a Cardboard Loom for Weaving: Cut the Notches
- Step-by-Step: Warp the Loom
- Step-by-Step: Add and Separate the Weft
- Step-by-Step: Finish and Remove the Weaving
- Common Mistakes
- Frequently Asked Questions
- What kind of cardboard is best for a weaving loom?
- What yarn should I use for a cardboard loom?
- How many notches should I cut in the cardboard?
- Can a young child make a cardboard loom?
- How do I keep the woven rows from becoming too tight?
- How do I remove a finished weaving from the loom?
- Conclusion
What You Need to Make a Cardboard Loom for Weaving
Everything comes from the recycling bin, a drawer or a yarn basket. Gather it all before you start, because hunting for a blunt weaving needle halfway through warping is how projects get abandoned.
- Cardboard: one flat panel from a corrugated shipping box, roughly 8 by 12 inches or 12 by 18 inches. Corrugated cardboard with two visible flutes along the cut edge is sturdy enough for adults and older kids. Chipboard works too and cuts cleaner. A thin cereal-box panel is fine for a first sampler but will soften after a few rows.
- Scissors or a craft knife: a craft knife gives you clean, even notches, and an adult should handle it. Scissors work if you cut short snips from each edge toward the middle.
- Ruler and pencil: for marking notch positions. A measuring tape or a strip of masking tape as a guide line saves time.
- Yarn for the warp: worsted-weight acrylic or cotton, about 7 or 8 stitches per inch of warp. Anything thinner slides out of the notches.
- Yarn for the weft: the same weight works best. Bulky, novelty yarn and ribbon are better on a circular loom.
- A blunt weaving needle or a substitute: a blunt needle is ideal. Bend a paperclip into a hook, or tape a Popsicle stick to a flat button and tuck yarn under it.
- Optional: masking tape for reinforcing corners, a scrap of cardboard as a beater, and a phone photo of your colours before you start weaving.
Skip the yarn for now if you just want the frame. Warping and weaving practice on the first loom is part of the fun, and the second one takes half the time.
Step-by-Step
How to Make a Cardboard Loom for Weaving: Cut the Notches
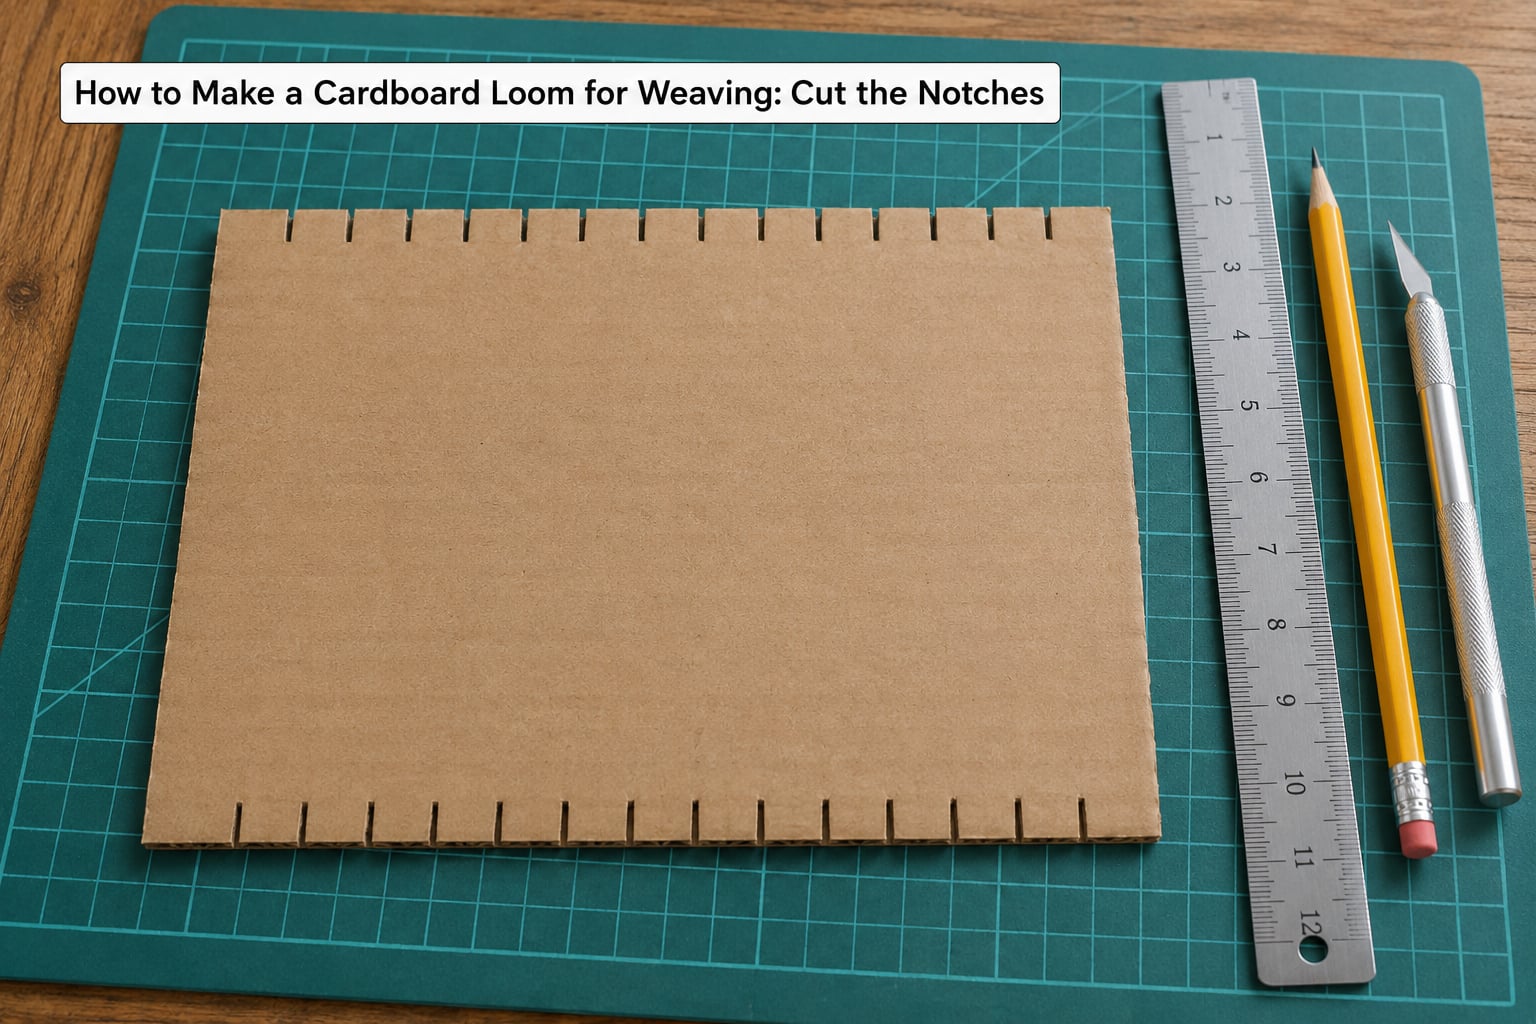
Notches decide the width of your weave, so measure twice. Use a 1/4 inch gap as the starting gauge and aim for 8 warp threads per inch of loom width.
- Flatten the panel. Open out the box and press the panel flat under a stack of books if it has memory. A flat panel notches evenly.
- Mark the long edges. Draw a light pencil line 1 inch in from each of two opposite long edges. Notches go on those two lines only.
- Measure the notches. Mark every 1/4 inch along the first line with a pencil dot, then carry the dots across to the second line with the ruler. A strip of masking tape with 1/4 inch gaps taped along the edge makes this step go fast.
- Cut toward the middle. Snip each notch inward about half an inch, no deeper. Cutting deeper weakens the tabs and lets warp threads slip.
- Check the count. Aim for an odd number of warp threads. With an even count every row lands in the same place and the weave goes striped with no pattern change at all.
- Reinforce the corners. Fold the box tabs in and tape them flat behind the panel so the cardboard cannot split when you pull on a tight row.
You can see it worked when the notches look identical in width from across the room. Small unevenness is fine, within about half the notch width, and the eye never picks it up in the finished piece.
Safety note for kids: an adult marks and cuts every notch. It is the one step on this list not worth handing to small hands, and it takes two minutes.
Step-by-Step: Warp the Loom
Warping is just yarn wrapped back and forth between the notches. It looks fussy and takes four minutes once you accept that every strand has to look the same.
- Tie a tail on. Tie your warp yarn to the first notch on the bottom line, leaving a 4 inch tail. Tape the tail to the back of the cardboard so it cannot creep.
- Wrap upward and over. Bring the yarn up to the matching notch on the top line, sit it in the notch, then back down to the next notch on the bottom line.
- Keep walking. Continue zigzagging, one notch over each time, until you reach the last notch. Do not skip notches, and do not double back at any point in the middle.
- Keep tension even. Pull each pass only as snug as the last one. Some weavers add a dab of tape along the bottom edge to anchor the first few wraps.
- Anchor the end. Tie the last pass to the final notch, then clip the tail and tape it down.
- Hold the last warp thread. Put a finger on the outermost warp strand and keep it there for the whole weaving. Experienced weavers return to this habit again and again, and it is the single thing that stops the finished cloth bowing into an hourglass shape.
The two outermost strands are not decorative. Keep them straight and treat them as one edge of the fabric; letting them wander inward creates bulges under the weave that never flatten out.
Step-by-Step: Add and Separate the Weft
Weaving the weft is the part children take to immediately. Thread the weft yarn onto the needle, or tuck the end under the paperclip hook, and start at one side.
- Pass over two, under one. Work the yarn in front of the first warp strand, then behind the second, repeating the path as far as you can reach.
- Change the path each row. Start the next row in the gap that the previous row passed in front of. That reversal is the whole technique: plain weave on one row, plain weave inverted on the next.
- Pack gently. Push each row toward the previous one with the needle, the paperclip hook or a scrap of cardboard. Push toward the woven cloth, never toward the working yarn.
- Leave it a little loose. A good row still shows a tiny gap between the warp threads and fills in as you add the next few rows. If it is tight now, it will be board-stiff when you finish.
- Change yarn as you like. Tuck the old weft tail under two rows and start the new colour inside the same gap.
Do you want pattern? Looped fringe or a simple rya knot between rows turns leftover yarn into a textured wall piece, and a strip of cotton fabric pulled through the shed gives you a check pattern with no extra planning.
Step-by-Step: Finish and Remove the Weaving
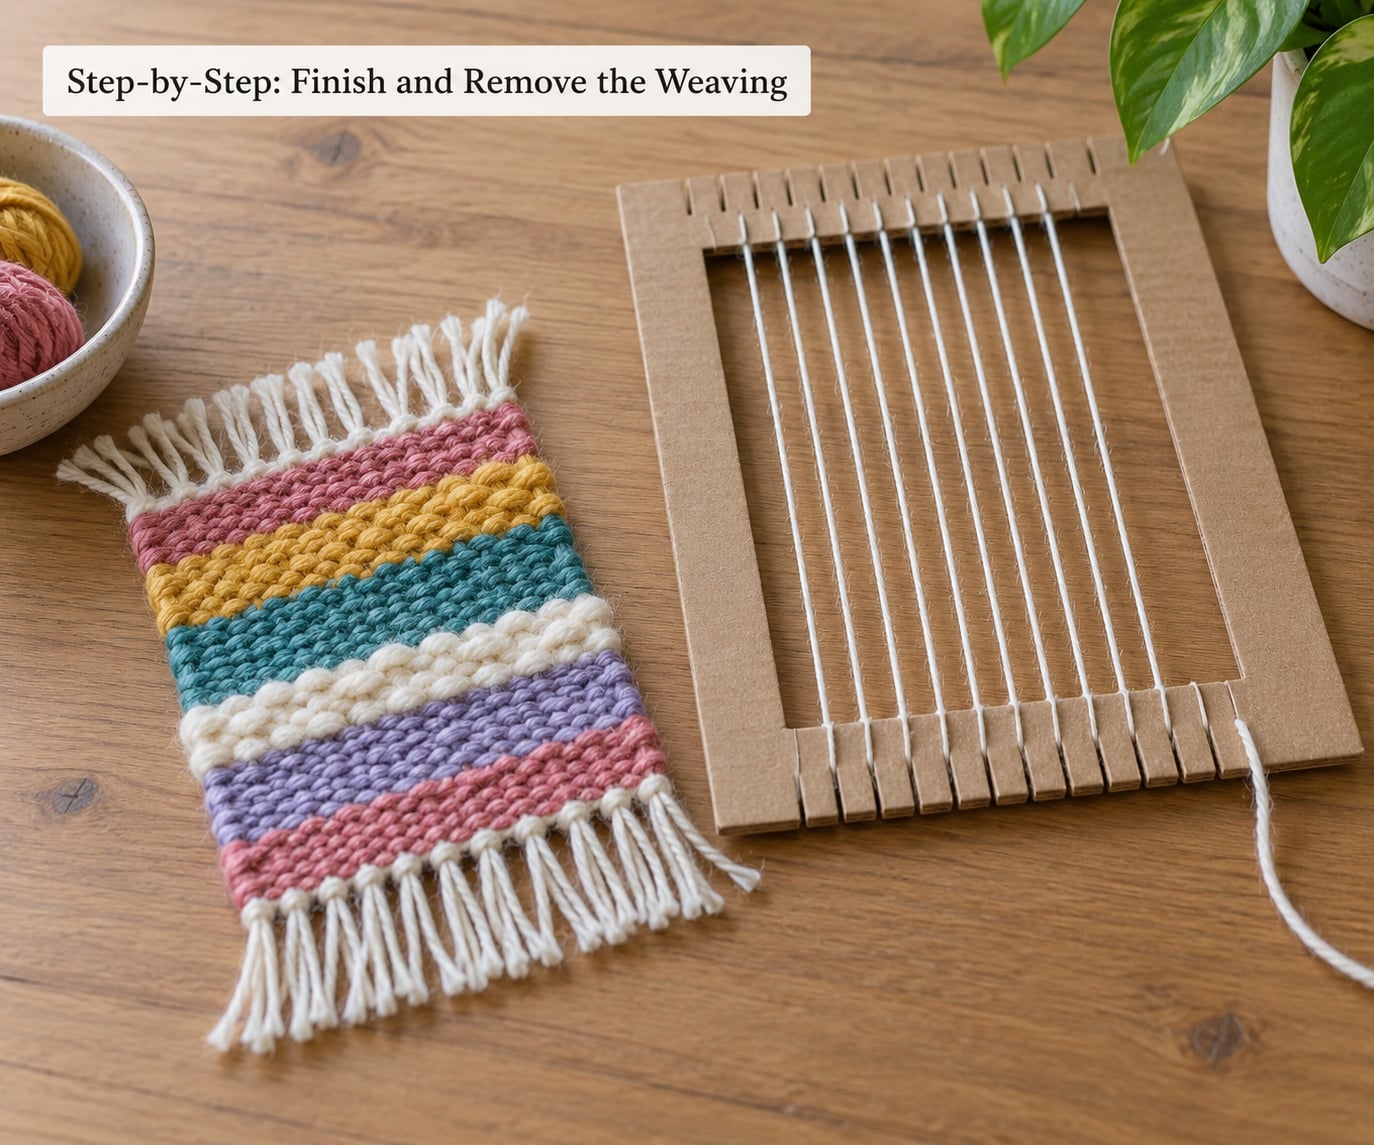
Never pull a finished piece off by a corner. Cut it off deliberately and the fabric keeps its shape.
- Tie off the last row. Weave one final row, tuck the working yarn tail through two loops underneath, and pull gently until it stops.
- Release the warp. Untape the starting tail and lift the warp threads out of the notches one at a time. They spring free on their own once the first corner is done.
- Cut between the warps. Snip the warp strands on the wrong side of the cloth, notched side, leaving a 2 inch tail on each end.
- Finish without a needle. Tie pairs of tails in a double overhand knot, trim to fringe, or weave the loose ends back through the back of the piece. Knotting is faster than sewing and it holds.
- Block it flat. Lay the piece face down on a towel, dampen it lightly, press with a book, and leave it a few hours.
It worked when the fabric stays flat when you hold it by one corner. If it curls, that is the warp pulling inward, and blocking fixes it.
Common Mistakes
Uneven warp spacing. One gap a full notch wider than the rest and the whole piece skews as you weave. Fix it before warping: lay the pencil marks out along the whole edge, count them twice, and recut any notch that is visibly wider or narrower than its neighbours.
Split cardboard. The panel tears at a corner when a warp thread is yanked. Fix it by taping the box tabs flat behind the panel and pulling every pass to the same moderate tension instead of tightening at the end.
Rows packed too tight. The finished fabric comes off the loom stiff as cardboard and the gaps disappear. Push each row in with one finger’s worth of pressure, and leave about a half-notch of play so the yarn can settle.
Skipped warp threads. The needle jumps a strand and every later row is off. Count aloud: even numbers stay in front, odd numbers go behind, and check the count at the right edge before you pull the row in.
Fragile fringe. Knotting a single tail once lets the whole row pull out. Double the tail, make an overhand knot below it, and trim all tails to the same length last.
A few extra pointers. Worsted yarn on a rectangular loom, bulky yarn or ribbon on a circular one. Plain weave first, then try a two-row twist by moving the path one notch over at the start of every second row. For children under about eight, do the notching and warping yourself, then hand over the weaving rows, which is where they want to be anyway.
Frequently Asked Questions
What kind of cardboard is best for a weaving loom?
Corrugated shipping-box cardboard with two flutes along the edge is the best all-round choice. It holds notches without tearing and survives a full project. Chipboard is cleaner to cut and works well too. Avoid thin cereal-box card for anything larger than a small sampler, since it softens and splits after a few rows.
What yarn should I use for a cardboard loom?
Worsted-weight acrylic or cotton yarn, roughly 7 or 8 wraps per inch of loom width, gives the easiest results. Thinner yarn slips out of the notches and turns the warp into a wobble. Bulky yarn and ribbon work nicely on a circular loom with notches cut wider, about half an inch. Match weft weight to warp weight.
How many notches should I cut in the cardboard?
Cut one notch every 1/4 inch along two opposite edges, which gives about 8 warp threads per inch of width. A 12 inch wide loom then carries around 96 warp threads, plenty for a coaster or a small wall hanging. Aim for an odd number of warp threads so rows alternate cleanly instead of stacking in the same grooves.
Can a young child make a cardboard loom?
Yes, with an adult handling the cutting and warping. Notching cardboard needs a steady hand and a craft knife, and warping asks for even tension that small fingers cannot hold yet. Once the warp is on, the weaving rows are all child-friendly and need no tools at all. Children under about eight do best with plain over-and-under weaving and thick yarn.
How do I keep the woven rows from becoming too tight?
Push each new row toward the woven cloth with light finger pressure instead of pulling the yarn hard, and leave a small gap between the warp threads. That gap closes on its own as the next few rows go in. Keep your finger on the outermost warp thread while packing, which stops the fabric narrowing into an hourglass shape.
How do I remove a finished weaving from the loom?
Tie off the last row, then lift the warp threads out of the notches one at a time starting from a corner. Snip the strands between the cloth and the cardboard, leaving a 2 inch tail on each end. Tie pairs of tails into double overhand knots and trim to fringe. Never pull the piece off by a corner, and the fabric will stay flat.
Conclusion
How to make a cardboard loom for weaving comes down to four moves: mark notches at even 1/4 inch spacing, wrap the warp with steady tension, weave the weft over and under while changing the path every row, then secure and cut the ends free.
Start with worsted yarn and notches cut an even distance apart, and your first project should hold together on the first try. Save the cardboard panel when you finish, too. It warps again in under five minutes, and the second weaving is always faster than the first.