If you want to know how to melt crayons safely with kids, the short version is this: an adult handles every heat source, and the child handles the colors. Crayons are pigment suspended in paraffin wax, and that wax softens around 100 to 115 degrees F and turns fully liquid somewhere between 130 and 150 degrees F. That is a narrow window, which is why low, slow heat and constant supervision matter more than any special equipment.
The whole activity takes about 30 minutes of work plus 15 to 20 minutes of cooling. Almost every burn I have seen around this craft comes from one of three mistakes: an unattended heat source, a child reaching toward wax that looks cool but is not, or a tool that was never meant to hold melted wax.
What your child actually does depends on age. A three-year-old can sort colors and press wax into a mold with a spoon once it has cooled enough to touch. A seven-year-old can pour under your hand on the table. An adult still handles the stove, the hairdryer, the oven, and the cleanup.
Table of Contents
- What You Need
- How to Melt Crayons Safely with Kids: Step-by-Step
- 1. Prepare a Safe Work Area
- 2. Choose the Lowest Heat That Works Safely
- 3. Melt the Crayons in Small Batches
- 4. Pour and Let the Crayons Harden
- 5. Clean Up and Store the Finished Project
- Common Mistakes
- Using an open flame or a candle
- Microwaving wax
- Overheating the wax
- Using the wrong container
- Letting a child near the hot wax
- Pouring wax down the sink
- Clear wax pooling on top
- Mixing too many colors in one container
- Frequently Asked Questions
- What is the safest way to melt crayons with kids?
- Do I need a double boiler to melt crayons safely?
- Can children pour the melted wax into the mold?
- How long do melted crayons take to harden before kids touch them?
- What do I do if melted wax spills on clothes, carpet or furniture?
- Can I melt crayons in the microwave or melt them on the stove?
- A Safe, Simple Crayon-Melting Project
What You Need
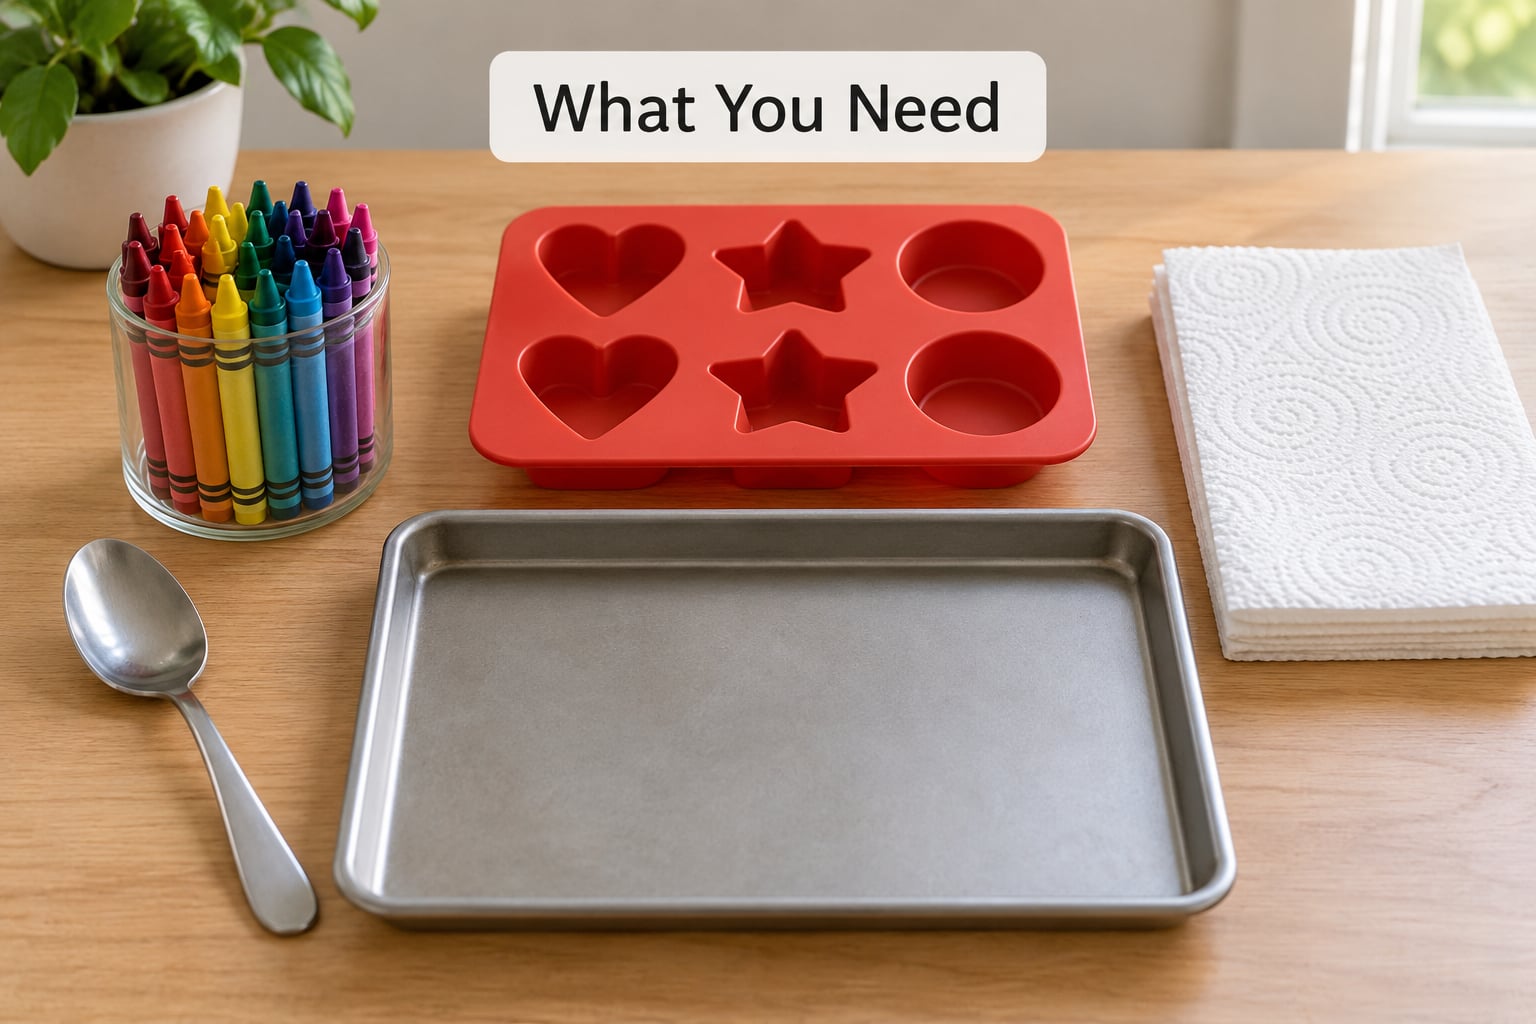
Keep the list short. You can melt crayons with a spoon, a heat-safe container, and a warm water bath, and most of the rest is protection.
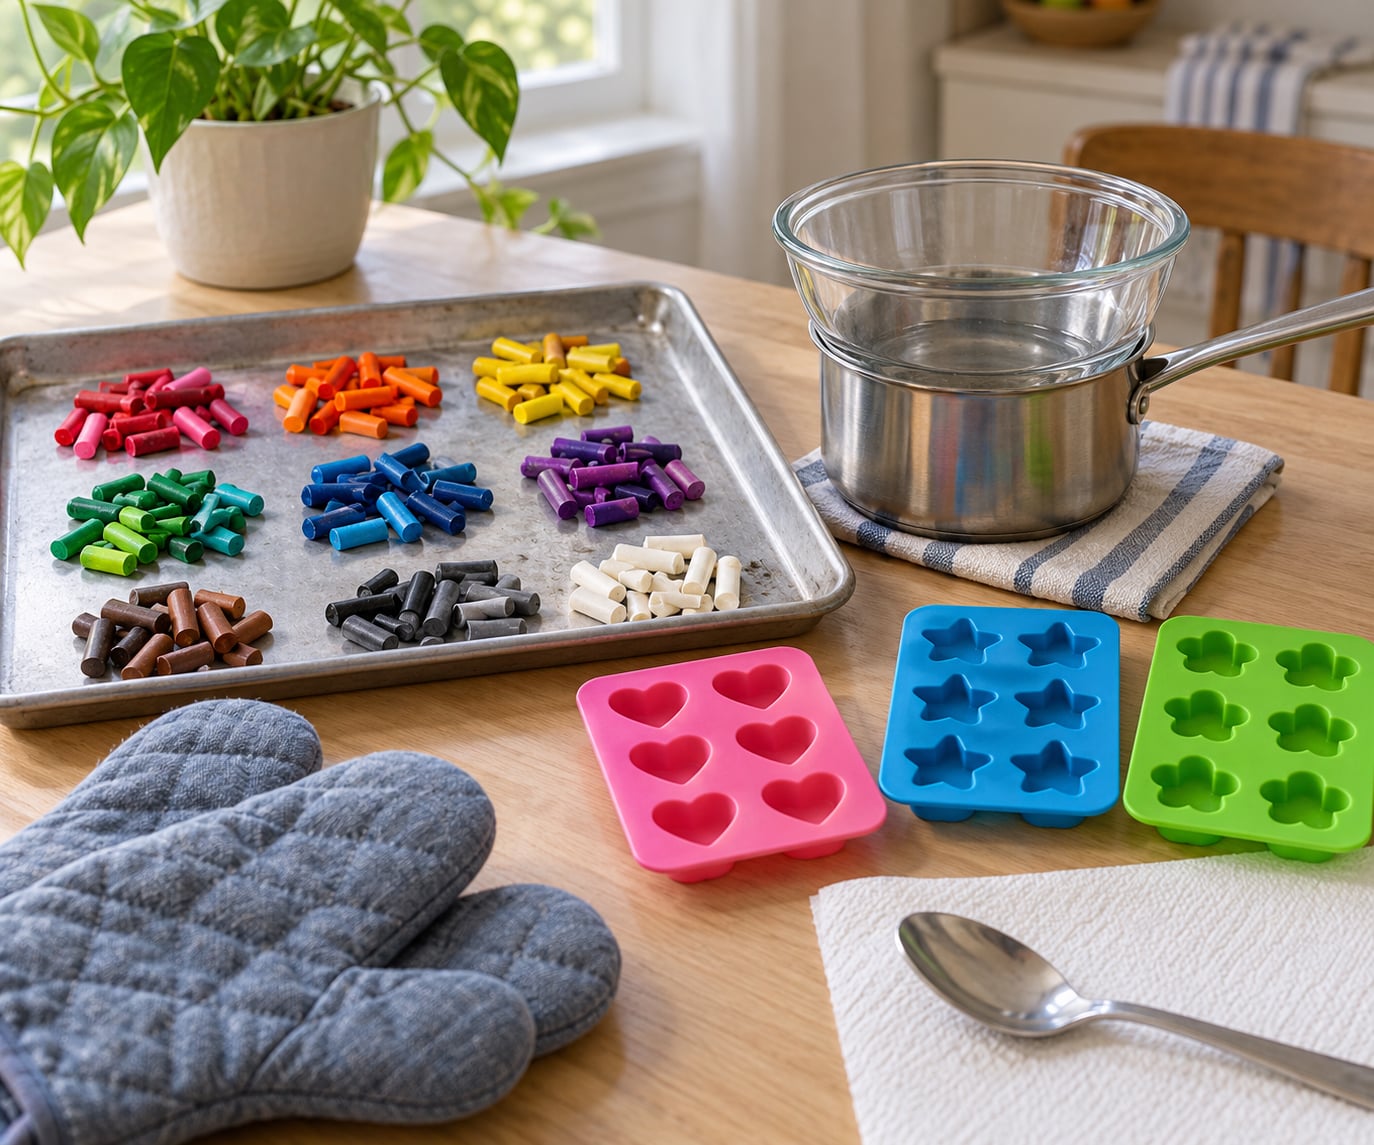
- Wax source: broken crayons, short nubs, or a whole box. Melt in small batches of five to eight pieces so the container stays manageable.
- Heat-safe containers: silicone molds, an oven-safe jar, silicone baking cups, or a metal tin. Never use plastic that is not rated for heat, and never use a cup you plan to drink from.
- Low-heat method: a saucepan with a heat-safe bowl on top for a double boiler, or sunlight on a foil-lined tray. A hairdryer on a low setting works too, but it makes the room warm and the wax unpredictable.
- Protection: a metal baking sheet or a foil-lined tray to catch drips, oven mitts, and a clear spot on the floor where nobody walks.
- Cleanup: paper towels, an old toothbrush, a scraper or a plastic card, and a sealed bag or jar for scraps.
One shortcut saves real time: soak crayons in tap water for about ten minutes and the paper wrapper slides right off. Dry them fully on a towel before any heat goes near them, since damp paper steams and the wax sticks to less when the wrapper is gone.
How to Melt Crayons Safely with Kids: Step-by-Step
This guide covers the general approach that works for every method below: an adult runs the heat, an adult handles the hot container, and the child works at a set distance. Skip the open flame, skip the microwave, and never leave a heat source running while you turn away.
1. Prepare a Safe Work Area
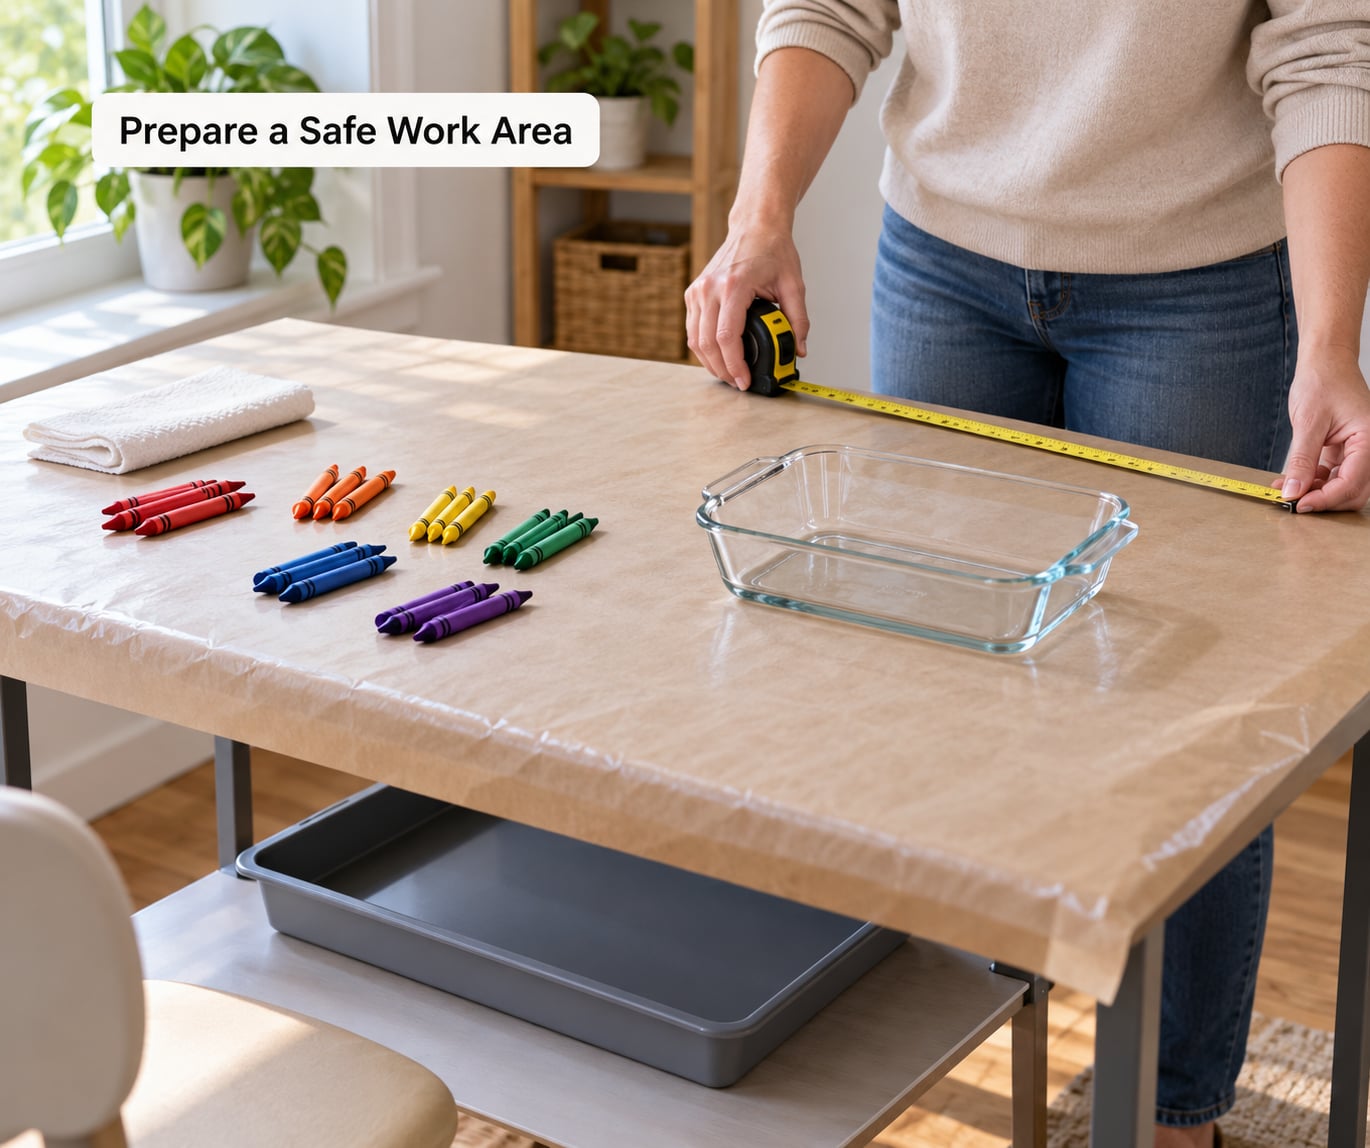
Set a metal baking sheet or a foil-lined tray on a table near a wall, away from the walkway. Wax travels further than you expect, and a tray means a spill is a paper towel wipe instead of a carpet stain.
Decide your child’s boundary before you heat anything, and say it out loud. A tape line on the floor about three feet from the table works well. The rule is simple: heat side is grown-up side, and that holds for the whole project, not just the first five minutes.
Sort crayons into small color groups while the wax is still solid. That is real work for a young child, and it is the part that decides whether the finished piece has clean color bands or a brown smear.
2. Choose the Lowest Heat That Works Safely
A double boiler is the safest useful setup for an indoor project. Fill a saucepan with a couple of inches of water, set a heat-safe bowl on top so the bowl never touches the water, and keep the flame or burner on low. The water caps the temperature and keeps wax from scorching.
Direct heat is faster and less predictable. A hairdryer on low blows soft, even heat and lets you control the rate by distance, but wax will run down the canvas or drip onto whatever is beneath it. Sun melting is the gentlest option of all, and it is the one method where a child can genuinely be the maker rather than the watcher.
Whatever you pick, the heat source stays in your hands or in sight, never on a timer you walk away from.
3. Melt the Crayons in Small Batches
Load five to eight crayons into the heat-safe container, cut or snapped small so they sit flat rather than standing up like dominoes. Larger pieces melt on the outside while the core stays solid, which is how you get a lumpy puddle.
Bring the heat up slowly and watch for the first sign of change: the crayon slumps and the surface turns glossy and wet. That is the moment you stop adding heat. Molten wax should look smooth and pourable, like thin warm oil, not bubbling or smoking.
Stir only with a metal spoon, only while the container is on a stable surface away from your child, and only if the wax is already liquid. Do not stir a half-solid mixture. It splashes, and hot wax on skin is a genuine burn even though crayon is labeled non-toxic.
4. Pour and Let the Crayons Harden
An adult lifts the bowl and pours into the mold. Pour slowly, in one spot, and let it find its own level. If you want distinct bands of color, give each color a few seconds to settle before adding the next.
Your child can choose the color order, hold the mold steady on a flat surface, or count the seconds out loud. Those are real jobs, and handing a kid a job is what keeps the activity calm instead of chaotic.
Now the part most guides skip. Freshly poured wax looks like nothing more than liquid color, and the surface hardens well before the middle cools. Wait 15 to 20 minutes at room temperature before anyone touches the piece, and when you do touch it, press a fingertip into the thickest part first. That is where small fingertip burns come from.
5. Clean Up and Store the Finished Project
Let everything cool fully before you scrape. Hardened wax comes off silicone with a fingernail or a plastic card. If a tray is sticky, fold paper towel over it and press with the back of a warm spoon, then peel the towel away with the wax attached.
Wash tools in warm, soapy water once they are at room temperature. Never scrape wax down a drain, and never rinse a saucepan with hardened wax still in it, because the plug and pipes end up coated in it.
Store finished pieces somewhere shaded. Crayon pigment fades in direct sun and direct heat, which is a sad ending for a canvas you spent an afternoon on.
Common Mistakes
Most problems here are the same problem wearing different clothes: too much heat, too little supervision, or the wrong container.
Using an open flame or a candle
Wax is a fuel, so yes, a crayon can burn. A candle set up to melt crayon is an open flame sitting inches from a child, and there is no version of that I would run in a home. Use a double boiler or sunlight.
Microwaving wax
Microwaves heat unevenly, so you get hidden hot spots and a mold that scalds on the underside while the top feels fine. Plenty of videos show crayons microwaved on high for eight minutes, which is the opposite of safe. Use a low, controlled heat source instead.
Overheating the wax
Once wax smokes or darkens, it has broken down and you will taste it in the finished project. Extra heat buys you speed and costs you color. Turn the heat off at the first glossy slump.
Using the wrong container
Thin plastic cups warp and leak. Cheap aluminum pans leach into wax. Use silicone, glass rated for heat, or a metal tin you are willing to lose.
Letting a child near the hot wax
Melted wax does not look hot. It looks like bright liquid color, which is exactly why small children reach for it. The distance rule is not negotiable, and the twenty-minute cooling wait is not negotiable either.
Pouring wax down the sink
Solidified wax in a pipe is a plumber’s visit. Scrape it into a sealed jar or bag and put it in the trash once it is cool and hard.
Clear wax pooling on top
Leave it too long and the clear carrier wax separates, floating to the top while pigment settles to the bottom. The remade crayon then looks washed out with a colored layer underneath. Pull it off the heat as soon as the surface turns glossy.
Mixing too many colors in one container
Every color you add is a color you have to blend, and blends go muddy. One color or a deliberate pair per container gives you the clean stripes people are after.
Frequently Asked Questions
What is the safest way to melt crayons with kids?
The safest method is a double boiler, where a heat-safe bowl sits over gently simmering water and never touches it, with an adult controlling the burner the entire time. Sun melting on a foil-lined tray is the safest of all because there is no hot tool in the room. Keep children at a set distance, avoid open flames and microwaves, and wait 15 to 20 minutes after pouring before anyone touches the wax.
Do I need a double boiler to melt crayons safely?
No, but it is the best setup for an indoor project with young children. The layer of water keeps the temperature even and stops the wax from scorching, which a bare pan or a hairdryer will not do. You can substitute a heat-safe glass bowl over barely simmering water. A hairdryer on low also works for canvas projects, though wax runs fast and the air gets warm.
Can children pour the melted wax into the mold?
Not while the wax is hot. Melted wax causes real burns and it does not look hot, so young children should not handle the container at all. Older kids can pour once an adult tilts the bowl and guides their hand, or they can pour when the wax has cooled to a thick, syrupy stage in the bowl. Under-fives are better off choosing color order and holding the mold steady.
How long do melted crayons take to harden before kids touch them?
Wait 15 to 20 minutes at room temperature. The surface hardens within a few minutes, which is misleading, because the center of a thick pour stays warm long after the top looks solid. Test the thickest section with a fingertip before handing the piece over. Small pieces set faster than a full mold, and a warm room slows the whole process down.
What do I do if melted wax spills on clothes, carpet or furniture?
Let it cool completely first, then lift the hardened wax with a spoon or a dull plastic card. For a thin smear on fabric, cover it with plain brown paper and press with a warm iron on low; the wax melts into the paper and lifts off. Never iron fabric directly, and never pick at hot wax, since it sticks to skin as well as to fabric. Blot, do not rub.
Can I melt crayons in the microwave or melt them on the stove?
Skip the microwave. Wax heats unevenly, so hot spots form and a silicone mold can come out scalding on the bottom while the top feels fine. A double boiler on the stove is the safe version: the bowl sits above gently simmering water and never touches it. A bare pan on a burner scorches wax fast and creates smoke and drip risk, so keep children well away from either.
A Safe, Simple Crayon-Melting Project
Start with the table, not the crayons. Lay down a metal tray, mark your child’s boundary line, and sort the colors into small groups. Then bring the heat up slowly in a double boiler with an adult in charge of it, pour once the wax looks glossy and smooth, and wait the full 15 to 20 minutes before anyone touches the finished piece.
That is how to melt crayons safely with kids. The craft itself takes half an hour; what makes it safe is the boring, repeated adult control around it.