A paper bag puppet is a lunch bag turned inside out, decorated with a face, and worked with one hand: your fingers sit in the bag, and the bottom flap opens and closes like a mouth when you talk through it. Learning how to make puppets from paper bags takes about 15 minutes, costs next to nothing, and works for kids as young as two. If you have a brown paper bag, a marker, and something to glue with, you can start right now.
I have made these with my own kids more times than I can count, and the version that survives longest is the simplest one. Start with a face, check that the mouth flap moves, and only then add hair, clothing, and arms. My rule is that a puppet finished in twenty minutes gets played with for a week, while a puppet that takes an hour to decorate often gets abandoned halfway.
Below is the whole process, including the fixes for the four things that go wrong most often: glue that will not stick to the bag, ears that tear off, a face drawn too low to see, and a mouth flap that refuses to open.
Table of Contents
- What You Need
- Step-by-Step: How to Make Puppets from Paper Bags
- 1. Choose and Flatten the Paper Bag
- 2. Add the Face and Character Details
- 3. Create Hair, Ears, or Other Character Features
- 4. Decorate the Body and Finish the Puppet
- Making it work for different ages
- Common Mistakes
- Frequently Asked Questions
- What materials do I need to make paper bag puppets?
- What size paper bag works best for a puppet?
- How do I make the mouth open and close?
- Why will glue not stick to my paper bag puppet?
- What paper bag puppet ideas work well for toddlers?
- How do I make paper bag puppets last longer?
- Conclusion
What You Need
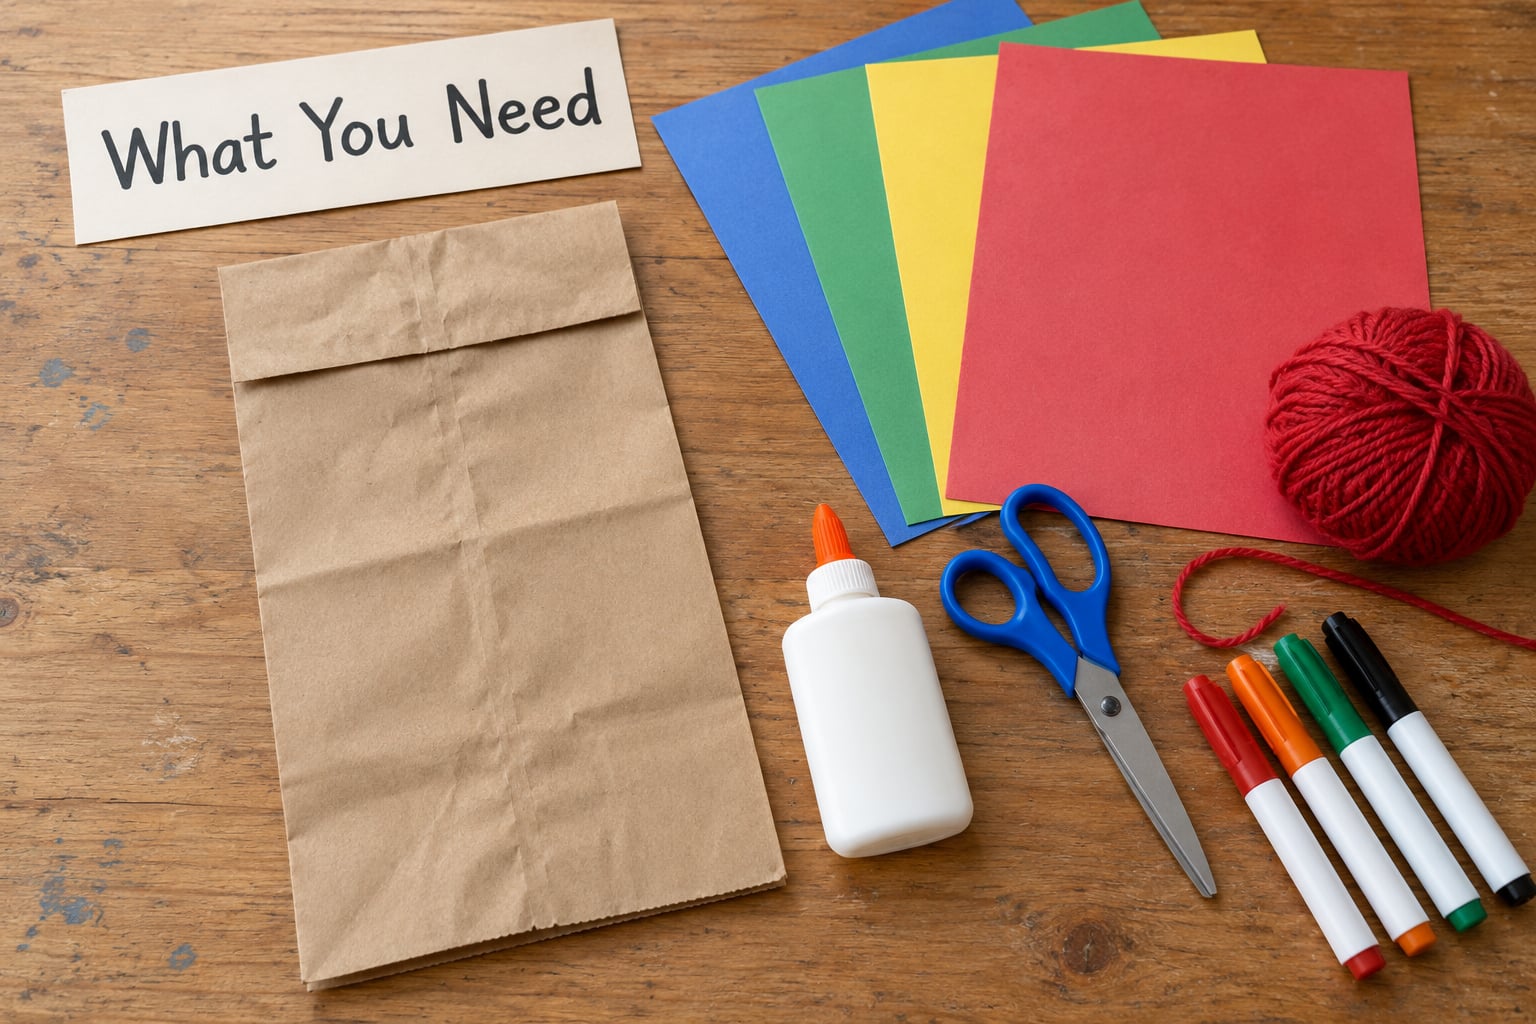
The core list is short. Everything else is optional decoration, and the craft works fine without a single one of them.
- A brown paper bag in medium or large size. A standard lunch bag is the sweet spot because a child’s whole hand fits inside and reaches the flap.
- A black marker or crayon for the face. Fine-tip permanent markers hold up best on the kraft surface of a bag.
- A glue stick or tacky craft glue. A glue stick is cleaner for small hands; tacky glue grips heavier pieces like googly eyes and pom-poms far better than a standard school glue.
- Construction paper in a few colors for hair, ears, hats, and clothing.
- Scissors, plus blunt-tip scissors if a toddler is doing the cutting.
Once you have a working puppet, these are the decorations worth having nearby: yarn for hair, googly eyes, buttons, pom-poms, pipe cleaners, fabric scraps, and a small piece of cardboard. A glue tab made from a strip of paper is the trick that keeps floppy ears attached.
Recycled bags work well. A clean paper grocery bag from the pantry is sturdier than a lunch bag because the paper is heavier, and a bag from a hardware store is sturdier still. Skip plastic bags, waxed or glossy bags, and anything already printed with a large logo across the middle of the face area. If the bag has a torn handle hole, that is usually fine as long as the hole is above the face.
Step-by-Step: How to Make Puppets from Paper Bags
1. Choose and Flatten the Paper Bag
Turn the bag inside out so the smooth printed side faces out and the folded bottom flap sits at the top like an open mouth. Smooth the bag flat with your palm, pressing out the creases so the face has a clean surface to sit on.
Before you draw anything, work out where the mouth will be. The flap edge is the upper lip, and it should sit roughly in the middle of the bag when the bag is held upright. Put the face above that line, not below it. You will know the placement is right when you slip your hand in and the flap falls open and shuts again without covering the eyes.
A bag is big enough when a child’s hand goes in to the knuckles and the fingers can reach the flap without stretching. A bag that is too small is the single most common reason a homemade puppet will not open and close.
2. Add the Face and Character Details
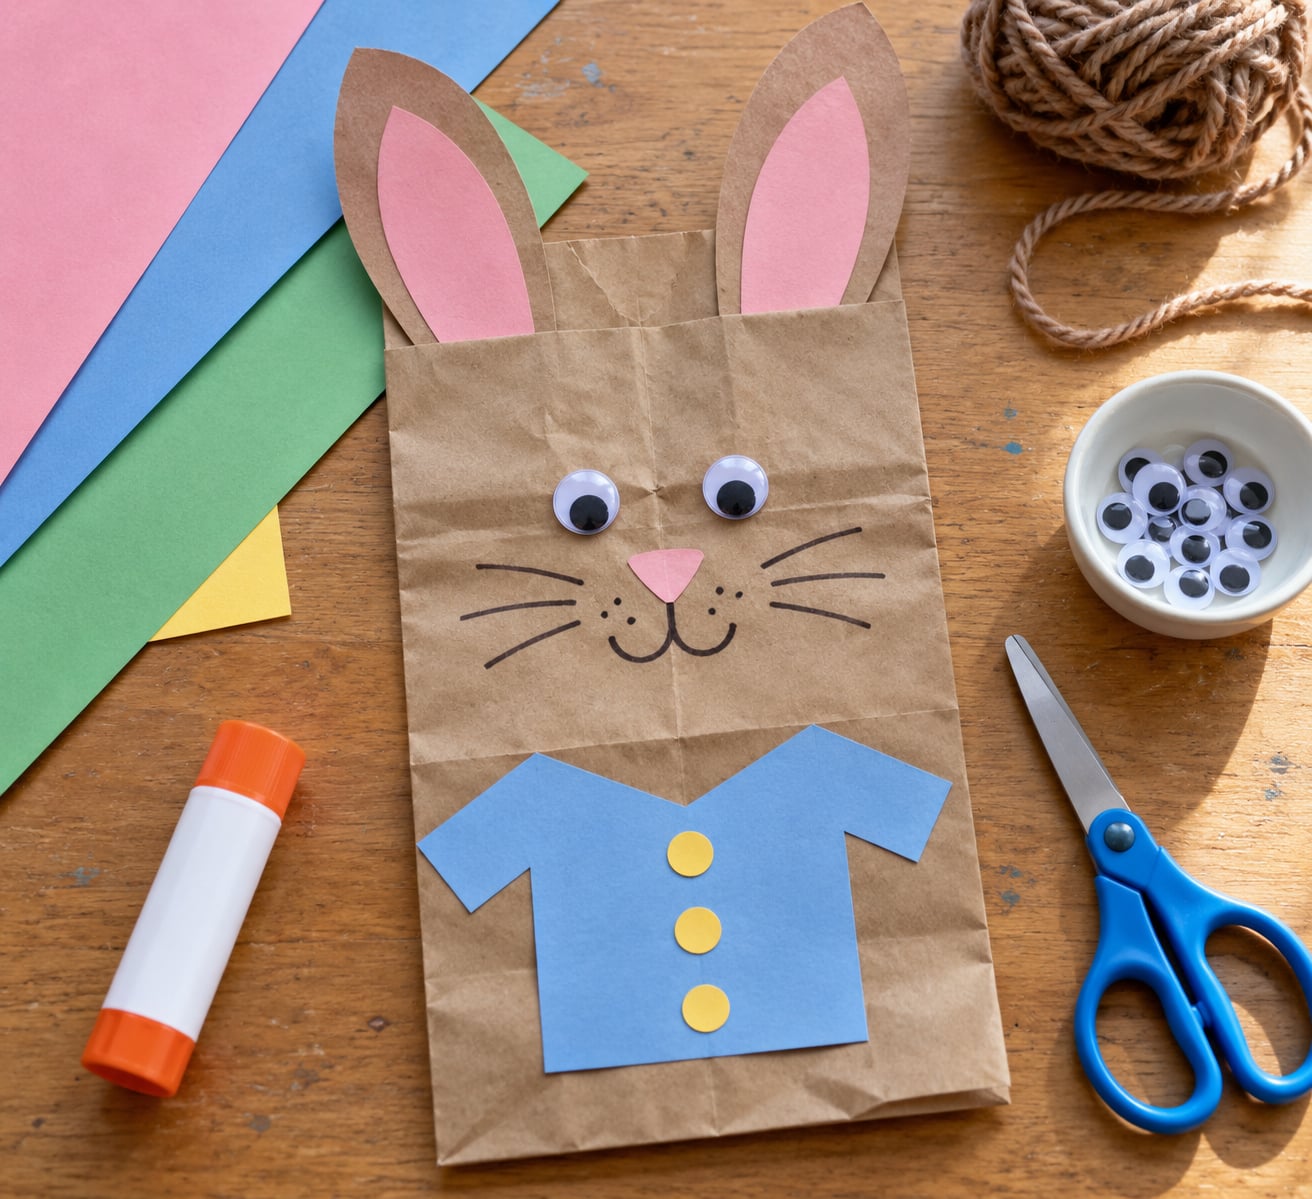
Draw the eyes first, spacing them about one eye-width apart in the center of the bag, then add a nose and a mouth. Simple shapes work better than detailed ones at this scale: circles for eyes, a rounded rectangle for a nose, and a curved line for a smile.
For a real talking effect, draw the upper lip on the flap along its lower edge, then draw the lower lip on the body of the bag where the flap meets it. When your fingers open, the viewer sees the inside of the bag as an open mouth, and the two drawn lines read as lips meeting.
Fill the inside of the bag with red or dark paper and glue it behind the flap. That single detail is what separates a puppet that looks alive from one that looks like a bag with a drawing on it. Once the face is on, hold the bag up and move the flap a few times before you add anything else. If the mouth moves cleanly, the puppet works, and everything from here is decoration.
Character choices are open-ended. A cat gets triangular ears and whiskers, a monster gets uneven teeth and spots, a person gets a drawn hairstyle, and a robot gets straight lines and a square head. Preschoolers usually invent their own, which is the point.
3. Create Hair, Ears, or Other Character Features
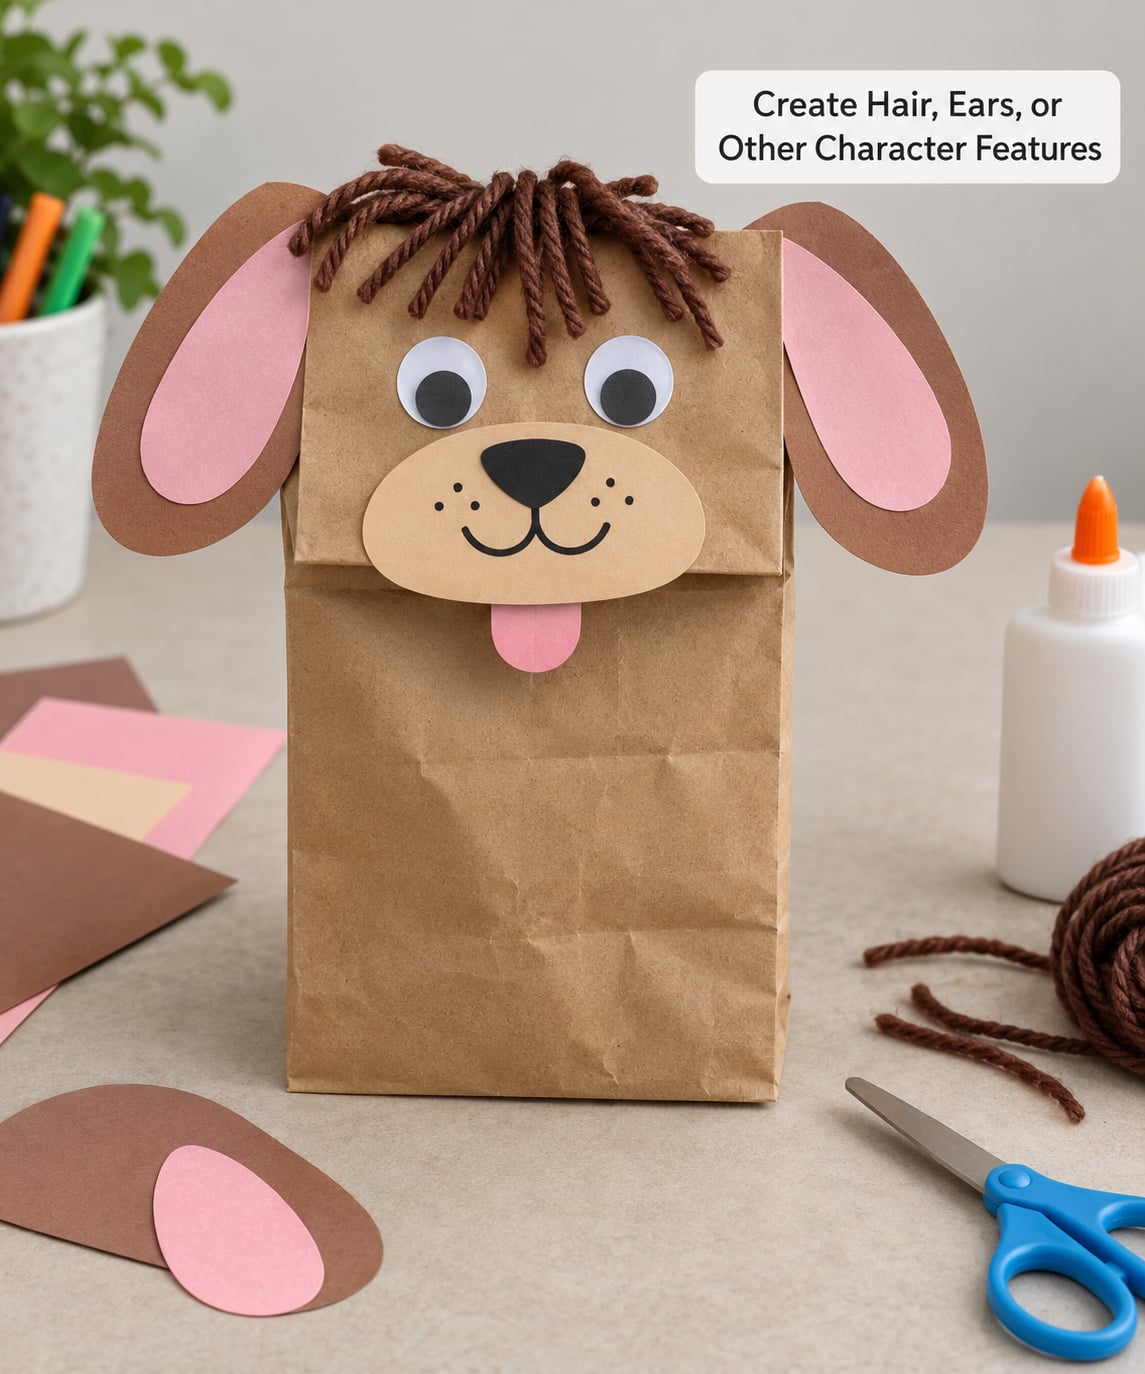
Cut shapes from construction paper, then glue them on. When a piece keeps flopping or tearing loose, glue a small paper tab behind it instead of piling more glue on the front. The tab is a strip of paper the size of a postage stamp, folded once, sandwiched between the decoration and the bag. It takes ten seconds and it holds.
Layering adds depth cheaply. Two triangles of slightly different sizes make an ear that reads clearly from across a room, and a lighter strip of paper behind an eye makes a face look finished rather than flat.
Yarn is the best hair. Cut short lengths, bunch them, and glue them along the top of the head, or wrap yarn around a finger and glue the loop on for curls. Fabric scraps work for floppy ears and a monster’s skin, and pipe cleaners bent into a curve make antennae that wobble when the puppet moves. Keep every addition light, because a puppet with heavy decorations gets tiring to hold after about five minutes of play.
4. Decorate the Body and Finish the Puppet
The lower half of the bag becomes the puppet’s clothing. A rectangle of construction paper shaped like a shirt, a bow tie made from a paper circle, buttons, stripes, or a scrap of patterned paper all read as an outfit. Leave a clear strip of bag between the mouth and the clothing so the flap still swings freely.
Run a finger along every glued piece once the glue has dried. Anything that lifts at the edge needs another pass of glue and a few minutes under a book, which is the fastest way to flatten a curling collar or a stubborn hat.
Then try the puppet on. Slide your hand in from the bottom, keep it relaxed, and move only your thumb and fingers. If the mouth opens wide and snaps shut, it is finished. Test it for a full minute before you call it done, because a puppet that works in your hand can still fail in a small child’s.
Making it work for different ages
- Ages 2 to 3: draw-only puppets. The face goes on with a marker and the cutting is done by an adult beforehand. One bag, one marker, five minutes.
- Ages 4 to 6: the full craft. Glue on a paper mouth, ears, and a shirt. This is the sweet spot for the whole project.
- Ages 7 and up: add separate arms and legs. Cut them as separate strips and tape them to a chopstick, a craft stick, or a paper handle so the child can hold the puppet and work the limbs separately.
Common Mistakes
The bag is too small, so the mouth will not open. The fix is sizing, not technique. A child’s hand has to reach the flap without a stretch. If the hand does not fit, the puppet is finished and dull, so try a larger grocery bag or cut the top of a bigger bag down.
The face is drawn too low. Everything below the flap gets hidden the moment the mouth closes. Keep the eyes and any hair above the flap line, and treat the lower half as clothing. Testing the placement with a hand inside the bag before drawing solves this in ten seconds.
Glue will not stick. School glue and googly eyes on kraft paper is a losing combination because the bag absorbs the moisture. Use tacky craft glue for anything heavy, press the piece down for a full 20 seconds, and give it a few minutes before handling. If a piece still lifts, add a paper tab rather than more glue.
The bag tears when a hand goes in. A dried-out bag splits along the fold. Loosen the bottom crease first, open the bag up with your other hand to make a wide oval instead of a circle, and slide the hand in flat rather than edge-on. Reinforce a torn spot with a strip of packing tape on the inside.
Too much glue, or glue everywhere. Lay out a sheet of wax paper or a scrap of newspaper first, keep the glue cap within reach, and let each layer dry before adding the next. For a no-mess version, use a glue stick for paper pieces and double-sided tape for anything small.
Too many decorations. A puppet covered in glued-on pieces is tiring to hold and breaks in a week. Pick three things you love, finish, and put the rest of the plan aside. My best ones had a face, a shirt, and hair, and that was plenty.
Two habits make the finished puppets last. Flatten them face down under a stack of books overnight so nothing lifts, then stand them in a box or basket with the faces peeking out. A small hole punched in each bottom edge and a ribbon threaded through them turns the whole collection into a closet you can hang on a door.
Once they exist, use them. A puppet show over the kitchen table, a retelling of a favorite picture book, or a set of family members introduces each other all use the same bags. For a group, put the bags, markers, and pre-cut paper pieces in trays ahead of time and let the decorating be the activity itself.
Frequently Asked Questions
What materials do I need to make paper bag puppets?
You need a brown paper bag in medium or large size, a black marker or crayon, and a glue stick or tacky craft glue. Construction paper and scissors cover most of the decorating. Yarn, googly eyes, buttons, pom-poms, pipe cleaners, and fabric scraps are optional extras that make the puppet more fun but are not needed to get a working one.
What size paper bag works best for a puppet?
A standard paper lunch bag is the best size for most children. A child’s hand should slide in to the knuckles and the fingers should reach the bottom flap without a stretch, because the fingers are what open and close the mouth. A heavier grocery bag also works and feels sturdier, but bags that are too small cannot make the flap move.
How do I make the mouth open and close?
Turn the bag inside out so the folded bottom flap sits at the top, then slide your hand in from the bottom of the bag. Move only your fingers, not your wrist, and the flap lifts and drops like a jaw. Drawing the upper lip on the flap edge and the lower lip on the bag below it, plus colored paper glued inside, makes the movement read clearly.
Why will glue not stick to my paper bag puppet?
Most glue failures happen because standard school glue is too watery to hold anything heavy on the absorbent kraft paper of a bag. Switch to tacky craft glue for googly eyes, pom-poms, and buttons. Press each piece down firmly for about 20 seconds, and if a piece still lifts at the edges, sandwich a small paper tab between it and the bag.
What paper bag puppet ideas work well for toddlers?
For children aged 2 to 3, keep it to a marker and a bag. Draw a face high on the bag, above the flap, and let them choose the animal or person. Save cutting and gluing for an adult, and skip anything small enough to be a choking risk. A second bag makes a matching set, and two puppets make a conversation much easier.
How do I make paper bag puppets last longer?
Press each glued piece down firmly, give it time to dry, and add a small paper tab behind anything that keeps lifting. Once everything is set, flatten the puppets face down under a stack of books overnight. Store them standing in a basket with the faces visible so nothing gets crushed, and avoid damp storage, which softens the paper and makes colors bleed.
Conclusion
Flatten a clean paper bag, draw a face above the flap, and hand the marker to your child. That is the whole first step, and it is enough on its own. Once the mouth moves, add a paper mouth, some yarn hair, and a shirt, then put the finished puppet to work in a story instead of leaving it on the shelf.