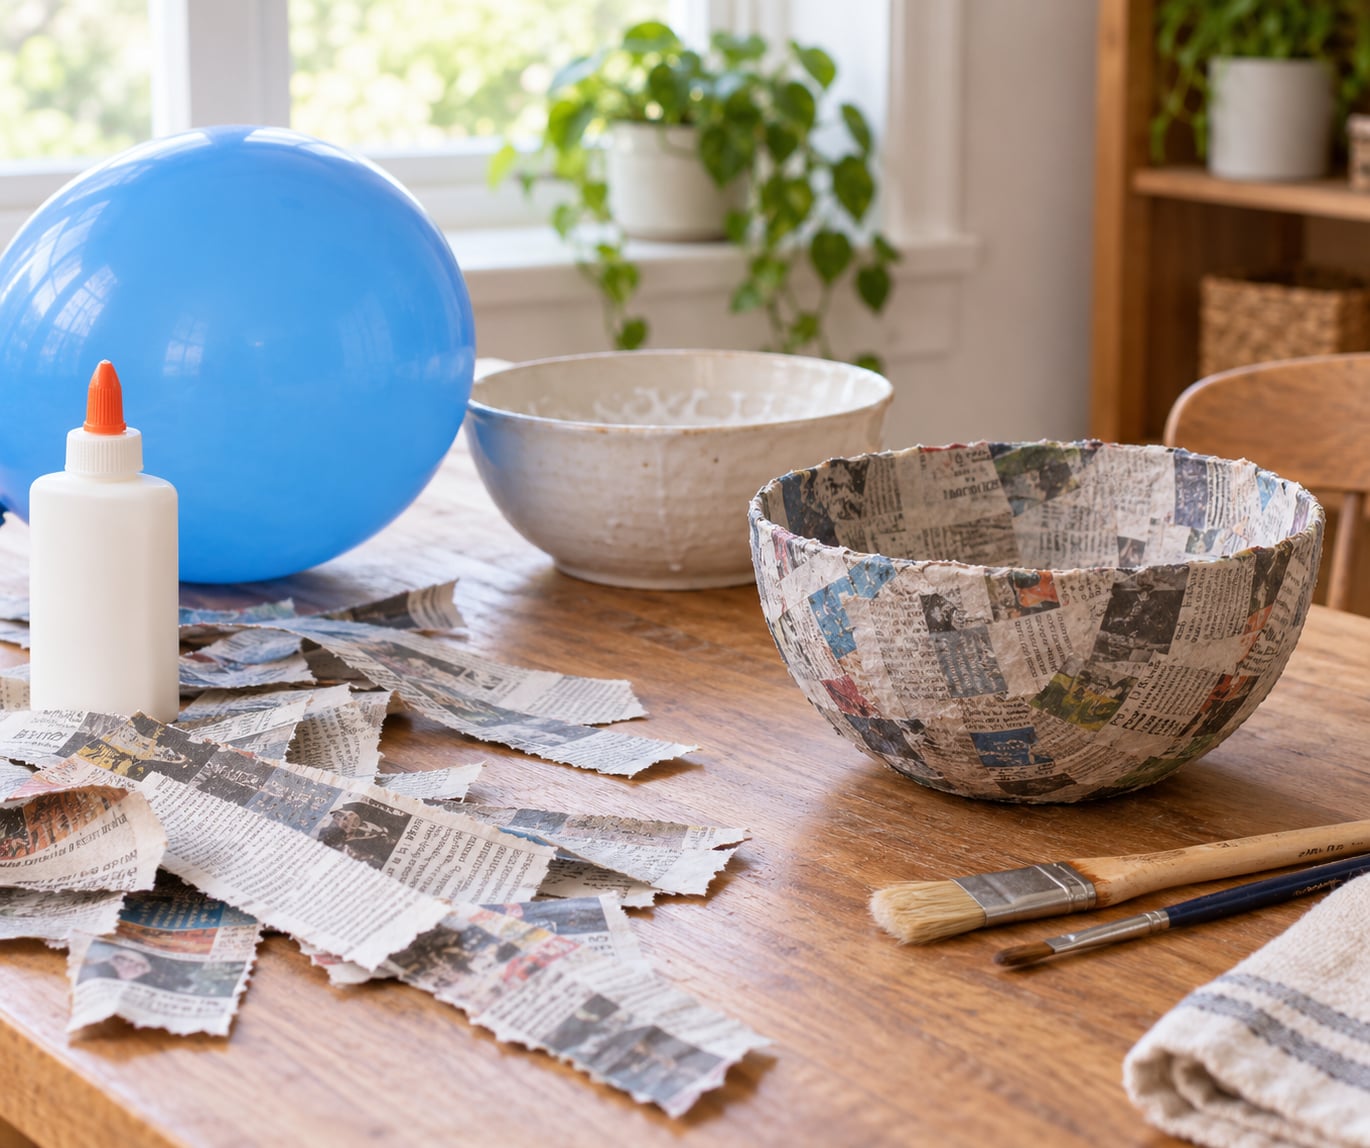
To make a paper mache bowl, you cover a bowl or balloon mold with four or five thin layers of newspaper strips dipped in glue paste, let it dry for 24 to 48 hours, then pop the mold and paint the shell. Expect 30 minutes of active work and about two days of drying, which makes it a good weekend project for kids and a cheap way to make a trinket dish or key bowl from recycled paper.
I have made these with my own kids more times than I can count, and the balloon version is the one that survives. A glass or plastic bowl gives you a flatter, wider shape; a balloon gives you a deeper, rounder bowl with a smooth interior, and it peels away cleanly once everything is bone dry.
Total time for one bowl: roughly 10 minutes of prep, 25 to 30 minutes of active layering, and 24 to 48 hours of drying. Most of the waiting happens while you do something else.
Table of Contents
- What You Need to Make a Paper Mache Bowl
- Paper you can use instead of newspaper
- Which adhesive should you use for a paper mache bowl
- Step-by-Step: How to Make a Paper Mache Bowl
- Step 1: Prepare the Balloon Mold
- Step 2: Make the Papier Mache Mixture
- Step 3: Apply the First Paper Layers
- Step 4: Add More Layers and Let Them Dry
- Step 5: Remove the Balloon and Finish the Bowl
- Common Mistakes and How to Fix Them
- The shell sticks to the mold
- The bowl tears when you lift it off
- The interior stays damp
- Wrinkles and hard lumps
- The bowl goes lopsided
- Paint looks blotchy or peels
- Frequently Asked Questions
- How long does it take to make a paper mache bowl?
- What glue should I use for a paper mache bowl?
- Can I use newspaper instead of paper mache paper?
- How do I remove the balloon from a paper mache bowl?
- Is paper mache waterproof?
- How many layers of paper mache does a bowl need?
What You Need to Make a Paper Mache Bowl
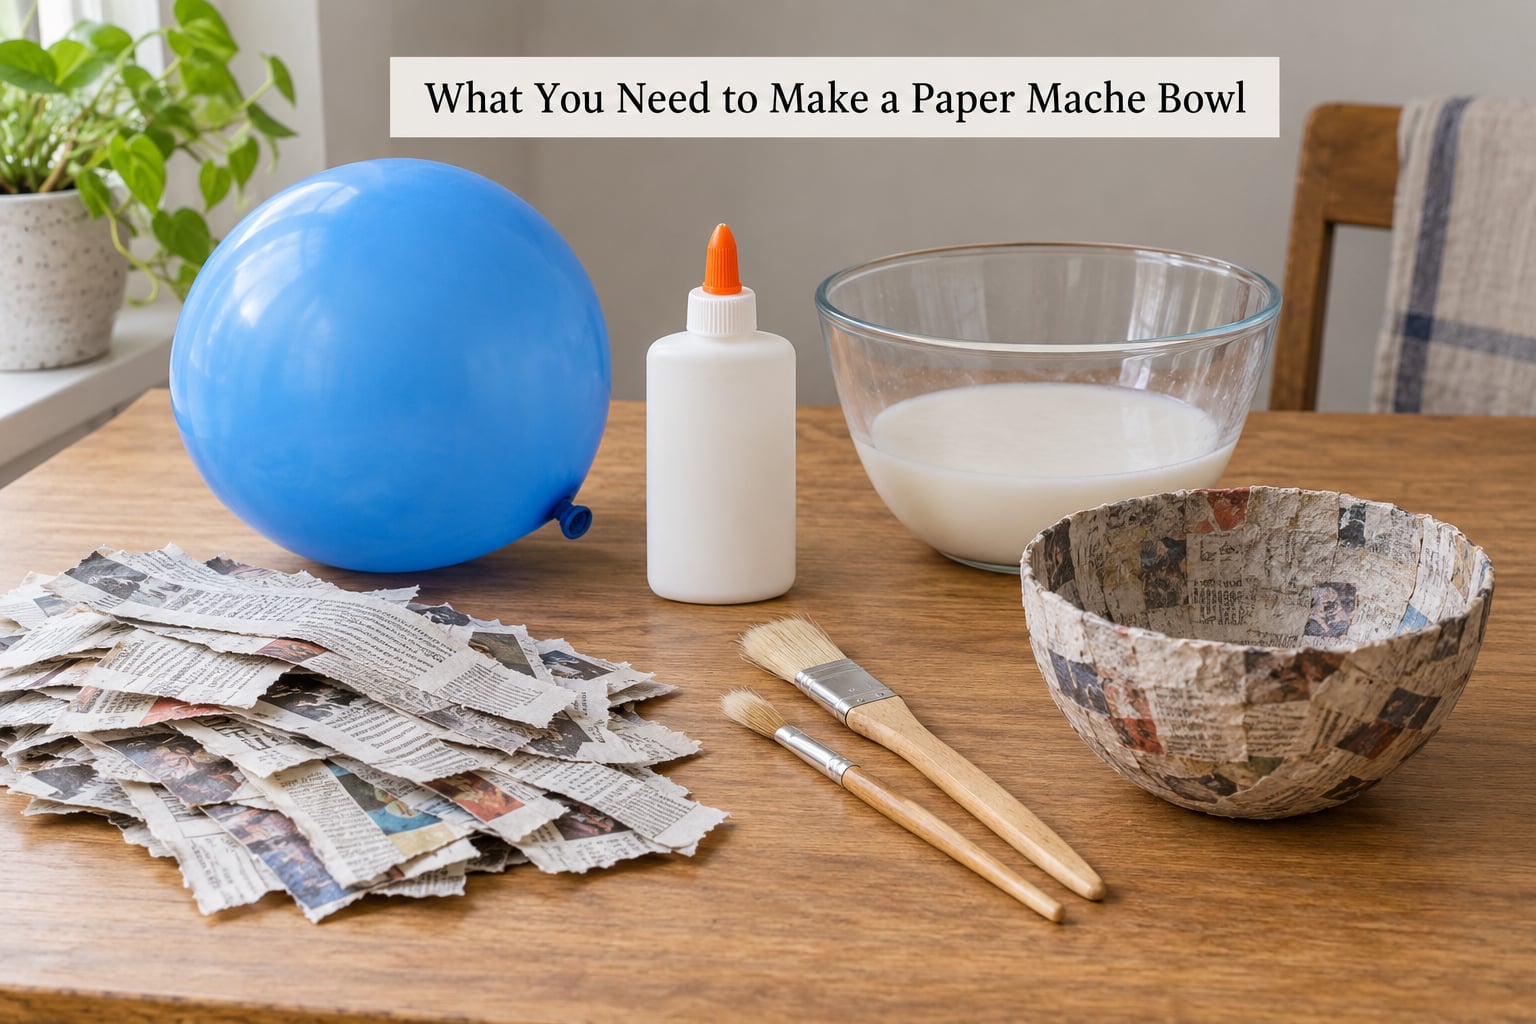
You need very little, and most families already have most of it in a junk drawer. The essential items are a mold, paper, an adhesive, a brush, a bowl for mixing, and something to cover the work surface so glue does not stick to the table.
- A mold. One balloon for a round bowl, or one glass, ceramic, or plastic bowl for a wide shallow one. A medium bowl around 6 inches across makes a good catchall size.
- Paper. Several sheets of newspaper, torn into strips roughly 1 to 2 inches wide. Skip pages with big photographs or heavy glossy ink.
- Adhesive. Diluted white PVA glue works well and needs no cooking. A flour and water paste is the traditional low-mess alternative once it is cooked.
- A wide flat brush or a wide popsicle stick for spreading paste. A stiff toothbrush works in a pinch.
- A shallow mixing dish and a spoon for the paste.
- Plastic wrap or aluminum foil and a little oil to wrap the bowl mold so the shell does not bond to it.
- Optional finishing supplies: acrylic craft paint, a foam brush, fine sandpaper, a sealant, and decorations like tissue paper, yarn, or gold leaf.
Paper you can use instead of newspaper
Newspaper is the default because it is free and strong once pastes soak into it. Tissue paper gives a smoother, lighter shell but tears easily, so use it only for the outer decorative layers. Crepe paper adds a rippled texture, and paper towels or toilet paper work for a soft pulp method where you soak the sheets and blend them into a clay-like lump.
Which adhesive should you use for a paper mache bowl
Glue or flour, both work. The difference is mess and how much strength you end up with.
| Adhesive | Mess | Strength | Dry time | Best for |
|---|---|---|---|---|
| Diluted white PVA glue | Low | Strong shell | 24 to 48 hours | Most beginners and older kids |
| Flour and water paste | Medium, needs cooking | Medium, more brittle | 24 to 48 hours | Younger kids and classrooms |
| Decoupage glue such as Mod Podge | Low | Medium | 24 to 48 hours | Neater glue with a sealing topcoat built in |
| Blended paper pulp | High, very sticky | Thickest, clay-like | 2 to 3 days | Chunky, sculpted bowls |
Step-by-Step: How to Make a Paper Mache Bowl
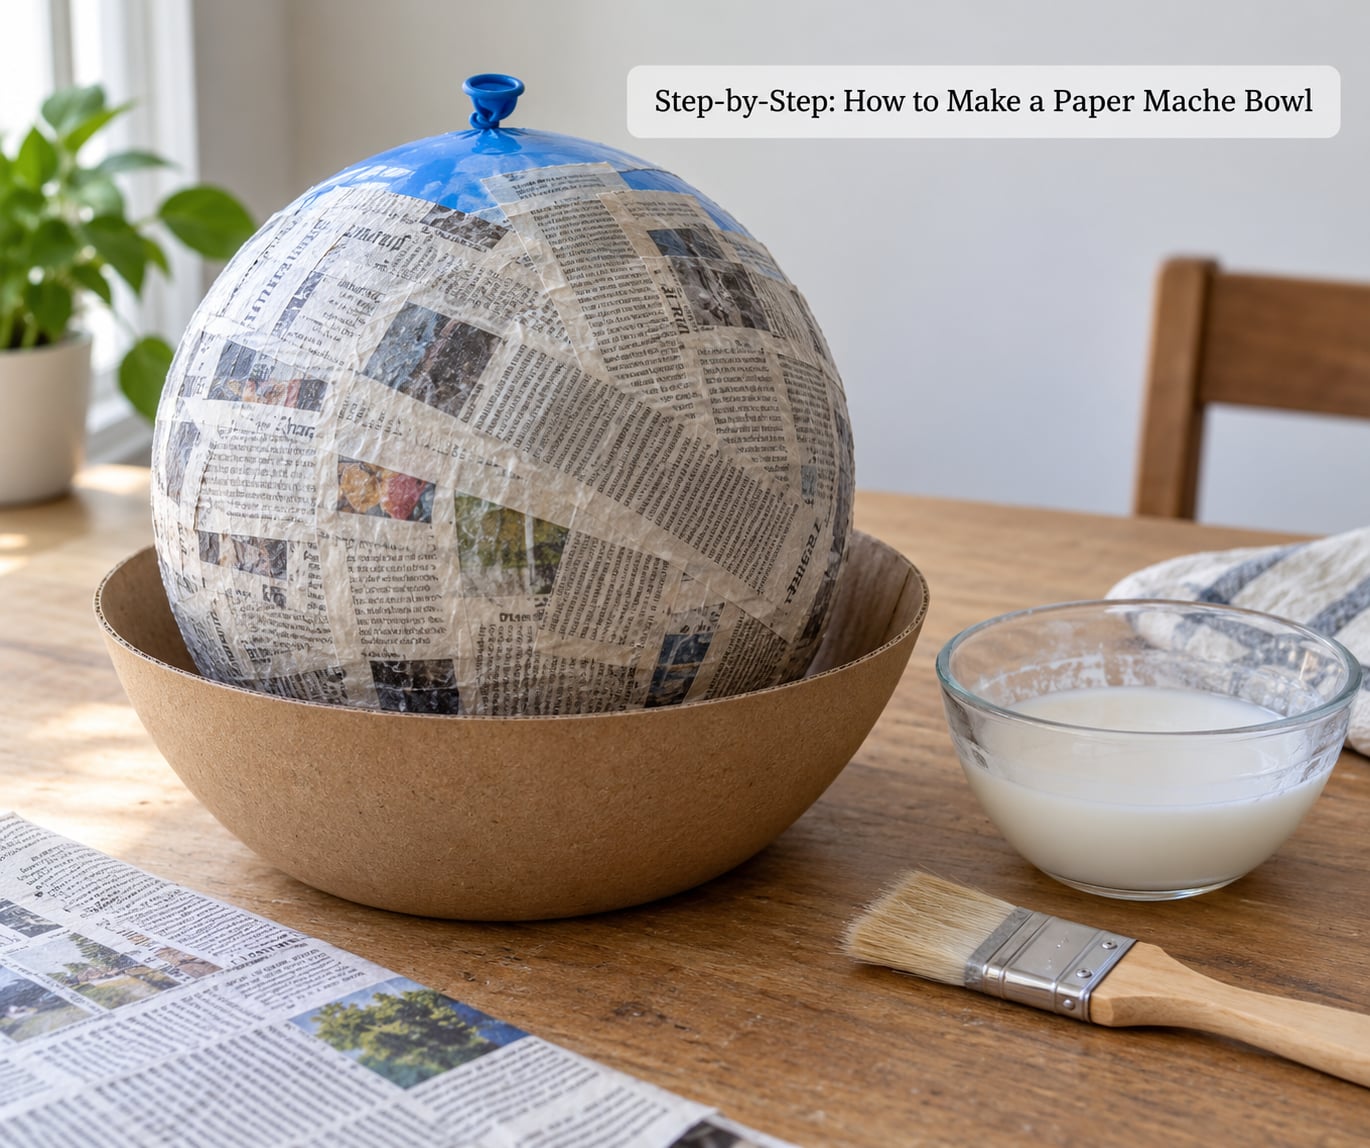
Follow these five stages in order and you will get a bowl that holds its shape instead of a soggy lump. The important thing is thin layers and full drying, not thick coats of paste.
Step 1: Prepare the Balloon Mold
Blow up the balloon to the size you want the finished bowl, roughly 6 to 8 inches across. Hold it up to the light and look for thin patches or odd bulges, and let a weak spot settle or use a different balloon. Set the balloon in a shallow cardboard box or low bowl so it sits steady while you work and cannot roll away.
For a bowl mold instead, wrap the outside in plastic wrap or foil and spread a thin film of cooking oil or petroleum jelly over it. The barrier is what stops the finished shell from bonding to the glass or plastic. Tuck the wrap up over the rim and smooth out every crease, because any wrinkle prints itself into the bowl interior.
Step 2: Make the Papier Mache Mixture
Mix one part flour with two parts water. For a small bowl, that is about a quarter cup of flour to a half cup of water. Stir the water first, then whisk in the flour a little at a time so no dry pockets form.
Cook the paste for a minute or two in a saucepan over low heat, stirring constantly, until it thickens and pulls away from the side of the pan. Cool it before using it. If lumps show up, blend or strain them out, because lumps are what create the hard bumps you will fight later.
Skip the stove and dilute white glue with water instead, roughly one part water to one part glue, until it is smooth and pourable. The consistency should be like thin cream or watery pancake batter. If it drips off the brush in a fast stream, add more glue.
Thin layers always beat one thick one. A heavy coat of paste stays wet inside the shell, so the bowl feels hard on the outside while the middle is still soggy.
Step 3: Apply the First Paper Layers
Tear the paper into strips about 1 to 2 inches wide and 4 to 6 inches long. Tear, do not cut. Cut edges sit in neat rows and show up as hard lines, while a torn edge feathers into the layer below and disappears.
Brush a thin coat of paste onto the mold, lay a strip on top, and press it down with your palm or the flat brush. Overlap each strip by about a third, then move on to the next one with a small gap so you can rotate the mold and keep the strips running in one direction.
Cover the entire surface with no bare spots showing. Large gaps become weak points that tear when you remove the mold, so patch them right away while the paste is still wet. Smooth out wrinkles with light strokes of the brush, working from the center outward.
Step 4: Add More Layers and Let Them Dry
Once the first layer is fully covered, add two or three more, letting each layer set for 20 to 30 minutes so you are not dragging wet strips across wet strips. Four or five layers is the target for a bowl that holds its shape. Six or seven gives you a thicker, heavier piece that resists warping.
As a general rule, bigger bowls need more layers than small ones, and anything meant to hold keys or be picked up wants at least five. A shallow dish that only holds rings and coins can get away with three or four.
Let the bowl dry somewhere with airflow, out of direct sun. A fan set on low speeds things up and pulls moisture out of the middle faster than a warm room alone will. In humid weather, expect closer to three days, and add a turning schedule so all sides dry at the same rate.
Step 5: Remove the Balloon and Finish the Bowl
Finish with one thin top layer of paper or a coat of paste to seal any gaps, then let it dry completely. The shell should feel room temperature, firm, and slightly leathery, with no cool or damp patches anywhere. A bowl that is even slightly damp in the middle will wrinkle as you try to shape it.
Pierce the balloon with a pin and peel the pieces away in small sections, pulling slowly. If a spot grabs, work it loose with a fingernail or the edge of a butter knife rather than yanking. Trim or sand a ragged edge with fine sandpaper, and patch any torn spot with a scrap of paper and paste.
For the smoothest look, rub the whole shell with fine sandpaper before painting. Use acrylic craft paint in thin coats, then a foam brush or soft brush to add texture and shading.
Paper mache is not waterproof on its own. A water-based decoupage sealant or two thin coats of clear acrylic sealer will protect the surface from splashes, and a paste bowl should stay decorative. Never use it for food or for holding water, because the glue and any paper printing are not food safe.
Common Mistakes and How to Fix Them
Almost every failed bowl comes down to one of six problems, and all six are fixable while you are working.
The shell sticks to the mold
You skipped the release layer, or the wrap had holes. Cut the shell off with a craft knife along the rim line and sand the edge smooth, or sand the bottom down until the mold is free. Next time, double the plastic wrap and overlap the seams, then coat it with oil.
The bowl tears when you lift it off
There were too few layers, or you removed it before it was dry. If the damage is small, patch from the inside with a scrap of paper and paste, then let it cure overnight. For the next attempt, aim for five layers and give the shell a full 48 hours.
The interior stays damp
Too much paste soaked deep into the paper, or the room is humid. Spread thinner coats, add airflow, and give the bowl extra time. A hairdryer on cool held a few inches away helps in a pinch. Thick paste is the most common cause, so thinner is the fix.
Wrinkles and hard lumps
You brushed too hard or the paste was lumpy. Smooth each strip with light strokes right after laying it, and strain or blend the paste before you use it. A damp brush cleans up a wrinkle before the next layer goes down.
The bowl goes lopsided
One side dried faster than the other. Turn the mold a quarter turn every few hours while it dries, and keep it away from radiators and sunny windows. Warping is usually drying, not construction, so it can be improved before you ever start layering.
Paint looks blotchy or peels
The surface was dusty, oily, or still damp. Sand lightly, wipe with a barely damp cloth, let it dry fully, then paint in thin coats. If paint still lifts, an adhesion promoter or a coat of decoupage medium over the shell fixes it.
Frequently Asked Questions
How long does it take to make a paper mache bowl?
Most small paper mache bowls need about 24 to 48 hours of drying time for the paper layers, plus extra time for paint or sealant. Add roughly 10 minutes of prep and 25 to 30 minutes of layering on top. A larger bowl takes longer because moisture stays trapped in the middle, and humid weather can stretch drying to three days. Airflow from a fan speeds things up.
What glue should I use for a paper mache bowl?
Diluted white PVA glue or school glue works well for a lightweight craft bowl. Mix it with water at roughly one part water to one part glue until it is creamy and spreadable. Avoid thinning it so much that it runs off your brush. A decoupage medium also works and doubles as a sealing topcoat, which saves you a finishing step.
Can I use newspaper instead of paper mache paper?
Yes, and newspaper is the most common choice. It is inexpensive, easy to find, and builds a strong textured surface once several thin layers go on. Use clean sections without large photographs or glossy ink, and tear the paper rather than cutting it so the edges blend instead of forming visible rows.
How do I remove the balloon from a paper mache bowl?
Wait until every layer feels completely dry and room temperature, then puncture and peel the balloon away in small sections. Pull slowly and gently so the thin papier mache shell does not tear, and free any spot that grabs with a fingernail or the edge of a butter knife. Patch any lifted area with a scrap of paper and paste.
Is paper mache waterproof?
Not on its own. Raw paper mache dissolves when it gets wet. Two thin coats of a water-based decoupage sealant or clear acrylic sealer will protect the bowl from splashes and light dampness, and adding foil inside before the final layers helps too. Even sealed, treat the bowl as decorative and never use it for food or for holding water.
How many layers of paper mache does a bowl need?
Four or five layers give a bowl that holds its shape, and six or seven make a thicker shell that resists warping. Big bowls need more layers than small ones. Three or four is enough for a shallow dish that only holds rings or coins, but anything that will carry keys or get picked up deserves at least five.
Start with the balloon, mix glue one-to-one with water, and lay on four or five thin layers without thick coats. Give it a full two days with a fan nearby, and that first bowl will come off the mold in one piece instead of three.