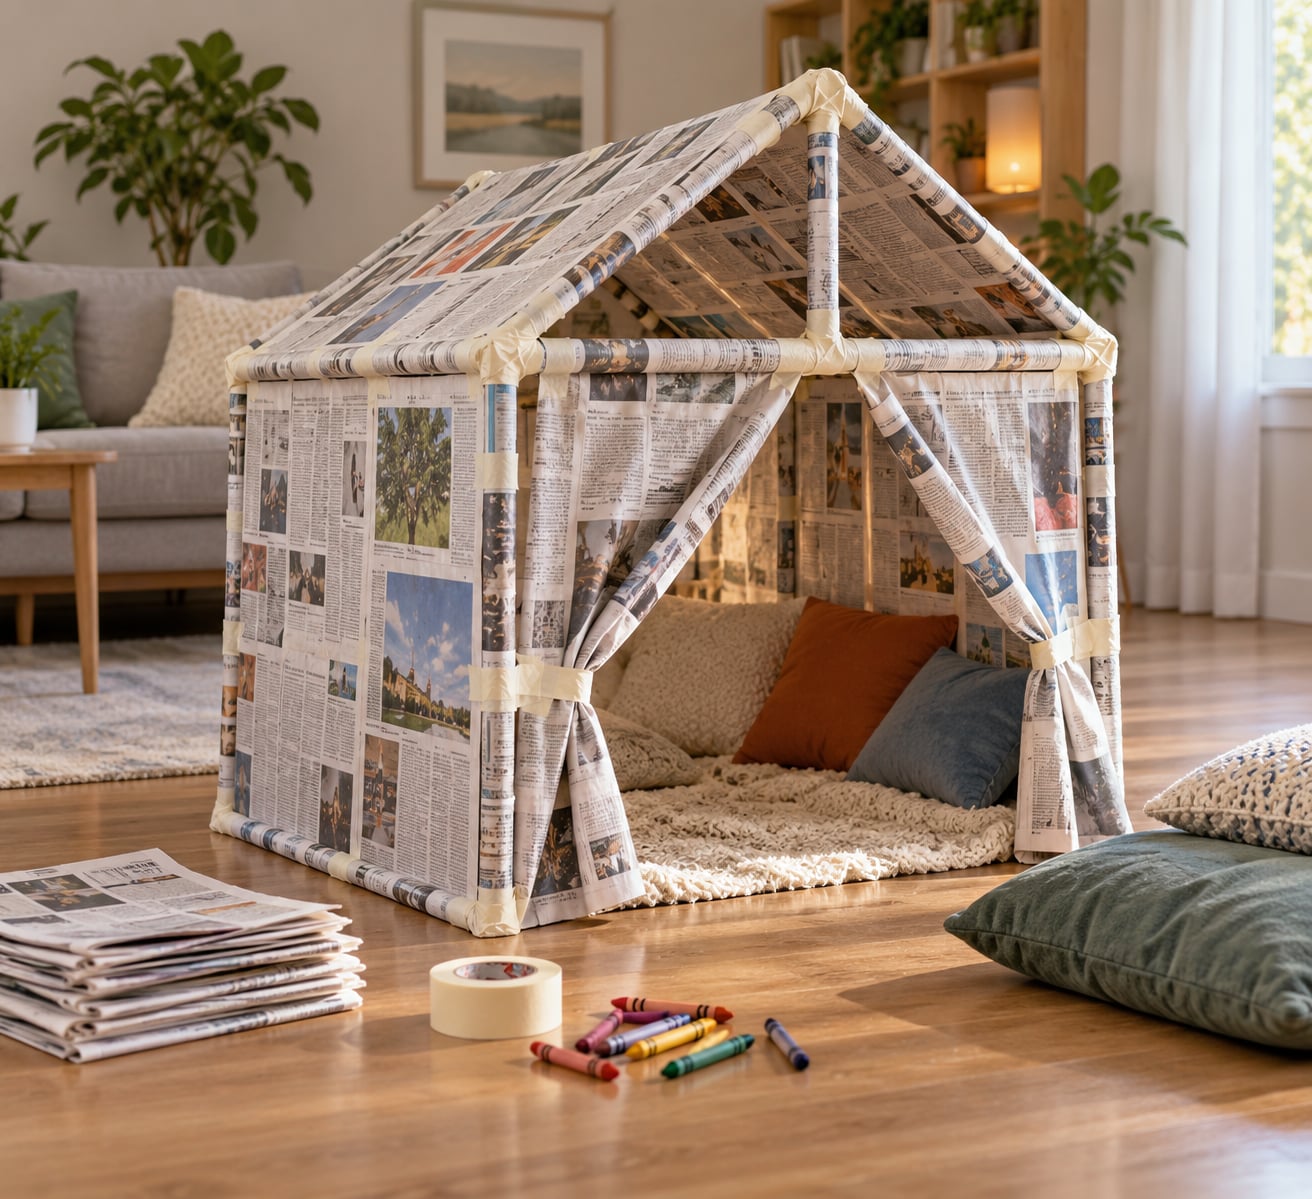
Learning how to build a newspaper fort with kids takes about 30 to 45 minutes, costs nothing beyond a roll of masking tape, and turns a stack of old newsprint into a playhouse that lasts until you take it apart. The whole thing rests on three moves: roll tight tubes, square up a base, and tape every joint twice. My favorite part is watching a six-year-old realize the wall only stays up because the corner is a triangle.
The kids who ask for this are usually the ones who have just been handed a tablet and rejected it. A newspaper fort gives them something to plan, argue over, and rebuild when it collapses, which is most of what engineering actually is.
Table of Contents
- What You Need
- Step-by-Step: How to Build a Newspaper Fort with Kids
- Choose the Fort Layout
- Build the Support Frame
- Attach the Newspaper Walls
- Shape the Roof and Entrance
- Decorate and Furnish the Fort
- Common Mistakes
- Safety Tips for Newspaper Fort Play
- Frequently Asked Questions
- How long does it take to build a newspaper fort?
- How much newspaper do you need for a fort?
- Can you build a newspaper fort without chairs?
- How do you keep a newspaper fort from collapsing?
- Is a newspaper fort safe for toddlers?
- How do you clean up and store a newspaper fort?
- Conclusion
What You Need
Gather everything before anyone starts rolling. The list is short, and almost all of it is probably in a drawer or the recycling pile already.
- Newspaper, 8 to 12 sheets. Two sheets per tube, so 12 sheets gives you six sturdy tubes.
- Masking tape, one roll. Holds the rolls and every joint. It is the only tool you truly need.
- Paper straws or a thick marker, 2 or 3. The mandrel you roll around so tubes come out evenly sized.
- Scissors, one pair. For trimming tubes to length and cutting doorway flaps. Adults only.
- Cardboard, 2 or 3 flat panels. Roof panels, a floor, or a sturdier frame corner.
- Painter’s tape, one small roll. Holds paper to cardboard without residue, which makes decorating easier.
- Cushions and a blanket, 3 or 4. Flooring and seating once the structure is up.
- Washable markers or crayons. Optional, for signs, flags, and window drawings.
- Battery string lights. Optional, to glow inside the fort with no heat or plug near paper.
Space matters more than supplies. Clear a patch of floor roughly six feet by six feet, push back anything glassy or tippable, and decide whether you are building indoors on the living room floor or in a covered porch area. Outdoors works fine as long as it is shaded and the ground is dry; the paper will go limp in the rain.
One bit of prep pays for itself. Roll a first batch of six tubes yourself, roughly ten minutes of work, while the kids sketch a floor plan. Children under about seven rarely roll tight enough tubes to carry weight, and a tube made by an adult gives them a model to copy.
Step-by-Step: How to Build a Newspaper Fort with Kids
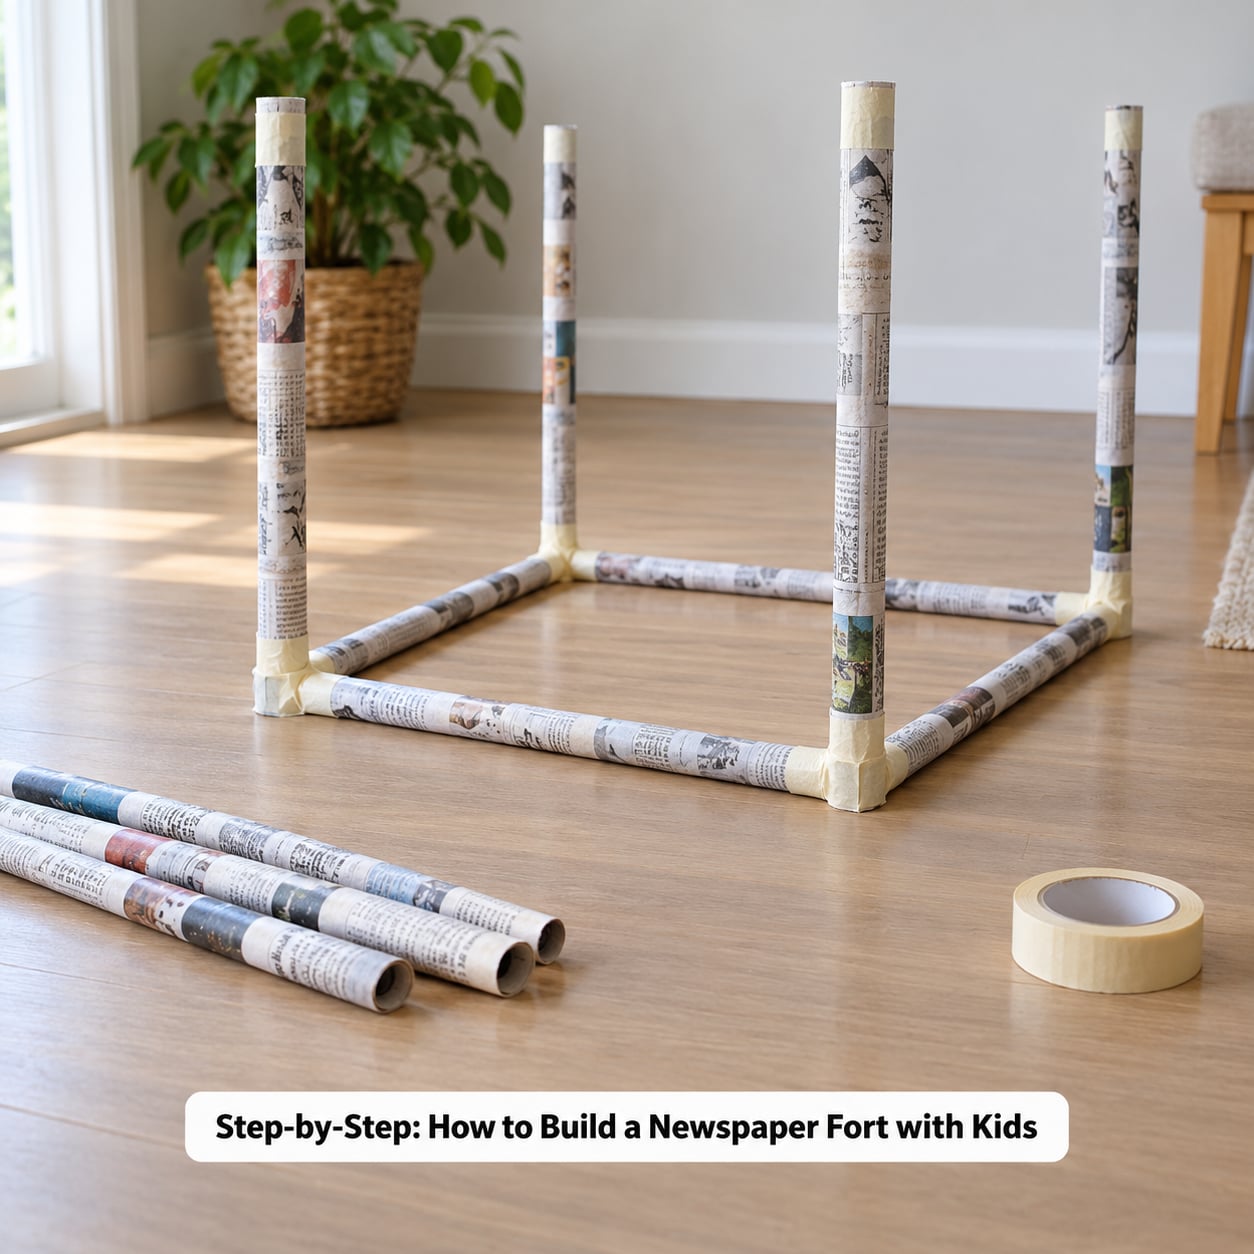
Work through these five stages in order. Each one has a quick check you can make before moving on, so you catch a problem while it is still one tape strip away from being fixed.
Choose the Fort Layout
Pick the shape first, because it decides how many tubes you need and how tall you can safely build. Four layouts cover almost every room.
A teepee is three or four tubes lashed at the top and spread at the floor, then skinned with leftover newspaper. It takes six tubes, builds in about fifteen minutes, and works beautifully for kids ages three to five. A chair tunnel lines a row of dining chairs with newspaper and drapes sheets over the top; it is the fastest option and the easiest to dismantle afterwards.
A cube playhouse uses eight tubes, four vertical and four horizontal, taped into a square frame with cardboard walls. This is the classic build and the one kids remember. The small hideaway is a one-tube corner with a sheet thrown over it, ideal when a child is tired or the weather is bad and everyone wants a quiet nook rather than a project.
Success check: lay out the footprint in painter’s tape on the floor first and walk around it. If a grown-up cannot walk the perimeter without ducking, the fort is the wrong size for your ceiling height and your kids.
Build the Support Frame
Stand your support pieces first and skin them second. Chairs, cardboard corner braces, or wooden dowels all work, and the cheapest version uses nothing but the tubes themselves.
For a cube, stand four tubes upright in a square about 20 inches apart, then tape a second set of four horizontally across the top. Work opposite corners rather than going around in order, because the frame stays square while you tape and turns into a rhombus if you rush it. For a teepee, lean four tubes together at the top, wrap a strip of tape around the crossing point, then splay the feet until the walls take a gentle outward lean.
Keep walkways open. Never stack chairs on chairs to gain height, since a fort that needs a ladder to enter is a fort that ends with a scraped knee. Push a wall panel gently with your palm; if it flexes more than an inch, add a diagonal brace from the base to the top rail.
Success check: the frame should stand unsupported for a full minute while you walk away and gather tape.
Attach the Newspaper Walls
Cover the frame with large sheets or the leftover flat pages you did not roll. Overlap every seam by four to six inches, because single-layer seams tear the first time a knee hits them.
Work from the bottom up and tape the bottom edge to the floor first so the wall cannot lift. Run masking tape in an X across each joint rather than a single strip, since crossed tape resists twisting far better. Painter’s tape works well for holding paper to cardboard and comes off clean afterward if you peel it while it is still tacky.
Leave gaps where you want windows, and do not cover the entire surface. Kids like peeking out, and those holes give air and light, which matters on a long afternoon indoors.
Success check: push each wall flat with your palm. Any spot that bows or crackles gets another crossed strip of tape before you move on.
Shape the Roof and Entrance
A flat cardboard panel taped across the top gives you a roof and a place to hang a flag, and it takes about a minute. A pitched roof made from two panels taped along a ridge line looks more like a fort and costs one extra tape strip.
For the entrance, cut a flap in the paper and fold the edges back, or simply overlap two sheets and leave a gap wide and tall enough for an adult to crouch through. Crouching matters: you will be the one bringing snacks in later. Keep the doorway away from the roof seam so the weight above does not pinch the flap down onto small hands.
Success check: crawl in and out three times without the roof touching your head. If it does, the fort is too tall for the room and the whole frame needs to come down a notch, which is easier to do now than after decorating.
Decorate and Furnish the Fort
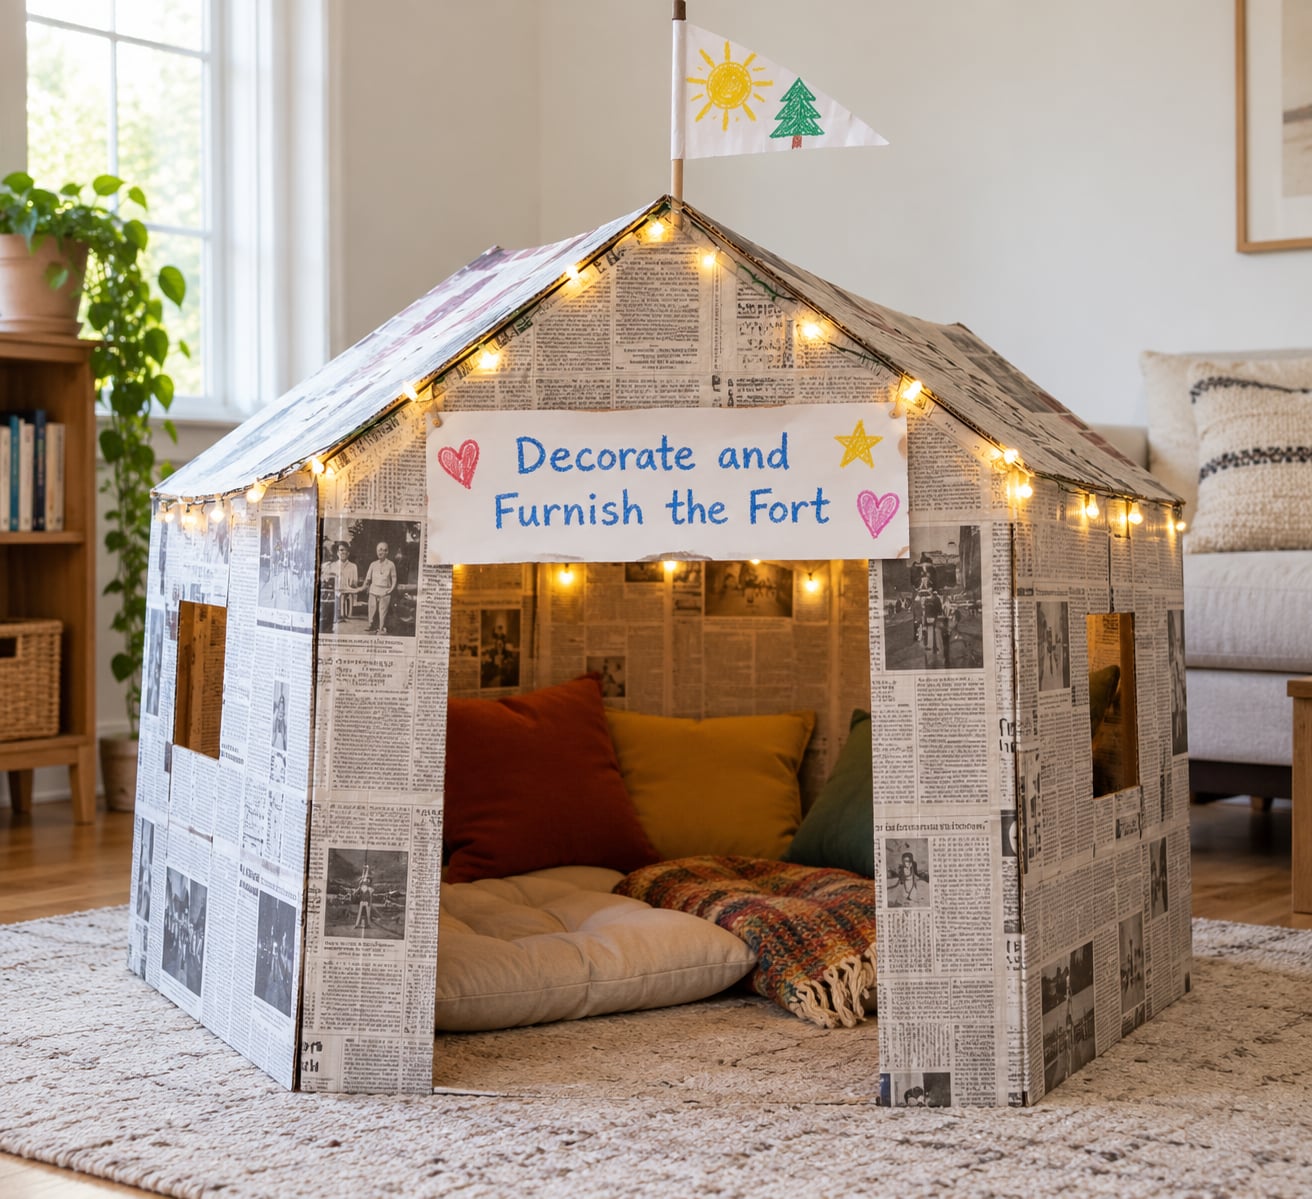
Decoration is the part kids claim as their own, so hand it over completely. Crayon and washable marker on the newspaper itself, cut paper flags taped to the roof, a hand-lettered sign reading the fort’s name, and a window drawn wherever they want one.
Inside, lay the blanket on the floor and add two or three cushions. A flashlight or a glow stick hung from a roof beam gives you a lamp without any flame or heat near paper. Battery string lights looped along the top edge work well too, as long as they are the battery kind and you leave them switched off while nobody is inside.
Then step back and let them decide what it is. A fort becomes a reading nook with a stack of library books, a snack station with a folding table, a spaceship with foil on the windows, or a ticket booth for the living room. The structure matters less than the naming, and that part is entirely theirs.
Common Mistakes
Walls that ripple or blow out. Almost always a seam problem. Overlap sheets by four to six inches and cross-tape every joint instead of running a single strip along it.
A frame that twists into a diamond. You taped around the square in order, so every push nudged it out of shape. Rebuild by taping opposite corners first, then fill in the remaining two.
Soft, useless tubes. Kids roll until the paper gives out rather than until it is tight. Show them that a firm tube makes a hollow sound when you tap it, and pre-roll a starter batch.
A roof that sags onto heads. One cardboard panel carries the load; three sheets of newspaper do not. Add a cross beam across the middle of the ceiling.
Doorways that pinch shut. Cut the flap so it folds outward, and keep it clear of the roof seam.
Exit blocked by cushions. Keep a straight crawl path from the door to a chair so an adult can get in without dismantling the whole structure.
Paper tearing underfoot. Ladder the floor with a second layer of newspaper taped side by side, so the walking surface wears out before the walls do.
Furniture damage. Newspaper ink transfers to upholstery and floors in a way that is genuinely annoying to scrub. Put down a sheet or a cheap shower curtain first, and never drape the fort over a sofa you care about.
Safety Tips for Newspaper Fort Play
- An adult does the taping and stapling. Use masking tape for anything a child will touch or climb on. If you use staples for adult-height structure work, keep the child away until every staple is hammered flat and covered with a strip of tape.
- Skip staples entirely under age five. Tape holds paper to paper just as well, and nothing sharp goes near a toddler’s hands.
- Scissors stay with the adult for the doorway cut. Offer torn paper edges instead, which children as young as three can manage.
- No climbing above about shoulder height. Newspaper tubes are strong along their length and weak across a joint. A fort that needs a chair to get into is not a fort, it is a fall.
- Check the furniture first. Any chair in the structure should be wide, un-tipped, and pushed against the wall rather than freestanding on uneven flooring.
- Use non-toxic supplies. Washable markers, crayons, and standard paper paste only. Skip spray paint and solvent-based markers near a fort full of paper.
- Keep air moving. Paper forts are warm inside. Crack a window, keep the doorway open on the hinge side, and check on the temperature during long indoor sessions.
- No candles, matches, or hot glue inside. Battery lights and glow sticks give the same atmosphere with none of the risk.
- Clear the floor first. Stairs and walkways cleared of toys and cords, sharp corners covered with a folded towel, and an adult within earshot for the whole build and the play that follows.
Frequently Asked Questions
How long does it take to build a newspaper fort?
Plan on 30 to 45 minutes for a small cube playhouse and about half that for a teepee or chair tunnel. Rolling the tubes takes the longest share of the time, so an adult who pre-rolls six tubes while kids plan the layout can finish in half an hour. Decorating adds another 15 minutes, and kids usually want far longer than that.
How much newspaper do you need for a fort?
Eight to twelve sheets covers most small forts, because two sheets make one sturdy tube. Six sheets is enough for a teepee, and twelve gives you six tubes for a cube frame with a couple spare. If your kids are ages three to five, aim smaller; they build faster than you expect and a tight little fort holds together better.
Can you build a newspaper fort without chairs?
Yes, and it is more stable. Cardboard corner braces, wooden dowels, or a frame made entirely from newspaper tubes all work, and none of them need to be moved when play is over. Chairs make the build go faster since the structure is already standing, but they are harder to keep square and easier to tip if a child climbs on them.
How do you keep a newspaper fort from collapsing?
Most collapses trace back to three things: a base that is not square, seams with no overlap, and walls with no diagonal support. Tape opposite corners first to hold the square, overlap paper seams by four to six inches, cross-tape each joint in an X, and add one diagonal brace per wall. Then push each panel with your palm and reinforce anything that moves.
Is a newspaper fort safe for toddlers?
It can be, with tape instead of staples and no cutting for the children. A three-year-old can absolutely enjoy a small teepee or hideaway built by an adult, and every part of it is soft paper. Keep the height low, keep exits open, avoid any small detachable pieces, and stay within earshot for the whole session.
How do you clean up and store a newspaper fort?
Take it apart in reverse: roof panels, paper skins, then tape the tubes separately. Flatten the paper and put it back in the recycling, and save the sound tubes for papier-mache or for the next fort. Wipe ink-marked surfaces with a barely damp cloth, and check your flooring for ink transfer before it sets overnight.
Conclusion
Start with the layout, not the tape. Tape off a footprint on the floor, ask your kids which of the four shapes they want, and pull eight to twelve sheets out of the recycling. Roll the first batch of tubes yourself, then hand over the masking tape and let the building decisions go their way.
How to build a newspaper fort with kids stays a good rainy afternoon in 2026, and it is still the cheapest screen-free afternoon I know.