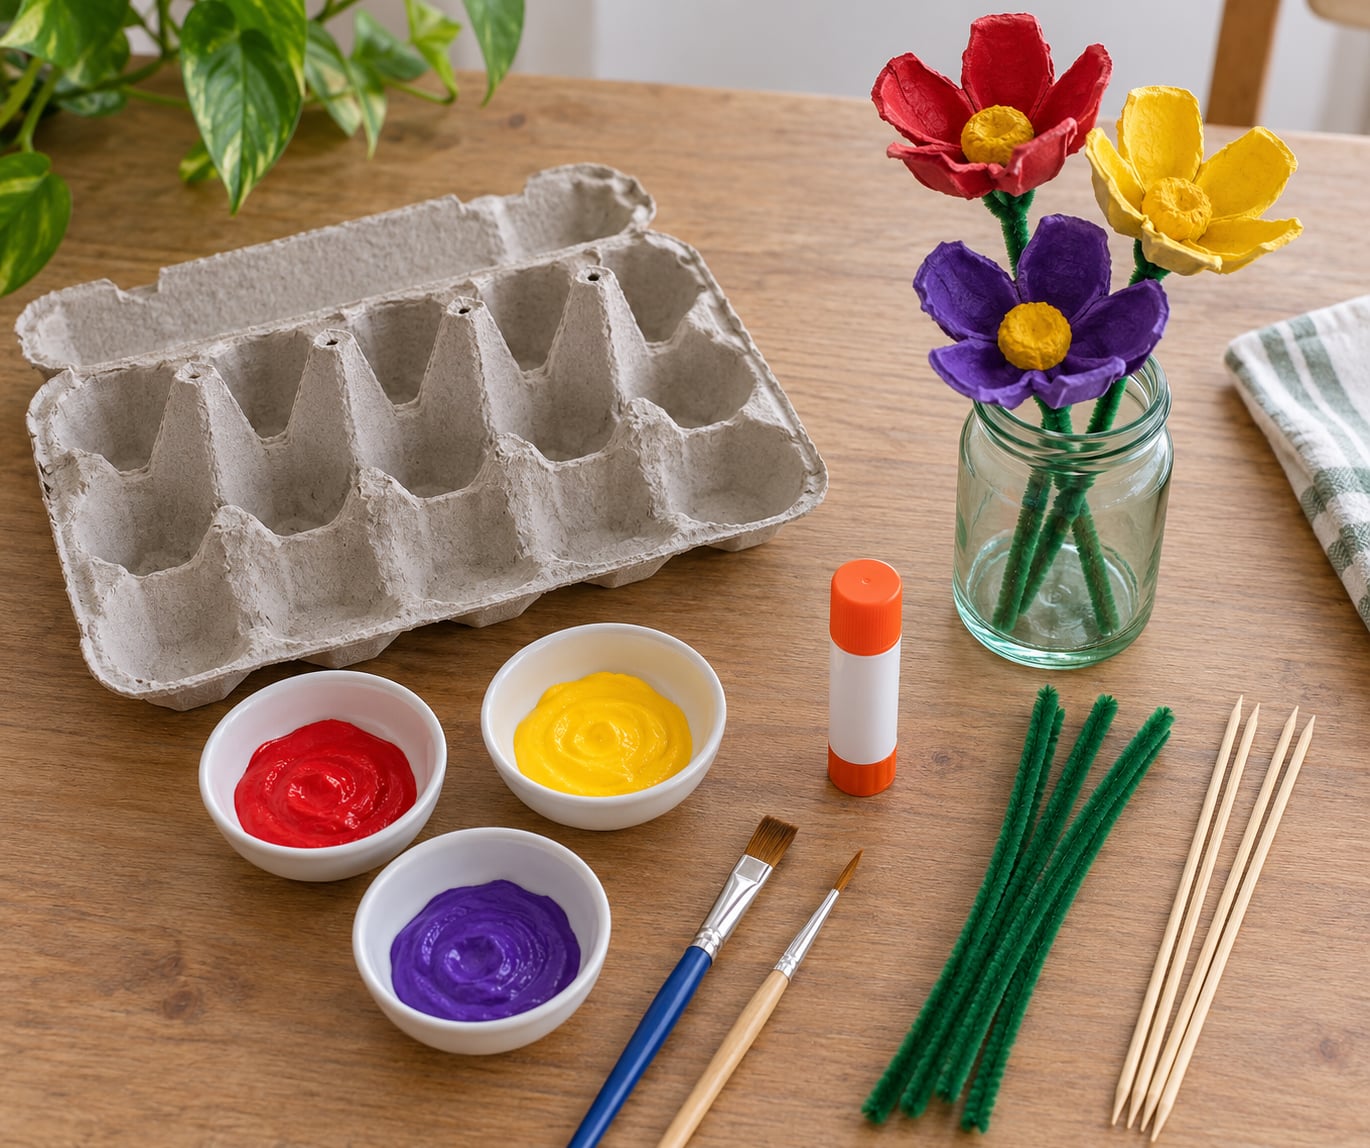
The best way to make egg carton flowers is to cut the cups of a clean cardboard pulp carton into petal shapes, paint them, layer two or three together into one bloom, and push a stem through a hole in the base. Twenty minutes of active work, two to three hours of drying, and you have a bouquet that never wilts.
It is one of those crafts that sounds like it needs special supplies and then turns out to need a carton you were going to throw away. My kids made a whole jar of them on a rainy Saturday, and the same three cardboard cups get reused long after the flowers are on the mantel.
Table of Contents
- What You Need
- Step-by-Step
- 1. How to Make Egg Carton Flowers from a Clean Carton
- 2. Cut the Petal Shapes
- 3. Paint the Egg Carton Flowers
- 4. Add the Stems and Leaves
- 5. Assemble and Display the Flowers
- Five Flower Shapes From the Same Carton
- Common Mistakes
- Frequently Asked Questions
- What kind of egg carton works best for making flowers?
- Should I paint the egg carton before or after cutting the flowers?
- How long does it take for egg carton flowers to dry?
- What can I use instead of pipe cleaners for the stems?
- Can toddlers make egg carton flowers?
- How do I keep the cardboard petals from tearing?
- Start With a Flattened, Marked Carton
What You Need
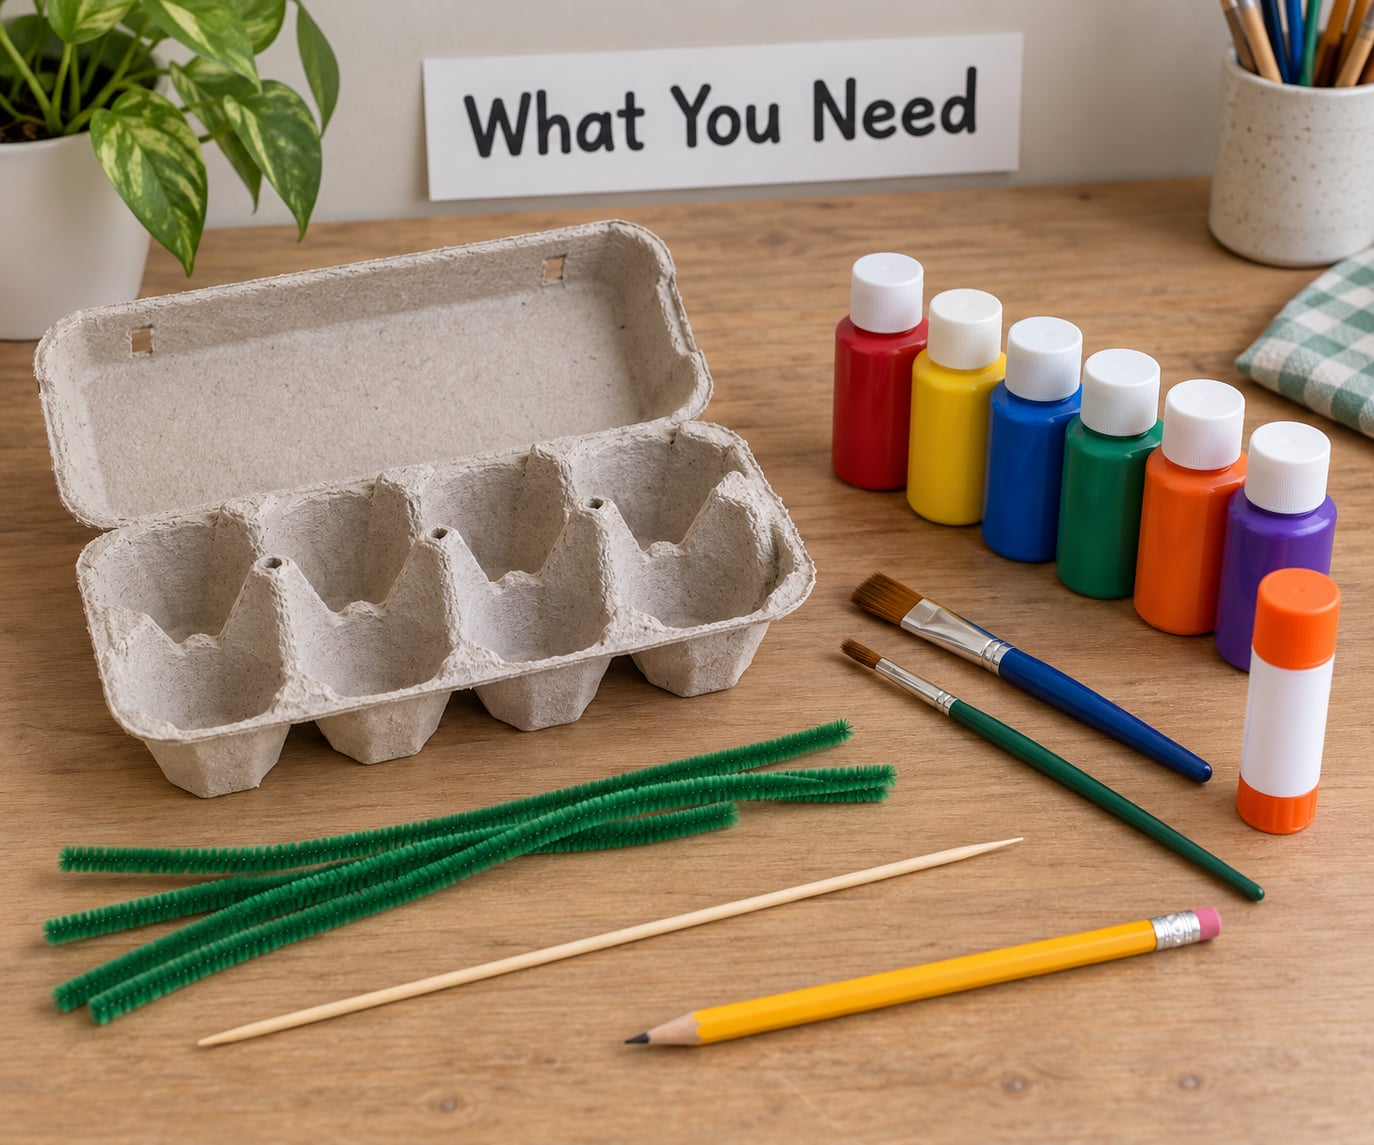
For about six flowers, gather these together on the table before you start. Having everything within reach saves the ten-minute hunt for a brush mid-project.
- A cardboard egg carton — pulp or paper, the grey kind. Not styrofoam, and not plastic. Three or four cups gives you three or four flowers.
- Child-safe scissors — small blunt-tip scissors for kids, kitchen shears if an adult is doing the cutting.
- Washable tempera or acrylic paint — two colors for petals, one contrasting color for the centers.
- A paintbrush — one thin brush for edges, one wider brush for filling in.
- A pencil — for marking the petal pattern before anyone cuts.
- Glue — a glue stick for little hands, a hot glue gun for adults who want it to set fast.
- Stems — bamboo skewers, wooden skewers, green pipe cleaners, paper straws or popsicle sticks. Pick one or mix them.
- Centers — pom-poms, buttons, pony beads or a yellow disc cut from a spare scrap of carton.
- Leaf material, optional — green craft paper or green-painted cardboard offcuts.
The carton matters more than any other item on that list. Pulp and paper cartons take paint cleanly, hold a petal shape and cut with kitchen scissors. Styrofoam cartons crumble into white shards at the notch, shed little balls instead of edges, and paint sits on top of them instead of soaking in. If styrofoam is all you have, it is still workable, but expect fuzzy edges and paint you have to apply in three coats.
Planning the time matters too. Active work is about 20 minutes per carton. Drying is two to three hours, and I mean properly dry, not dry to the touch and tacky underneath. That is why this works so well as a morning activity — paint before lunch, assemble after nap.
Adult help: an adult should handle the hot glue gun and any poking of holes with a skewer. Everything else, including cutting with blunt scissors, is a fine job for a preschooler.
Step-by-Step
These five steps follow the order most guides use, and they work whether you are making one flower or a full bouquet.
1. How to Make Egg Carton Flowers from a Clean Carton
Flatten the carton with the hinge at the bottom, then wipe the inside with a damp cloth and let it dry. Egg residue makes paint bubble and makes glue slippery, so take a minute over this.
Stand a single cup on its flat base and squash it flat with your palm. Draw a simple shape with the pencil: a wide rounded top for a daisy, a pointed top for a tulip, or a bell that curves inward at the tip. Repeat the same outline on four or five neighbouring cups so the petals match.
How you know it worked: the cup holds its flattened shape and the pencil lines are visible from both sides of the cardboard. If the cup springs open every time you press it, press it again with the hinge folded underneath until it stays.
2. Cut the Petal Shapes
Cut the carton into long strips along the ridges first, then cut each cup free from the strip. That gives you flat individual cups instead of fighting with a whole carton in your lap.
With a pencil line on your flattened cup, cut down from the top edge toward the base on both sides to make the petal outline. Leave a small gap uncut at the bottom, so the piece still holds together like a tiny cup with a flared rim. The deeper the notch, the more the petals open outward and bloom.
Now shape them. Round off the top with a tight scissor curve for soft petals, or snip a triangle for pointed ones. For a tulip, cut the flattened cup diagonally corner to corner and fold — the two flat sides curve outward on their own. Trim the base flat so the flower sits level.
How you know it worked: the piece sits flat on the table without rocking, and the petals spread slightly when you set it down. A piece that folds in half like a taco has a notch cut all the way through, so glue a fresh cup back on with a small dab.
3. Paint the Egg Carton Flowers
Paint before gluing. Paint first means no visible glue seams and no sticking-together while you work, and it is the reason I would never assemble a flower before this step.
Use thin coats. One heavy coat stays wet, drags and cracks as it dries. Two or three light coats give you saturated color with a dry surface between each. Paint the front, then flip and do the back — the back shows on any petal that curves outward, and unpainted pulp is grey and slightly damp-looking next to a colored side.
Set them on a flat surface, not on top of each other. If two pieces touch while wet they stick permanently, and you lose one petal.
Give the centers a contrasting color. Yellow on purple reads as a sunflower, orange on red reads as a poppy, white on blue reads as a cornflower. A two-tone petal — a darker color at the base fading to lighter at the tip — is the easiest way to make a batch of six look deliberate.
How you know it worked: the paint feels dry and slightly cool rather than tacky, and the cardboard no longer bends. If a coat is still sticky, give it another 20 minutes; it will not hurry.
4. Add the Stems and Leaves
Poke a small hole through the flat base of each flower with a kitchen skewer. An adult should do this on a cutting board, and the sharp tip should be snipped off afterward so the stem cannot spear anyone. A single hole in the center holds a bouquet fine; two holes side by side let a pipe cleaner thread through and twist into its own stem, which is the trick that works best for small hands.
Push the stem into the hole with a dab of hot glue at the base, or with a glue stick if the flower is for a young child. Stand it upright while the glue sets, around a minute with hot glue and several minutes with a stick.
Skewers stand up straight in a bouquet and look the most like real flowers. Pipe cleaners bend easily, so they are better for a single flower in a jar or for a preschooler who wants to curve the stem. Paper straws come in colors that match the petals, and popsicle sticks are wide enough to write a name on.
Leaves are cut shapes, nothing more. Two ovals at about 30 degrees, glued to the stem at different heights, is enough. Green craft paper works; so does the green you painted on the inside of the lid strip.
5. Assemble and Display the Flowers
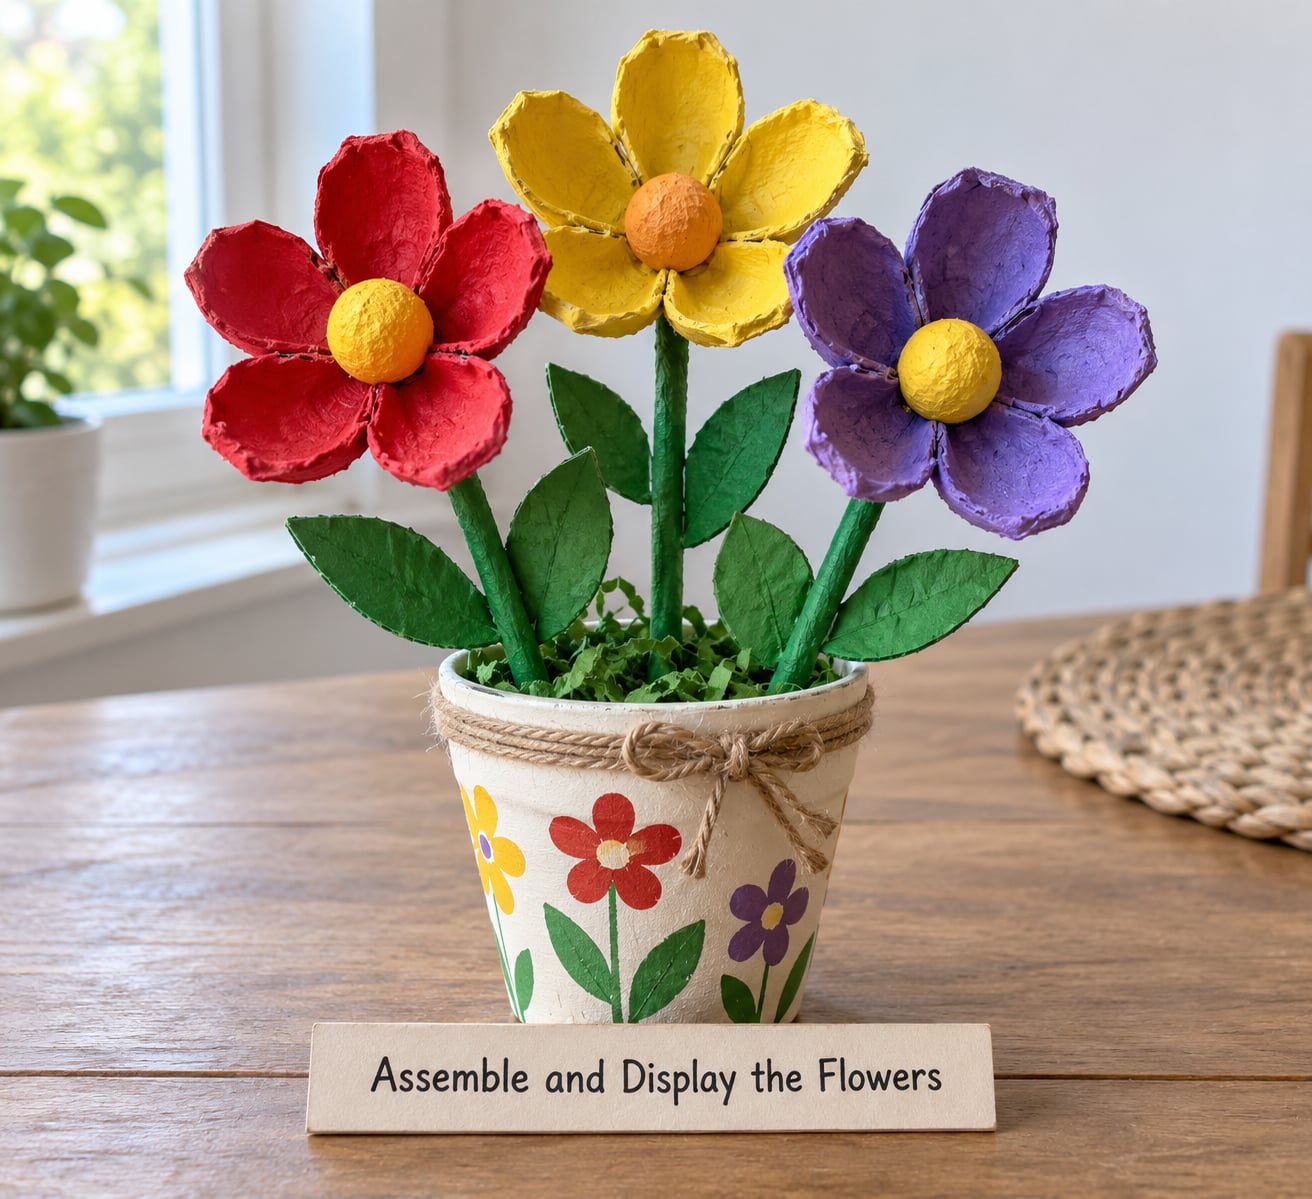
A single cup makes a small flower on its own, and that is the honest beginner version. Two cups back to back make a full bloom, and three layered with a bit of offset between each layer make the biggest one.
Run a thin bead of glue around the base of the top piece, press it onto the layer below and hold for a few seconds. Offset each layer slightly rather than stacking them straight — that is what gives it depth. Then add the center: a pom-pom pressed into a dot of glue, a button with a hole and a shank, pony beads threaded and glued in a ring, or a yellow disc of cardboard with a little spiral scratched into it from the edge.
For a bouquet, vary the stem lengths by an inch or two and stand them in a recycled glass jar. Tie a ribbon around the neck of the jar and trim it. A saved egg carton with the cups still attached, painted as a base, holds short-stemmed flowers without a jar at all.
Five Flower Shapes From the Same Carton
| Flower | How to cut it | Difficulty |
|---|---|---|
| Daisy | Flatten the cup, mark a rounded top, cut four wide petals with a small uncut gap at the base | Easiest |
| Tulip | Cut the flattened cup diagonally corner to corner and fold; the edges curve on their own | Easy |
| Bell flower | Cut a deep V into the top and round the shoulders | Easy |
| Rose | Shape wide petals, then glue three pieces into a tight spiral | Medium |
| Sunflower | Use long pointed petals from two rows of cups, with a large center disc | Easy |
Common Mistakes
Torn or crumbling cardboard. Usually a styrofoam carton, or a notch cut too deep. Switch to pulp, and stop cutting about a quarter inch from the base so the cup keeps an uncut band. Cut along the pencil line rather than freehand.
Uneven petals. The cups vary in size, so measure one cup first and use it as a template for the rest. If petals already look inconsistent, glue the smallest one onto the inside of the largest rather than putting them side by side.
Peeling or patchy paint. Thick coats, touching wet pieces, or bare cardboard showing through thin spots. Two thin coats beat one thick one every time, and add a third where the grey pulp shows through.
Paint bleeding onto the table or sticking pieces together. A clean egg carton tray or a plastic lid makes a paint palette. Lay finished pieces in a single layer and move them by the edges.
Stems that flop or look short. Pipe cleaners are flexible by design; use skewers for anything you intend to stand up. Push the stem in deeper, right through to the top of the cup, for a sturdier joint.
Glue not dry. Give hot glue a full minute before you let go and a second minute before you move the piece. A glue stick needs longer than most people expect, and the flower will slide apart if you rush it.
Papery-thin cups that warp. Cardboard egg cups from a flat paper tray are too thin to hold a petal shape. Real pulp cartons have two layers pressed together and are worth waiting a day to accumulate if you can stash them.
The scrap from this project is worth keeping. The lid strip with its little dome humps makes a caterpillar, the flat panels cut into leaves for a paper collage, the rolled-off spiral edges make a snail shell or a bow, and the uncut remainder folds into a seed tray you can use in spring. Washing and air-drying the pieces and keeping them in a jar is enough.
For age bands: a toddler of 2 or 3 paints the whole flattened carton first, then an adult cuts and shapes it while they watch, with a glue stick for assembly. A preschooler handles blunt scissors and the paint, with an adult poking holes and using the glue gun. An elementary-age child can cut, shape, paint and assemble a whole mixed bouquet on their own.
Frequently Asked Questions
What kind of egg carton works best for making flowers?
Grey cardboard pulp cartons work best, because the pressed double layer holds a petal shape and takes paint evenly. Styrofoam cartons crumble at the notches and shed loose beads instead of clean edges, and thin paper cups warp. If styrofoam is all you have, cut with a serrated knife and expect to apply paint in three thin coats to hide the pitted surface.
Should I paint the egg carton before or after cutting the flowers?
Paint the pieces after you cut them but before you glue anything together. Painting first keeps glue seams invisible, stops wet pieces sticking to each other, and means you only paint the areas that show. Painting the whole intact carton first works well for toddlers because there is less mess, but you end up repainting the offcuts.
How long does it take for egg carton flowers to dry?
Paint needs about two hours between thin coats, and a full three hours if you are layering two colors or painting both sides. Assembly takes another 15 minutes per carton once the pieces are dry. Plan for roughly 20 minutes of active work and up to half a day of waiting, and start before lunch so the gluing happens after a nap.
What can I use instead of pipe cleaners for the stems?
Bamboo and wooden skewers stand straight in a bouquet and look most like real stems. Paper straws are colored and hollow, which works if children push rather than poke. Popsicle sticks are wide, flat and easy to write a name on for a gift tag. Found sticks from outside work too, though check them for splinters first.
Can toddlers make egg carton flowers?
Yes, with the order of the steps reversed. A child of 2 or 3 can paint a flattened carton with their hands or a thick brush, and an adult cuts the petal shapes afterwards. Skip the skewer step entirely and use a glue stick instead of a hot glue gun, so there is nothing sharp or hot anywhere near small hands.
How do I keep the cardboard petals from tearing?
Cut along a pencil line rather than freehand, and stop about a quarter inch above the base so an uncut band holds the cup together. Use kitchen scissors on pulp rather than a craft knife, and squash the cup flat first so it is not bending in your hand. Torn edges can be patched with a small piece of scrap carton and a dab of glue rather than being thrown out.
Start With a Flattened, Marked Carton
The whole project rests on one early habit: flatten the carton, wipe it out and draw your petal outline before anything is cut. That ten minutes is what separates a flower with even petals from a pile of grey offcuts. From there it is cutting, painting, drying, layering — and the craft takes care of itself once it is standing in a jar by the door.