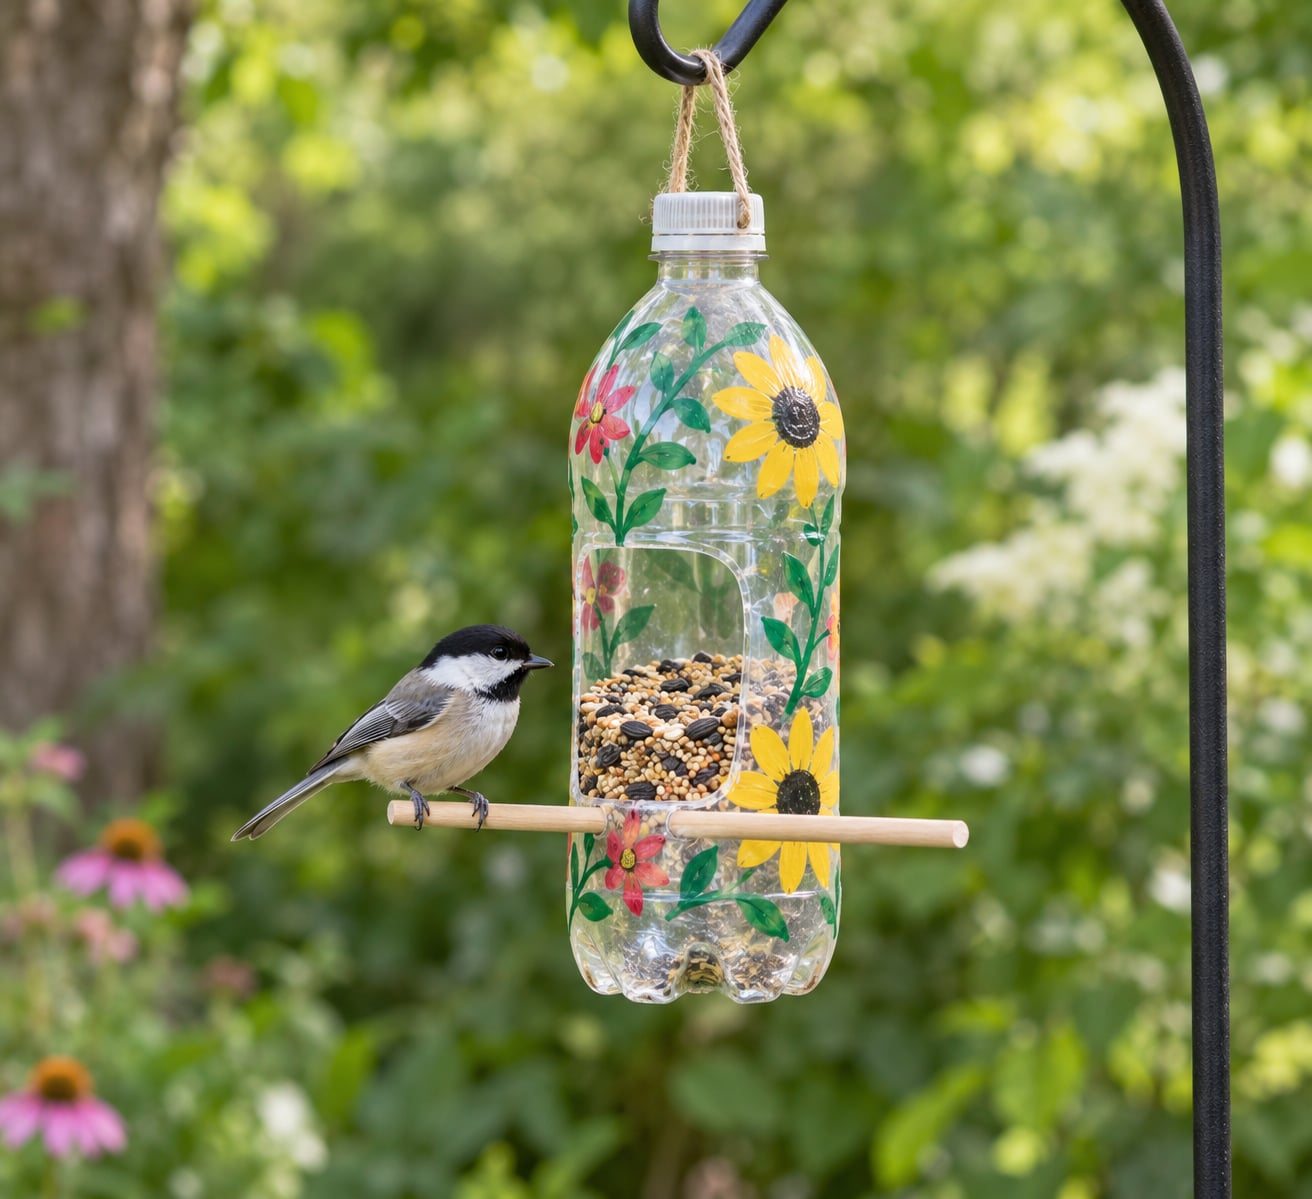
How to make a bird feeder from a plastic bottle takes about twenty minutes and costs almost nothing, because the bottle is something you already threw away. You cut two small feeding ports, add a perch, thread a hanger, fill it with seed, and hang it outside. It works as a gravity tube feeder: birds land on the perch and peck seed out through the ports, which are sized so the whole bottle never empties onto the ground.
I’ve built these with my kids on rainy afternoons, and the part they care about most is not the cutting. It’s the ten minutes the next morning, standing at the window waiting to see who shows up. Chickadees usually arrive first because they’re small and bold. Cardinals and sparrows follow once they’ve worked out the perch is theirs to use.
The whole thing is a good reuse project, too. A bottle headed for the recycling bin becomes a feeder that lasts a season or two, and kids can log the birds that visit on a simple chart. Below is the full build, the measurements that matter, and the mistakes I watched other families make so you can skip them.
Table of Contents
- What You Need
- Step-by-Step: How to Make a Bird Feeder from a Plastic Bottle
- Step 1: Prepare the Bottle
- Step 2: Mark the Feeding Openings
- Step 3: Cut the Openings
- Step 4: Add a Perch
- Step 5: Add the Hanger
- Step 6: Decorate and Fill the Feeder
- Step 7: Hang and Observe
- Common Mistakes
- Seed dumps out of the openings
- Birds land but never eat
- Seed gets wet and molds
- Sharp edges and a cracked bottle
- Poor food choices
- The feeder swings and the perch whips
- How to Make a Bird Feeder from a Plastic Bottle That Lasts All Summer
- Frequently Asked Questions
- What type of plastic bottle works best for a bird feeder?
- Can I paint a plastic bottle before making a bird feeder?
- How do I keep bird seed dry in a plastic bottle feeder?
- What should I put inside a homemade plastic bottle bird feeder?
- How long does it take to make a bird feeder from a plastic bottle?
- How do I clean and maintain a plastic bottle bird feeder?
- Conclusion
What You Need
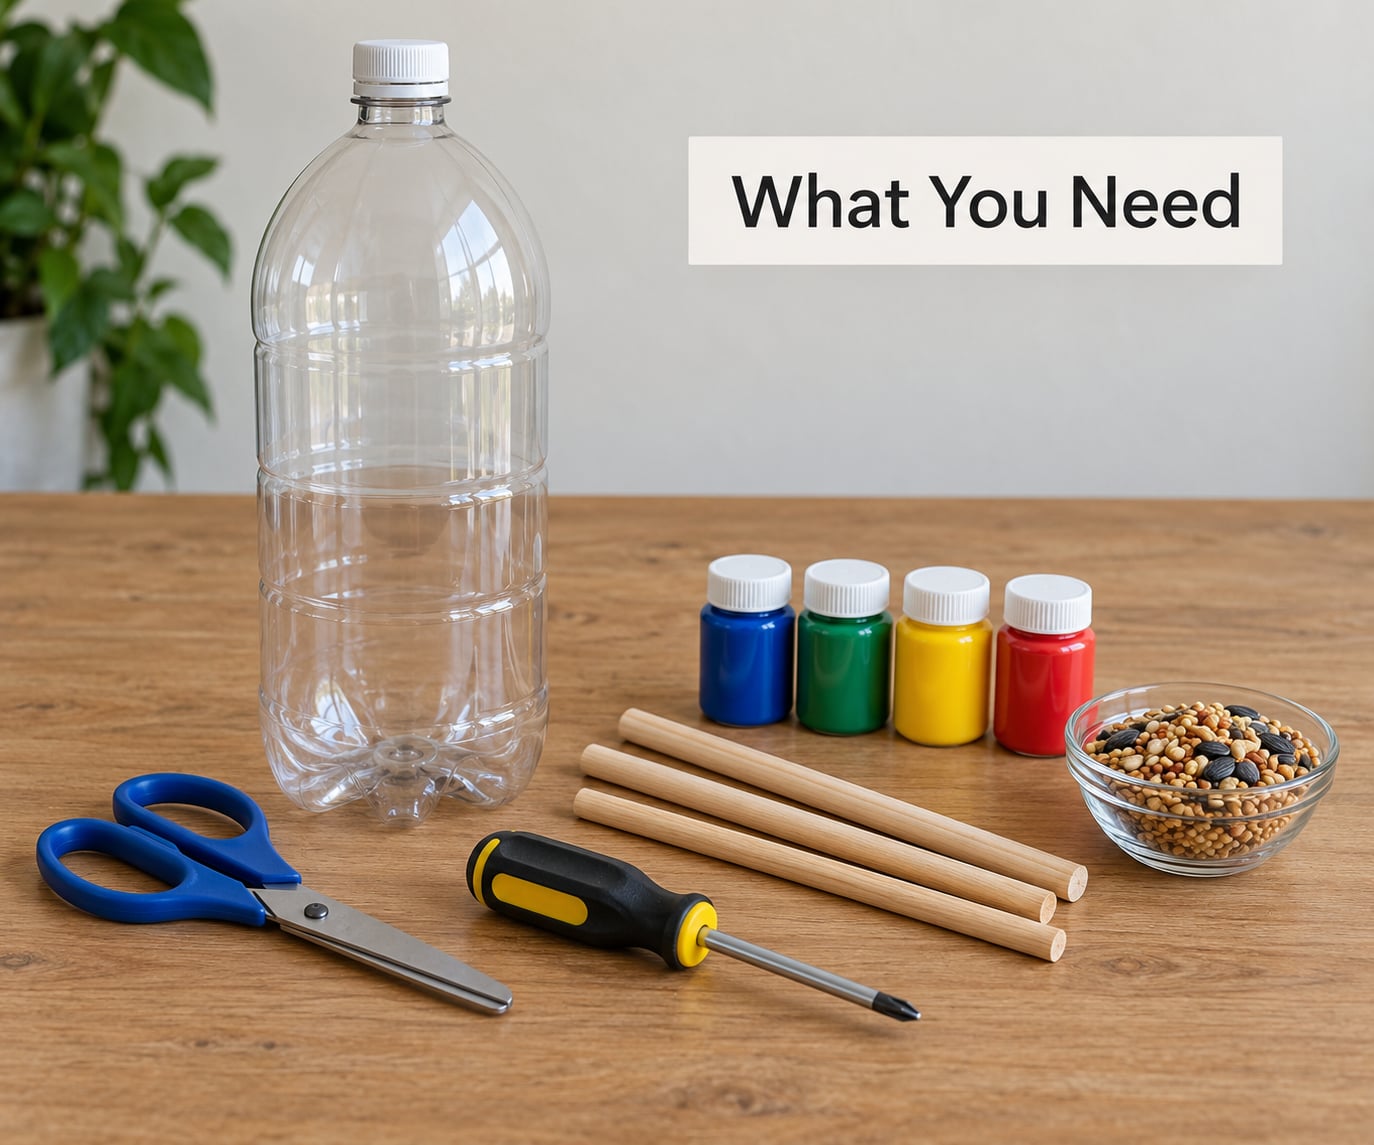
A 2-liter soda bottle is the sweet spot. It’s tall enough to hold a decent amount of seed, narrow enough that the perch doesn’t wobble, and sturdy enough to hang outdoors for weeks. Everything else on this list is either something you already own or costs a couple of dollars at a craft store.
| Item | Why you need it | Required? |
|---|---|---|
| 2-liter plastic soda or water bottle | The feeder body; sturdy, straight-sided plastic works best | Required |
| Wooden dowel, chopstick, or old spoon | The perch birds stand on while feeding | Required |
| Blunt-tip scissors or a craft knife | Cutting the feeding ports | Required |
| Push pin, awl, or screwdriver | Making the perch and hanging holes | Required |
| Twine, string, or a metal hook | Hanging the feeder | Required |
| Washable paint, markers, or stickers | Decorating; optional but fun | Optional |
| Small funnel | Pouring seed in without spilling | Optional |
| Clear packing tape | Rounding off sharp plastic edges | Optional |
| Bird seed | Plain black-oil sunflower seed is the best all-rounder | Required |
A five-minute inspection of the bottle saves the whole project. Squeeze it gently: if it flexes, cracks, or feels warped at the neck, throw it in the recycling instead. Thin bottles sag when they’re full and the seed ends up sitting in a puddle at the bottom.
One safety rule covers the rest: an adult handles the push pin, the awl, and any sharp scissors or knife. Kids can do the measuring, the marking with a pencil, the painting, and the filling, which is most of the fun anyway. Avoid using a lighter to smooth cut edges, since melted plastic gives off fumes; clear packing tape over the cut edge works well instead.
Step-by-Step: How to Make a Bird Feeder from a Plastic Bottle
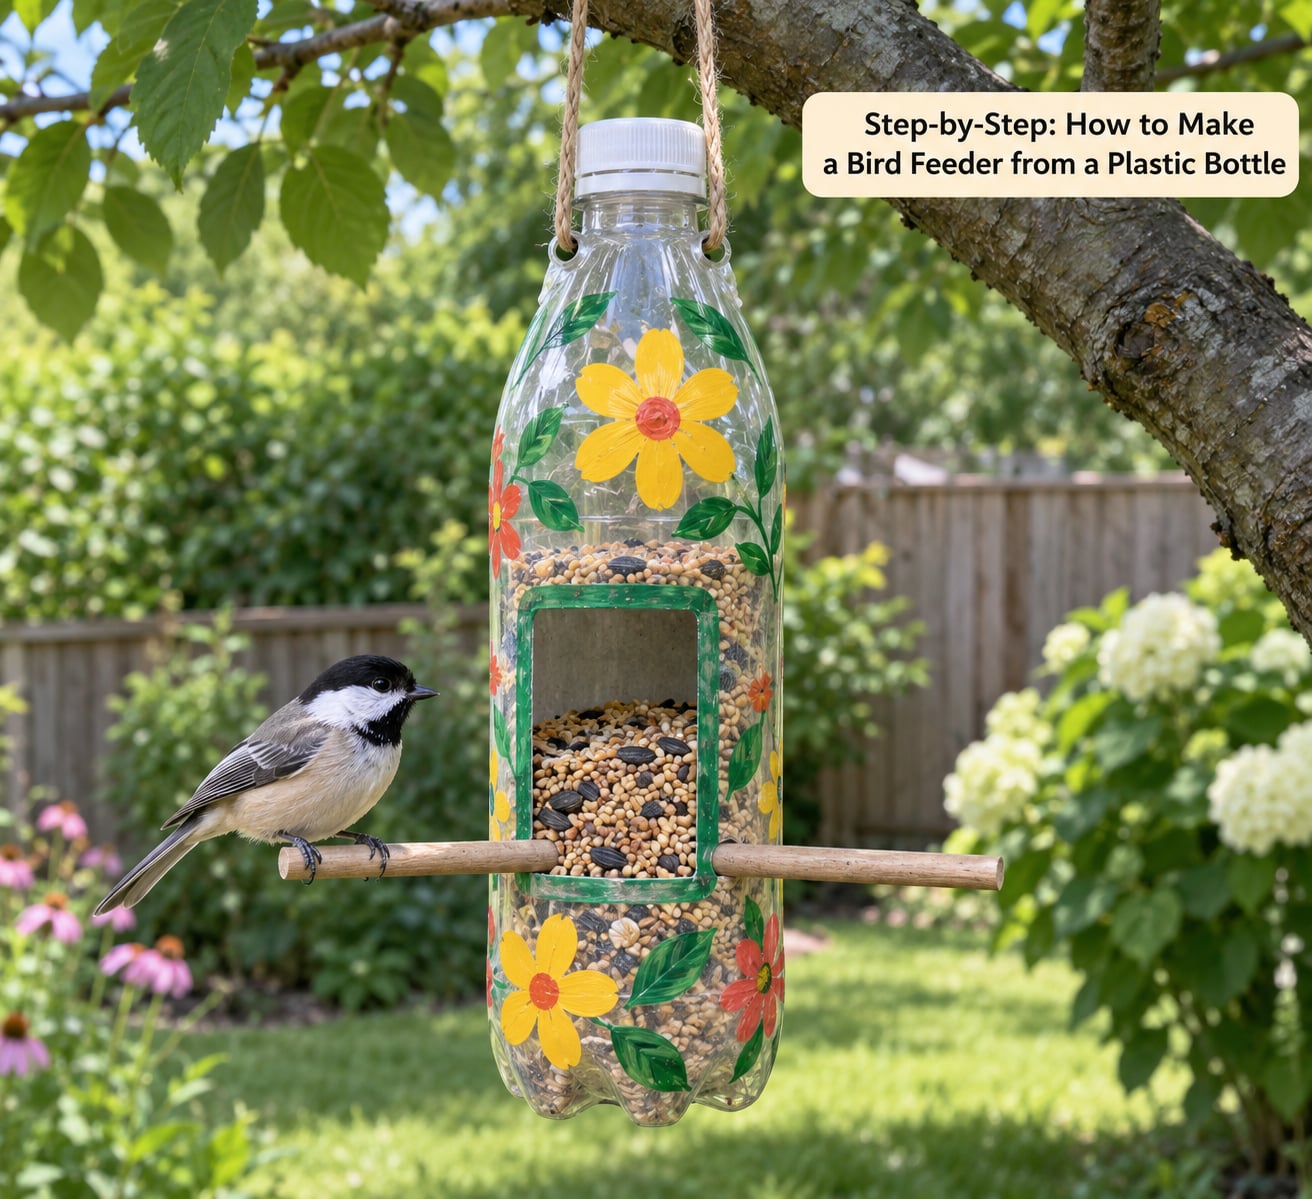
Step 1: Prepare the Bottle
Wash the bottle with dish soap and let it dry completely, then peel off the paper label and any leftover adhesive. A slippery label means the feeder slides in the wind, and adhesive under a warm summer sun turns to glue.
Take the cap off for now. You’ll put it back on at the end, and leaving it off during the build keeps stray seed and water out of the bottle while you work. Check that the bottle keeps its shape when you squeeze the middle. If it does, you’re good.
Step 2: Mark the Feeding Openings
Turn the bottle upside down so the base is up. Using a pencil, mark a small square or rectangle on two opposite sides, roughly a third of the way up from the base. Each opening should be about 7 to 8 mm across, which is about the size of a dime.
You want the port just above where the perch will sit, so the bird can reach in without stretching. The pen marks stay visible as your cutting guide. Step back and check the bottle from a few feet away: if you can’t see the two marks from the front, the openings are too small for a bird to find.
Step 3: Cut the Openings
Cut out the marked sections with blunt scissors, staying as close to the line as you can. Keep the offcuts in a bowl, because a triangle of leftover plastic makes a useful seed scoop later.
Hold the cut edge up to the light. If you see thin spikes or a rough lip, wrap clear packing tape over the edge or run a craft file across it. You’ll know this step worked when the bottle stands on its cap by itself without wobbling.
Step 4: Add a Perch
Push a pointed tool through the bottle about 3 inches, or 7.5 cm, up from the base, directly below one feeding port. Widen the hole with scissors until the dowel is a snug friction fit rather than a loose wobble. Slide the perch through so it runs straight across the bottle, in front of the opening.
If you’d rather not drill at all, glue a wooden spoon handle or a craft stick across the front of the bottle just under the port, with washable craft glue. Let it set for an hour. The bird needs something solid directly below the opening to hop onto, and without it most visitors won’t stay long enough to work out how to eat.
Step 5: Add the Hanger
Poke two small holes on opposite sides of the neck, just below where the cap screws on. Thread sturdy twine through both holes and tie the ends together in a loop above the neck, or run the twine through a small metal eye screwed into the cap for a neater hang.
Balance matters more than strength here. If the loop is off-center, the feeder spins in every gust and the perch whips around, which scares birds off. Adjust the knot until the bottle hangs level, then test it with a firm tug before you walk away.
Step 6: Decorate and Fill the Feeder
Turn the bottle upright and paint it, add stickers, or glue on paper cutouts of birds and leaves. Washable acrylic paint works on plastic; use a light hand so the plastic doesn’t soften near a warm window. Keep the ports, the perch holes, and the base fully clear of paint and glue.
Wait until the paint is dry, then fill the bottle no more than about two-thirds full. Pour seed down a small funnel or a rolled-up sheet of paper so it doesn’t scatter. A full bottle works mechanically, but a heavy feeder swings more and the seed at the bottom can stay damp and go off before you can reach it.
Step 7: Hang and Observe
Screw the cap back on, then hang the feeder from a sturdy branch, a shepherd’s hook, or a bracket well away from the house. Aim for roughly 5 to 6 feet off the ground, in partial shade, and place it more than 30 feet from a window if you can. Birds that feed right at a window can hit the glass.
Give the bottle a level push and watch how it settles. Then leave it alone and check back the next morning. A quiet feeder that sits level, drains, and stays dry is doing its job even on the first day.
Common Mistakes
Almost every problem with a bottle feeder traces back to one of five things: a weak bottle, badly sized ports, no perch, trapped moisture, or a hungry squirrel. Here’s how each one shows up and what to do about it.
Seed dumps out of the openings
This is the most common failure. Ports wider than about a quarter inch let a bird hook out seed, and the rest follows onto the ground. Cut a fresh port smaller than you think you need, or trim an oversized one back with scissors. If squirrels are the culprits, they’ll widen a correct port over time, so a metal washer glued around each opening helps slow them down.
Birds land but never eat
That means the port is in the wrong place. A bird perches, has to stretch upward or lean away from the food, and gives up. Put the opening directly above the perch, and shift the perch closer if there’s a gap. Feeder design does decide who visits, and this is usually the reason sparrows ignore a feeder that works fine for woodpeckers.
Seed gets wet and molds
Water sitting in the bottom of the bottle turns the seed into a mold problem within days. Punch four or five small drainage holes in the base, angled slightly downward toward the ground, and keep the cap screwed on so rain doesn’t run in through the neck. Swap the seed out weekly rather than topping it up, and toss anything that smells stale or looks damp.
Sharp edges and a cracked bottle
Cover every cut edge with clear tape and skip any bottle that cracked during the build. Also drill the hanging holes slowly, with the bottle supported on a folded towel. Pushing a pin through unsupported plastic splits the neck more often than not.
Poor food choices
Plain black-oil sunflower seed is the reliable, inexpensive choice, and it’s fine in a small feeder because birds can grip it. Skip bread, crackers, salt, and cooked food, none of which give wild birds what they need. If you use a specialty seed with a fine mix, check that it isn’t so dusty that it empties through a correctly sized port.
The feeder swings and the perch whips
An unbalanced hanger or a bottle filled edge to edge produces constant motion, and birds won’t approach anything that moves. Re-tie the loop so the bottle sits level, hang it somewhere sheltered from the strongest wind, and keep the fill to two-thirds.
How to Make a Bird Feeder from a Plastic Bottle That Lasts All Summer
Two details do most of the durability work. Hang the feeder in shade so the plastic doesn’t fade and go brittle, and leave a finger’s width of air around any window. If you want to skip the feeder entirely and keep the plastic in the loop, rinse and reuse the bottle for plant cutting starts or for holding water in the garden instead. One bottle, one summer of birdwatching, and nothing wasted.
Frequently Asked Questions
What type of plastic bottle works best for a bird feeder?
A 2-liter soda or water bottle is the best all-round choice. It is tall enough to hold a good amount of seed, narrow enough that the perch stays steady, and rigid enough to hang outdoors. Avoid thin, flexible bottles, juice containers, and anything cracked or warped, because they sag once full. A 1-liter bottle works but holds so little seed that you refill it daily.
Can I paint a plastic bottle before making a bird feeder?
Yes, and it is one of the best parts for kids. Paint the bottle after cutting the ports and hanging holes, or paint first and cut through the dried paint. Use washable acrylic or tempera paint, apply a light coat, and leave the feeding ports, perch holes, and base drainage holes completely clear so nothing blocks them.
How do I keep bird seed dry in a plastic bottle feeder?
Keep the cap screwed on so rain cannot run in through the neck, and punch four or five small drainage holes in the base so water escapes. Hang the feeder in partial shade rather than full sun, which warms the bottle and encourages spoilage. Empty and replace old seed every week instead of topping it up, and wash the bottle with a dilute bleach solution once a month.
What should I put inside a homemade plastic bottle bird feeder?
Plain black-oil sunflower seed is the best general choice because small birds such as chickadees and nuthatches can grip it and it stays affordable. Fill the bottle about two-thirds of the way so it does not swing when full. Avoid bread, crackers, salt, butter, and cooked leftovers, which provide little nutrition for wild birds and can spoil quickly in a warm bottle.
How long does it take to make a bird feeder from a plastic bottle?
About twenty minutes for the basic build, plus an hour of drying time if you add paint or glue. Cutting the ports and threading the hanger takes the longest. Once it is hung, most feeders are visited within a day, and a single bottle usually keeps birds coming for a season or two before the plastic gets tired.
How do I clean and maintain a plastic bottle bird feeder?
Empty the seed every week and wash the bottle in warm soapy water, then disinfect it roughly monthly with a solution of one part bleach to nine parts water, rinsed well and left to dry in the sun. Scrub the port holes with a pipe cleaner or bottle brush. Replace the whole bottle if the plastic has yellowed, cracked, or gone brittle, and retire it if you ever find mold.
Conclusion
Start by picking a sturdy 2-liter bottle and pressing it to check that it holds its shape, then mark two ports about a third of the way up from the base and about the size of a dime. Let an adult handle the cutting and the drilling. The rest is measuring, filling, and hanging.
Once it’s outside, keep a simple list of who visits. Knowing that a chickadee shows up on day two and a cardinal on day five turns a craft project into a nature study, and it gives kids a reason to care about reusing the bottle. When the feeder finally tires, wash it and put the plastic back to work in the garden.