Plastic bottle crafts for kids need very little: an empty bottle from the recycling bin, paint, glue, and about half an hour. The ten projects below are the ones that survive real life with real children, and each one lists the bottle size that works best so you can pick a craft before you hunt through the cupboard.
I have made these with my own kids and with groups of three and four year olds, which is where the age guidance comes from. Everything here is cheap, low-mess compared with glitter, and forgiving if a child smears it. A few need adult hands with the scissors or the glue gun, and I have flagged those clearly.
Table of Contents
- Plastic Bottle Crafts for Kids at a Glance
- 1. Painted Bottle Pencil Holder
- 2. Flower Vase Craft
- 3. DIY Bird Feeder
- 4. Recycled Bottle Planters
- 5. Bottle Cap Coin Bank
- 6. Dinosaur Bottle Terrarium
- 7. Underwater Bottle Scene
- 8. Bottle Rocket Craft
- 9. Mini Marble Run
- 10. Reusable Watering Can
- Frequently Asked Questions
- What kind of plastic bottles are best for kids crafts?
- How should I clean plastic bottles before making crafts?
- Can toddlers make plastic bottle crafts?
- What paint and glue are safe for plastic bottle crafts?
- How can I stop a plastic bottle craft from leaking?
- Start with the Simplest Bottle Project
Plastic Bottle Crafts for Kids at a Glance
| Finished craft | Best bottle type | Age range | Setup time | Difficulty |
|---|---|---|---|---|
| Painted pencil holder | 2-liter soda | Preschool and up | 20 min | Easy |
| Flower vase | 2-liter or juice bottle | School age | 30 min | Easy |
| Hanging bird feeder | 2-liter soda | School age, with an adult outdoors | 30 min | Easy |
| Recycled planter | 2-liter soda | Preschool and up | 25 min | Easy |
| Bottle cap coin bank | Water bottle with cap | School age, adult cuts the slot | 40 min | Moderate |
| Dinosaur terrarium | Large water bottle | Preschool and up | 30 min | Moderate |
| Underwater scene | Small juice or water bottle | Preschool and up | 35 min | Moderate |
| Bottle rocket | 2-liter soda | School age | 40 min | Easy |
| Marble run | 2-liter soda | School age, adult cuts | 45 min | Moderate |
| Watering can | 2-liter or larger | School age, adult cuts | 35 min | Moderate |
Age bands used here: preschool covers roughly 3 to 5, school age covers 6 to 9. Anything below 3 is a no for cutting, glue or small parts, though the painted bottle holder works as a no-cut version if you decorate the outside only.
Difficulty is about the cutting, not the creativity. Easy means child-safe scissors and no heat. Moderate means a craft knife, a hole punch, or a hot glue gun, and an adult should handle those steps.
1. Painted Bottle Pencil Holder
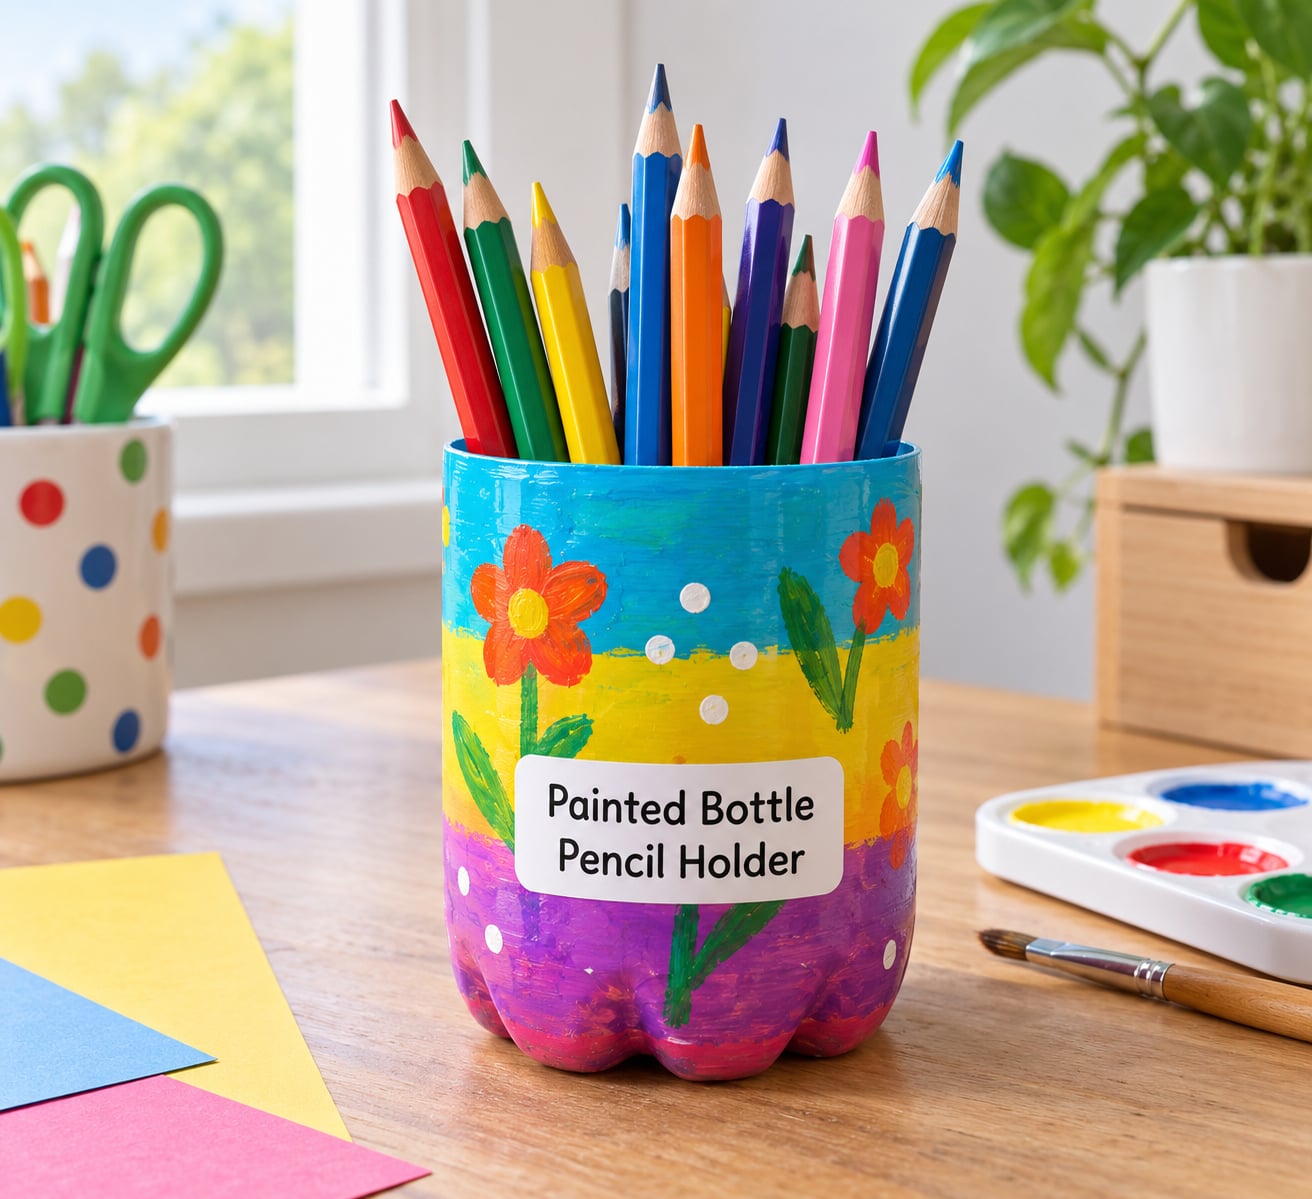
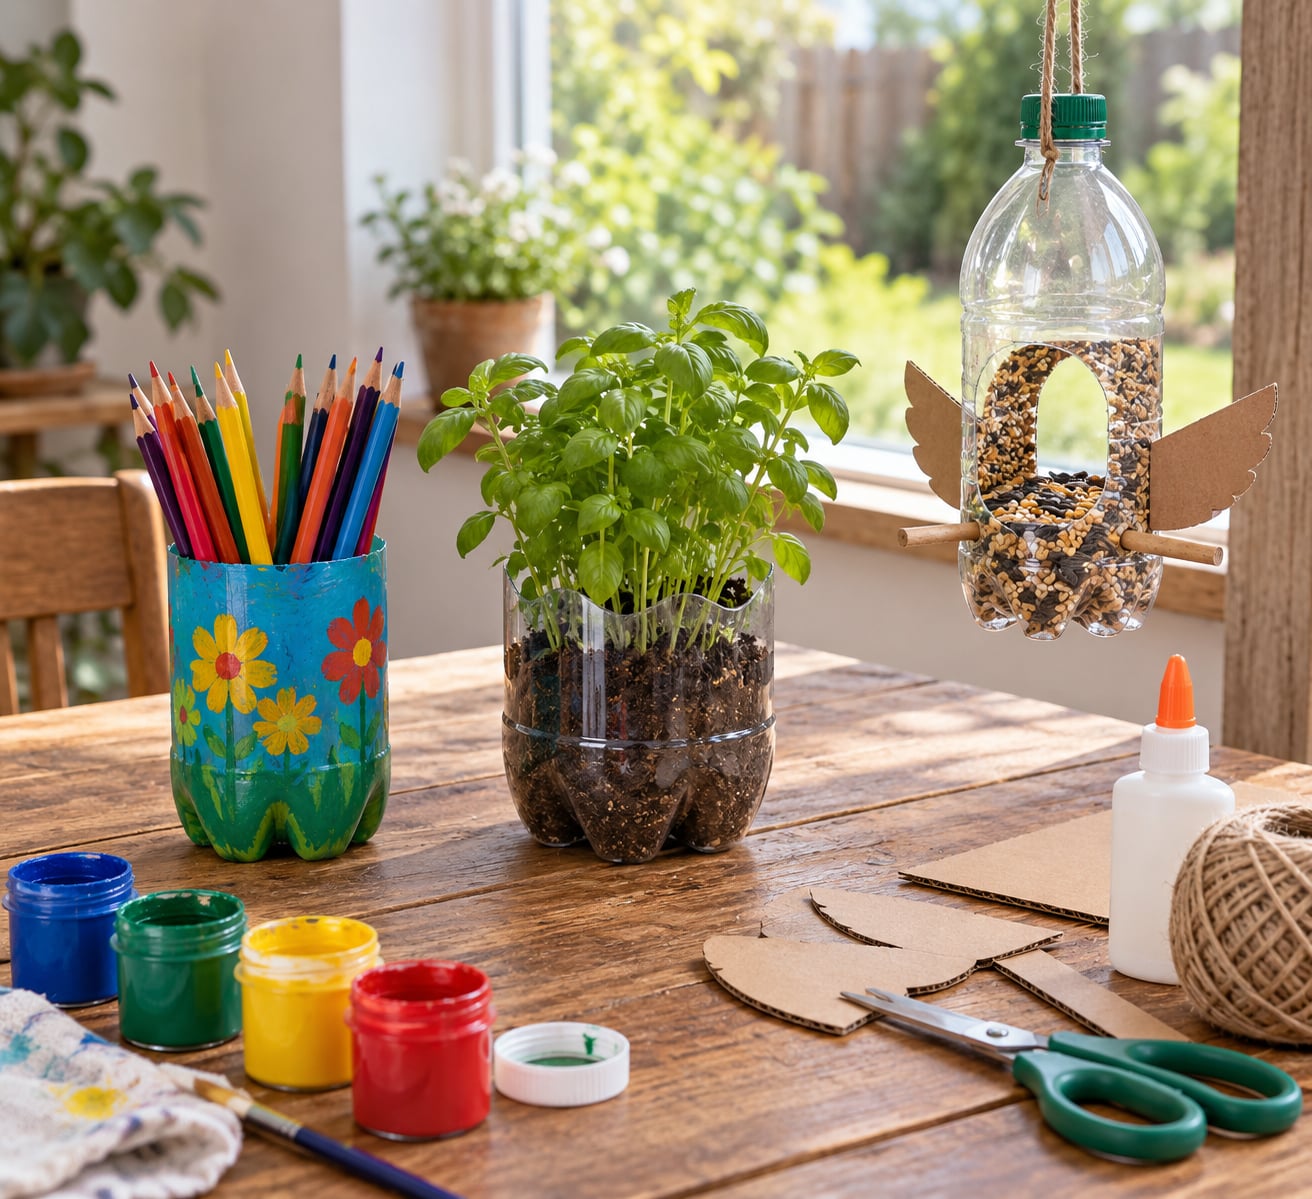
A pencil holder is the one I send every family to first. It takes twenty minutes, it survives being knocked off a desk, and the finished thing looks good enough to leave out.
What you need: a 2-liter soda bottle, acrylic paint or paint pens, a craft knife, a cutting mat, and either a strip of packing tape or a piece of clear packing film cut to the base.
Cut the bottle off about four inches from the base, straight and level, so the holder stands flat. Adults should do this cut on a mat, turning the bottle away from the body as the blade goes through. Sand the rim lightly with an emery board if it feels sharp to a thumb.
Paint the outside or use paint pens for patterns. Once dry, lay a dab of hot glue on the base and press on a felt pad or a cork circle. That single step is the difference between a holder that stands and one that ends up rolling under the sofa with twenty pencils in it. For an invisible seal, brush a thin coat of clear acrylic sealer over the paint after it cures.
Skills: grip strength, counting pencils in and out, color sorting.
2. Flower Vase Craft
Cutting the top of a bottle into petals turns the neck into a bloom, which is why this looks like a real flower rather than a decorated container. It is the most forgiving of the bottle-shaped projects because a wobbly petal still reads as a petal.
What you need: bottles in two or three sizes, scissors or a craft knife, acrylic paint, a green bottle or green cardstock for the stem, and strong glue.
Cut around the shoulder of the bottle in six or eight long V shapes, stopping where the bottle starts to widen, so the petals stay attached at the base. For a realistic open flower, cut deeper and further down; for a tulip, make fewer and shorter cuts. Snip each tip rounded rather than pointed, which stops the petals from fraying.
Make three sizes from one bottle by cutting sections at different heights, then nest them so the largest sits at the back. Paint the petals and, if you want a stem, roll a strip of cardstock into a tube and glue it inside the neck. These look good as table decorations in batches.
Skills: bilateral coordination, pattern making, scissor control.
3. DIY Bird Feeder
This is the project that gets used rather than put in a cupboard, and it is the one I like most for teaching kids why holes have different sizes. It needs an adult at the drilling and hanging stages.
What you need: a 2-liter soda bottle, a drill or a nail and hammer, twine or strong string, exterior paint or markers, and a small dish for a seed platform.
Cut two small holes near the top on opposite sides and thread twine through them to make a hanger, then cross the strings and knot them under the base as a cradle. Add two holes in the base for drainage and water to escape, and glue a bottle cap upside down inside as the seed platform so birds stand rather than drown in seed.
Fill with black oil sunflower seeds, which are what wild birds actually eat. Skip bread, salt and anything salty, and do not fill it completely. Rinse and refill every few days in warm weather, and bring it in for winter so it does not become an ice bath. Paint the outside so it blends into the garden rather than advertising itself to a cat.
Skills: measurement, cause and effect, seasonal observation.
4. Recycled Bottle Planters
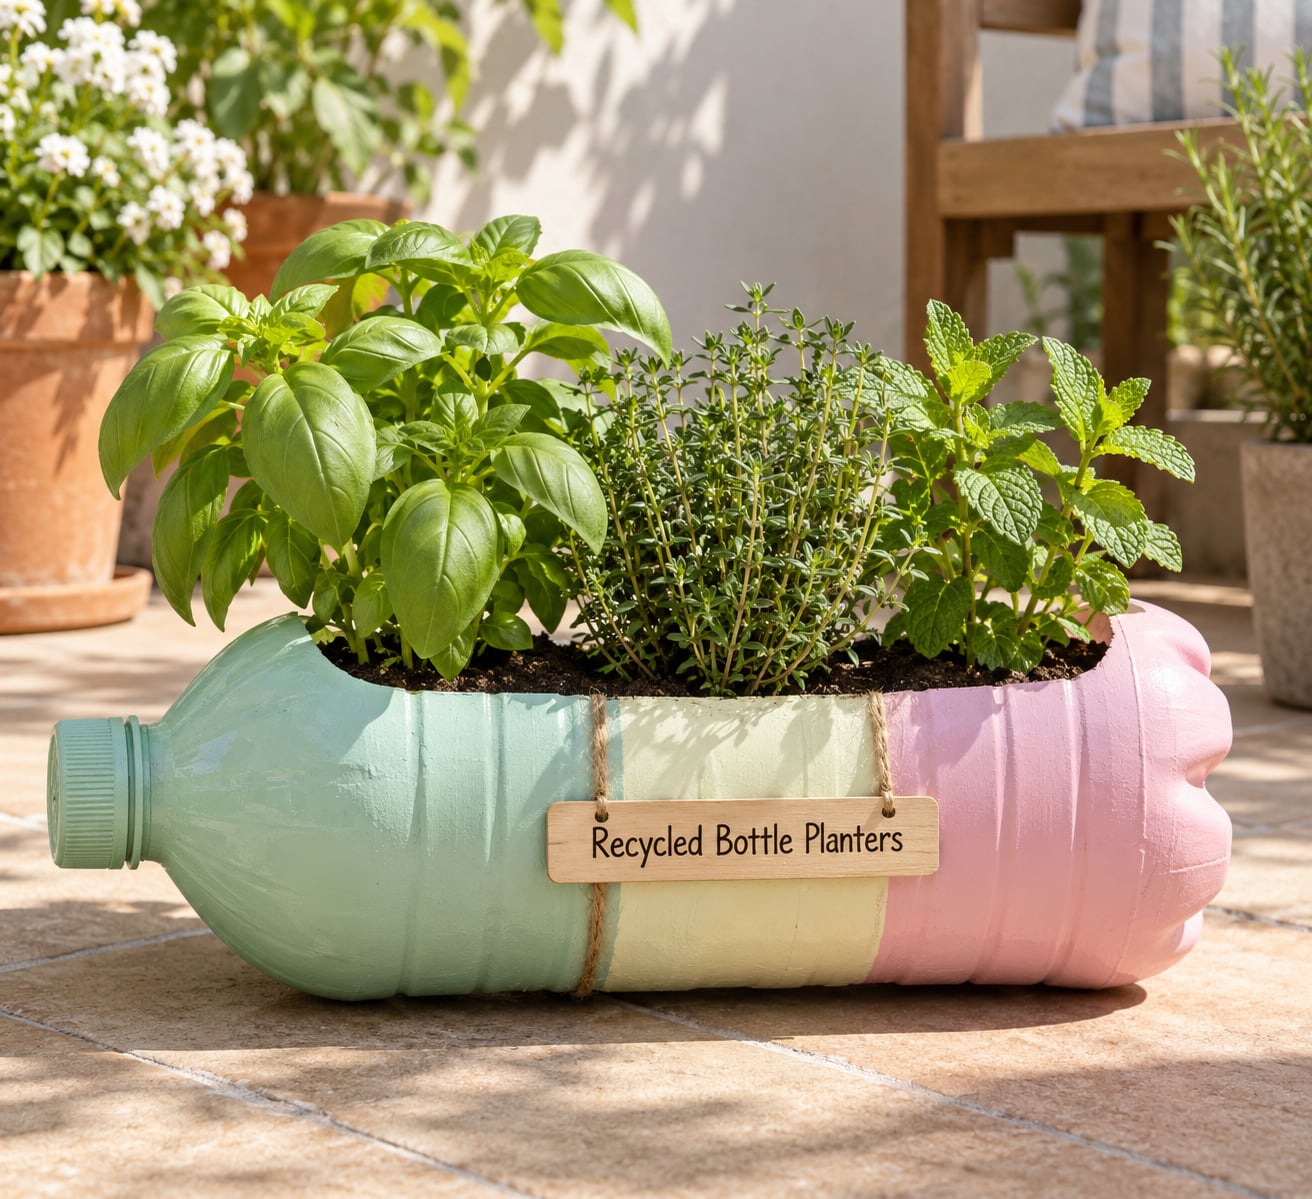
Planters are the most useful project in the list because the object keeps working after the craft session ends. Cut a 2-liter in half and you have two planters from one bottle, which is handy if you have been accumulating them.
What you need: 2-liter bottles, a nail or drill, paint or a sealant liner, potting soil, and seeds or a small nursery plant.
Cut the bottle in half horizontally and drill three or four drainage holes in the base of each half. A liner of two or three inches of potting soil on the bottom stops the roots sitting in water; pebbles alone work as a coarse layer but will not replace drainage holes, so drill them anyway.
Sun-loving and forgiving options suit children best: basil, thyme, marigolds, strawberries, or a small pepper plant. Herbs need a windowsill with real sun, and most of them die if you overwater, so let the top inch of soil dry between waterings. Painting the outside with exterior paint makes a planter that survives a season outdoors; plain, unpainted plastic is fine but gets brittle in winter sun.
Skills: sorting seeds, watering routine, measuring depth.
5. Bottle Cap Coin Bank
A coin bank makes saving tangible in a way a jar of coins does not. The tactile click when the coin drops is most of the appeal, and that sound keeps kids coming back to it.
What you need: a plastic bottle with a screw cap that still fits, a craft knife, a coin or a bottle cap as a slot template, paint or stickers, and strong glue or a nail to fix the cap shut.
An adult should cut the slot. Lay the bottle on its side, trace a coin against the plastic just below the cap, then cut through the front wall only so the bank stays sealed, and widen the slit enough for the coin to fall through. Test it with the coin you traced before you let go of the knife.
To keep the cap closed, glue it and ring it with a strip of tape, or drive a nail through the cap into the thread. Paint the body before assembly so the wet paint does not gum up the slot. Decorations go on the body, not the cap, since the cap is the moving part.
Skills: cause and effect, counting money, fine motor handling of small objects.
6. Dinosaur Bottle Terrarium
A terrarium is a sensory bottle turned inside out: instead of a sealed liquid you get layered soil, and instead of watching something float you get a small world you can keep rearranging. It suits children who like dinosaurs, insects and building things.
What you need: a large clear water bottle cut and laid on its side as a viewing window, small stones, potting soil, moss or a toy plant, and a plastic dinosaur figure.
Fill from the back to the front in visible layers: stones at the base for drainage, a thick band of soil, then moss. Slope the soil to make a hill rather than a flat floor, and bury the dinosaur’s legs so it looks like it is standing rather than balanced. Everything inside must be small enough that it cannot press against the opening.
Glue a strip of cardstock along the cut edge to frame the scene and stop the plastic edges flaring. Do not use real water inside a cut bottle, since it will not stay put. If you want movement, run two drops of glycerin down the inside of the closed lid section instead, which gives a slow trickle without a spill.
Skills: sequencing layers, storytelling, descriptive language.
7. Underwater Bottle Scene
This is the one to make when the weather keeps everyone indoors. It is also the easiest project to get wrong, and the mistake is almost always air bubbles in the water.
What you need: a small juice bottle or water bottle with the cap on, blue and green acrylic paint, play sand, small shells, paper or foam fish, and a clear seal or glue.
Make the background first. Squeeze a little paint into one corner of the empty bottle and tip it to spread; painting the whole bottle with a brush wastes paint and covers your layers. Let it dry fully.
Add sand in two or three separate pours, not one, and tap the bottle gently against a hard surface after each pour to release trapped air. Press each fish into the sand at an angle, one layer at a time, so the scene has depth instead of looking like a sticker sheet. Fill with water to the neck, squeeze the cap on tightly, and glue the cap seam. Expect a few small bubbles no matter how careful you are; they read as underwater sparkle, not a failure.
Skills: ordering, fine motor placement, vocabulary for sea creatures.
8. Bottle Rocket Craft
Make this a pretend rocket, not a launch toy. It is a shelf display piece or a bookend, and it is worth saying so up front because bottles plus water plus children plus a driveway is how people get hurt.
What you need: a 2-liter soda bottle, cardboard, craft foam or cardstock for fins, silver and red acrylic paint, and glue or a low-temperature glue gun handled by an adult.
Wrap a strip of cardboard around the middle of the bottle as the body panel, then cut three fins from cardboard in the same shape. Attach them to the base, flare them outward, and paint the whole thing silver with red stripes and a row of window shapes that you paint on rather than cut out.
Add a cardboard cone to the cap for the nose cone. Nothing goes inside, nothing pressurises, and it never gets filled with water. If your child wants movement, hang it from a bedroom ceiling on clear fishing line so it turns slowly, which is the same idea as the wind spinner but without a drill.
Skills: measuring, symmetry, imaginative play.
9. Mini Marble Run
A marble run is physics with a race attached, and it is the project kids ask for twice. One bottle makes two runs if you cut it into long halves rather than quarters.
What you need: a 2-liter soda bottle, a craft knife, cardboard tubes or straws, tape, optional small plastic cups, and one marble.
An adult cuts the bottle in half lengthwise so you have two long channels with a curved base. Tape a cardboard tube or paper straw along the inside of each channel to create the ramp, leaving a short gap between ramp ends so the marble drops rather than stopping. Add a small plastic cup at the bottom as a catch, taped to the outside with a finger of clearance.
Test with a tilt rather than a hill or stairs, since a marble run on a marble run is a broken marble and a hoover job. If the marble flies out, add a taller lip at the end of each ramp. Supervise the whole first run; small marbles and hard plastic floors are not a combination to walk away from.
Skills: prediction and testing, gravity reasoning, measurement.
10. Reusable Watering Can
This is the only project here that turns into outdoor play rather than an object on a shelf, and it handles far more water than a cup. It suits a child who has outgrown sitting at a craft table.
What you need: a 2-liter bottle or larger, a craft knife, a cork or bottle cap, a length of garden hose or a firm plastic tube, wire or a wooden dowel for the handle, and duct tape.
An adult cuts a hole near the base, as low as you can while leaving enough wall, then pushes the hose through and seals it with hot glue and tape. If the tube is soft, slip a dowel inside it so it holds its shape when it points up. Puncture a few small holes in the far end of the tube with a nail heated over a hob, and only with no children in the kitchen at the time.
Cut a second hole on the opposite side for the handle, thread wire through it and tape it into a loop. Make the base flat on a hard surface so it stands when full. Mask-tape a strip of clear plastic inside so you can see the water level, and check the holes outdoors over a flower bed before anyone points it at a sibling.
Skills: tool handling, cause and effect, plant care routine.
Frequently Asked Questions
What kind of plastic bottles are best for kids crafts?
Any empty bottle works, and size decides the project. Two-liter soda bottles are the most useful for planters, bird feeders and games because the walls are thick and the shape is stable. Standard water bottles suit sensory bottles, terrariums and puppets. Small juice bottles and medicine bottles suit tiny planters, jewellery pots and miniature animals. Avoid anything glass, and skip bottles that held chemicals or motor oil.
How should I clean plastic bottles before making crafts?
Rinse the bottle, fill it with warm water and a squirt of dish soap, then scrub the inside with a bottle brush if you have one. Rinse well and let it dry completely before painting or gluing, because trapped moisture shows up later as bubbles under the paint. Most labels peel off a wet bottle after thirty seconds of soaking. Any sticky residue comes off with a cloth and a little rubbing alcohol.
Can toddlers make plastic bottle crafts?
Between two and three, treat bottle crafts as a decorating activity rather than a building one. Decorating the outside of an intact bottle with stickers, washable paint or paper shapes needs no cutting at all and works well. Anything involving scissors, a craft knife, hot glue or small caps should wait until three and up, and even then an adult should do the cutting and the gluing. Bottle caps are a real choking hazard under three.
What paint and glue are safe for plastic bottle crafts?
Acrylic paint and standard washable kids paint both stick to plastic once the surface is clean and dry, though a thin base coat of white primer gives the truest colour. For glue, a solvent-based craft glue gives the strongest bond; school glue works for paper and light decorations but peels off plastic over time. Hot glue holds well but burns, so let an adult apply it, and keep children away while it sets.
How can I stop a plastic bottle craft from leaking?
Leaking is usually a loose cap rather than a bad seal. Run a thread of clear sealer or glue around the cap threads before you screw it down, and tighten it while the sealer is still tacky. If the split is in the body rather than the cap, wrap that area with a strip of clear packing tape, or slide a bottle sleeve over the join. For anything filled with water, test it over the sink before it goes on a shelf.
Start with the Simplest Bottle Project
If you are trying this tonight, do the pencil holder. One bottle, one cut, twenty minutes, and a result that survives being handled. If you would rather wait for outdoor weather, do the planter instead, since it takes the same effort and then keeps growing.
Two habits make these projects easier. Keep the cutting and the gluing to an adult’s job, and let every bottle dry fully overnight if you are painting, because rushing is what causes peeling paint and leaking caps.
Plastic bottle crafts for kids also do something for the recycling pile that nothing else does with it: bottles that would otherwise sit empty now become a feeder in the garden or a holder on a desk. Keep the labels off the bottle before you start, since they wash off in warm soapy water in about half a minute, and recycle whatever is left over rather than binning it.