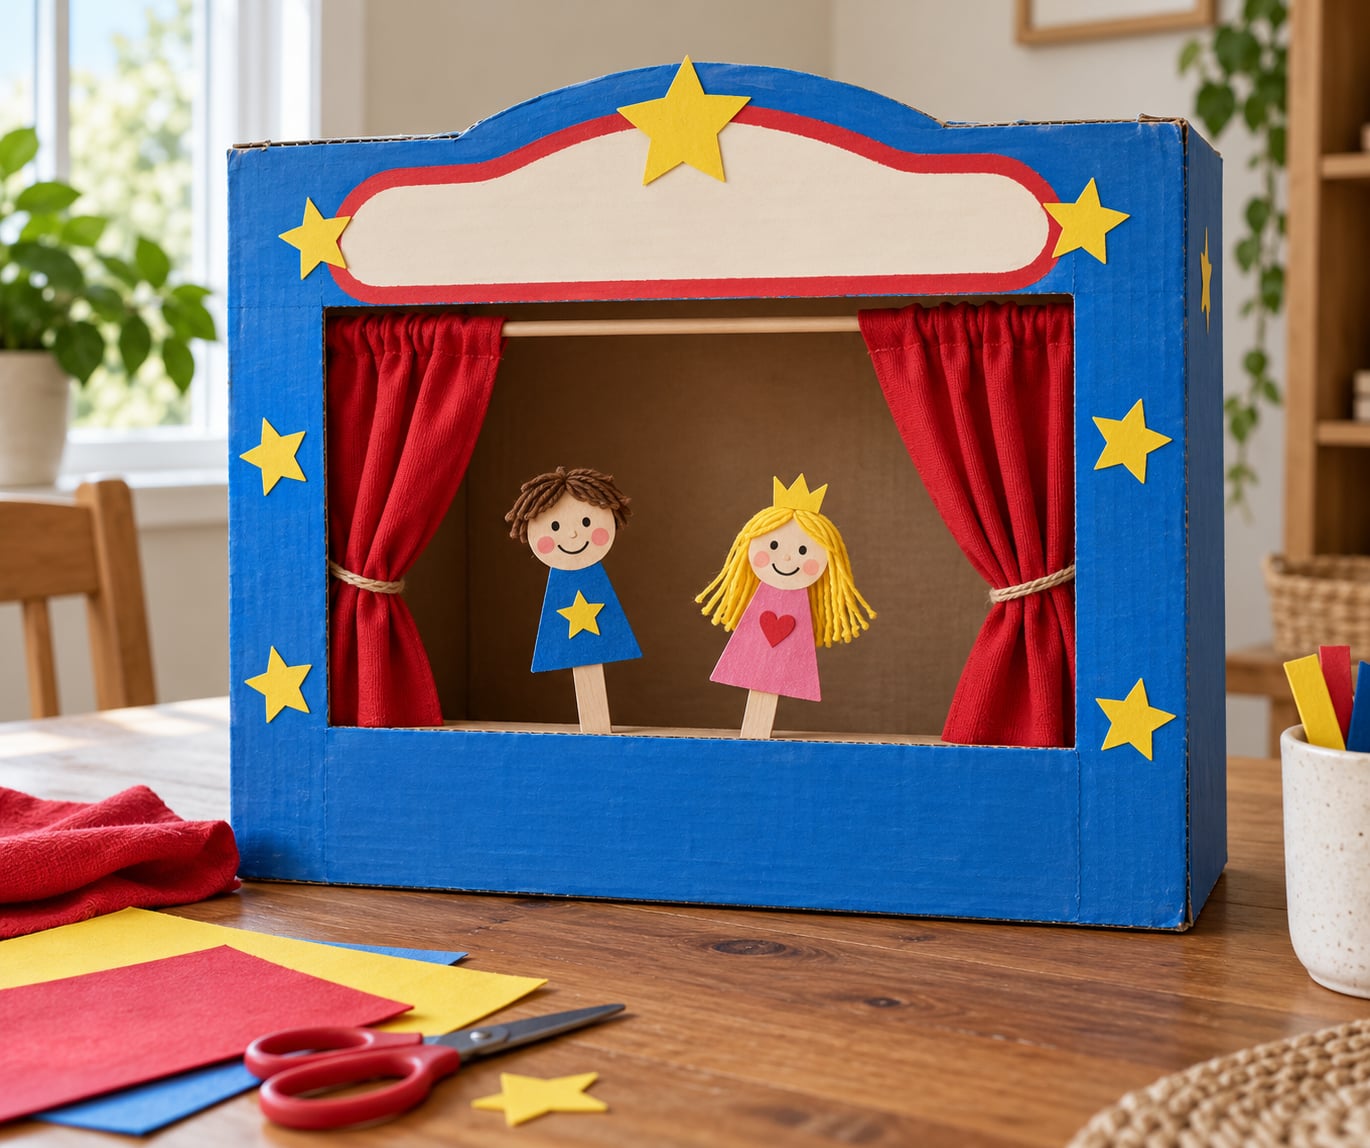
A cardboard box, a pair of scissors, and about an hour is genuinely all it takes to turn the back of a closet into a small stage. Cut a wide opening in the front panel, hang two fabric curtains inside it, and you have a shadow-proof, screen-free theater that runs on a cereal box or a discarded appliance carton. Kids usually put on their first show before the paint is dry, which tells you everything about how well this project works.
The first one I built took an entire Saturday and leaned over every time a puppet moved. The version I describe now takes an hour, and the same three decisions decide whether it holds up: pick a box with a wide flat face, reinforce it before you decorate, and make the opening bigger than you think you need. Everything else is decoration.
When you learn how to build a puppet theater from a cardboard box, the box is the easy part. The whole thing takes about an hour with a helper, and the only real decisions are which face you cut into and how big you make the opening.
Table of Contents
- What You Need to Build a Puppet Theater from a Cardboard Box
- Step-by-Step: How to Build a Puppet Theater from a Cardboard Box
- Prepare and Strengthen the Box
- Cut the Stage Opening
- Add Curtains and a Stage
- Decorate the Puppet Theater
- Add Puppet Rods and Test the Theater
- Common Mistakes
- Frequently Asked Questions
- What size cardboard box is best for a puppet theater?
- What materials do I need to build a puppet theater from a cardboard box?
- How do I make curtains that open and close?
- What kinds of puppets work best in a cardboard box theater?
- How old should a child be to make a puppet theater?
- What is a puppet show box called?
What You Need to Build a Puppet Theater from a Cardboard Box
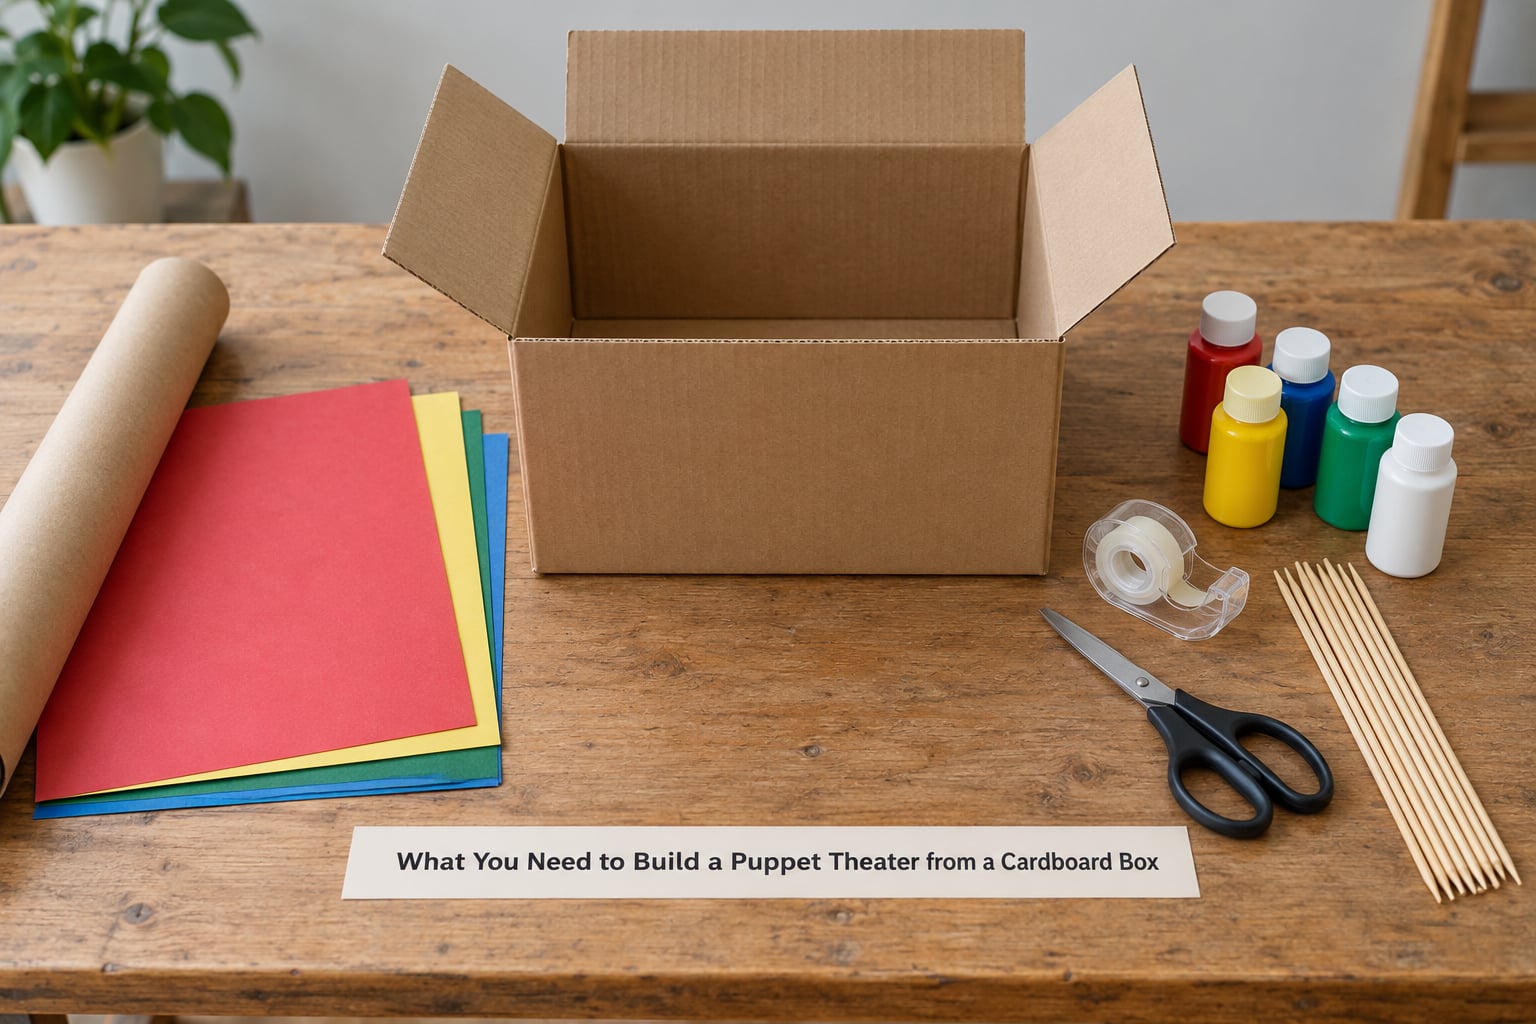
The essential list is short, and most households already have it. The optional decorating supplies are what turn a brown box into something a child is proud to show off.
Structure and tools
- One large cardboard box, ideally a flattened appliance box, a moving box, or two cereal boxes taped side by side
- Strong packing tape, masking tape, or a glue stick
- Scissors for adults, plus a craft knife if you are cutting a thick window for light
- A ruler and a pencil for marking the opening
- Painter’s tape for a straight painted edge
Stage and curtain
- Two pieces of fabric, an old towel, or a pillowcase for curtains
- A wooden dowel, craft stick, or length of string to hang them from
- Ribbon or yarn ties
- A small ledge cut from extra cardboard, roughly 2 inches deep, for the puppet rail
Decorating (optional)
- Poster paint or acrylic paint and a brush
- Construction paper, cardstock, or a roll of plain packing paper
- Stickers, pom-pom trim, buttons, glitter, or old magazine cutouts
- Scissors with rounded tips for children who are decorating
On box size, proportion beats size. A wide, shallow opening is what makes a puppet theater feel like a theater rather than a tunnel, so a 24 by 18 inch face works better than a tall narrow one. For toddlers, a single cereal box held between two books is enough. For a seven year old who wants changeable scenes, you want a face at least 20 inches across. Deep boxes are also steadier because they have a heavier base, which is worth thinking about when a three year old leans on the front panel.
Most people’s first attempt at how to build a puppet theater from a cardboard box goes wrong on the seams, not the decorating. Tape them, then cut.
One more thing worth checking before you start: skip the box if its corners are crushed or water-stained. Flimsy cardboard is the reason a finished theater ends up in the recycling bin after one afternoon.
Step-by-Step: How to Build a Puppet Theater from a Cardboard Box
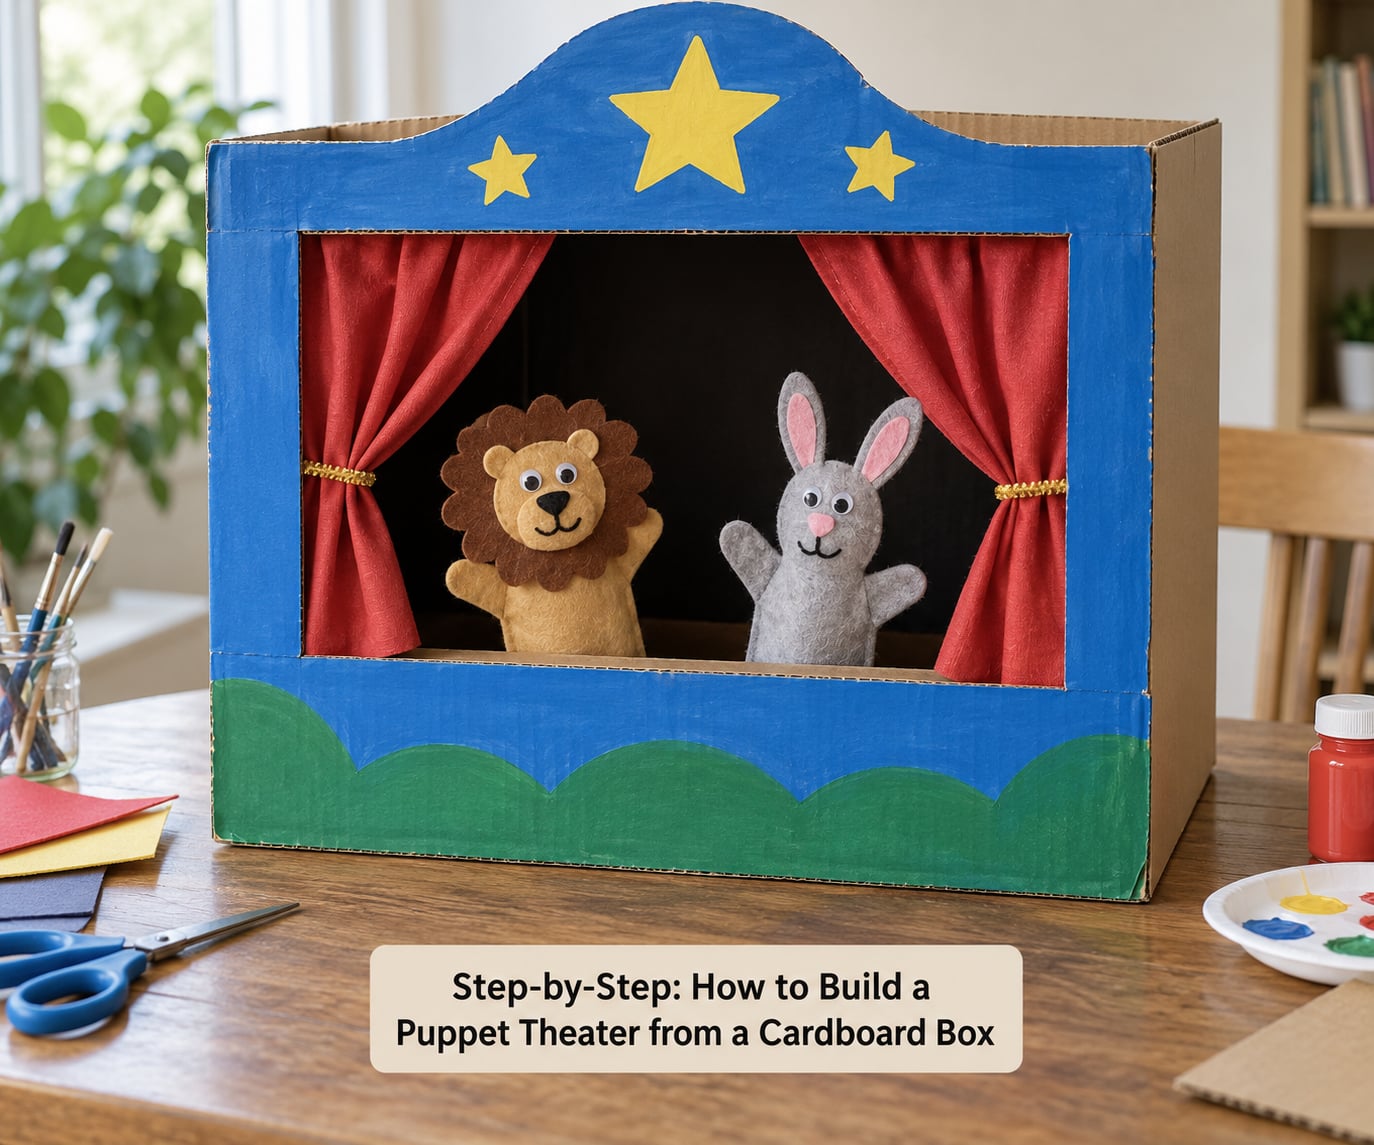
Work in this order: strengthen, cut, stage, decorate, test. Painting comes after cutting in my version, which surprises people who paint first and then discover their clean surface is full of fingerprints from taping.
Prepare and Strengthen the Box
Set the box on its front face and check that it sits flat on a table. If it rocks, trim a little off the flap that sticks out underneath. Then run strips of packing tape along every vertical seam, across each bottom corner, and over any soft spot you can press with your thumb.
The test is simple: push down on the top of the box with both hands. If nothing flexes or creaks, it is ready. For a tall box, tape a strip of cardboard across the back to stop it bowing backward when a child presses on the front.
Cut the Stage Opening
Mark the opening with a pencil before you cut anything. A good rule is to leave a 3 inch border on every side and cut no higher than halfway up the front panel, which leaves a solid band above for a sign.
Cut along the bottom line first, then the two sides, then finish with the top. Cutting the largest piece off last keeps the cardboard stable. Leave the bottom edge of the opening uncut if you want a natural ledge, or cut it fully and add a separate cardboard strip for puppet support.
Run your finger along every cut edge and fold or sand any flap that sticks up. Then hold a puppet in front of the opening and push it through. If it catches on a corner, that corner gets taped flat or widened before you go further.
Add Curtains and a Stage
Glue or tape a dowel across the top of the opening, just inside the front panel, so the curtains hang behind the frame and disappear when they part. Fabric with ribbon ties slides better than paper, which catches and tears at the fold.
For a working curtain without sewing, cut two rectangles of fabric, fold the top edge over the dowel, and run a line of glue along the fold. A length of string tied between two points across the top also works as a simple sliding rail.
Now glue the cardboard ledge inside, level with the bottom of the opening. This rail is what stops a puppet from nose-diving onto the floor, and it doubles as a shelf for tiny props.
Decorate the Puppet Theater
Mask off a border with painter’s tape, then paint the frame a solid color so the cardboard corrugation stops showing through. Two thin coats beat one thick one, and the second one goes on after the first dries.
Add a marquee sign with the theater name in large letters across the top band, and use the side panels for stars, curtains drawn in paint, or cutout shapes. Sticker and pom-pom trim work well on the proscenium arch because they add texture without weight.
Keep heavy embellishments away from the opening itself. Glitter, sequins, and pom-poms near the stage edge shed into the box, and anything glued across the front panel makes the theater feel unstable when a child pushes on it.
Add Puppet Rods and Test the Theater
Make your puppets before you hang the curtains, because you will want to know how tall they sit. A stick puppet usually wants a rod about 10 inches longer than the height of the opening, so the puppeteer can work from behind the box without hands showing.
Attach the rod to a paper plate puppet with tape at the back of the shoulders, or to a sock puppet by pushing it through the sock cuff. Wooden skewers and chopsticks hold up better than flat craft sticks, which flex and make the puppet wobble.
Now the real test. Set the box on the table, close the curtains, and run a puppet through the middle of the opening. Check three things: the puppet clears the ledge, the curtains part without catching on the rod, and the box does not slide when the rod is pushed from behind. If the box moves, wedge a rubber doorstop or a folded towel underneath.
Once it passes those three checks, add a backdrop. A sheet of plain paper taped to the inside back wall gives you a blank scene, and swapping it between acts takes about five seconds.
Common Mistakes
Almost every disappointing cardboard theater fails for one of six reasons, and all six have cheap fixes.
The opening is too small. Puppets enter, then snag on a corner, and the whole performance stops. Cut the opening 2 inches wider than you planned, leaving a 2.5 inch border for strength.
The box collapses during play. A child leaning on the front panel means an unreinforced box folds. Double the tape on the base and corners, and add a cardboard strip across the back.
Curtains fall or will not slide. Paper curtains tear at the fold and fabric without a proper top hem slides unevenly. Use a glued-over dowel rather than a taped one, and hang the fabric behind the front panel so the rod is out of sight.
Sharp cut edges. Cut cardboard is genuinely sharp enough to cut a small hand, especially along the corrugation. Fold the edges inward, tape them flat, or cover them with strips of paper tape before a child uses the theater.
Decorations make the front unstable. Thick paint, glued-on cardboard, and bulky trim add weight to the exact panel that gets pushed. Decorate the top band and side panels, and keep the area around the opening thin.
Puppets fall over. A puppet with a short rod or a wide base tips as soon as it moves. Add a small cardboard foot at the bottom of each puppet, or tape a flat base to the ledge so the puppet stands unsupported between scenes.
One more worth knowing: hot glue on thin cardboard stays flexible and lets the panel bow. Craft glue or double-sided tape holds better for structural pieces, and if you do use a glue gun, keep the nozzle away from the cardboard, which burns and browns within seconds. Rounded-tip scissors for kids, and let an adult handle any craft knife.
Frequently Asked Questions
What size cardboard box is best for a puppet theater?
A box with a face at least 18 inches wide and 12 inches tall works for most children. Wide and shallow beats tall and narrow, because a wide opening lets puppets move freely across the stage. A cereal box suits toddlers, a 24 by 18 inch moving or appliance box suits ages six and up, and a deep box is steadier because it has a heavier base.
What materials do I need to build a puppet theater from a cardboard box?
You need a cardboard box, packing tape, scissors, a pencil and ruler, two pieces of fabric for curtains, a wooden dowel or craft stick to hang them, and a strip of cardboard for the puppet ledge. Paint, construction paper, stickers, and pom-pom trim are optional. Add wooden skewers, paper plates, felt, or old socks if you are making puppets in the same session.
How do I make curtains that open and close?
Glue a wooden dowel across the top of the stage opening, just behind the front panel, then wrap the top edge of each fabric curtain over the dowel and glue it down. Hang the rod level so both curtains meet in the middle. For a no-sew version, run a string across the top of the opening and tie loops of ribbon to it. Fabric slides better than paper, which tears at the fold.
What kinds of puppets work best in a cardboard box theater?
Stick puppets made from paper plates, cardstock shapes, or cut-out characters glued to wooden skewers are the easiest to control. Sock puppets work if the rod is pushed through the cuff. Hand puppets can be used if the opening is tall enough for a whole forearm. Avoid anything much taller than the stage opening, since it will not travel through the space.
How old should a child be to make a puppet theater?
Ages three and up can decorate a pre-cut box with stickers, glue stick, and crayon. Ages six and up can measure, cut with rounded-tip scissors, and attach rods. A craft knife and hot glue should stay with an adult regardless of age, since both need adult supervision. Younger children also do better with a smaller box that sits on a table at their height.
What is a puppet show box called?
The finished stage is usually called a puppet theater, a puppet theatre, or a toy theater. The style with a flat printed front and a stage opening is also called a proscenium theater, named after the arch that frames the opening. A homemade version made from a box is sometimes called a shoebox puppet theater, after the most common box used.
Start with the box tonight. Tape up the corners, mark an opening wider than your child’s arm span, and cut it out. Paint it this weekend, add curtains and a backdrop next week, and let the first performance be an improvised one about whatever the day was like. That is the whole project.