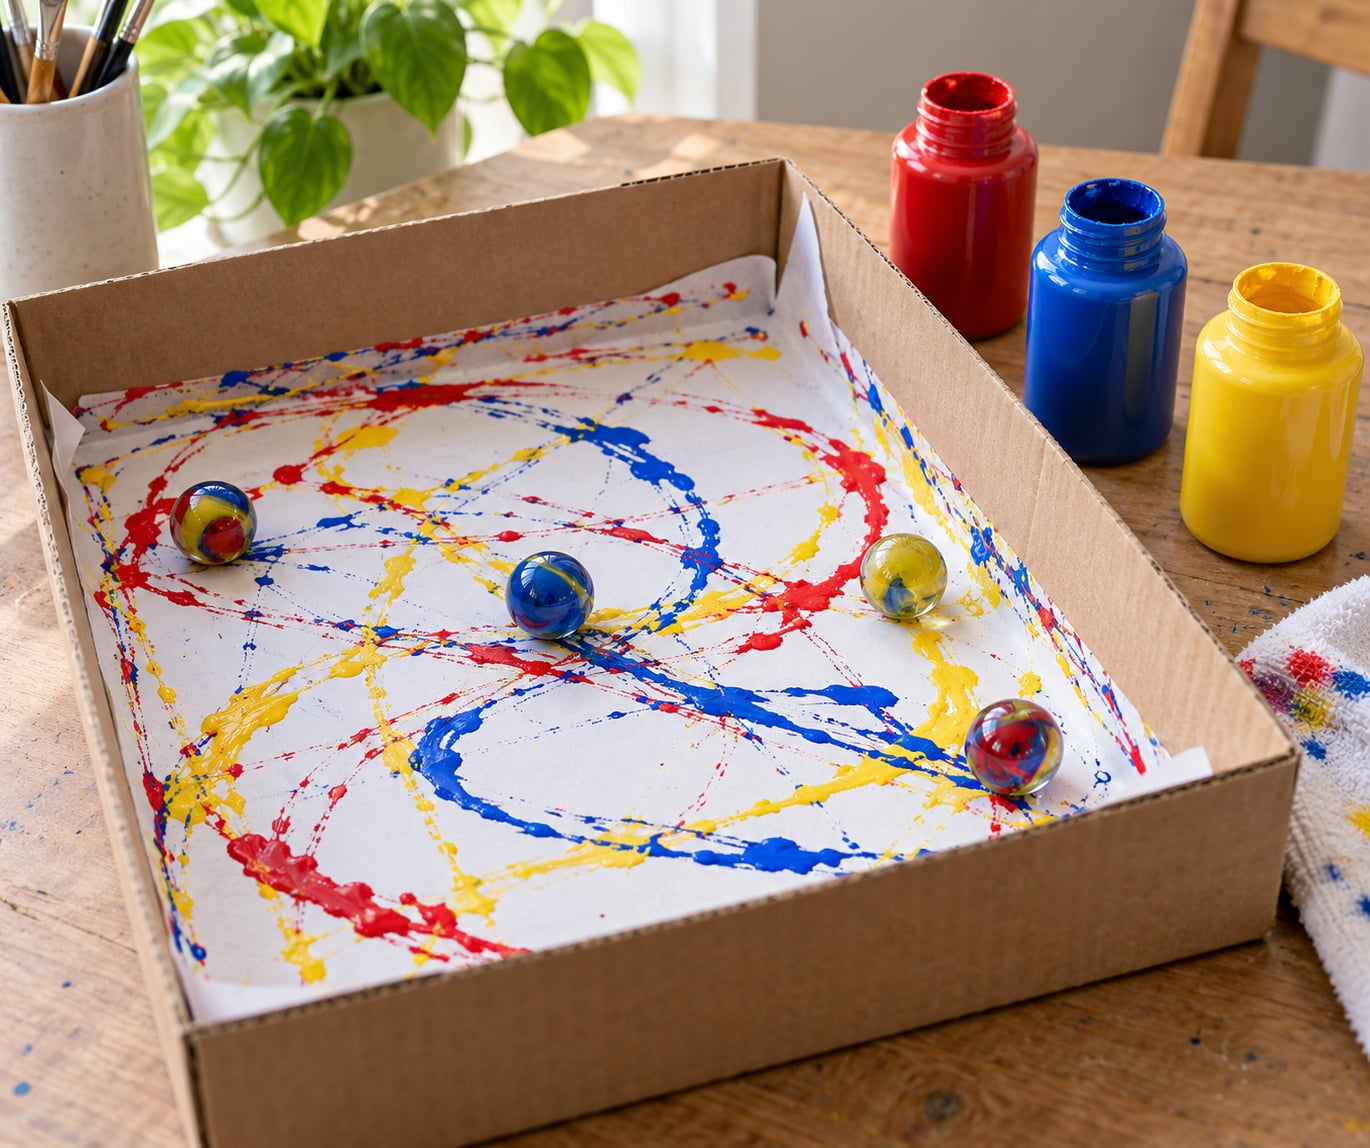
To do marble painting in a box, line a shallow cardboard box or box lid with paper, drop on small pools of washable paint, add a few marbles, and tilt the box until the marbles drag veins of color across the page. The active part takes about 15 minutes, then the paper dries flat on the table overnight.
It is one of the cheapest art activities you can set up, and almost everything comes out of a junk drawer. A pizza box lid, three colors of washable tempera, a handful of glass marbles, and a sheet of medium-weight paper are the whole list.
What makes it work is simple physics. Paint clings to the marble in a thin film, and every roll deposits that film as a trail, stretching and dragging it into lines. Tilt the box and the marble keeps rolling, so the trail repeats until the paper fills in.
This is the kids’ box technique, not traditional paper marbling or Ebru, which use alum, mordants, and size-treated paper. Nobody needs that for this.
Kids stay with it because the cause and effect is instant. A hard tilt sends the marble careening into the corner and leaves a fat streak behind it, which is more interesting than anything on purpose.
On mess: it is far tamer than it looks. The paint stays in the box, the whole thing sits on a towel or baking sheet, and the marbles rinse clean in warm water. The hands come off with soap and water.
Ages 3 and up is the sensible range, with an adult close by. Marbles are a choking hazard, so skip them for children under three or use large wooden beads you can supervise constantly. Use non-toxic washable paint and keep a damp cloth within reach.
Table of Contents
- What You Need
- Step-by-Step: How to Do Marble Painting in a Box
- 1. Set Up the Box
- 2. Add the Paint
- 3. Make the Patterns
- 4. Lift the Finished Artwork
- 5. Clean Up and Reuse the Box
- Common Mistakes
- Frequently Asked Questions
- What kind of box should I use for marble painting?
- Can toddlers do marble painting in a box?
- What paper works best for marble painting?
- How do I stop the paint from drying on the marbles?
- How long does marble painting take to dry?
- Can I reuse the paint and box afterward?
- Conclusion
What You Need
Gather everything first. Setting up takes five minutes once the supplies are out, and nothing more than a shoebox and a piece of paper is genuinely required.
- A shallow cardboard box or box lid — a shoebox lid, a pizza box, or a shallow food storage tub. Low sides keep the marbles on the paper.
- Paper — printer paper, cardstock, or watercolor paper cut to fit the base. Medium weight holds up when wet.
- Washable tempera paint — two or three colors is plenty. More turns the sheet muddy.
- Marbles — 6 to 12 glass or wooden marbles for a shoebox lid. More marbles means more coverage and more chaos.
- Masking tape — for light paper that lifts or buckles.
- A protected work surface — a towel, a sheet of newspaper, or a baking sheet under the box.
- A small plate or bowl — for dipping marbles in paint one color at a time, and for rinsing.
- A bowl of warm water — for the marbles, and for hands at the end.
No marbles? Water beads, ping pong balls, bottle caps, wooden beads, or nuts all work. They behave differently from glass: ping pong balls float on thick paint and make round blots, nuts and bottle caps are rough and scratchy, so they deposit less paint and leave more broken texture. Test one on a scrap of paper first.
Step-by-Step: How to Do Marble Painting in a Box
Set the box on your protected surface and tape the paper down flat. Then add paint, roll the marbles, and lift the paper out while it is still damp.
1. Set Up the Box
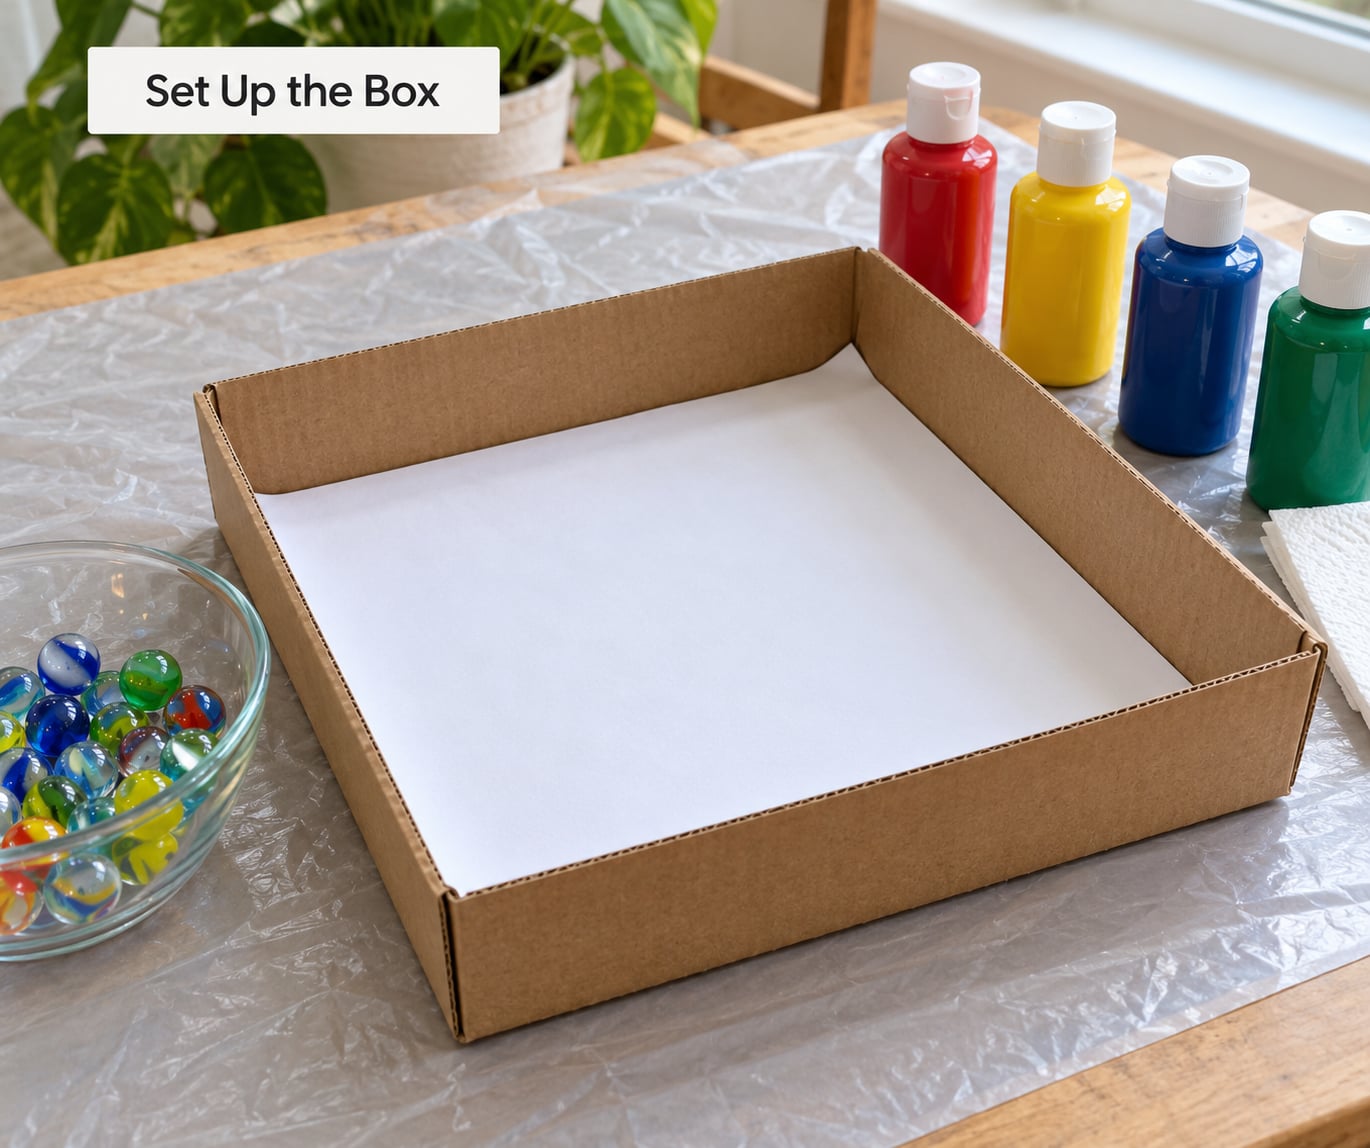
Cut your paper to sit flat inside the base, with a finger’s width of cardboard showing all the way around. Tape the corners down if the paper is light enough to move, and run the tape right across the middle of the sheet so the marble cannot catch a corner and drag it up.
Check the sides before you pour paint. Anything taller than about 3 inches lets marbles run to the wall and sit there, which is where half the paint ends up.
2. Add the Paint
Squeeze dime-sized drops of two or three colors onto the paper, spaced a few inches apart. A quarter-sized dollop is plenty.
Two colors give clean veins. Four gives a brown wash once the marble drags one color into the next, which is the single most common reason a first attempt disappoints.
3. Make the Patterns
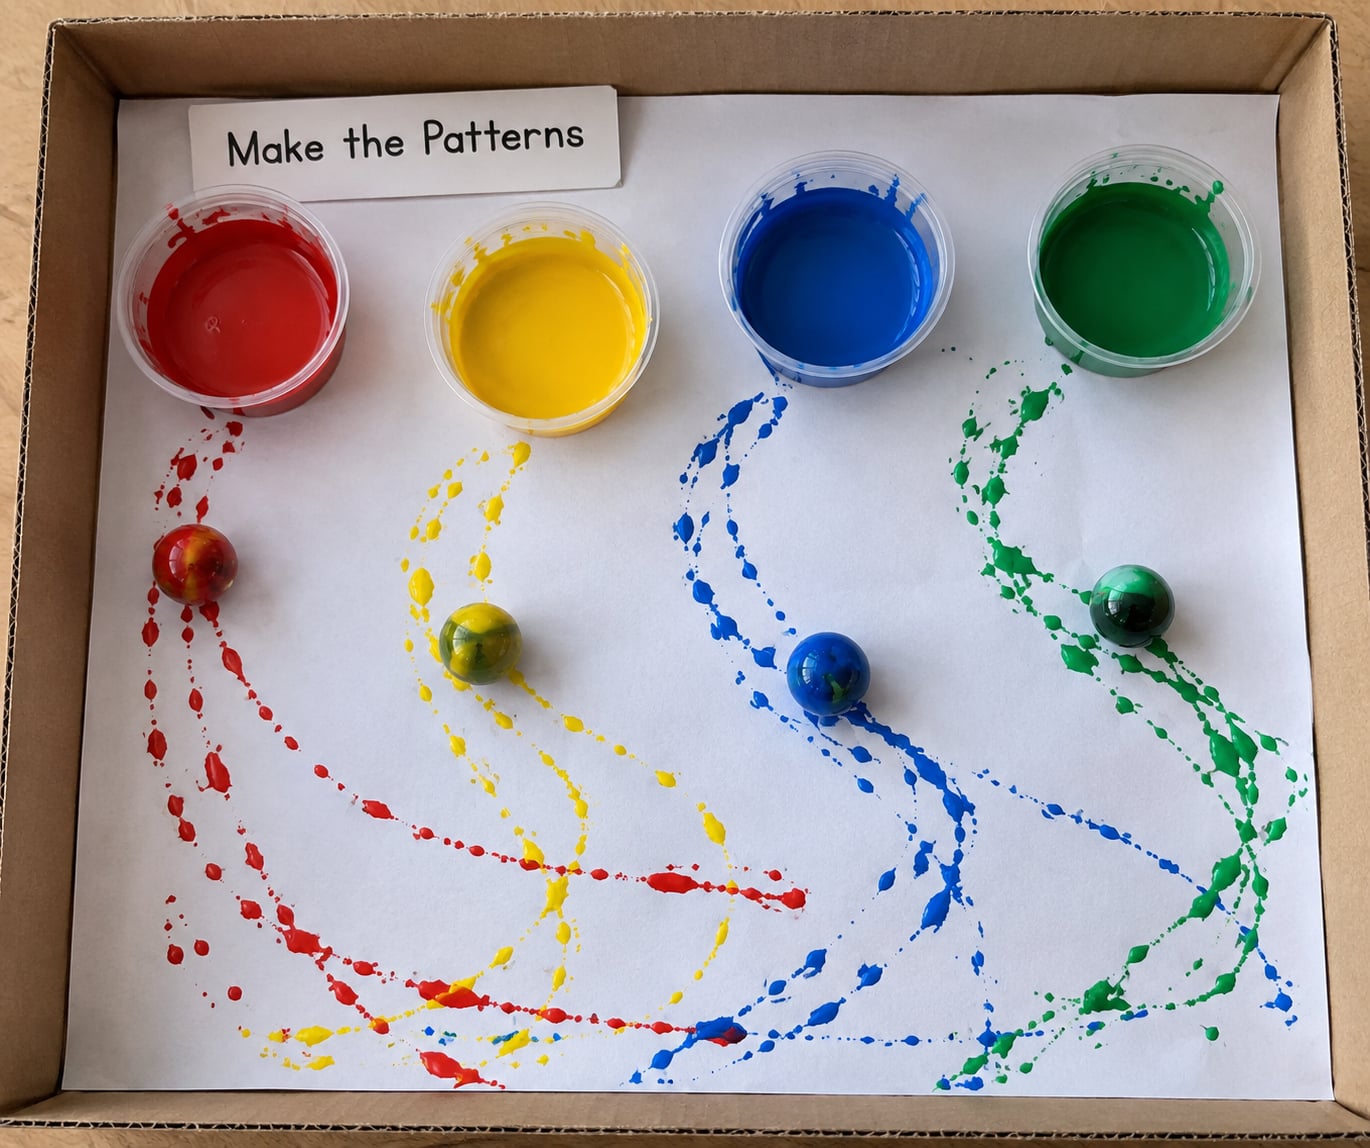
Drop the marbles into the paint, roll them in the dollops with your fingers, then set them in the middle of the paper. Tilt the box slowly forward, back, then side to side, and let the marbles do the drawing.
Marble painting in a box produces its best veining when the tilt is gentle. A steep angle flings the marble to the wall and leaves a thick stripe behind it. Small corrections, back and forth, build the layered, swirling look that makes people think of real marble.
Want fewer colors but more depth? Let the first pass dry for 15 minutes, then add a second color and roll again.
4. Lift the Finished Artwork
Lift the paper by the edges, holding it at two corners, and lay it flat on a drying rack or an empty sheet of paper. Sliding it sideways while wet will smear the paint.
If the sheet sticks in a corner, slide a spoon or a plastic spatula underneath instead of pulling. Stand the paper upright in a jar if you want to save counter space.
5. Clean Up and Reuse the Box
Pour the marbles straight into a bowl of warm water and swish them until the water runs clear, then dry them with a towel. Wash the box with a damp sponge before the paint sets.
Leftover paint goes down the sink if it is washable tempera. Wipe the base with a damp cloth while it is still wet, and let the cardboard dry on its own before you stack anything on top.
The box becomes a storage bin, a gift box, or next week’s marble run once it is clean and dry.
Common Mistakes
Most first attempts go sideways in the same handful of ways. Each one has a fix.
Too much paint. A flooded sheet has no white showing through and no visible veins. Use half what feels right, add more between layers, and stop when the trails still read as separate lines.
Tilting too fast. A hard tilt flings marbles into the corners and paints the walls instead of the paper. Roll the box slowly between your hands, using a wide, shallow arc.
Wrong paper weight. Light copy paper buckles and lets the marble drag a wrinkle across the design. Move to medium-weight paper or cardstock, and tape the sheet down if it shifts.
Leaving the paper untaped. The marble catches an edge and pulls the sheet with it. Masking tape across the corners and center solves it in two seconds.
Marbles escaping the paper. Once they reach the cardboard, they stop picking up paint. Keep the paper large enough that the whole roll path stays on it, and use low sides.
Too many colors. Four or five colors mix into mud the moment they touch. Two, or three at most, keeps every vein readable.
Lifting while wet. Moving a damp sheet smears everything into a blur. Lay it down, leave it alone, and check back in an hour.
A few habits make it easier every time. Pre-dip marbles in paint on a small plate rather than dropping them straight on. Lay down a newspaper or towel you do not mind ruining. Keep a wet cloth in one hand and a bowl under the box. Work in thin layers rather than one thick one.
Frequently Asked Questions
What kind of box should I use for marble painting?
A shallow cardboard box lid or a pizza box is the best starting point. The walls only need to be 2 to 3 inches high so the marbles stay over the paper. A pie pan or baking sheet with a rim works well for small pieces, and a clear food storage container lets you put the lid on and shake instead of tilt, which is easier for small hands.
Can toddlers do marble painting in a box?
Children 3 and up handle this well with an adult nearby. Marble painting works at about 2 years old if you pre-dip the marble in paint on a plate and give the child the box lid rather than the whole box, so the marble stays contained. Skip actual marbles under three years, since they are a choking hazard. Use large wooden beads or pom-poms instead.
What paper works best for marble painting?
Medium-weight paper is the sweet spot because it will not buckle when wet and still shows the veins clearly. Printer paper works if you tape it down. Cardstock holds up better but needs thicker paint to transfer off the marble. Watercolor paper gives the most detail and takes the longest to dry. Cut every option slightly smaller than the base of the box.
How do I stop the paint from drying on the marbles?
Rinse the marbles in warm water as soon as the painting is finished, before the paint skins over, and dry them with a towel. Dried tempera comes off glass with a soak in warm soapy water or a little rubbing alcohol on a cloth. Wooden marbles soak rather than dissolve, so rinse them right away and wipe them with a damp cloth.
How long does marble painting take to dry?
Washable tempera on printer paper dries to the touch in 30 to 60 minutes and is fully handled in a few hours. Cardstock, watercolor paper, and anything with a second paint layer take overnight. Lay finished pieces flat or stand them upright in a jar, and wait 24 hours before stacking, framing, or cutting the paper.
Can I reuse the paint and box afterward?
You can reuse the box after a wipe-down, and once the cardboard is fully dry it works as a storage bin or a gift box. Leftover washable tempera can be thinned with water and reused for finger painting or paper dipping, or tipped down the sink. Marbles rinse clean in a bowl of water and last for years.
Conclusion
The easiest way to start is a taped-down sheet of medium-weight paper in a shallow box, two or three colors of washable tempera in dime-sized drops, and six marbles rolled through the paint.
Tilt slowly, lift the paper by its corners, let it dry flat for an hour or overnight, then rinse the marbles in a bowl of warm water before the paint sets. That is the whole routine, and it is why how to do marble painting in a box stays on repeat in our house.