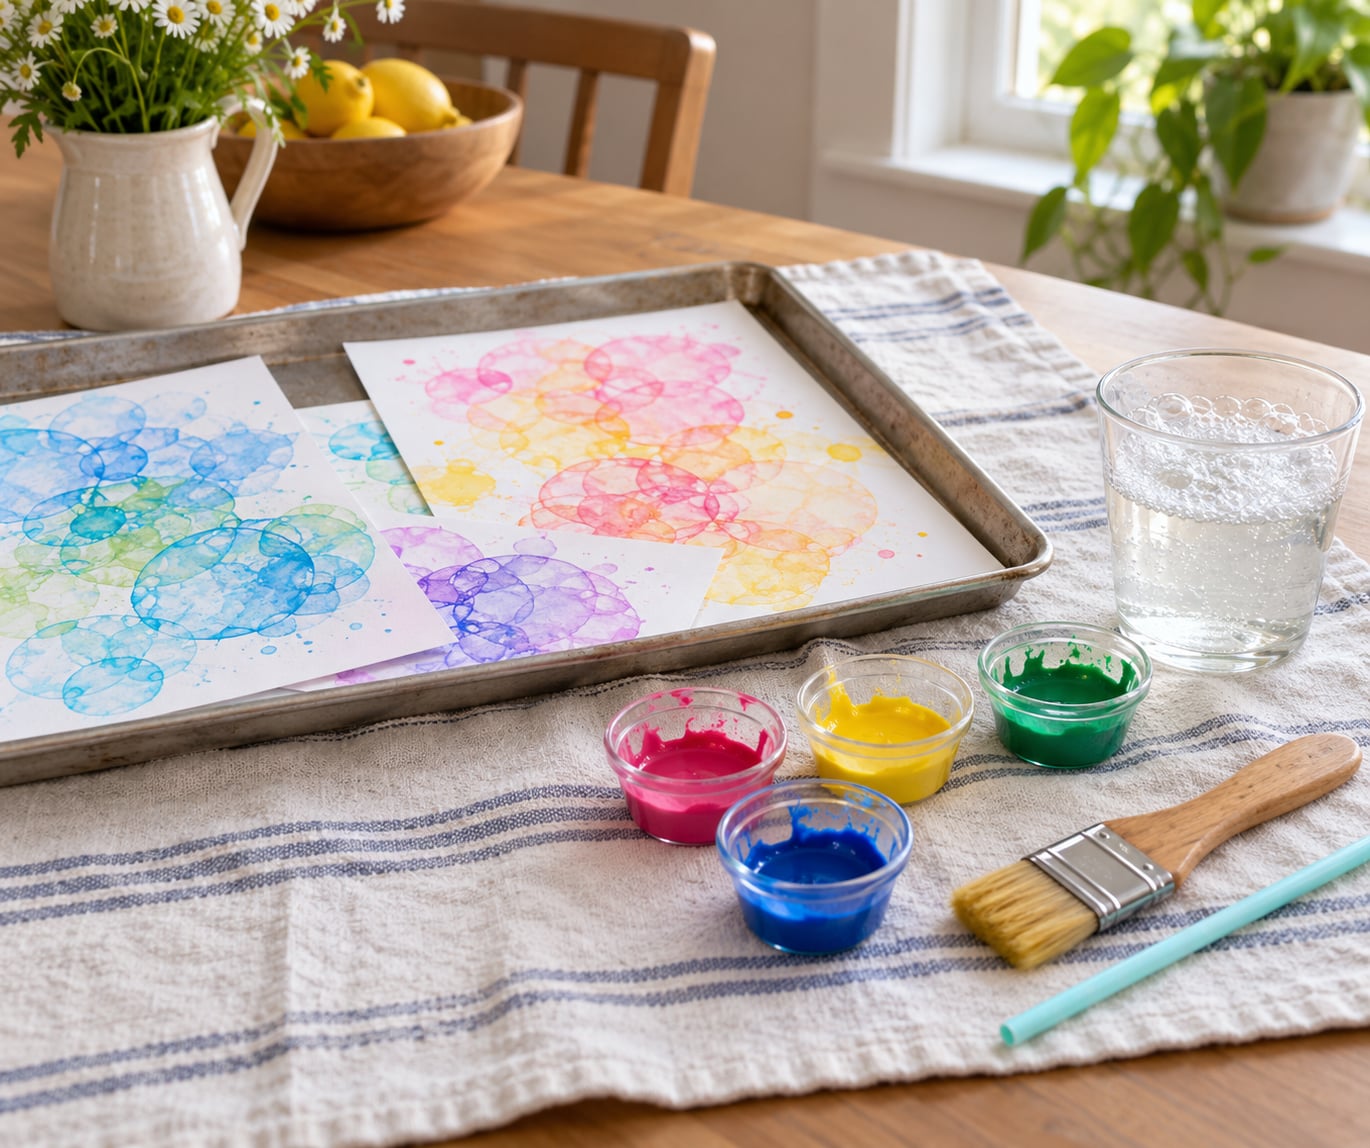
Bubble print art is a two-ingredient painting activity: mix water and dish soap, stir in a little washable paint, grow coloured bubbles, and press paper onto them. The soap film carries the pigment onto the sheet as rings and arcs, so children get a real painting without needing brush skills. Set aside about 30 minutes plus drying time.
It is one of those crafts where the mess stays in the tray and the results never look the same twice. I have done this with three-year-olds and with seven-year-olds, and the older kids get more absorbed, not less, because there is no right answer to copy.
Ages three and up can manage the basics with an adult nearby. Two is a stretch, mostly because blowing bubbles through a straw reliably ends with someone drinking the mixture.
Table of Contents
- What You Need for Bubble Print Art with Kids
- How to Make Bubble Print Art with Kids: Step-by-Step
- How to Make Bubble Print Art with Kids: Mix the Bubble Solution
- How to Make Bubble Print Art with Kids: Prepare the Paint
- How to Make Bubble Print Art with Kids: Create the Bubbles
- How to Make Bubble Print Art with Kids: Transfer the Print
- How to Make Bubble Print Art with Kids: Finish and Display
- Common Bubble Print Art Mistakes and Easy Fixes
- The bubbles will not hold
- The colour runs straight through
- The prints come out faint
- The paper sticks or tears
- The mess gets out of hand
- Frequently Asked Questions
- What age can do bubble print art?
- What paper works best for bubble printing?
- Can toddlers do bubble print art?
- Why isn’t the colour showing on my bubble prints?
- How long does bubble print art take to dry?
- Can you do bubble printing on canvas or fabric?
- Conclusion
What You Need for Bubble Print Art with Kids
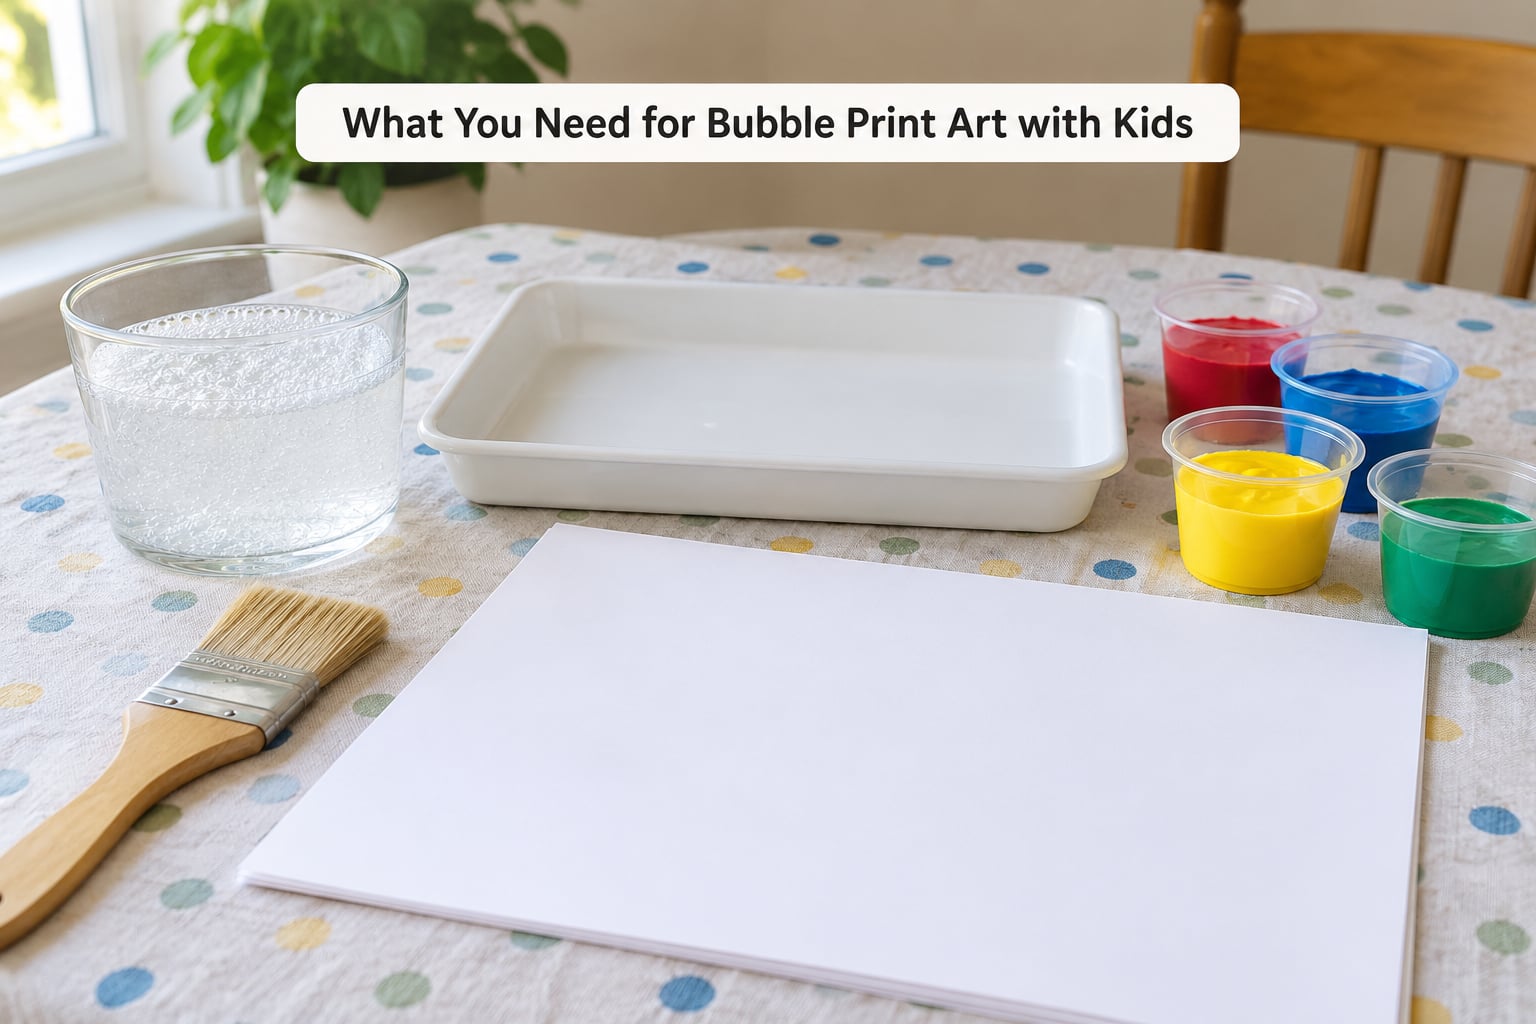
The core list is short enough that you can assemble it while the kettle boils.
- Dish soap — 1/2 cup, the standard washing-up liquid works fine
- Water — 1 1/2 cups, warm rather than hot
- Washable tempera paint or liquid watercolours — 1 to 2 tablespoons per colour
- A shallow bowl or baking tray — wider is better because bubbles need room
- Small plastic cups — one per colour, so a child can dip and pour safely
- Paper — large white cardstock or heavy drawing paper
- A drinking straw, a bubble wand, or a wide flat brush — one of the three is enough
- A washable cloth or plastic tablecloth — for under the work surface
- Old towels and a bowl of warm water — for cleanup
Which items a child can handle alone is a fair question when you are setting up with more than one. Cups, straws, paper and a brush can all go straight into small hands. Mixing the soap, pouring water and cutting paper are adult jobs, and they take about two minutes.
A plastic tablecloth matters more than it sounds. The paint mixture is thin enough to run off paper, and it will find any gap in the covering.
How to Make Bubble Print Art with Kids: Step-by-Step
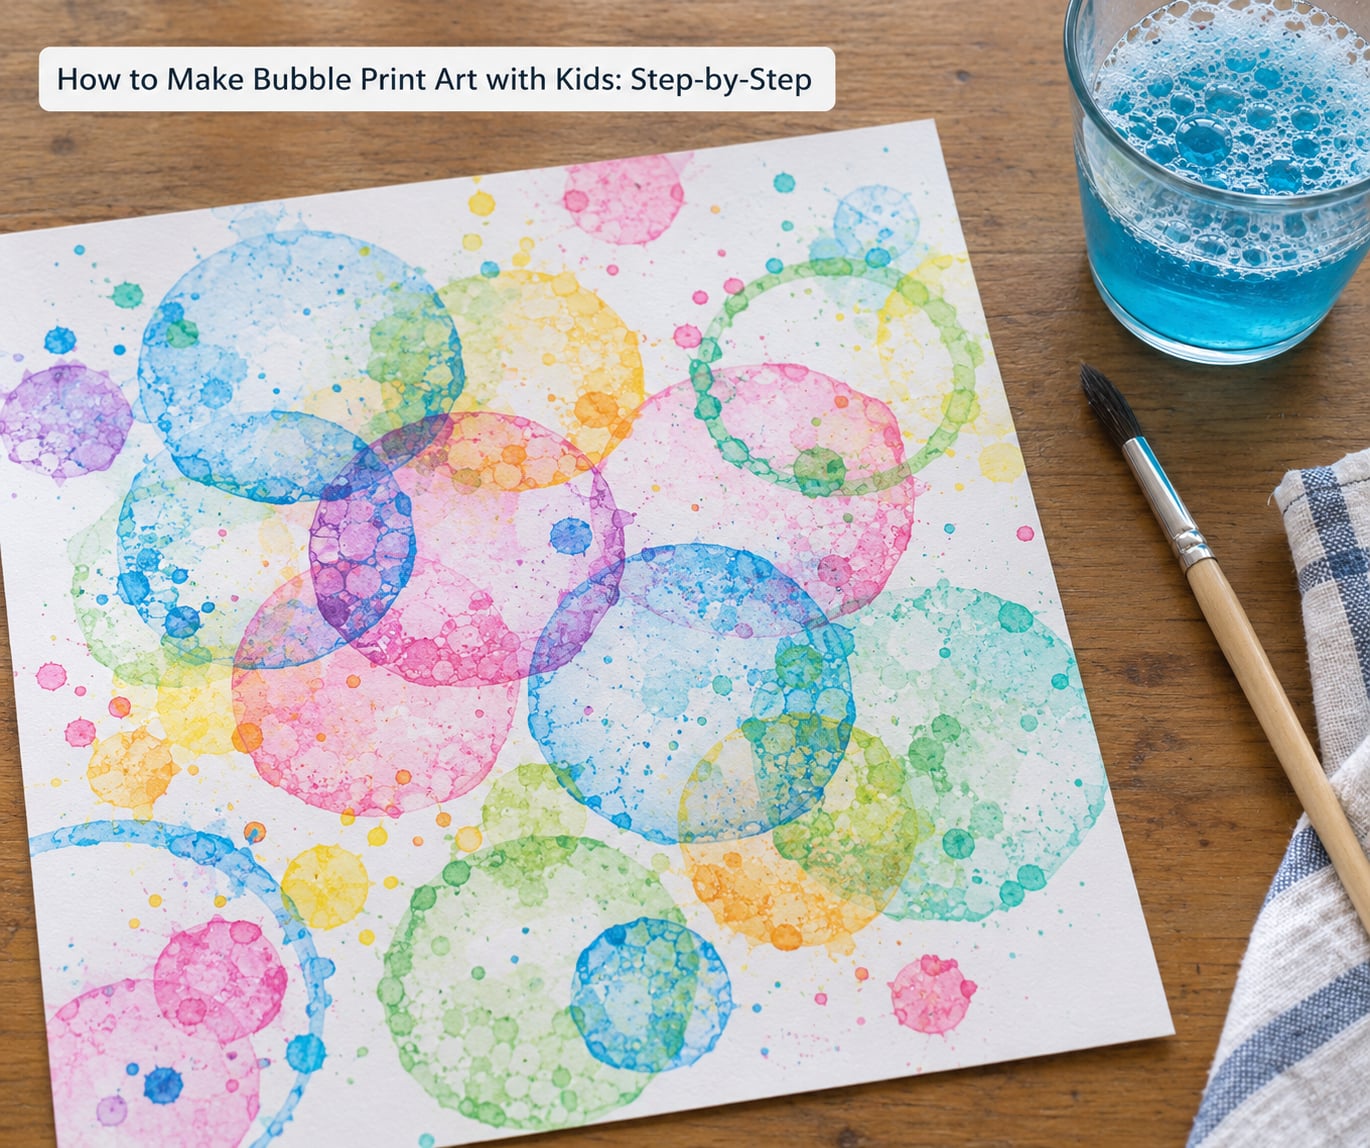
Five steps, about half of which is setup. Once the cups are filled, the making part takes five minutes flat.
How to Make Bubble Print Art with Kids: Mix the Bubble Solution
Pour 1/2 cup dish soap into a bowl and stir in 1 1/2 cups of warm water. Stir slowly and let it sit for a minute — bubbles that have been frosted into foam collapse faster than ones you have let settle.
If the mixture will not hold bubbles, add a tablespoon of water and stir again, gently. If you want bubbles that last noticeably longer, add two teaspoons of corn syrup or liquid sugar. That is the one variation worth knowing, and it makes the colours far easier to catch.
How to Make Bubble Print Art with Kids: Prepare the Paint
Put one colour in each small cup and add the bubble solution a spoonful at a time until it runs like thin cream. Too thick and the colour sits in a blob at the bottom of the bubble; too thin and it never shows up on the paper.
Aim for three or four colours to start. More than that gets muddy fast, and the overlaps are where the interesting colour mixing happens anyway.
How to Make Bubble Print Art with Kids: Create the Bubbles
Dip a straw into a cup and blow gently across the surface to raise a cluster of small bubbles, or wave a bubble wand just above the mixture to drop a curtain of them. A wide flat brush also works — load it and hold it face down over the tray.
Keep straws out of mouths. Have children blow into the cup away from their face, and if anyone gets solution in their eyes, rinse with clean water straight away. Dish soap is meant for dishes, not for eyes.
How to Make Bubble Print Art with Kids: Transfer the Print
Lay the paper gently on top of the bubbles, hold it there for a couple of seconds without pressing, and lift it away. Pressing hard bursts everything at once and leaves a pale wash instead of rings.
Repeat with a second colour while the paper is still damp. The layers overlap and the shapes do not match, which is exactly the point.
How to Make Bubble Print Art with Kids: Finish and Display
Leave the sheet flat somewhere out of the way until the paint dries, then add details in pen or pencil once it is fully dry. Faces, monsters, seaweed and planets all grow out of the pattern nicely.
Once dry, the paper can be cut up for cards and gift tags, or taped to a classroom wall as a collaborative piece where each child adds a corner.
Common Bubble Print Art Mistakes and Easy Fixes
Almost every disappointing bubble print comes down to one of four things. The fix is usually a small change earlier in the process rather than anything you do at the end.
The bubbles will not hold
The mixture is too concentrated or has been over-stirred into foam. Let it sit for a minute, add a tablespoon of water, and try again. Cold water also weakens the film, so use lukewarm.
The colour runs straight through
The paint is too thick for the paper to hold. Stir in another spoonful of bubble solution. If you are on thin printer paper, move to cardstock — light paper wicks the mixture through before it can set.
The prints come out faint
This is the most common complaint, and it has three causes. The bubbles popped before the paper landed, the paint was diluted too far, or the colour was too light to read. Add corn syrup for longer-lasting bubbles, use less water in the paint, and try a deeper colour such as teal or purple instead of pale yellow.
The paper sticks or tears
The bubble film has dried before you lifted. Press and lift in one movement with no pause, and keep a second sheet ready so you are not holding the first one up while waiting.
The mess gets out of hand
Work inside the tray with the paper no larger than the tray, and keep the cups within reach. Outdoors on a porch or in a bathtub is even better — but do not leave a young child unsupervised with bowls of water outdoors.
Cleanup is warm water, dish soap and a cloth, which is one of the better arguments for this activity. If a coloured ring shows up on a table later, a paste of baking soda and water lifted with a cloth usually shifts it.
Frequently Asked Questions
What age can do bubble print art?
Three is a reasonable starting age for the basic technique, with an adult close by. Children that age can dip a straw, blow gently and lay paper on top, which is most of the activity. Under three, the appeal is mostly blowing bubbles rather than printing with them, and the habit of drinking from the straw makes it a frustrating one. Five and up, kids start controlling the size of their bubble clusters and choosing their own colour sequences.
What paper works best for bubble printing?
Heavy cardstock or good quality drawing paper. The paper needs enough weight to stay flat when damp, and thin printer paper wicks the mixture straight through before the pigment can settle. Watercolour paper works and takes the colour more deeply, though the result is softer. Newspaper is good for a first trial if you want a cheap practice run, since staining is not a problem when the paper was never meant to be kept.
Can toddlers do bubble print art?
With close supervision, yes, but most adults find it stops being a printing activity and turns into bubble blowing. The two problems are blowing technique, which takes practice, and the drinking question, which comes up every time. A better toddler version is a shallow tray of coloured bubbles with a few sheets of thick paper and no straws at all. They make marks by pressing, patting and dragging paper through the foam instead.
Why isn’t the colour showing on my bubble prints?
The usual causes are bubbles popping before the paper lands, paint diluted past the point of visibility, or a colour too light to read against white. Fix it by adding two teaspoons of corn syrup to lengthen bubble life, using less water in the paint, and switching to a stronger colour. If you skipped the corn syrup and work fast, you will also see a lot more colour on the paper. Timing is everything here, and it takes a few rounds to feel it.
How long does bubble print art take to dry?
Usually one to two hours on a flat surface at room temperature, longer if you layered several colours or used thick cardstock. Anything more than about a day and you are waiting on humidity rather than the paint. Dry it flat and out of direct sun, and do not hang it while it is still damp or the rings will streak. Once dry, the colour is fairly permanent on paper.
Can you do bubble printing on canvas or fabric?
You can, but swap tempera paint for fabric dye and expect the colours to land lighter. Regular washable tempera sits on top of the surface and rubs off, while dye bonds to the fibre. On stretched canvas, use dye thinned with bubble solution and treat the finished piece with a fabric medium so it survives a wash. On a tote bag, keep the prints away from anything that gets washed often.
Conclusion
Start with the mixture: half a cup of dish soap and a cup and a half of warm water, stirred and left to settle. Cover the table, dilute one washable paint with that solution, and let your child grow a cluster of bubbles and press paper on top. Add the corn syrup if the colours are not showing up.
Once the first print works, layer two or three colours on the same sheet. The overlapping rings are where the good ones come from, and that is the part children keep asking to do again.