Pour painting is the easiest way I know to get a child genuinely excited about art: you thin washable paint, pour it onto a canvas or heavy paper, and let gravity do the pretty part. Learning how to make pour paintings with kids takes about 20 minutes of setup and 30 minutes of pouring, and the mess is manageable if you cover the table first. No brushes, no sketching, and no wrong answers.
My youngest was three the first time we tried it and finished a piece she still keeps on her wall. An adult stays close for the pouring, but the tilting and layering is genuinely child-led, which is why it holds their attention longer than most craft time. Here is the full process, including the four problems that come up every single time and how to fix them.
Table of Contents
- What You Need
- Step-by-Step
- Step 1: Prepare the Painting Area
- Step 2: Choose and Thin the Paint
- Step 3: Pour the First Colors
- Step 4: Tilt and Layer the Paint
- Step 5: Add Simple Pour-Painting Details
- Step 6: Let the Painting Dry
- Common Mistakes
- Tips for Pour Paintings with Kids
- Frequently Asked Questions
- What kind of paint is best for pour paintings with kids?
- Can children make pour paintings without a canvas?
- Do I need to thin the paint before pouring it?
- What can I use instead of cups for pouring paint?
- How do I stop pour paint from running off the edges?
- How long does a kids pour painting take to dry?
- Make Your First Pour Painting
What You Need
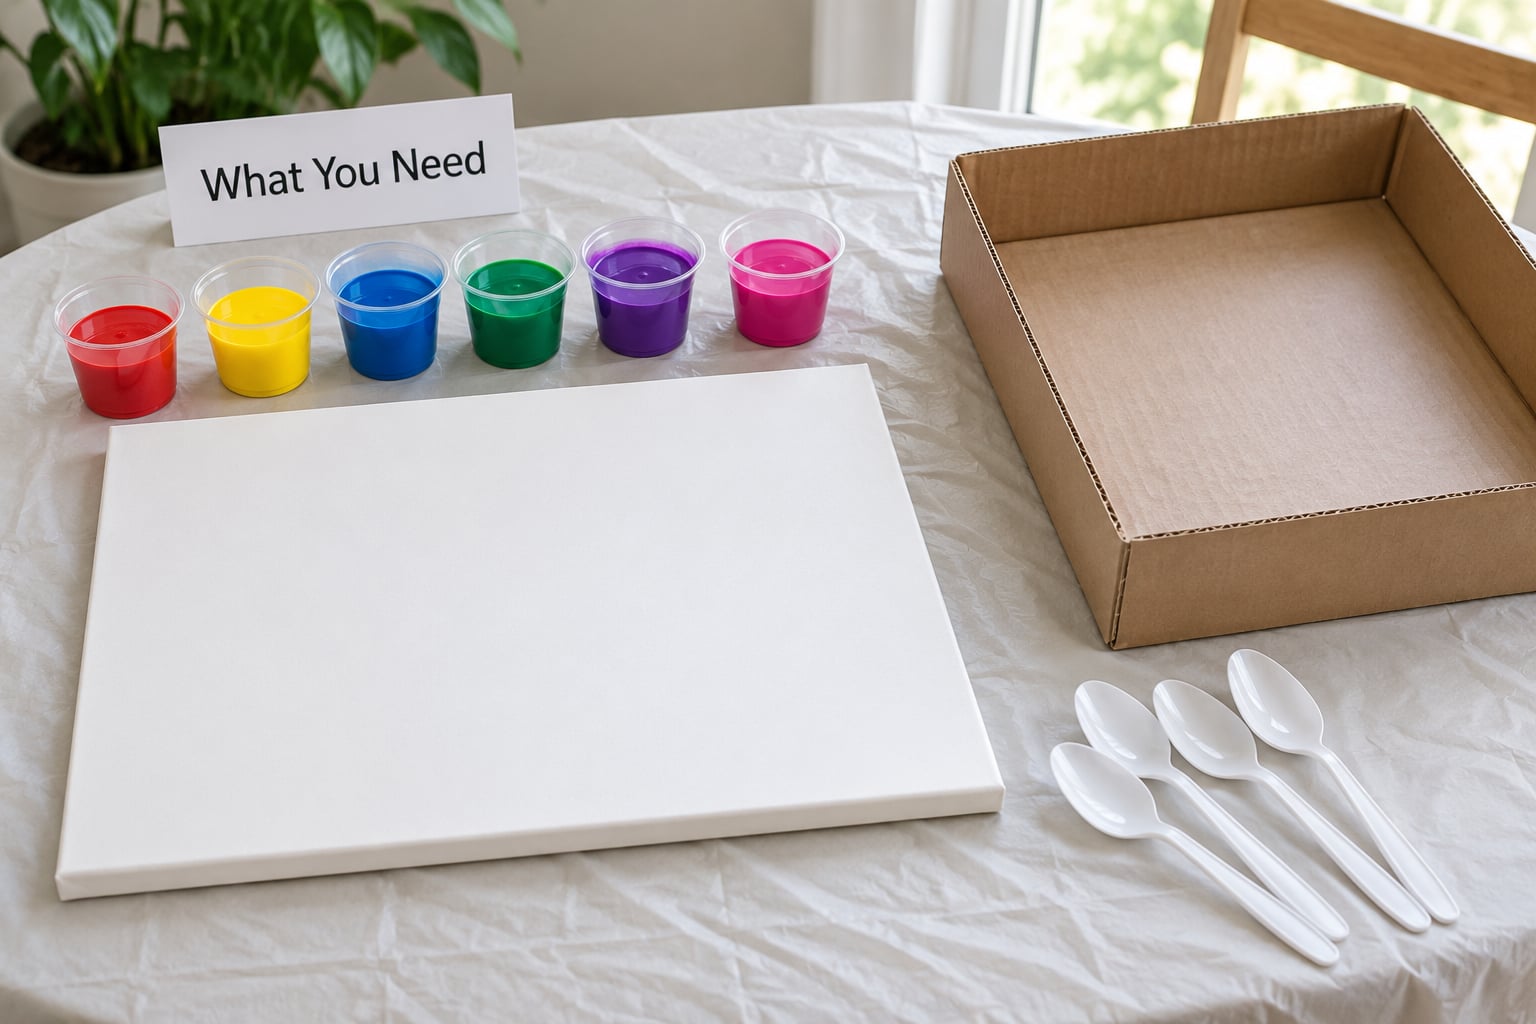
The list is short, and most of it is things you already have. For one child working for about half an hour:
- Surface: one 8 x 10 inch stretched canvas, a canvas board, or a sheet of heavy card stock taped to a piece of cardboard.
- Paint: about 60 ml (a quarter cup) per color, three or four colors total.
- Pouring medium: 120 ml (a half cup) if you are thinning regular acrylic yourself. Skip it entirely if you buy paint that is already mixed to pour.
- Cups: five or six small plastic cups, or one cup per color plus a spare.
- Pouring tools: plastic spoons, a paper straw, or a craft stick per child.
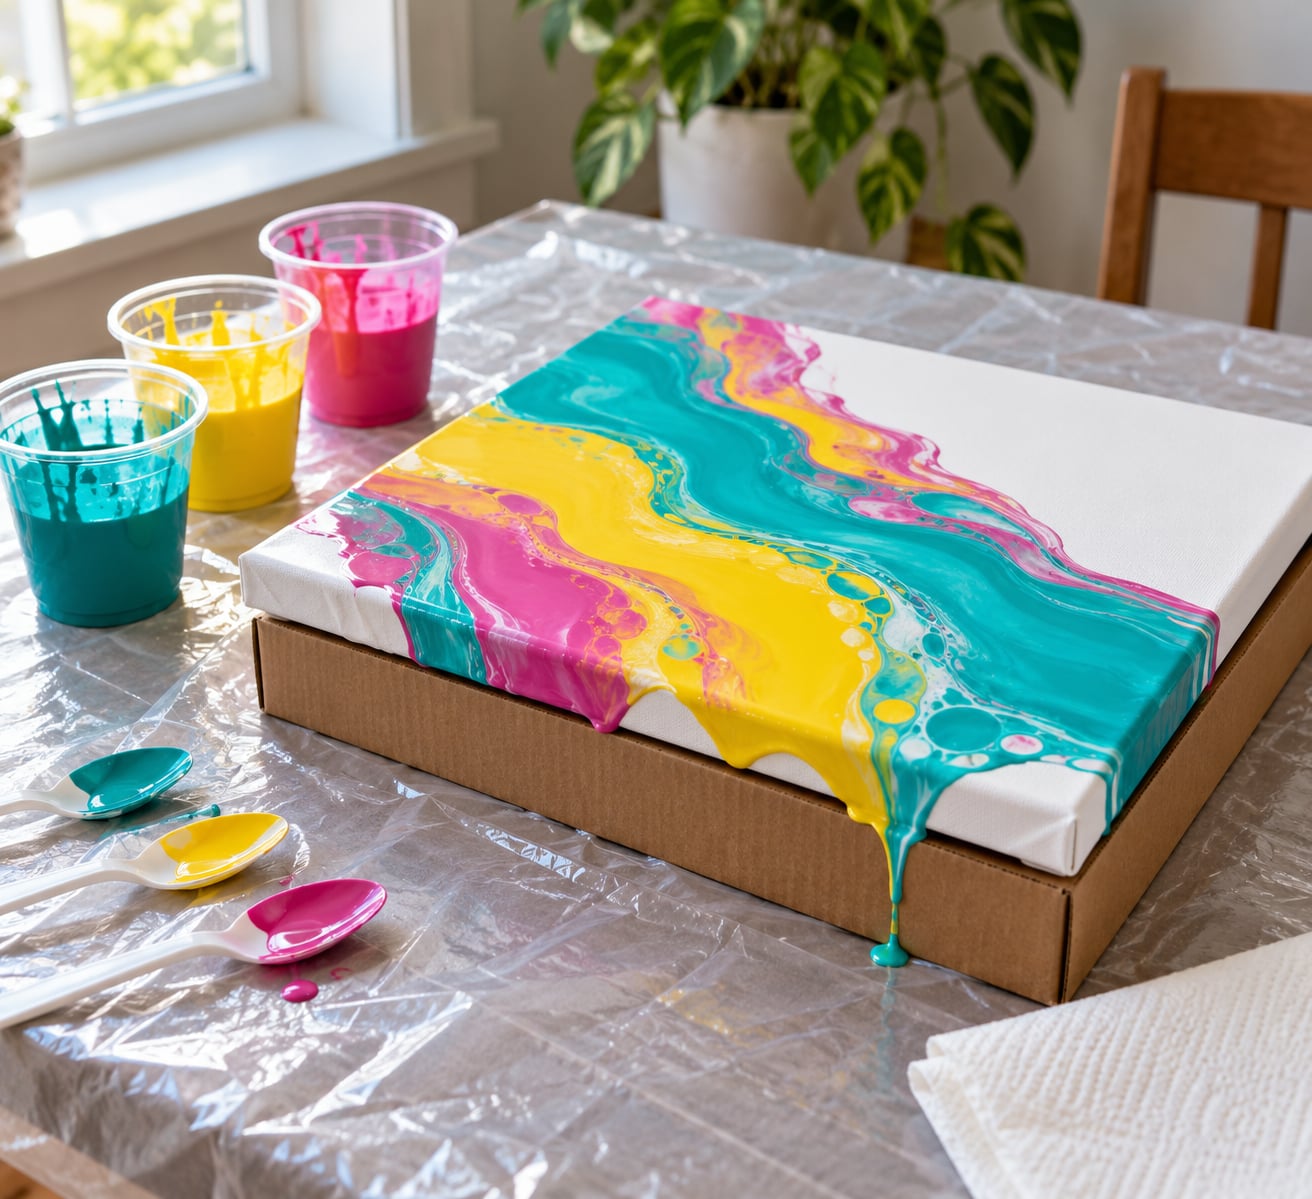
- Drip catcher: a shallow cardboard box, a plastic tray, or a plastic plate under each canvas.
- Protection: a plastic tablecloth or shower curtain, paper towels, and an old sheet for the floor if the table is near it.
Two paint routes work here. The first is premixed pouring paint, which is already the right thickness, so you pour straight from the cup and the whole activity is easier. The second is regular acrylic paint thinned with a pouring medium at roughly 2 parts paint to 1 part medium. That is the ratio most beginner kits use and it flows like thick cream.
If you would rather not buy a medium at all, school glue works as a stand-in. Mix two parts acrylic paint with one part white school glue, stir slowly, and let it sit for a few minutes so the bubbles rise. The result runs a little thicker and pours slower, and some people notice a faint glue smell while it is wet, so ventilate the room. It is a real option, not a compromise.
Tempera paint is the other substitute worth knowing. It is thin, washable, and cheap, needs no thinning at all, and is what most preschool washable paint actually is. The result dries flatter and more matte than acrylic, which is fine for a first pour.
Step-by-Step
Step 1: Prepare the Painting Area
Cover the table edge to edge and tape the cover down past the overhang. Put the cardboard box or plastic tray on top, and set the canvas on top of that so any overflow has somewhere to go that is not the floor.
Fill each cup one third full and set them in a row at the back of the table, within reach but away from the canvas edge. Lay out one spoon per child before anyone starts. Doing all of this first is what separates a calm activity from a frantic one, because nobody has to stop mid-pour to find something.
Step 2: Choose and Thin the Paint
Pick three colors to start, ideally ones that look good side by side. Blue, yellow, and white is a reliable trio. Red, blue, and yellow will turn brown in the middle, which surprises people the first time.
Stir each cup with a spoon or a craft stick for about 30 seconds. If the paint forms a ribbon as it falls off the spoon, it is right. If it plops in a lump, add a splash of water; if it runs like milk, add a little more paint. Kids can do this stirring step themselves, which keeps them busy while you set up the rest.
Step 3: Pour the First Colors
Have each child pour their first color in one spot near the center of the canvas, not in a spiral around the rim. Puddles in the middle give the paint room to travel when you tilt.
Then let them add a second color right next to it, touching but not fully overlapping. Pours that start close together make cleaner bands than pours spread across the whole surface. A squeeze bottle with a fine nozzle gives more control for younger children who tend to pour with enthusiasm rather than aim.
Step 4: Tilt and Layer the Paint
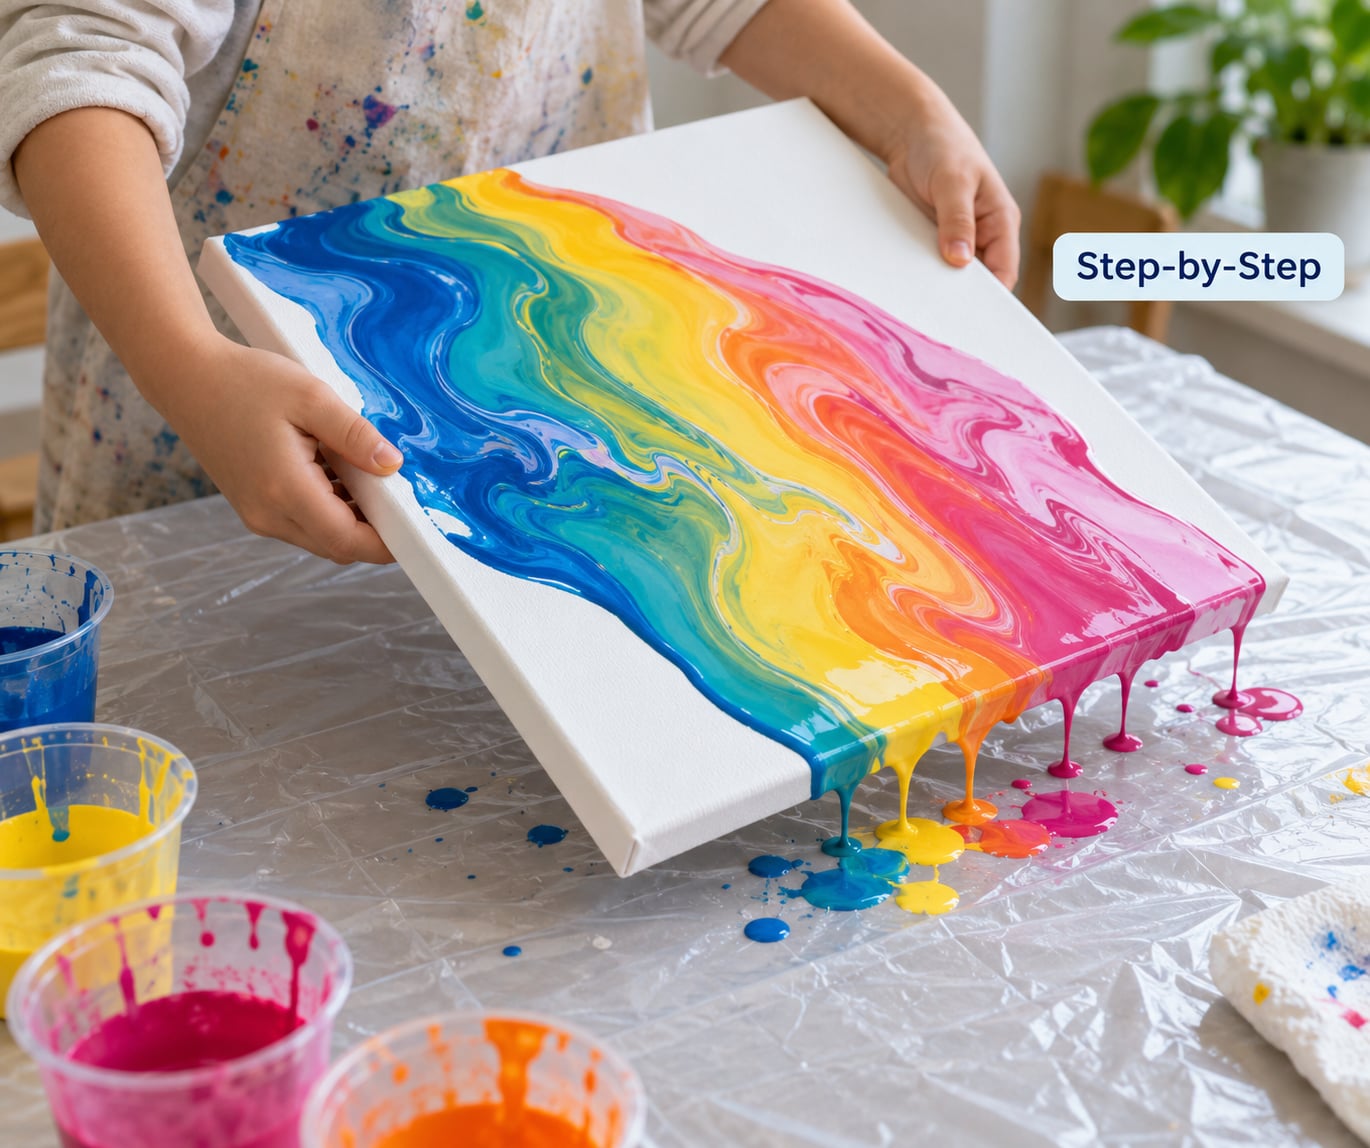
This is the good part. Pick the canvas up by the edges and tilt it slowly in one direction, then another, letting the paint run into wide bands. Slower tilting gives cleaner edges than fast tilting.
Let your child do this while you steady the bottom corner. Tilting is repetitive, physical, and hard to get bored of, so many kids stay with it for ten minutes on their own. Pause between directions to let the paint settle, then add another cup of color and tilt again for a new layer. Two or three layers is plenty before the colors start turning muddy.
Step 5: Add Simple Pour-Painting Details
While the paint is still wet, a craft stick dragged through the puddle pulls a thin line of one color through another and creates a feathered effect. A paper straw blown gently across the surface pushes paint into cells and lacy shapes, though the results are unpredictable and that unpredictability is the appeal.
Splattering with a spoon is the messiest option, so save it for outdoors or drop it entirely if you are trying to keep the table clean. A few dots made with the end of a craft stick add texture without much risk. One or two details is plenty; more tends to muddy an otherwise clean pour.
Step 6: Let the Painting Dry
Leave the canvas flat on the raised surface. Do not stack anything on it, and keep curious hands away, because a fingertip print stays in the paint permanently.
Surface dry to the touch takes about 30 minutes to an hour depending on how thick the paint is. A piece can feel dry and still dent if you press it, so give it overnight before moving it. Fully cured takes two or three days.
Once cured, you can seal it with an acrylic varnish or clear coat if you want the colors sealed permanently and wipeable. If your child will keep eating near it or you plan to cut it up for cards and bookmarks, sealing is worth the extra cost. Otherwise, a canvas stored flat is fine on its own.
Common Mistakes
The paint runs off the edges. Nearly always means too much paint or a canvas sitting flat on the table. Use less paint per cup, roughly a third cup for an 8 x 10 canvas, and elevate the surface on a box or tray with a lip. Any paint that reaches the edge becomes a drip rather than a run.
Colors turn muddy. That is what happens when three or more colors sit in the same place at once. The fix is layering instead of mixing: pour one color, let it spread, then add the next. Also watch out for the red-blue-yellow trap mentioned earlier.
Paint is too thick to move. It will sit on the canvas as a blob. Add a small amount of water or medium and stir again, aiming for the ribbon test in Step 2. Thick paint is easier to salvage than thin paint, so add liquid a spoonful at a time.
Too much mess. The single biggest cause is thin paint plus a flat surface. Thicken the paint, raise the canvas, and move the whole setup to a table near a sink. Painting one child at a time while the others do something else also cuts the chaos dramatically.
The paint will not move at all. If tilting does nothing, the paint has started setting. With fast-drying acrylic, work within a few minutes of pouring. If the piece is already skinning over, stop and let it dry flat; the finish will be less fluid but still good-looking. Pouring medium slows this down, which is one of its real benefits.
Pouring medium quantities and cost are unclear. Adult pouring kits are aimed at hobbyists, and a bottle labeled for something else is a common first mistake. For a kids project you need a quarter cup of medium per canvas, not the amount on the front of the bottle. Buy the small bottle, and skip it entirely if you use premixed pouring paint.
Tips for Pour Paintings with Kids
Start with two colors, not five. Two colors make obvious bands and give a small child an easy sense of control. Five is a lot to hold in your head at once, and the canvas turns grey-brown in the middle.
Adjust by age. A toddler can do the pouring and tilting with an adult holding the canvas, using a wide squeeze bottle for control and a smaller surface like paper or a canvas board. Preschoolers can handle cups and tilting with a nearby adult. School-age kids can run the whole sequence, including the tilting, and start experimenting with straw blowing and layering.
Give each child their own tray. Set a plastic tray inside a garbage bag on each child’s workspace. When the activity is done, pull the bag out, tie it, and throw the whole thing away. That is the fastest cleanup method I have found and it works for a group.
Protect clothes before paint is opened. Aprons on is a suggestion nobody follows. Old shirts, rolled sleeves, and painting over a shower curtain work far better, especially for a first attempt.
There is no wrong way. This matters more than it sounds. A three-year-old’s first pour looks like a splodge, and if that gets treated as a failure, they usually ask to stop. Say the paint did what paint does, then do another one.
Pour onto other things too. Wooden cutouts, paper plates, paper mache forms, and terracotta pots all work. A seasonal shape like a shamrock, pumpkin, or snowman makes the finished piece easy to hang and gives you an excuse to make a second batch later in the year.
Use up the leftovers. Mixed paint keeps for days in a sealed cup and can be used again on paper, bookmarks, or a second canvas. Rinse water with acrylic in it should go down the sink with plenty of cold water, or be scraped into the trash first if you have a lot of it. Do not pour concentrated paint into a storm drain.
Frequently Asked Questions
What kind of paint is best for pour paintings with kids?
Washable tempera paint is the easiest starting point for young children, because it is already thin and needs no mixing. For older kids, washable acrylic thinned with pouring medium gives brighter color and more interesting cells. Premixed pouring paint skips the mixing step entirely. Whatever you pick, check the label for non-toxic and washable, and keep an eye out for allergy warnings if your child has sensitive skin.
Can children make pour paintings without a canvas?
Yes, and some surfaces are better for young kids. Heavy card stock or poster board taped to cardboard works well, as do paper plates, paper mache forms, wooden cutouts, and terracotta pots. Canvas board is more forgiving than stretched canvas because it will not flex while you tilt it. A plastic sheet or old baking tray also works for a first try, and gives you a surface you can rinse clean.
Do I need to thin the paint before pouring it?
Only if you are using regular acrylic paint. Mix about two parts paint with one part pouring medium, and use school glue as a substitute if you have it. Premixed pouring paint and tempera paint are already thin enough to pour, so adding more liquid just makes them run off the canvas. The test is simple: if paint falls off a spoon in a smooth ribbon, it is ready.
What can I use instead of cups for pouring paint?
Almost any small container works. Paper or plastic cups are fine, and so are small yogurt cups, lid from a jar, plastic shot cups, or even the top of a plastic bottle cut off. A squeeze bottle with a narrow nozzle gives younger children much better control over where the paint lands. For holding mixed paint, any container with a lid stops it from drying out between pours.
How do I stop pour paint from running off the edges?
Elevate the canvas on a shallow box or tray with a raised lip, and use less paint. A third of a cup per color on an 8 x 10 canvas is plenty, and more than that is the most common cause of runaway paint. Tilt the canvas slowly and in one direction at a time, and pause between angles so the paint can settle instead of surging. Some drips are normal, which is what the tray is for.
How long does a kids pour painting take to dry?
Expect 30 minutes to an hour before the surface feels dry to a light touch, and overnight before it is safe to lift or stack. Full curing, when the paint is hard enough to seal, takes two to three days. Thicker paint and cooler, humid rooms both slow this down. Once cured, an acrylic varnish will seal the color permanently and make the finished piece wipeable.
Make Your First Pour Painting
Set up a small space, pick three colors, and let it be a bit ugly. The first one always is. Once your child has tilted that canvas and watched the colors run together, they will ask to do it again, and by the third one you will have a system that fits your table and your kid.