These pinecone crafts for kids turn a handful of forest debris into an afternoon of making, and most of them need nothing more than washable paint, glue and a few bits of paper. I grew up with a basket of pinecones by the back door, and the projects below are the ones that reliably hold a child’s attention rather than fizzling after five minutes. Every idea below works with pinecones you collect on a walk, and most suit ages three and up with an adult nearby.
Ten projects, each with a realistic age range, time needed and the skill it quietly builds. If you only make one, start with the painted animals; it needs almost nothing and works for toddlers, preschoolers and older kids in equal measure.
Table of Contents
- Pinecone Crafts for Kids at a Glance
- 1. Painted Pinecone Animals
- 2. Pinecone Christmas Tree Ornaments
- 3. Pinecone Seed Dispensers
- 4. Pinecone Spiky Hedgehogs
- 5. Pinecone Miniature Fairy Houses
- 6. Pinecone Nature Mandalas
- 7. Pinecone Suncatchers
- 8. Pinecone Scale Bracelets
- 9. Pinecone Bird Nest Crafts
- 10. Pinecone Printmaking
- How to Choose Safe Pinecone Crafts for Kids
- Frequently Asked Questions
- How should pinecones be prepared before making pinecone crafts for kids?
- What age is appropriate for pinecone crafts with paint, glue, or beads?
- Can you use pinecones for Christmas crafts without using hot glue?
- How can I make pinecone crafts more durable for outdoor decorations?
- What simple materials work best for younger children making pinecone projects?
- Can pinecones be used for crafts after they have been collected outdoors?
- Conclusion
Pinecone Crafts for Kids at a Glance
The table below sorts all ten projects so you can pick by age, time and mess tolerance before you start gathering supplies.
| Project | Best age | Time | Main supplies | Skill it builds |
|---|---|---|---|---|
| Painted pinecone animals | 3 and up | 20 minutes plus drying | Washable paint, paper, glue | Fine motor control |
| Christmas tree ornaments | 4 and up | 25 minutes plus drying | Paint, glitter, ribbon, string | Pattern and colour choice |
| Seed dispensers | 5 and up, with an adult | 20 minutes plus overnight set | Wax or glue, birdseed, twine | Sequencing and measurement |
| Spiky hedgehogs | 4 and up | 20 minutes | Paint, cardboard, felt, glue | Scissor control, gluing |
| Miniature fairy houses | 6 and up | 45 to 60 minutes | Pinecones, cardboard, craft sticks, leaves | Planning and spatial thinking |
| Nature mandalas | 4 and up | 30 minutes | Sorted natural materials, paper plate | Sorting and symmetry |
| Suncatchers | 5 and up | 30 minutes plus drying | Paint, beads, yarn, hole punch | Hand-eye coordination |
| Scale bracelets | 6 and up | 35 minutes | Pinecone scales, paint, card band | Careful extraction, patience |
| Bird nest crafts | 3 and up | 20 minutes | Shredded paper, twigs, felt eggs | Imaginative play |
| Printmaking | 5 and up | 30 minutes | Tempera paint, paper, brushes | Pressure and repeat patterns |
1. Painted Pinecone Animals
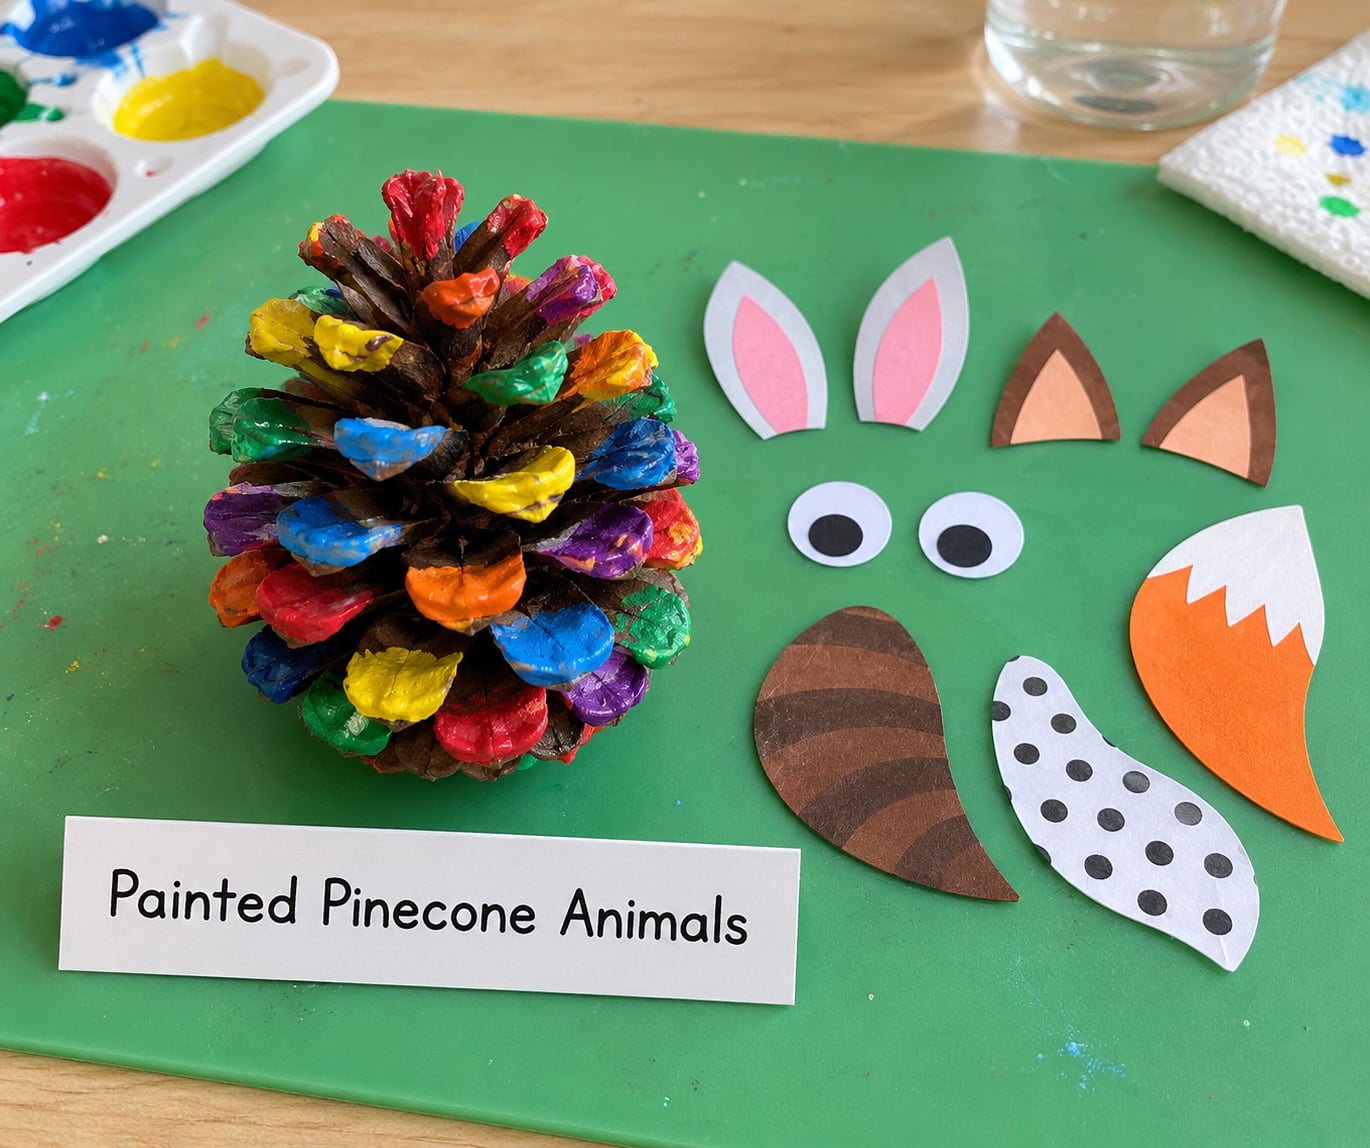
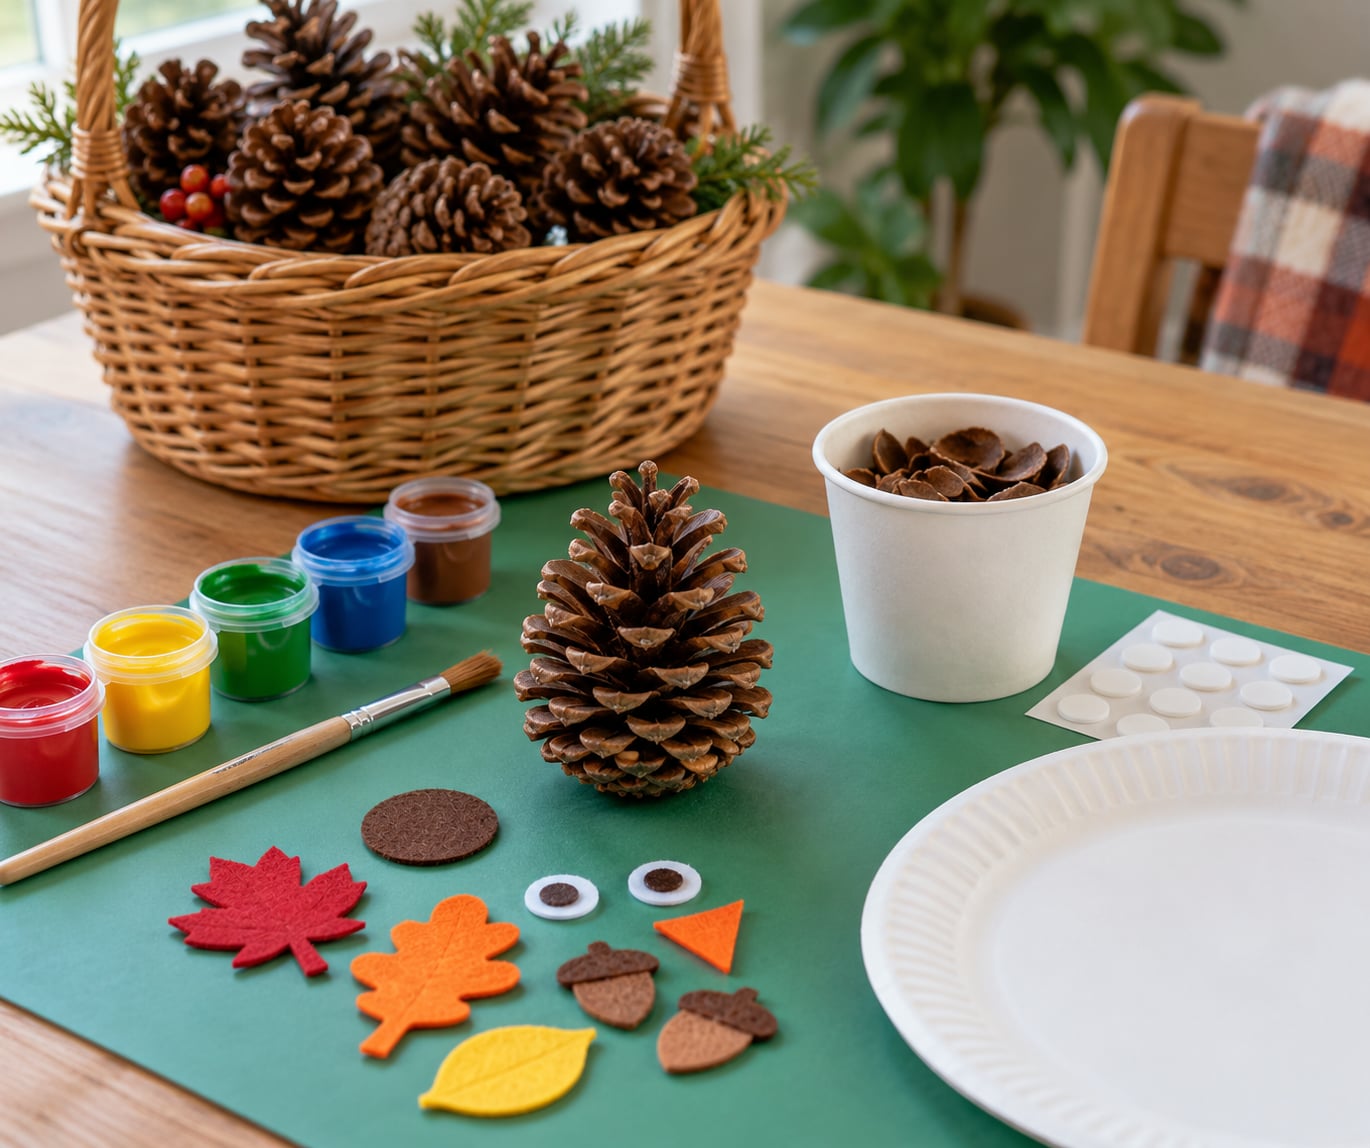
This is the one to make first. A pinecone already has the shape of a body, so painting the scales in one colour and adding a face does most of the work for you. Owls, hedgehogs, foxes and squirrels all come out of the same base shape.
Set out newspaper or a sheet of wax paper first, because the paint pools in the scales and gets everywhere. Use washable tempera paint rather than acrylic if the craft might land on clothes or a sofa.
Paint the whole cone in a single colour and let it dry flat, roughly two hours or overnight. Then cut or fold the extras: two triangles for ears, a triangle folded in half for a beak, felt or googly eyes, and a small pom pom or strip of tissue for a tail. Tack the pieces onto the cone with craft glue or glue dots, pressing each one for a few seconds so it grips the bumpy surface.
Hands on the tips of the scales rather than the points works better for younger children, and the flat base end is the easiest place to attach everything. For a group of preschoolers, cut all the parts in advance and put them in labelled cups; that turns the project into a twenty-minute activity instead of a forty-minute one.
2. Pinecone Christmas Tree Ornaments
Ornaments are the reason most families end up with too many pinecones, and they double as a weekend craft you can finish in one sitting. Paint, glitter, ribbon and a loop of jute twine are enough.
Brush on a coat of paint and let it dry before adding glitter, otherwise the glitter will not stick past the first shake. Dip the ornament into a shallow tray of glitter while the paint is still slightly tacky, and hold it over a paper towel so the excess falls back into the tray.
Thread a 12-inch piece of twine through the top using a long piece of floral wire, or knot a short ribbon loop through the gap between two scales. For a small tabletop tree, glue three or four finished cones onto a cardboard triangle painted green. A clear acrylic sealer brushed over the dry ornament keeps the glitter where it is and helps the piece survive handling.
Glue dots hold pinecones to a grapevine wreath better than liquid glue, because the cone sits at an angle and needs the tack of the dot rather than a wet grip. If your family wants the decoration to last more than one season, seal it before it goes anywhere near a radiator or a sunny window.
3. Pinecone Seed Dispensers
This is the one project on the list that leaves the house and does something useful afterwards. Birds take the coated pinecone to a branch, peck it, and the seeds fall onto the ground below, which is safer for the birds than a flat tray feeder.
An adult does the coating. Melt a short stick of paraffin wax in a slow cooker or double boiler, or use plain craft glue if you would rather skip heat entirely. Stir birdseed into the melted binder until it is thick and clumpy, then press the mixture into the gaps of the pinecone and smooth the outside so seeds are not glued to the whole surface.
Rest the cone on a sheet of wax paper and leave it somewhere cool overnight. Tie twine to the top, hang it from a branch a few feet off the ground, and keep it in a dry spot so rain does not wash the binder away.
Sunflower butter works as the binder instead of wax, and it gives the birds fat as well as seed. Skip it entirely if your child has a peanut allergy or the feeder goes to a school, and use a nut-free sunflower seed mix so the project stays safe for everyone.
4. Pinecone Spiky Hedgehogs
The hedgehog is the classic preschool pinecone project and the reason most teachers have a basket of them by the door in October. The cone becomes the spiky back, and a cardboard or card base holds the face.
Cut a half-circle from brown card and stand the pinecone on it with the wide end up. Paint only the cone, usually brown, black or cream, and glue on two googly eyes, a small felt or paper nose, and two felt ears tucked against the sides.
Adding a few pressed leaves or a strip of felt at the base sells the idea that something is living in a garden. Glue dots are kinder than liquid glue for this project because the cone rolls and the pieces keep sliding off.
Cut the base shape yourself if you are working with a group; the semi-circle is the hardest part of the whole craft for small hands. This one trains scissor control and steady pressing, which is why it shows up in so many classroom projects.
5. Pinecone Miniature Fairy Houses
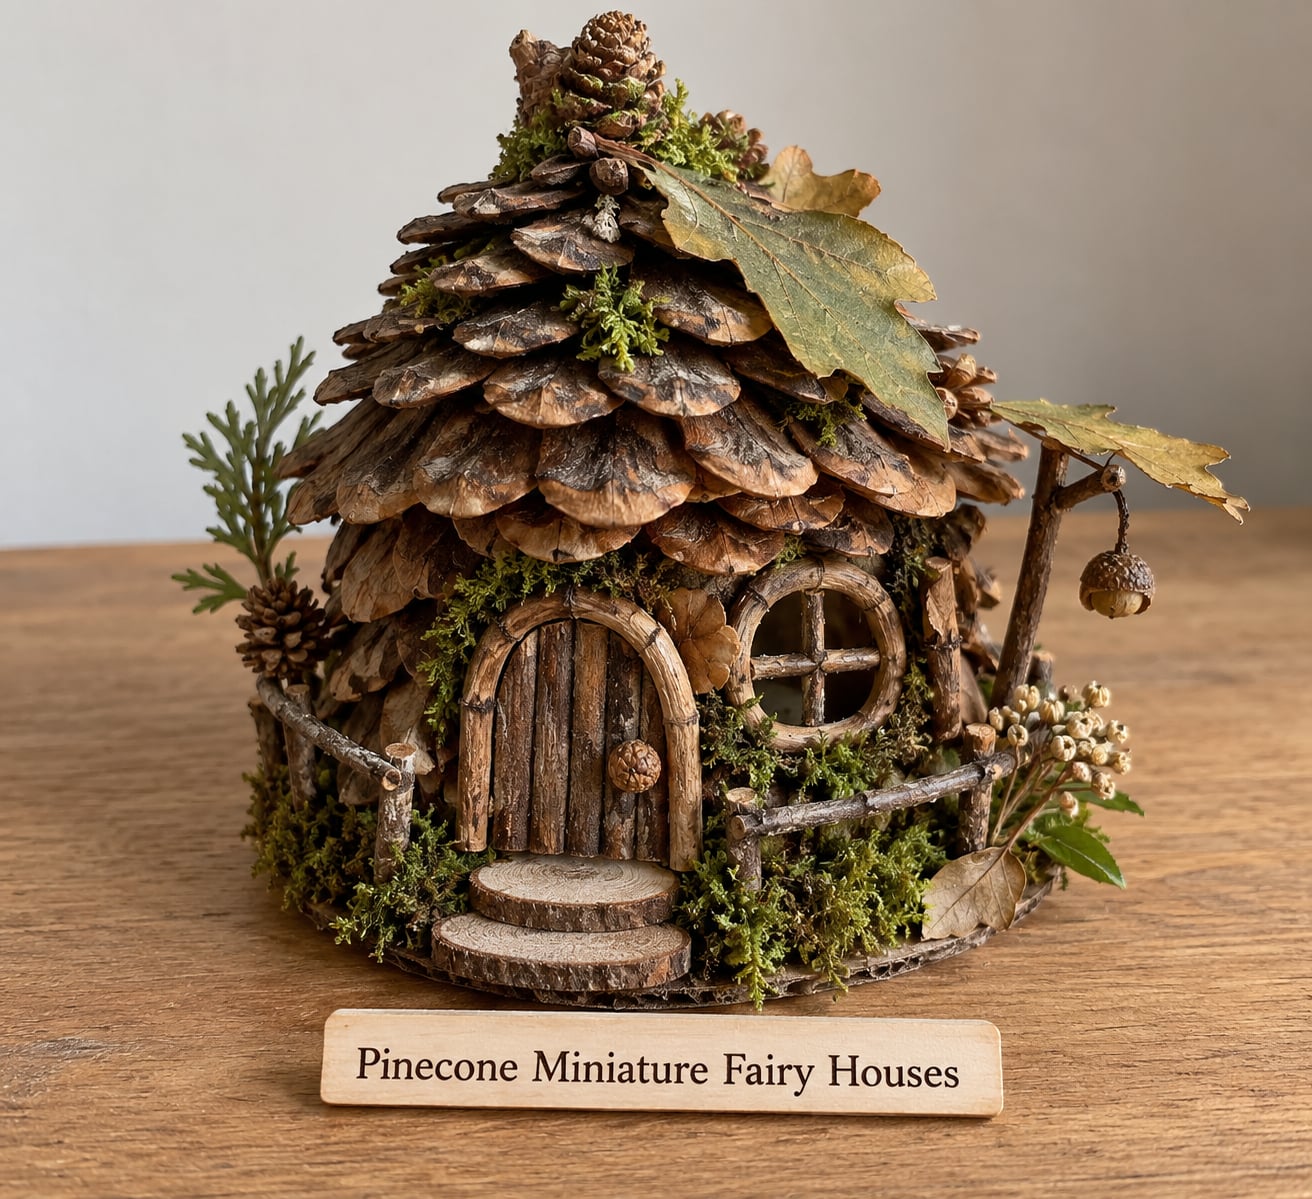
Fairy houses take longer than everything else here, and that is exactly why they work for six-year-olds and up. A three-year-old will last about eight minutes; an eight-year-old will plan the roof for half an hour.
Cut a square of cardboard for the floor and a triangle of cardstock for the roof, then let the child overlap pinecones along the walls like shingles. Push the cones into place with a dot of glue at the base rather than at the tip; gluing the tip makes the house wobble.
Craft sticks make door frames and window outlines, natural leaves fill the gaps around the base, and a small piece of felt or moss covers the roof. A bead for a door knob is a nice finishing touch.
Set the finished house on a nature table beside a collection of leaves and pebbles, and it quietly becomes a small play scene. If you build several, a group of them makes a village, which is far more absorbing than a single house.
6. Pinecone Nature Mandalas
This is the quietest activity on the list and the one that keeps a child focused longest. No glue is needed at all, so it suits children who dislike sticky hands.
Sort a pile of natural materials first: pinecone scales, leaves, acorn caps, seeds and small stones grouped by size or by colour. Choose a flat base such as a paper plate, a piece of cardboard or a slice of wood.
Work outward from the centre. Lay the largest pieces in the middle ring and fill the gaps with progressively smaller ones, repeating the same shape and colour in each ring. Symmetry is the whole exercise; the finished pattern should look roughly the same from every direction.
The sorting stage on its own is a good maths session, and older children can count how many pieces appear in each ring. Small pinecone scales also show the spiral arrangement found on real conifer cones, which makes this a craft with a science question attached.
7. Pinecone Suncatchers
A pinecone has open gaps, so it makes a surprisingly good light catcher. Painted scales, beads and yarn turn an ordinary cone into something that glows near a window.
Outline the tips of the scales with a metallic or white paint pen, or paint the whole cone and let it dry fully. Thread small beads onto fishing line or clear elastic, then attach them with glue dots where the gaps are widest so light still passes through.
Punch a hole at the top with a hole punch, working carefully since the cone can crack. Add a loop of yarn for hanging. Hang it on a porch rail, a garden hook or a window frame where the morning sun will catch it.
Keep the beads large enough that they cannot pass through a toilet paper roll. That single rule covers most choking risk in this project and it applies to any loose craft piece for children under three.
8. Pinecone Scale Bracelets
Bands made from pinecone scales look surprisingly like something bought in a gift shop, and the extraction step gives small hands a genuine fine motor challenge.
Soak a cone in warm water for ten minutes, then dry it. The scales loosen and come away more easily, and a plastic card helps flick them off without snapping the cone.
Sort the loose scales by shape and length, then paint them in one or two colours on a sheet of newspaper. A narrow card or a strip of felt becomes the band; glue the painted scales along it in overlapping rows until the gap closes.
Measure the wrist before you glue, leaving room for a finger underneath. Elastic is more forgiving than glue for a first attempt, and it means the band can be resized after a few minutes of real wear.
9. Pinecone Bird Nest Crafts
Nests are the easiest pretend-play prop here and they suit the youngest makers on the list. There is no glue involved at all in the basic version.
Give each child one pinecone with the scales fluffed open, a small ball of shredded paper, a few short twigs and a felt or wooden egg. Let them tuck the shredded paper inside the cone and arrange the twigs around the rim.
A dab of glue on the eggs makes them stay put, which matters if the nest will travel between rooms. For a nest you can hang, glue the whole cone to a cardboard disc first and add a loop of twine.
This is the project that turns into a game rather than ending on the table. Put the nests on a shelf and watch what children do with them next.
10. Pinecone Printmaking
Printmaking turns one pinecone into a sheet full of patterns, which makes it good value when you only have a few cones to hand.
Roll tempera paint onto the flat cut end of a single scale, or paint the end of a whole small cone. Press it straight down onto heavy paper or card and lift it before the paint smears.
Repeat the press in rows, varying the colour each time, and let the child fill the gaps with simple shapes or pencil marks. Whole cones print as stars, while single scales print as neat little scales, so both work in the same sheet.
Water-based tempera cleans up with a damp cloth while it is still wet, which is the deciding factor in most homes. Cardstock takes the paint better than plain paper and stops the sheet curling.
How to Choose Safe Pinecone Crafts for Kids
Pinecones are safe materials for children, with three caveats worth knowing before you start. The scale tips are genuinely sharp, and parents regularly report small cuts from toddlers grabbing them, so hold the base rather than the points and skip projects involving pressure or cutting for children under four.
Check each cone before it goes into the basket. Look for white or grey fuzzy patches, damp spots or anything that smells musty, and discard those rather than washing them. Pinecones collected outdoors can hold insects underneath the scales, sap, bird droppings and dirt.
For cleaning, bake cones at 200F for 30 to 45 minutes, which kills what is hiding inside and dries them out for painting. A soak in warm water with a splash of vinegar is the gentler option; it loosens dirt, and the cones need several days to dry fully afterwards. Skip both if you plan to use the cones in a feeder, since salt water residue is not something you want near birds.
Keep hot glue guns and sharp craft knives firmly in adult hands, and use a low-temperature gun if you take that route at all. Tacky glue, glue dots and craft tape handle pinecones well enough that most of the projects here never need heat. Small loose parts such as beads, pom poms and googly eyes are choking hazards under age three, so choose projects with pieces larger than a toilet paper roll.
One last practical note. Work on a sheet of paper rather than a tablecloth, set out a tray for glitter and loose seeds, and put the paint down on a plate rather than straight into the cap. Glitter and birdseed do not vacuum well, and that one habit saves the vacuum cleaner.
Frequently Asked Questions
How should pinecones be prepared before making pinecone crafts for kids?
Brush off loose dirt and check for insects, then bake the cones at 200F for 30 to 45 minutes. That kills what is hiding under the scales and dries them out so paint and glue grip properly. A warm water and vinegar soak is the gentler alternative, though the cones need several days to dry completely. Always discard any cone with fuzzy patches, damp spots or a musty smell rather than trying to clean it.
What age is appropriate for pinecone crafts with paint, glue, or beads?
Painted pinecone animals and bird nest crafts suit children from about age three, with an adult nearby. Beads, scissors and cut card shapes are better from age five or six. Under age three, keep to projects with no loose parts, because anything that fits through a toilet paper roll is a choking risk. Sharp scale tips are the main injury concern, so choose the smooth base end and avoid crafts that need pressure or cutting.
Can you use pinecones for Christmas crafts without using hot glue?
Yes. Tacky craft glue works on pinecones when you apply a thin coat to the flat base or the gap between two scales rather than the point, and glue dots are good for attaching eyes, ears and small paper pieces. PVA or school glue is fine for paper and felt. Give any glued area a few seconds of firm pressure, and test a small hidden spot first because pinecones are porous and glue can soak in and loosen.
How can I make pinecone crafts more durable for outdoor decorations?
Brush on a clear acrylic sealer once the paint is completely dry, which stops glitter shedding and slows water damage. Hang or place ornaments somewhere sheltered from direct sun and rain, and avoid radiators and heat vents indoors. For seed dispensers, use a wax or glue binder rather than water so rain does not wash the seed away. Outdoor crafts in full sun fade within a season even when sealed.
What simple materials work best for younger children making pinecone projects?
Washable tempera paint, paper, glue dots and a small pair of scissors cover most projects for young children. Painted animals, hedgehogs and nests need little more than that. Skip beads, small pom poms and googly eyes below age three, and skip glitter if cleanup is a worry since it sticks to everything. Keeping the supply list to one tray and one box makes setup and clearing up fast.
Can pinecones be used for crafts after they have been collected outdoors?
Yes, and foraging them is the cheapest way to stock a craft box. Choose cones that are dry and closed, and gather them from the ground rather than shaking them from live branches. Soak or bake them at home, then store them in a basket or paper bag somewhere dry with good airflow. Cones collected months earlier work as well as fresh ones once they have been cleaned and dried out.
Conclusion
Start with the painted animals. One pinecone, one colour of washable paint and a few paper triangles gives you a finished craft in about twenty minutes, and it works for almost any age from three upward. Once the novelty wears off, move to something that takes longer: a fairy house for planners, a printmaking sheet for children who like to see results multiply, or a seed dispenser if you have a tree or garden edge nearby.
Pick based on the child’s age, what you already have in the craft box and how much patience you have on a given afternoon, and set the cones out on a tray before anyone starts.