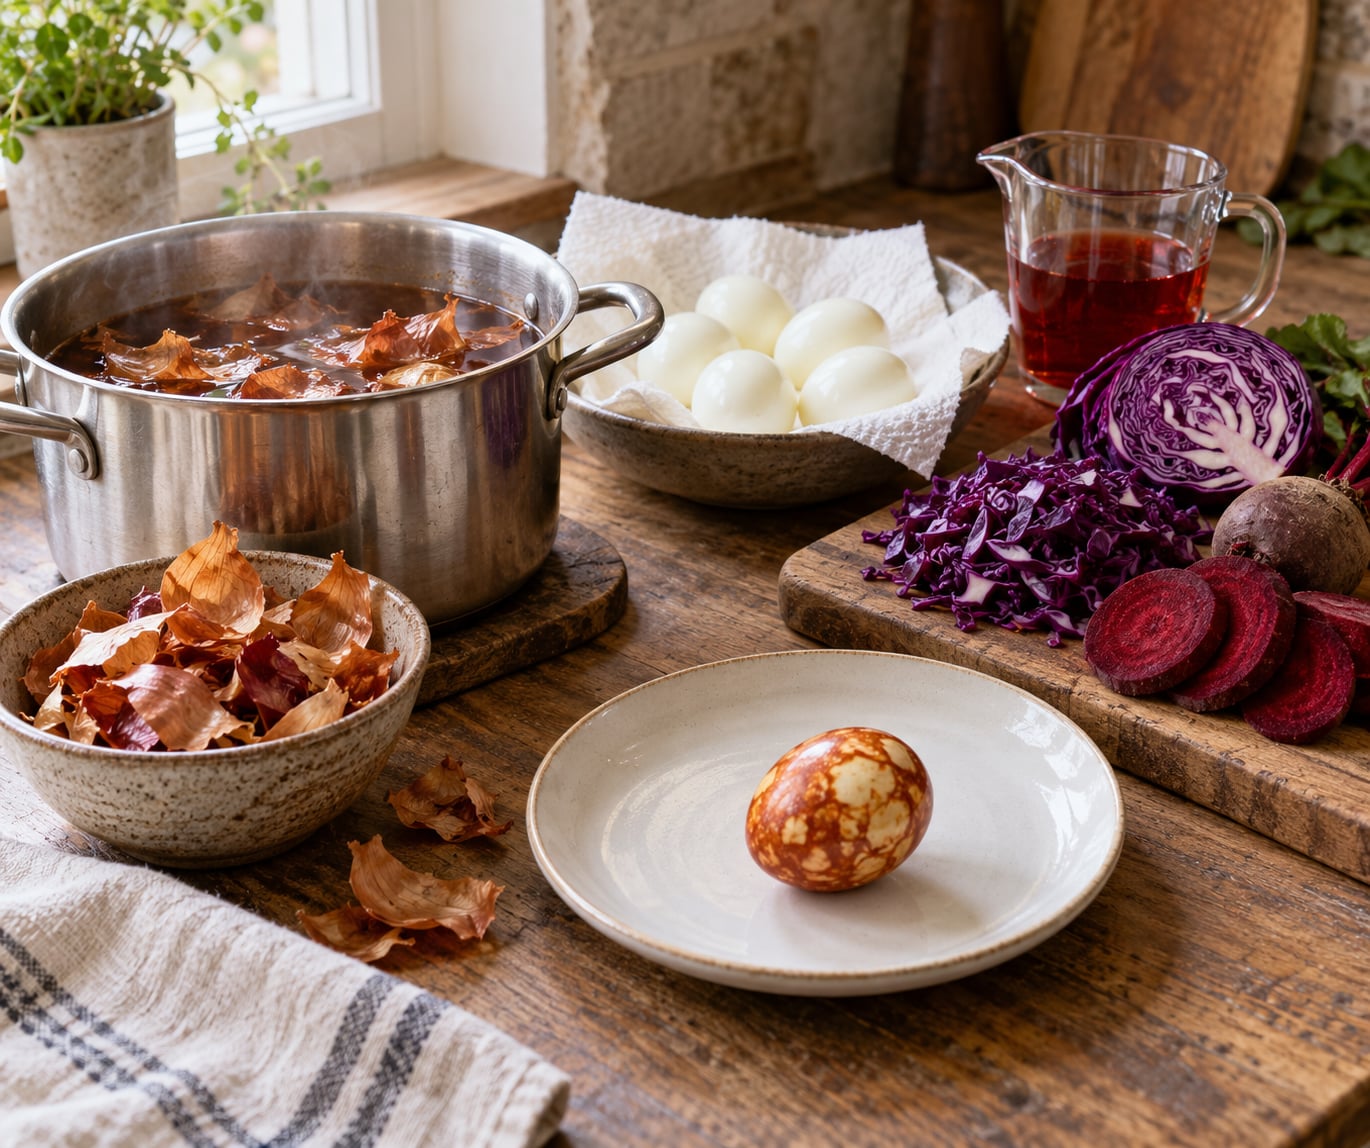
Dyeing Easter eggs with onion skins and vegetables takes about 30 minutes of active work plus a long, hands-off soak. Simmer the peels or chopped vegetables in water with a splash of white vinegar, lower the eggs straight into the hot bath, then let them sit as the liquid cools. Onion skins give you amber, ochre and gold; beetroot, red cabbage, turmeric and blueberries fill in pink, blue and yellow.
The whole approach costs nothing if you save your onion peels, and the color is far softer than dye tablets. It also means kids can help and still eat the eggs afterward. The trade-off is that color takes patience: most eggs need four hours in the bath, and an overnight soak gives you the deep, even shade people are aiming for.
Start with onion skins. They are the most forgiving ingredient, and almost every batch turns out at least presentable even the first time.
Table of Contents
- What You Need
- Step-by-Step
- How to Dye Easter Eggs with Onion Skins and Vegetables: Prepare the Workspace
- Cook and Cool the Eggs
- Make the Onion-Skin and Vegetable Dye Baths
- Dye, Rinse, and Dry the Eggs
- Try Simple Two-Color and Marbled Effects
- Common Mistakes
- Store the Decorated Eggs Safely
- Frequently Asked Questions
- Do you need vinegar to dye Easter eggs with onion skins and vegetables?
- Which vegetables make the best natural Easter egg colors?
- Why are my naturally dyed eggs pale instead of brightly colored?
- Can I prepare the vegetable dye baths and hard-boiled eggs in advance?
- Are onion-skin-dyed eggs safe for children to eat?
- How should naturally dyed Easter eggs be stored and displayed?
- Get Started with Natural Easter Egg Color
What You Need
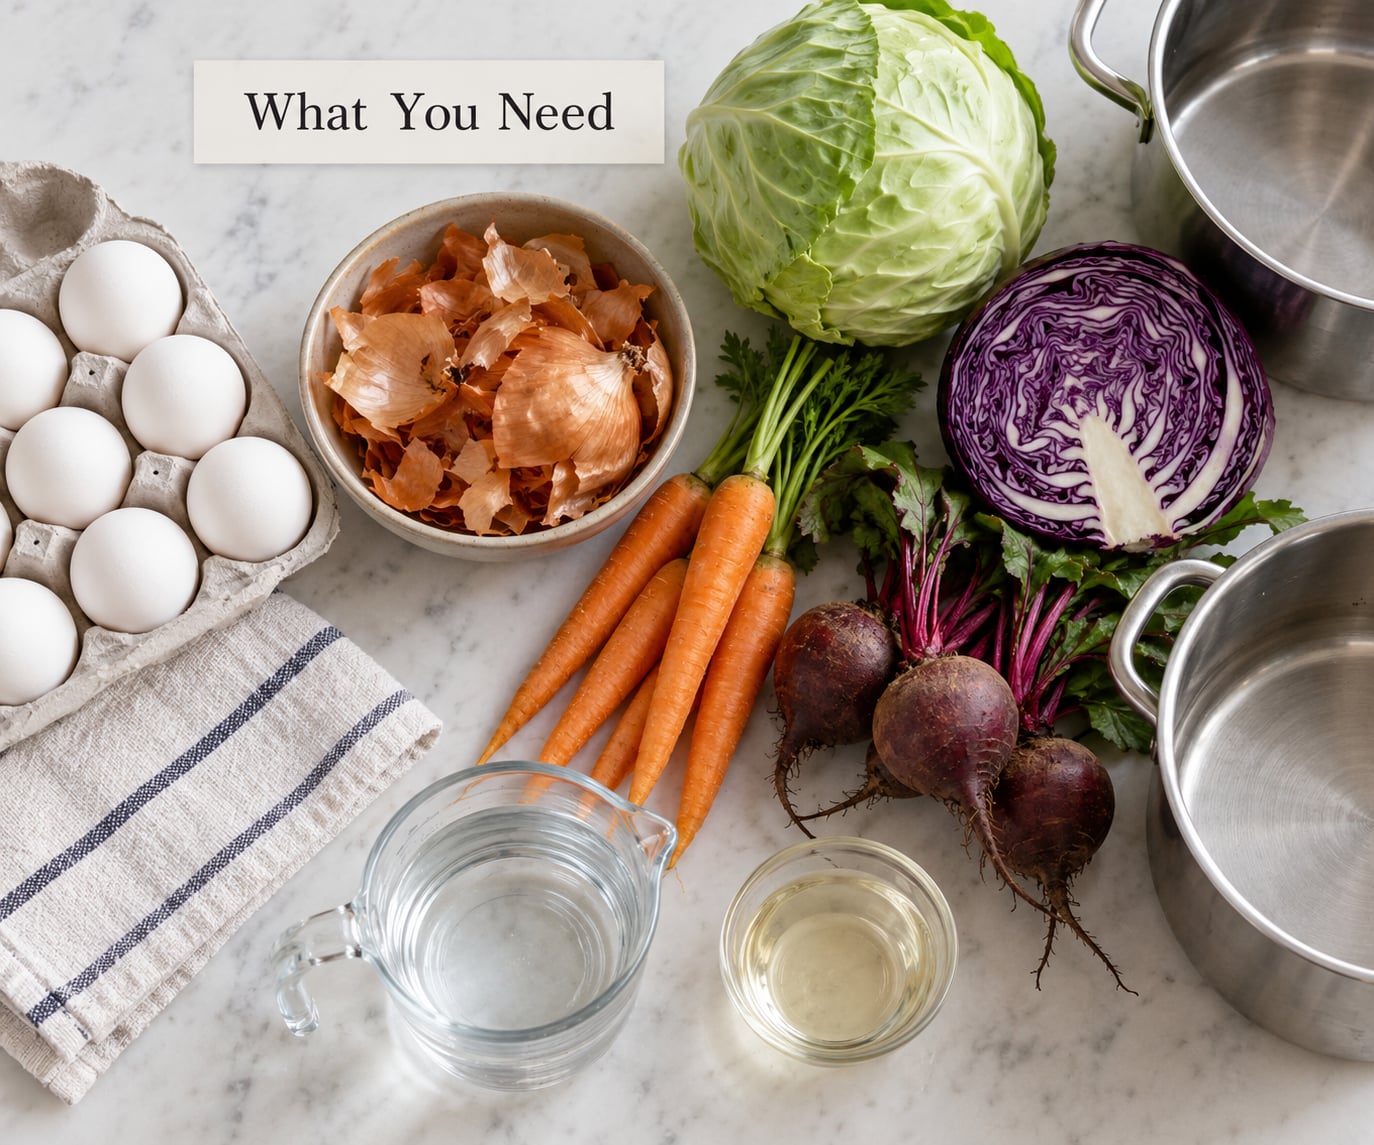
For a dozen eggs you need a pot, a second pot or bowl for cooling, tongs and a strainer. Cover the work surface with newspaper or a cheap tablecloth, because dye splashes while it simmers and it will stain a wooden counter.
Wear rubber gloves for the soaking and rinsing. The dye stains fingernails and skin more than it stains the shell, and warm vinegar water is rough on bare hands anyway.
Here is the base shopping list for one dozen:
- 12 eggs, at room temperature
- 3 to 4 generous handfuls of dry onion skins, or about 2 cups
- 4 cups of water, plus extra for cooling
- 3 tablespoons of white vinegar
- 1 tablespoon of salt
- A pot with a lid, a second pot or bowl, tongs and a strainer
- Gloves, paper towels and a spoon of vegetable oil for the final shine
For colors beyond amber, add one or two of these: a quarter of a red cabbage, two or three raw beets, a tablespoon of ground turmeric, a packed cup of spinach, a cup of blueberries or a handful of dried hibiscus flowers. Red cabbage gives a blue that most families expect to be purple; more vinegar pushes it bluer, less pushes it pinker.
Save your onion skins as you cook. Keep them in a bag in the freezer, where they dry out fine and keep for months. This is the step everyone skips and then wonders why they only have a handful. A single onion yields a thin scrap, so a dozen eggs really does take several onions’ worth of peels.
Step-by-Step
How to Dye Easter Eggs with Onion Skins and Vegetables: Prepare the Workspace
Set up every pot before you turn on the heat. Dyeing goes faster than you think, and hunting for tongs with wet, orange hands is miserable.
Lay out your tools on a covered surface: pot, lid, tongs, strainer, gloves, a bowl of cool water for the finished eggs, and paper towels. Keep the vinegar bottle within reach too.
Decide how many colors you are running before you start. Each dye bath needs its own pot, because red cabbage and beetroot will muddy each other instantly. One color is a good first attempt; three is a full afternoon.
Cook and Cool the Eggs
Hard-boiling the eggs first gives you the most control, which makes it the better method for beginners. Raw eggs dropped into a simmering bath also work and give a slightly mottled shell, but they are harder to time.
For hard-boiled eggs, lower them into already-boiling water and cook for 12 minutes. That holds the center at the USDA-recommended 160°F, which is the safe minimum for eggs. Transfer them straight to an ice bath for 5 minutes so the cooking stops.
Leave the shells on. The dye bonds to the shell, and a peeled egg has too little surface left to take color evenly. The shell also protects the egg in the hot bath.
How do you know they are done? Spin one gently on the counter. A hard-boiled egg spins fast and smoothly; a raw one stutters and wobbles. It is a rough test, but it works.
Make the Onion-Skin and Vegetable Dye Baths
Fill your pot with 4 cups of water, add 3 to 4 handfuls of onion skins, 3 tablespoons of white vinegar and a tablespoon of salt. Bring it to a boil, then drop the heat and simmer gently for 20 minutes. The liquid will turn a deep brown-orange and the kitchen will smell like a stockpot.
The vinegar is doing real work here. Onion skins and vegetable peels contain tannins, the same compounds that color tea and red wine, and an eggshell is alkaline. Without acid the dye just sits there. The vinegar lowers the pH, opens the shell’s pores a little and lets the tannin bond.
Turn off the heat and let the bath cool to a warm, safe-to-handle temperature before the eggs go in. For a vegetable bath, chop the produce small, simmer it in the same 4 cups of water with the vinegar for 20 to 30 minutes, then strain out the solids. Keeping the solids in for cabbage and beets actually deepens the color, so strain only if they are getting too soft.
A spinach bath is the exception. Spinach gives a muted sage green, not a bright one, and it turns brown if you simmer it long. Twenty minutes is plenty.
| Dye source | Color it gives | Simmer | Soak |
|---|---|---|---|
| Yellow onion skins | Warm amber to gold | 20 min | 4 hrs to overnight |
| Red onion skins | Deep russet, near copper | 20 min | 4 hrs to overnight |
| Red cabbage | Blue to purple, greener with more vinegar | 25 min | 4 to 6 hrs |
| Beetroot | Pink to ruby red | 25 min | 4 to 6 hrs |
| Turmeric | Bright yellow | 15 min | 2 to 4 hrs |
| Spinach | Muted sage green | 20 min | 2 to 4 hrs |
| Blueberries | Dusty blue-grey | 20 min | 4 hrs |
| Hibiscus flowers | Deep pink to red | 15 min | 2 to 4 hrs |
Keep a spoon of the raw vegetable or skins in the bath while the eggs soak. If the color starts to fade, add more and let it steep.
Dye, Rinse, and Dry the Eggs
Lower the eggs into the warm bath with your tongs and make sure every one is fully submerged. If an egg floats, press it down with a spoon or the back of a ladle. An air pocket at the top is exactly where the pale patch comes from.
Leave the pot uncovered on the counter for four hours, or cover it and move it to the fridge for an overnight soak. The dye works as the bath cools, which is why a warm bath and a cold one land on different shades. Cooler baths give deeper, more even color because the dye takes longer to fix.
Pull one egg out at the four-hour mark and rinse it under cold running water. If the color looks right to you, drain the batch. If it is too pale, add a splash of vinegar, put the eggs back and give them more time.
Rubbing is what ruins a good shell. Dry each egg by pressing a paper towel around it rather than wiping the surface.
While they are still warm, rub a small amount of vegetable oil or olive oil over each egg and buff it. That gives the dull natural shell a shine that dye tablets never quite manage.
Try Simple Two-Color and Marbled Effects
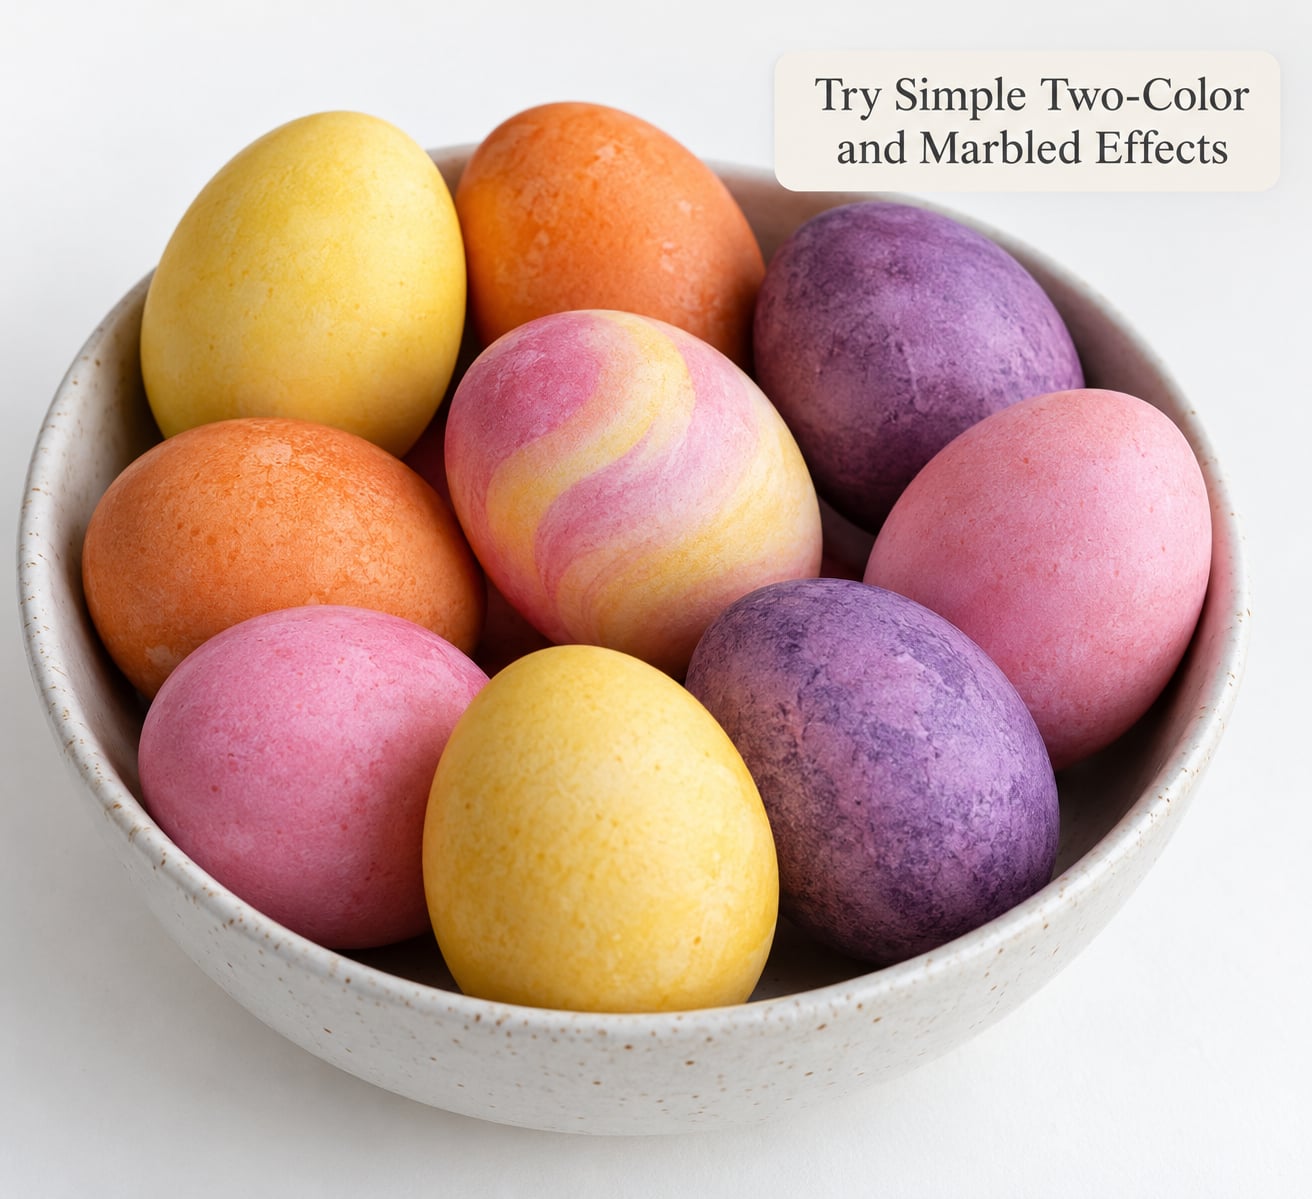
For a two-tone batch, pull half the eggs at two hours and let the rest keep soaking. The early ones stay pale gold and the late ones go deep amber, and the pair looks deliberate rather than accidental.
Marbling comes from wrapping rather than loose baths. Soak onion skins in cool water until soft, lay a piece of cheesecloth or an old nylon stocking over an egg, pile the wet skins on top and gather the edges. Tie it with kitchen twine loosely, like a loose parcel. The skin patches print against the shell and the exposed areas take a lighter shade.
Leave a finger’s width of room around the twine. Tight string cracks shells, and the eggs go into the water jostling against each other.
Two more prints cost nothing: press a sprig of parsley or sage against the shell and hold it in place with a little beaten egg white, or tuck a leaf under the cloth before you wrap. Parsley prints most clearly. Heavier leaves like oak and maple give a fainter outline.
Common Mistakes
Pale eggs. Usually not a bad batch of onions. The common causes are a short soak, an egg that floated partly above the line, or too little vinegar. Give pale eggs another two hours in the same bath with a splash of vinegar and they will improve noticeably.
Cracked shells. The dye leaks out and you get a pale egg with brown streaks. Cracks come from twine pulled too tight, eggs dropped into boiling water, or shells weakened by age. Lower eggs in gently with a ladle.
Muddy color. You put two vegetables in one bath. Red cabbage and beetroot together give a dull brown nobody wants. One dye per pot.
Even, flat, boring color. That is a loose bath working correctly. Wrap eggs in skins or cloth if you want variation.
Very dark, almost brown eggs. An overnight soak in onion skins does that. Pull them at four hours for a warm amber instead.
Dye on hands and countertops. Wear gloves, and wipe splashes while the surface is still damp. Once a dried onion dye sets into a counter, it takes a degreaser and elbow grease.
Sticky pots. That is sugar from the onion skins caramelizing on the base. Simmer rather than boil, and stir once or twice. A splash of vinegar in the water discourages it.
Store the Decorated Eggs Safely
Keep dyed eggs in the refrigerator until you are ready to display them, and keep the display itself cool. A basket on a warm mantel or a sunny windowsill will fade the color within a few hours.
Follow the two-hour rule: cooked eggs left at room temperature should be discarded after two hours. Cooked eggs in the fridge keep about one week, so plan your dyeing a few days ahead rather than the morning of.
Onion-skin and vegetable dyes are food, so the eggs are safe to eat as long as you handled them safely. Discard any egg that smells off, and remember that the dye bath itself is not drinkable even though its ingredients are. Let the used bath cool, strain out the solids and compost the liquid once the color has gone from it.
Frequently Asked Questions
Do you need vinegar to dye Easter eggs with onion skins and vegetables?
Yes. Eggshells are alkaline and the dyes in onion skins and vegetables are tannin-based, so they will not bond without acid. Three tablespoons of white vinegar in four cups of water is enough for a dozen eggs. Apple cider vinegar works the same way, and a tablespoon of lemon juice is a reasonable swap, but plain vinegar tastes the least noticeable on the finished shell.
Which vegetables make the best natural Easter egg colors?
Beetroot, red cabbage, turmeric and hibiscus give the most saturated results. Spinach and blueberries produce genuine color but softer, dustier shades, which suits a rustic palette rather than a bright one. Onion skins sit in between: reliably warm and golden, and they take color more evenly than any vegetable.
Why are my naturally dyed eggs pale instead of brightly colored?
The three usual causes are a short soak, a partly submerged egg, and too little vinegar. Give pale eggs another two hours in the same bath with a splash of vinegar added. A fourth possibility is thin or brownish onion skins, and adding a second handful of skins while the eggs soak fixes that.
Can I prepare the vegetable dye baths and hard-boiled eggs in advance?
Yes, and it is the easiest way to manage a large batch. Make the dye baths up to three days ahead and refrigerate them, then reheat gently to a warm simmer. Hard-boiled eggs keep well refrigerated for about a week, so you can boil them a day or two early and dye them when you are ready.
Are onion-skin-dyed eggs safe for children to eat?
They are, as long as the eggs were cooked and handled safely. Onion skins, beetroot, cabbage and turmeric are ordinary food ingredients, which is the main reason parents choose this route over dye tablets. Keep eggs refrigerated, follow the two-hour rule at room temperature, and skip any egg that smells off or has cracked and drained.
How should naturally dyed Easter eggs be stored and displayed?
Refrigerate them until display time and keep the display cool, because heat and sunlight fade natural dyes faster than any others. Display them the same day you dye them where you can, and refrigerate the rest for up to a week. A cardboard egg carton in the fridge works well for transport.
Get Started with Natural Easter Egg Color
Begin with onion skins, since they give the most reliable color for the least effort. Boil four eggs, simmer one pot of skins with vinegar for 20 minutes, and let them sit four hours. Taste the method on a small batch before you commit a full dozen to it.
Then add one vegetable color, and only after that start layering, marbling and leaf prints. Once you know how your own eggs take the dye, everything else is just adjusting the soak time.