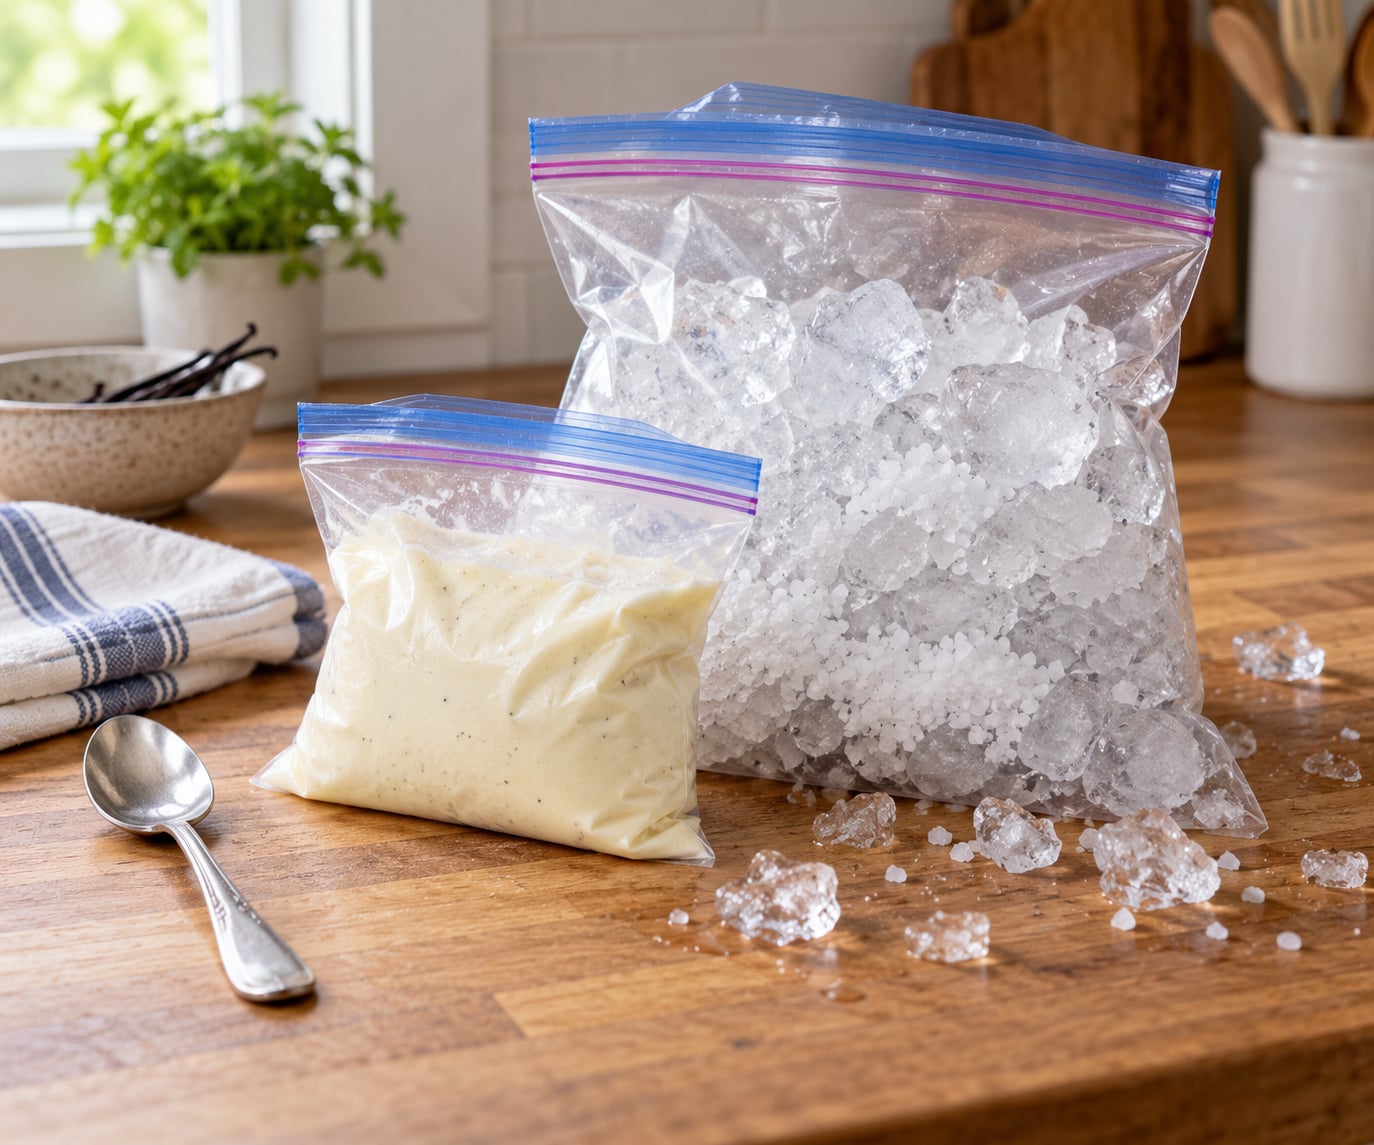
You can make ice cream in a bag in about 10 minutes with five ingredients, a quart-size zip-top bag, a gallon-size bag, ice and rock salt. No freezer space, no ice cream maker, and no plugged-in anything. Kids get to shake it, which is honestly the best part.
The whole idea is a double bag. You mix the creamy base in a small bag, drop it inside a bigger bag packed with ice and salt, then shake until the mixture thickens into something close to soft serve. It tastes like homemade ice cream and it costs almost nothing to make.
Here is the full method, followed by what to do when it goes wrong, because on a first attempt something usually does.
Table of Contents
- What You Need
- Which milk and cream combination should you use?
- Step-by-Step: How to Make Ice Cream in a Bag
- How to Combine the Ice Cream Base
- How to Chill the Bag Quickly
- How to Tell the Ice Cream in a Bag Is Ready
- Common Mistakes
- Frequently Asked Questions
- What ingredients do I need to make ice cream in a bag?
- Do I need a freezer to make ice cream in a bag?
- How long does it take to make ice cream in a bag?
- Why is my ice cream mixture still watery?
- Can I make this ice cream ahead of time?
- Conclusion
What You Need
Measure everything out before you start. Once the base is in the bag and the ice is going soft, you do not want to be hunting for the measuring spoon.
For the ice cream base:
- 1/2 cup heavy cream
- 1/2 cup whole milk
- 2 tablespoons granulated sugar
- 1/4 teaspoon vanilla extract
- A pinch of salt, about 1/8 teaspoon
For the ice bath and gear:
- 4 to 6 cups ice, roughly crushed or cubed small
- 1/3 to 1/2 cup rock salt, also sold as ice cream salt
- 1 quart-size zip-top bag for the base
- 1 gallon-size zip-top bag for the ice bath
- A second quart bag or a small bowl as a backup liner
- A kitchen towel, oven mitts or a pair of gloves
- A spoon and a small whisk or fork
This recipe makes roughly 2.5 to 3 cups of ice cream, which is four small servings. It is a small-batch recipe on purpose. Doubling it means two gallon bags and far more shaking, so make a second batch instead.
Use bags you trust. Cheap thin bags split under the weight of ice and salt water, and then you are wiping dairy off the counter. Heavy-duty freezer bags are worth it. A backup bag inside the outer bag costs nothing and catches the leaks that happen anyway.
Which milk and cream combination should you use?
Fat is what makes it creamy rather than icy. More cream means a smoother result, less cream means more ice crystals and a icier texture.
| Combination | Result | Best for |
|---|---|---|
| 1/2 cup heavy cream + 1/2 cup whole milk | Creamy and smooth | The standard, works every time |
| 3/4 cup heavy cream + 1/4 cup whole milk | Richest and densest | Adults, or a small reward batch |
| 1 cup half-and-half only | Lighter, slightly icier | Kids who dislike heavy cream |
| 1 cup whole milk only | Thinnest and icier | Still freezes, just not as creamy |
| Coconut cream and a dairy-free milk | Creamy, coconut flavor shows | Dairy-free batches, nut-free days |
Skip the raw egg method. Some no-cook ice cream recipes call for a pasteurized raw egg to thicken the base, and that is a different process with different handling rules. This one does not need it.
Step-by-Step: How to Make Ice Cream in a Bag
The process takes six steps and about 10 minutes of active shaking. Lay out a dish towel first, because the outer bag gets genuinely cold.
1. Mix the base. Add the heavy cream, whole milk, sugar, vanilla and the pinch of salt to the quart bag. Press out the air carefully, seal it, then squish the bag with your fingers until the sugar disappears. You should not see grains left at the bottom.
How to Combine the Ice Cream Base
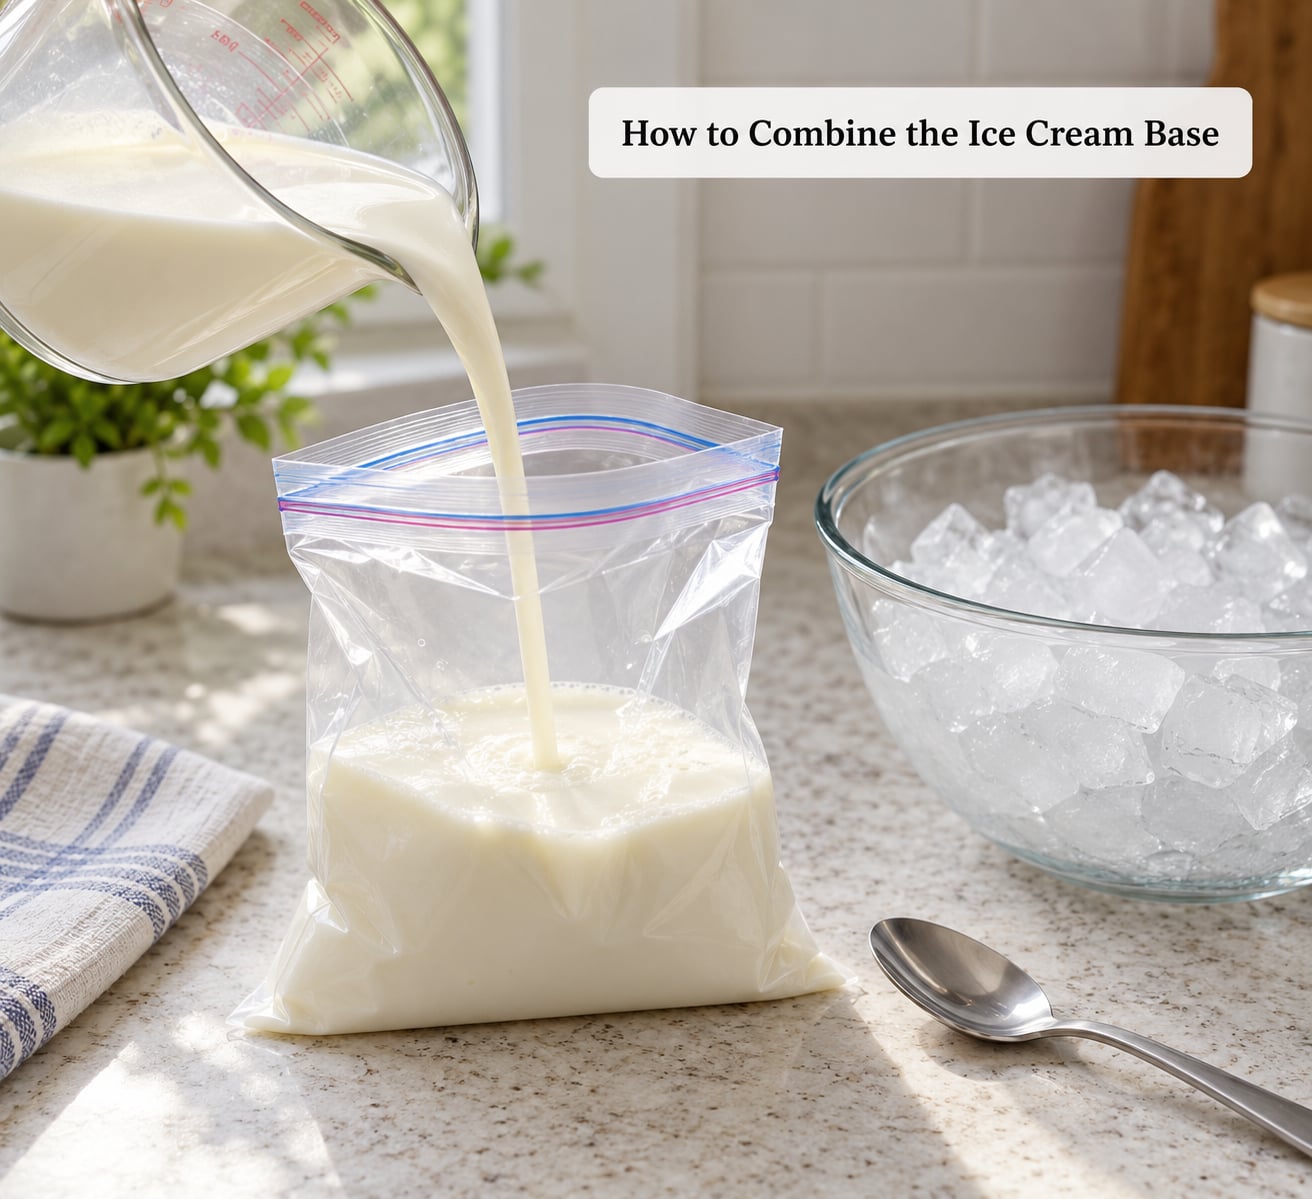
The sugar dissolves faster if you warm the cream for 20 seconds in the microwave first, but room temperature dairy works too. If the bag feels loose and sloshy, double-bag the base before it goes into the ice.
Fold in anything soft now. Mashed banana, a spoonful of nut butter or cocoa powder mixes in smoothly at this stage. Save chocolate chips, cookie crumbs and fruit for later, because anything firm or frozen stays in hard little lumps.
2. Prep the outer bag. Put the ice in the gallon bag and pour in the rock salt. Add the sealed base bag on top and push it down into the ice so it sits surrounded rather than on top.
How to Chill the Bag Quickly
Crushed ice beats cubes because it packs tight around the small bag and touches more of its surface. Cube ice still works, but roll the outer bag on the counter first so the cubes settle around the base.
Salt is the whole trick. Rock salt melts the ice faster and drops the temperature of the bath well below 32 degrees F, which is what pulls heat out of the cream. Regular table salt does the same job, but it dissolves faster, so use roughly double the amount, about 3/4 to 1 cup.
3. Seal it tight. Push the air out of the gallon bag and zip it closed. Check the seal by turning it upside down over the sink. If the base shifts or water creeps to the zip, add another bag or retie it in a knot.
4. Shake. Hold the bag by the top seam with a towel wrapped around your hands and shake hard for 5 to 10 minutes. Fast, short shakes work better than slow swinging. With several kids, playing hot potato with the bag keeps everyone involved and keeps the shaking brisk.
5. Check the texture. Lift the small bag out, open it and squeeze a drop onto the side of the bag. It should hold its shape and pull into a soft curl. If it runs flat and milky, keep going.
How to Tell the Ice Cream in a Bag Is Ready
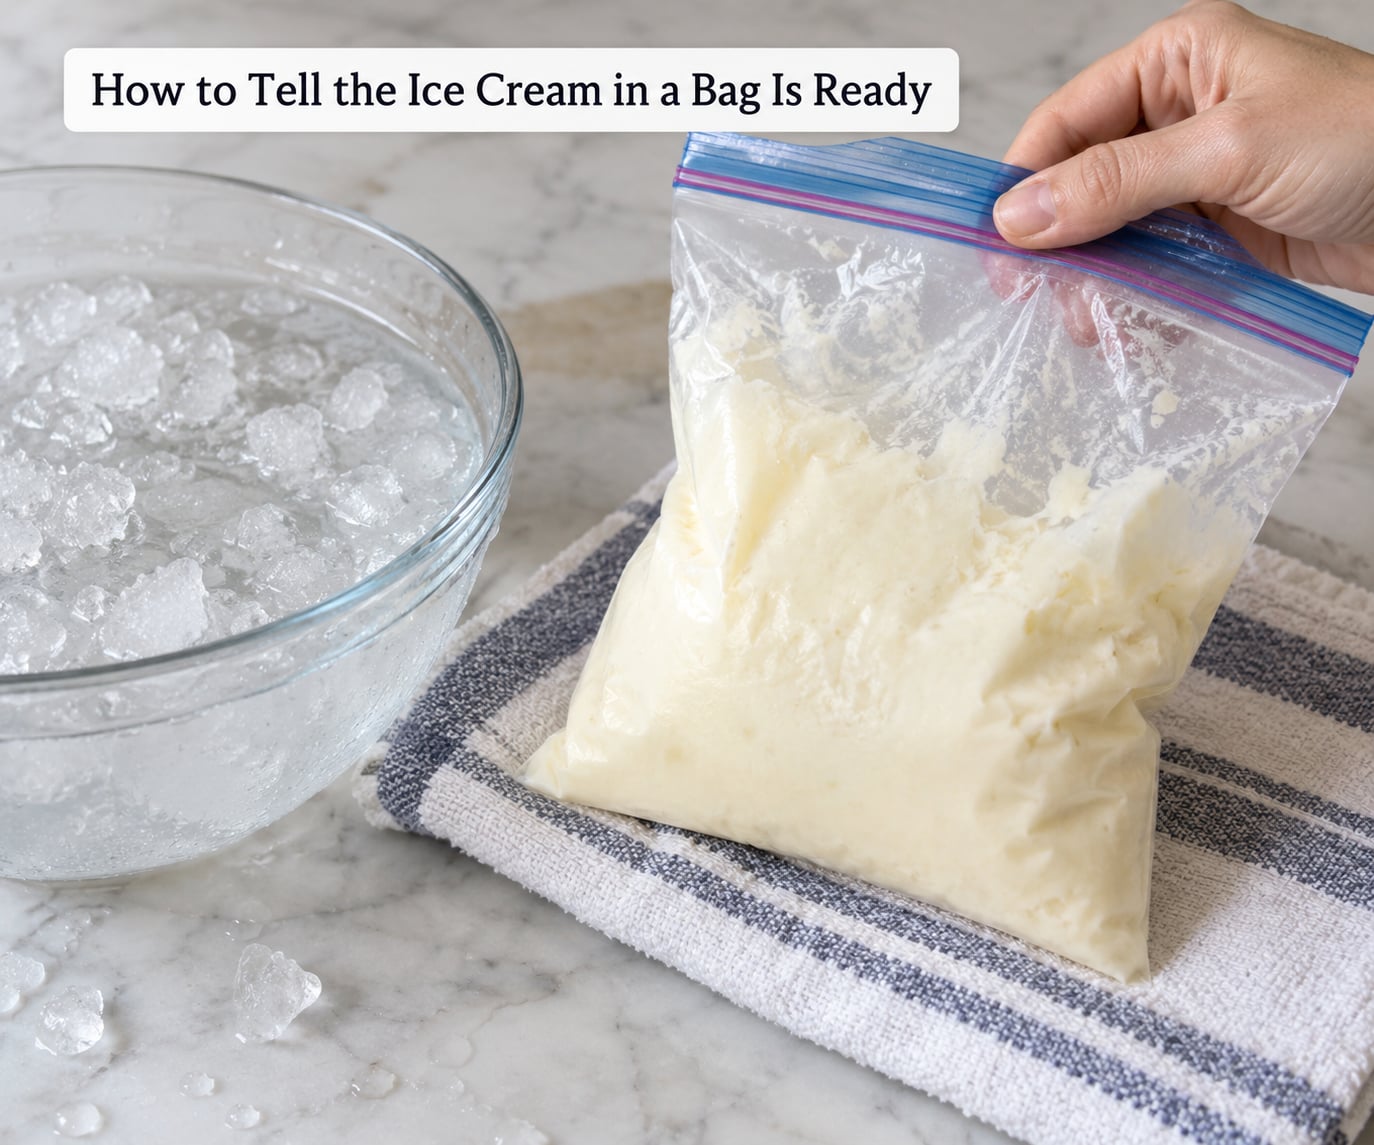
A finished bag feels heavy, cold and hard to squish, and the mixture inside has gone from liquid to thick and creamy. It behaves more like soft serve than like a solid brick. That is normal for this method.
If the mixture is still watery after 10 minutes, the usual cause is the ice bath, not the base. Add another handful of ice and a couple more tablespoons of salt, then shake again for 3 or 4 minutes.
6. Rest and serve. Wipe the outside of the small bag dry, open it and scrape the ice cream into bowls. Let it sit for a minute before eating. It firms slightly as it sits and continues to set if you move it to the freezer.
Common Mistakes
Almost every failed batch comes down to one of six things.
| Problem | Why it happens | Fix |
|---|---|---|
| The bag leaks or splits | Thin bags, or air left inside before zipping | Double-bag and squeeze out the air, then test the seal over the sink |
| The mix stays slushy after 20 minutes | Shaking too gently, or too little ice and salt | Shake faster in short bursts and add a handful of ice plus 2 tablespoons of salt |
| Ice crystals and a hard, icy texture | Too much milk and not enough cream | Use half-and-half or heavier for the next batch |
| Sugar still grainy | Not enough mixing before it went into the ice | Warm the cream briefly, or squeeze the bag longer at room temperature |
| Chocolate chips or frozen fruit stay hard | Firm mix-ins added too early | Fold them in after the mixture thickens, or use very small pieces |
| Cold saltwater ends up in the bowl | The inner bag was not dry before opening | Wipe the bag outside, open one corner and spoon the ice cream out |
Cold hands are the most common complaint, and gloves or a folded dish towel handle it completely. Expect to hear requests for more ice and more rock salt than you think you need. The bath should end up looking like loose gray slush rather than like ice in water.
Serve it in bowls rather than cones. This ice cream is softer and melts faster than store-bought, and cones break when the ice cream starts to drip.
For storage, keep it in the freezer and eat it within a week. Do not refreeze a batch that has fully melted. Since this recipe contains dairy, treat the freezer time as the safe limit rather than a quality one.
Frequently Asked Questions
What ingredients do I need to make ice cream in a bag?
You need four base ingredients: half a cup of heavy cream, half a cup of whole milk, 2 tablespoons of sugar and a quarter teaspoon of vanilla. On the outside, add 4 to 6 cups of crushed ice and about a third to half a cup of rock salt in a gallon-size bag. You also need one quart-size zip-top bag for the base, a towel or gloves, and a spoon. The whole batch makes about 2.5 to 3 cups.
Do I need a freezer to make ice cream in a bag?
No. The ice and salt in the outer bag do all the chilling, so no freezer is involved and no freezer space is used. A freezer is only useful afterward, if you want the finished ice cream to firm up into a hard scoop. That is optional, and skipping it leaves you with a soft serve style texture that is ready to eat right away.
How long does it take to make ice cream in a bag?
Plan on about 10 minutes: a couple of minutes to mix the base and set up the ice bath, then 5 to 10 minutes of shaking. Large cubes of ice and a thin base take closer to 15 minutes. If the mixture is still watery at the 10 minute mark, add more ice and salt and keep shaking rather than starting over.
Why is my ice cream mixture still watery?
The usual reasons are not enough shaking, not enough ice, or not enough salt around the inner bag. Table salt also disappears faster than rock salt, so if you used it, double the quantity. Make sure the base bag is surrounded by ice rather than sitting on top of it, and shake in quick, hard bursts rather than slow swings. Give it three more minutes after adding salt before you assume it failed.
Can I make this ice cream ahead of time?
Yes. Because this base has no cooked eggs or custards, it freezes fine. Keep each batch in its own sealed freezer bag with the date written on it and use it within about a week. Leave a little room in the bag for the ice cream to expand, and do not refreeze a batch that has already melted, since dairy loses both safety margin and texture at that point.
Conclusion
Start by mixing the base in a quart-size bag, sealing it hard, and nesting it inside a gallon bag full of ice and rock salt. Shake until the mixture stops sloshing, then scrape it into a bowl. That first batch takes about ten minutes from counter to spoon.
Keep a couple of things in mind the first time round. Expect a soft serve texture rather than a hard scoop, and put a towel down before you start shaking. When it comes out a little icier or a little runnier than you hoped, add ice and salt and keep going. Most second attempts turn out better than the first one.
For a family looking for a small-batch, no-freezer treat that doubles as a kitchen science demonstration, this is about as simple as it gets.