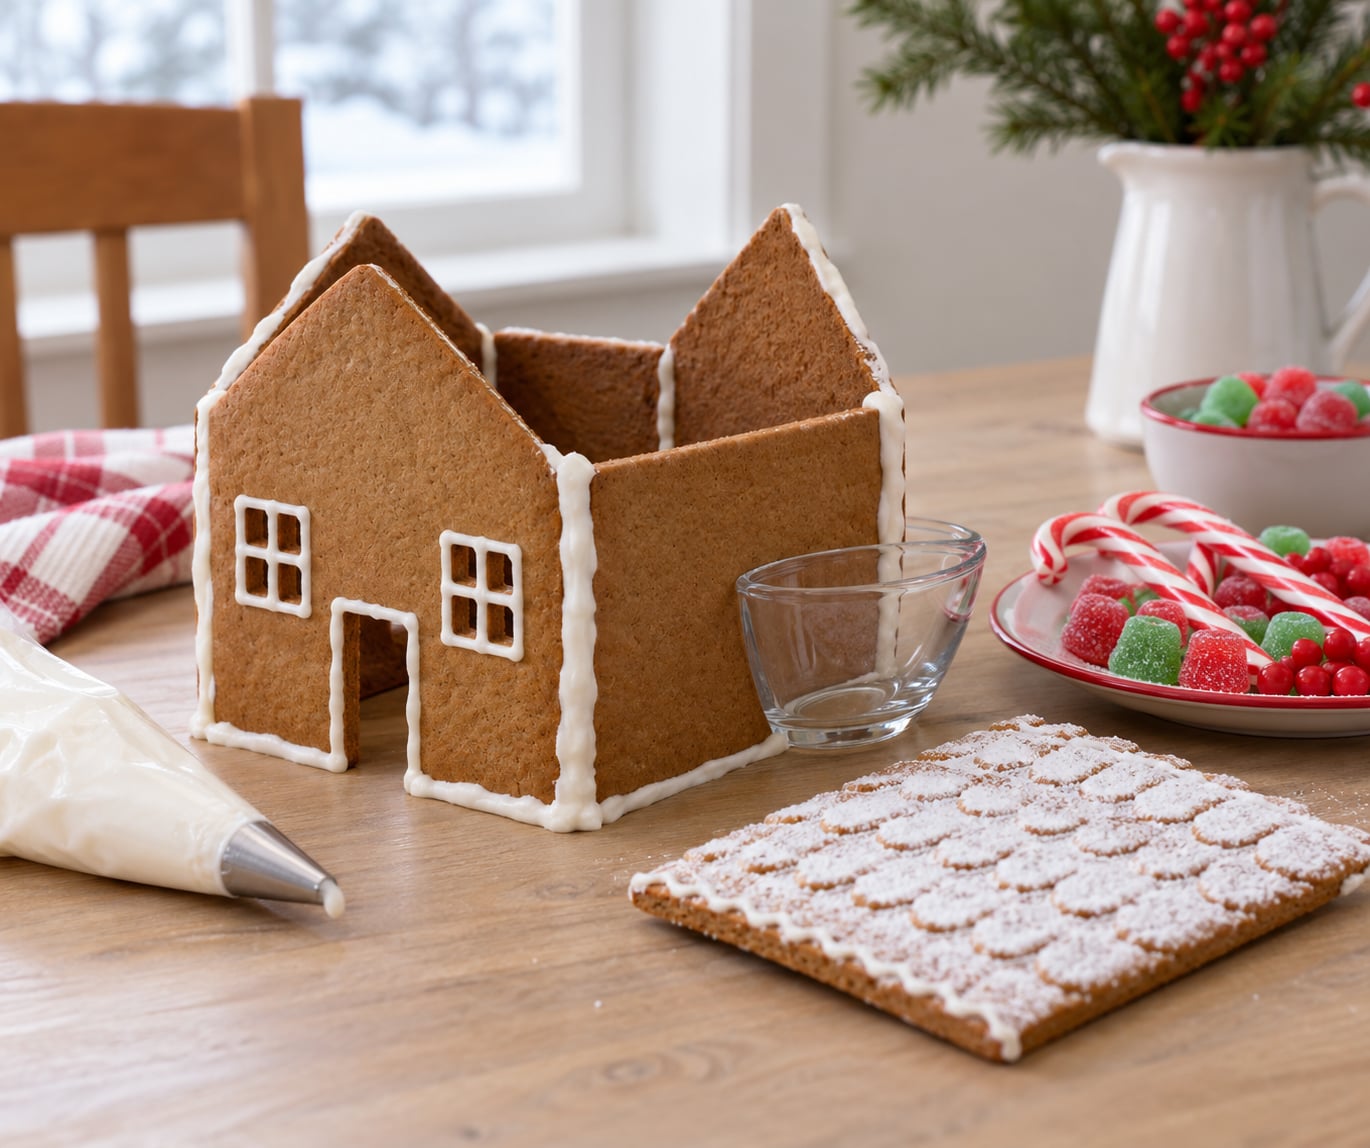
The trick to a gingerbread house that stays together is stiff royal icing and enough drying time between each stage. Pipe the seams thick, brace the walls while the icing sets, prop the roof until it is solid, then leave the whole thing alone for at least an hour before you touch it.
Most collapsed houses are not a recipe failure. They are a timing failure, and sometimes a consistency failure where the icing behaves like frosting instead of mortar. Fix those two things and the same dough that slumped last year will stand on your table through Christmas.
Budget about three hours of active work for a house you build from scratch, spread over two days. A kit house takes closer to ninety minutes. The active time is short; the waiting is what eats the afternoon.
Table of Contents
- What You Need
- Step-by-Step: Build a Gingerbread House That Stays Together
- 1. Prepare the Templates and Choose a Simple House Design
- 2. Roll and Cut the Dough Evenly
- 3. Bake the Pieces Firm So the House Stays Together
- 4. Make the Icing Glue Thick Enough to Hold the House Together
- 5. Assemble the Base and Walls
- 6. Add the Roof and Let Everything Set
- 7. Decorate Without Overloading the House
- Common Mistakes That Make Gingerbread Houses Collapse
- Tips for a Stronger, Longer-Lasting Gingerbread House
- Frequently Asked Questions
- What is the best icing for making a gingerbread house stay together?
- How long should a gingerbread house dry before decorating?
- How do I keep a gingerbread house from collapsing?
- Can I make a gingerbread house ahead of time?
- How do I transport a gingerbread house without breaking it?
- Your First Fix: Thicker Icing and a Longer Wait
What You Need
You can build a house from a kit, from graham crackers, or from rolled gingerbread dough. The dough route gives you control over thickness, and thickness is what determines whether a wall can bear weight.
For the structure:
- Gingerbread dough, or a boxed mix, enough for two wall panels, two side walls, a front and back gable, two roof panels, and a base board
- A house template, printed or traced from a roof plan onto stiff cardboard
- Two sturdy baking sheets, plus parchment paper or a silicone baking mat
- Confectioners sugar, egg whites or meringue powder, and a small amount of cream of tartar
- A stand mixer or hand mixer, a piping bag, and a small round or star tip
- Small bowls or glass cups to brace the walls, plus toothpicks or wooden skewers
- A ruler, a rolling pin, and a sharp knife or a small cookie cutter
- A cake board, a piece of cardboard, or a baking sheet to use as a portable base
For decoration, once the house is dry:
- Gumdrops, mini marshmallows, candy canes, and small hard candies
- Edible glitter, sprinkles, and extra icing thinned into a flood consistency for windows
- Something yellow behind the windows if you want the house to glow, such as a tea light holder
Wax paper or acetate sheets work better than parchment for the large pieces. They peel away cleanly when you lift an edge, and a bent sheet releases a wall in one motion instead of a slow tug that cracks a corner.
Step-by-Step: Build a Gingerbread House That Stays Together
The order matters more than the speed. Bake first, cool completely, pipe the walls, wait, pipe the roof, wait again, decorate last. If you try to build and decorate in one sitting, you will be holding a roof panel with one hand and squeezing an icing bag with the other, and the seams will never set properly.
Difficulty is low. The fiddly part is keeping the dough an even quarter inch thick, and even that gets easier after the first piece. Children as young as five can pipe seams and place candies if an adult handles the roof and the props.
1. Prepare the Templates and Choose a Simple House Design
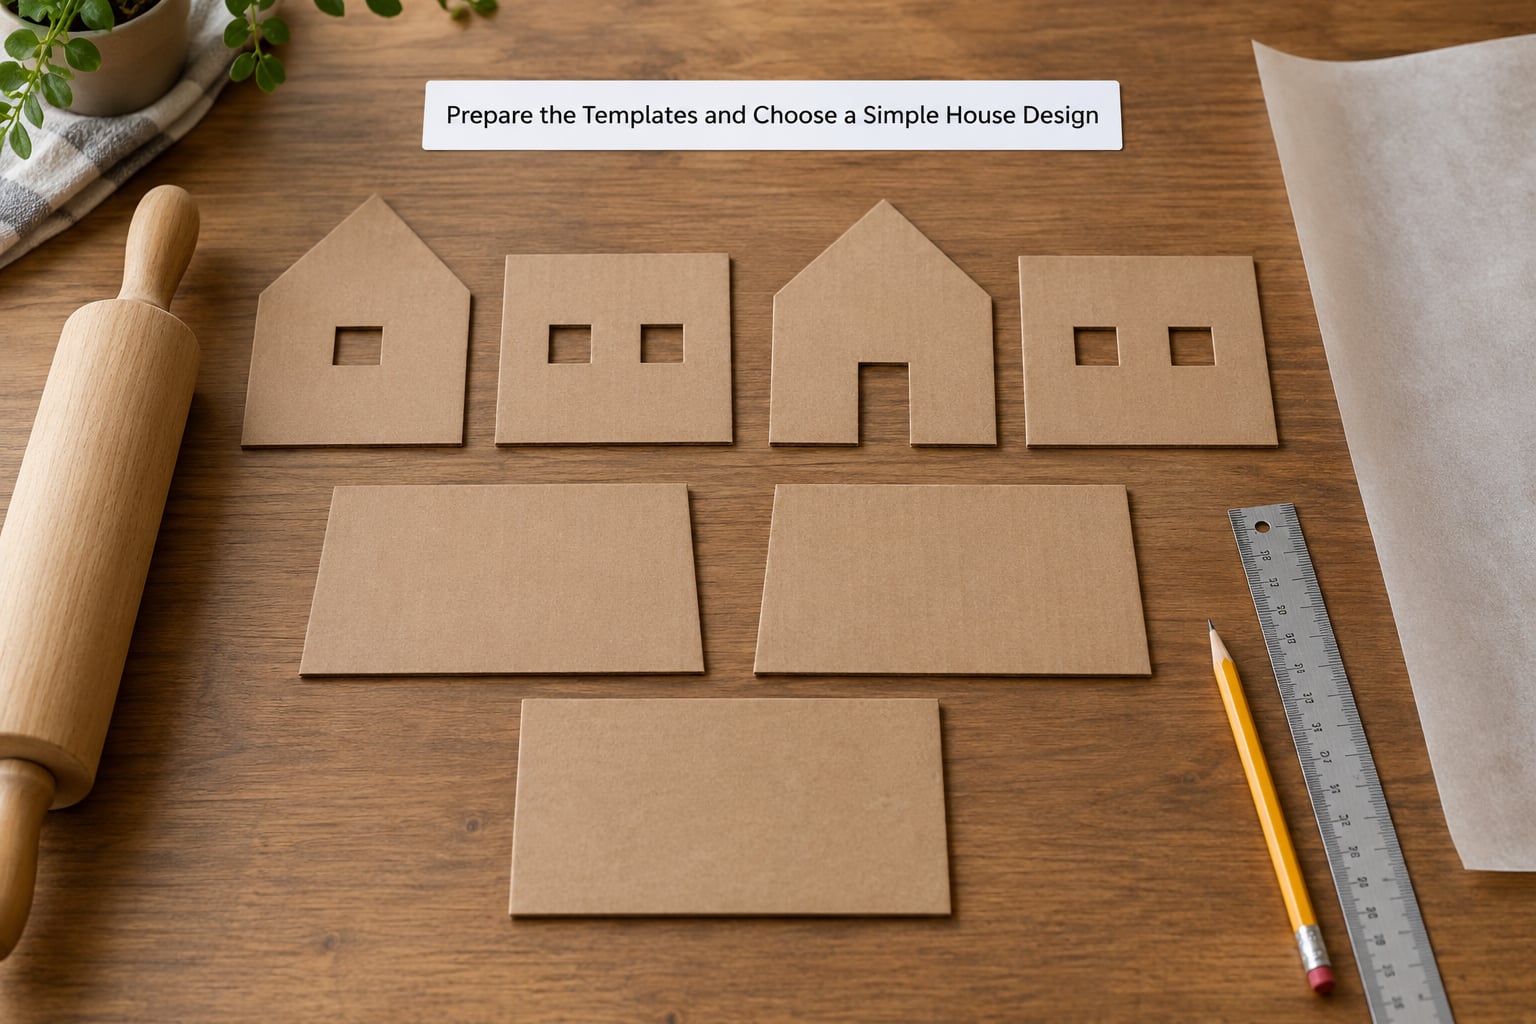
Simple shapes hold. A basic rectangle house with two straight walls, two gable ends, and two sloped roof panels survives far better than a design with curved eaves or a turret, because flat pieces meet along long straight seams that are easy to fill with icing.
Trace your plan onto stiff cardboard and cut it out with a craft knife. A cereal box is the right thickness. Floppy card bends during assembly, and that bend is exactly what tips a wall out of square.
Before you roll any dough, stand the pieces on edge and check that they meet. The two side walls should equal the length of the front and back walls, and the two roof panels should be identical so the ridge runs straight. A quarter inch of overlap at each corner is helpful, since it gives icing more surface to grab.
Make the base bigger than the footprint of the house by at least an inch on every side. That margin is your glue surface and your handle for moving the whole thing later.
2. Roll and Cut the Dough Evenly
Roll the dough to a consistent quarter inch. Thinner pieces snap at the corners when you lift them; thicker pieces bake into rocks that crack along the seam instead of bending slightly to meet their neighbor.
Chill the dough for at least an hour before cutting. Cold dough holds a sharp edge, and a sharp edge is what keeps a wall from slumping in the oven. If your dough cracks at the edges as you roll, pinch the cracks closed and add a spoonful of water; if it sticks to everything, dust the surface lightly with flour and chill it longer.
Cut with a sharp knife or a small straight-edged cutter, pressing straight down rather than sawing back and forth. Wobbling cuts leave a base with high and low spots, and a base that rocks is a house that will lean.
Keep the base flat and separate from the walls, about one inch larger on all sides. Many builders skip the base and glue the house straight to a board, but building the base out of dough gives you an anchor that anchors every wall below it.
Re-roll scraps only once or twice. Each pass warms the dough and dries it out, and the third re-roll usually gives you pieces that crack in the oven.
3. Bake the Pieces Firm So the House Stays Together
Bake at 350 degrees Fahrenheit for 12 to 15 minutes, depending on thickness. Construction dough holds its shape better than a soft gingersnap dough, so skip the molasses-heavy cookie dough and use a firm, low-spread recipe.
You know the pieces are done when the edges look dry and set, the centers no longer look wet or glossy, and a piece lifted with a spatula holds its shape without bending in a soft curve. Pale is fine. Dark is not, because scorched gingerbread turns brittle and will snap at the ridge.
Leave the pieces on the baking sheet for two full minutes after they come out of the oven, then move them to a rack. Gingerbread is deceptively fragile while it is warm, and it finishes hardening as it cools.
Wait until every piece is completely cool to the touch before you touch one with your hands. Warm gingerbread flexes, and flexing at the moment you set a wall onto a seam is how corners snap. This single waiting rule fixes more broken houses than any recipe change.
4. Make the Icing Glue Thick Enough to Hold the House Together
Royal icing is the right glue because it dries into a hard shell and does not need to be cooked or heated. For a house of average size, beat 1 pound of confectioners sugar with 3 large egg whites, half a teaspoon of cream of tartar, and a teaspoon of vanilla until the mixture holds stiff peaks, roughly five to seven minutes.
Families avoiding raw egg can swap the egg whites for meringue powder and water, following the ratios on the meringue box, then add the same amount of cream of tartar. It sets just as hard and it is the version most gingerbread house builders on family forums recommend for households with young children.
The consistency test matters more than the recipe. Turn the bowl upside down and none of the icing should fall out. Squeeze a small bead onto a spare piece of dough: if it slumps into a puddle, add more confectioners sugar a spoonful at a time. If it holds a sharp peak, it is ready to be glue.
Two warnings worth taking seriously. Pasteurized egg whites are the safer choice for anything a child will eat, and melted sugar burns as badly as any hot sugar and is strictly an adult job with everyone else out of the kitchen.
5. Assemble the Base and Walls
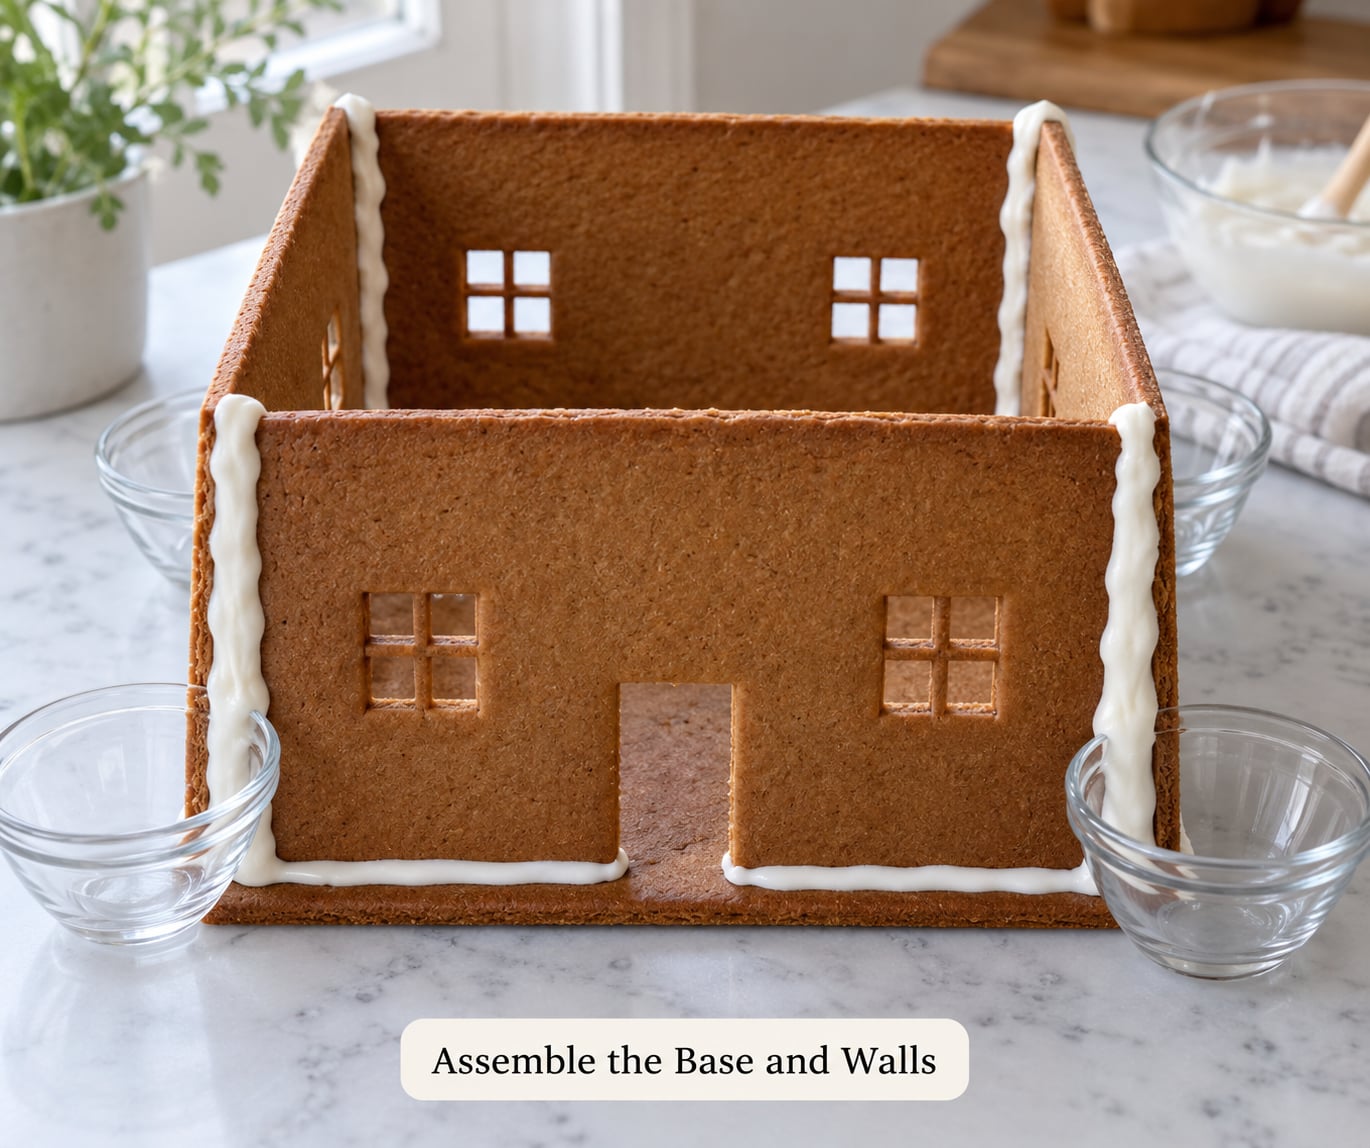
Set the base down first and pipe a generous bead of icing around where the first wall will sit. Press the wall into it and hold it for a few seconds to let the icing grab. Do not slide the wall into place, because sliding drags icing out from under the edge and leaves a hollow seam.
Stand a second wall parallel to the first and wedge a small glass bowl between them. The bowl is a temporary brace that stops the walls leaning toward each other, which is the single most common reason a house ends up looking like a lopsided card box. Glue the two remaining walls to close the box.
Run an extra thick seam on the inside corner of each joint. Interior seams carry the load and nobody ever sees them, so this is the best place to be generous.
Then stop. Leave the walls standing for 20 to 30 minutes before you touch anything. The success check is simple: come back, flick the top of a wall gently with a fingertip, and it should feel firm and stay vertical without you holding it. If it wobbles, give it another ten minutes.
6. Add the Roof and Let Everything Set
The roof fails more often than the walls, and the reason is physics. Two flat panels leaning against each other push outward at the ridge, and any gap in that ridge joint lets them slide straight off.
Dry fit both roof panels on top of the walls before you pipe anything. Slide them together until the ridge is nearly closed with no daylight and no visible step. That is the shape you want to rebuild.
Lift one panel, pipe a thick bead of icing along the top of each wall, and set the panel on. Run a generous seam along the ridge where the two panels meet, and press a little extra icing into any gaps. Push three or four toothpicks down through the ridge into the wall tops, leaving the visible ends long enough to pull out later. They are structural, not decorative.
Prop the roof from underneath with additional toothpicks, skewers, or a folded paper support while it sets. Remove the props after about an hour, not before, and press gently on each panel to confirm it does not shift.
Then give the finished house at least one more hour in a cool, dry spot before decorating. Overnight is better if you can manage it. The two waits people confuse are the short set, when icing stops being wet, and the full dry, when it becomes hard enough to carry weight. You need both.
7. Decorate Without Overloading the House
Work in order so the structural parts get covered first. Pipe a border along the roof edges and the base, then the windows, then the roof surface, and save the loose candy for last.
Place heavyweight items low. Malted balls, gumdrops, and anything dense belong along the base line and on the lower roof slope, where gravity helps instead of pulling. A roof loaded with heavy candy on both slopes is a roof that slides to the low side overnight.
Glue every decoration on. A drop of thick icing under each piece is enough, and it doubles as the adhesive and the visual detail.
Fragile things go on at the very end, right before the house goes on display. Frosting details smear if you handle them earlier, and a fingerprint on a snowy roof is a disappointment nobody enjoys.
Common Mistakes That Make Gingerbread Houses Collapse
Almost every failure shows up as a symptom you can diagnose. Here is what to look for and what to change.
| Symptom | Cause | Fix |
|---|---|---|
| Walls lean inward or spread apart | Nothing braced the corners while the icing was wet | Wedge small bowls between the walls, or tape a temporary cardboard corner, and let the seams set 20 to 30 minutes |
| The whole house sags minutes after assembly | The seams were still wet and every joint was under load | Wait the full set time between walls and roof, and leave the house untouched for an hour after the roof goes on |
| Icing behaves like frosting and puddles | Underwhipped, or too much liquid in the bowl | Beat another two to three minutes, then add confectioners sugar a spoonful at a time until a test bead holds a peak |
| Pieces crack while being moved | Handled while still warm from the oven | Cool fully on the sheet, then on a rack, and lift with a spatula instead of a finger and thumb pinch |
| Edges crumble and fall off the wall | Dough too dry, or rolled too thin | Use firm construction dough, roll to a full quarter inch, and pinch cracks closed before chilling |
| Walls spread flat in the oven | Soft cookie dough with too much fat or leavening | Switch to a firm low-spread recipe, and trim the baked pieces back to your template lines |
| Roof slides or falls off | Thin ridge seam, a stepped fit, or props removed too early | Dry fit first, pipe a fat ridge seam, add toothpicks, and keep the props on for a full hour |
| The house sags a day later | Warm or humid display spot softened the icing | Move it to a cool, dry room away from radiators, ovens and sunny windows |
If the dough itself is too crumbly to roll, it is usually short on molasses or brown sugar rather than short on flour. Add a tablespoon of molasses or corn syrup and knead it in. If it sticks to your hands instead, chill it longer and dust the surface rather than adding more flour, which makes the baked pieces dry and brittle.
For a house that has already slumped mid-build, the fix is rarely starting over. Stand it back up, prop the walls, and reinforce the failing joint by piping icing inside the corner where the crack is. Give it an hour to dry before you try to straighten it again, because moving a joint while the icing is wet just reopens it.
On the glue debate that comes up constantly on baking forums: royal icing made with meringue powder is the most common answer because it is edible, strong, and free of raw egg. Melted sugar works, and it sets into glassy glue, but it burns badly and needs a grown-up and a dry work area. Melted chocolate is fine for small decorative joins, not for load-bearing seams. Hot glue holds well and makes the house non-edible, plus it is difficult to squeeze into a seam without getting on the ceiling.
Tips for a Stronger, Longer-Lasting Gingerbread House
Work on a protected surface. A sheet of wax paper under your base catches icing drips, stray candies, and the crumbs from trimming the baked pieces to size. It also means the whole house is lifted by the base rather than by a wall.
Keep children away from the house while it dries, and give them the decorating job at the end. Set time is about an hour, and that hour is when the structure is most fragile. A single fingertip on an unset roof panel is often the difference between a house and a pile of pieces.
Build on a portable base. A cake board, a piece of cardboard, or a cookie sheet underneath the base lets you carry the whole house by the edges instead of gripping the roof. If you are moving it, the base is the only part you should touch.
Store it in a cool, dry room and out of direct sun. A house that sits above a radiator or in a humid kitchen picks up moisture, the icing goes tacky again, and the walls start to lean within a few days. On a board, away from heat, an all-edible house usually holds its shape for the several weeks of the holiday season, and the decorations fade before the structure gives.
If you want it to last as a display piece rather than as a treat, a light coat of clear craft sealant on the icing, applied only where nobody will eat it, locks the whole thing down and pushes the life out to several months.
Frequently Asked Questions
What is the best icing for making a gingerbread house stay together?
Royal icing beaten to stiff peaks is the best choice, made with 1 pound of confectioners sugar, 3 egg whites, half a teaspoon of cream of tartar, and a teaspoon of vanilla. Test it by squeezing a bead onto a spare cookie: it should hold a peak and not slump. Meringue powder works in place of egg whites if you want to avoid raw egg, and it sets just as hard.
How long should a gingerbread house dry before decorating?
Wait at least one hour after the roof goes on, and overnight is better if you can plan for it. The walls need 20 to 30 minutes of set time before the roof is added. If you press a roof panel gently and it shifts at all, it needs more time. Decorating too early is the most common reason a finished house slides apart in the first hour.
How do I keep a gingerbread house from collapsing?
Use firm construction dough rolled to a full quarter inch, bake it until the edges look dry and set, and cool every piece completely before handling. Join the pieces with thick royal icing rather than thin frosting, brace the walls with small bowls while the seams set, prop the roof for a full hour, and leave the house alone overnight before decorating.
Can I make a gingerbread house ahead of time?
Yes, and it is easier that way. Bake the pieces two or three days ahead and store them airtight at room temperature. Make the royal icing the day you assemble, since it needs a fresh mix to hold stiff peaks, though a covered bowl in the fridge keeps it usable for a day. The full build is best split across two days so the house can dry overnight.
How do I transport a gingerbread house without breaking it?
Build it on a cake board, a piece of cardboard, or a cookie sheet, and always lift it by the base. Put a layer of tissue or parchment over the roof and sides so nothing scrapes, and carry it level with two hands underneath the board. Do not pick it up by the roof peak. A structure that has dried overnight moves well; one that is still slightly damp does not.
Your First Fix: Thicker Icing and a Longer Wait
If you change only one thing this year, make the icing thicker. Beat it two minutes longer than the recipe says and add sugar until a test bead stands up on its own. Frosting-strength icing will never carry a roof, and no amount of careful assembly will make up for it.
The second change is to stop decorating on the same afternoon you build. Assemble the walls, wait, add the roof, wait an hour, then walk away and come back tomorrow. The house does almost all of its real bonding while you are asleep, which is the one advantage this project has over every other holiday craft on the list.