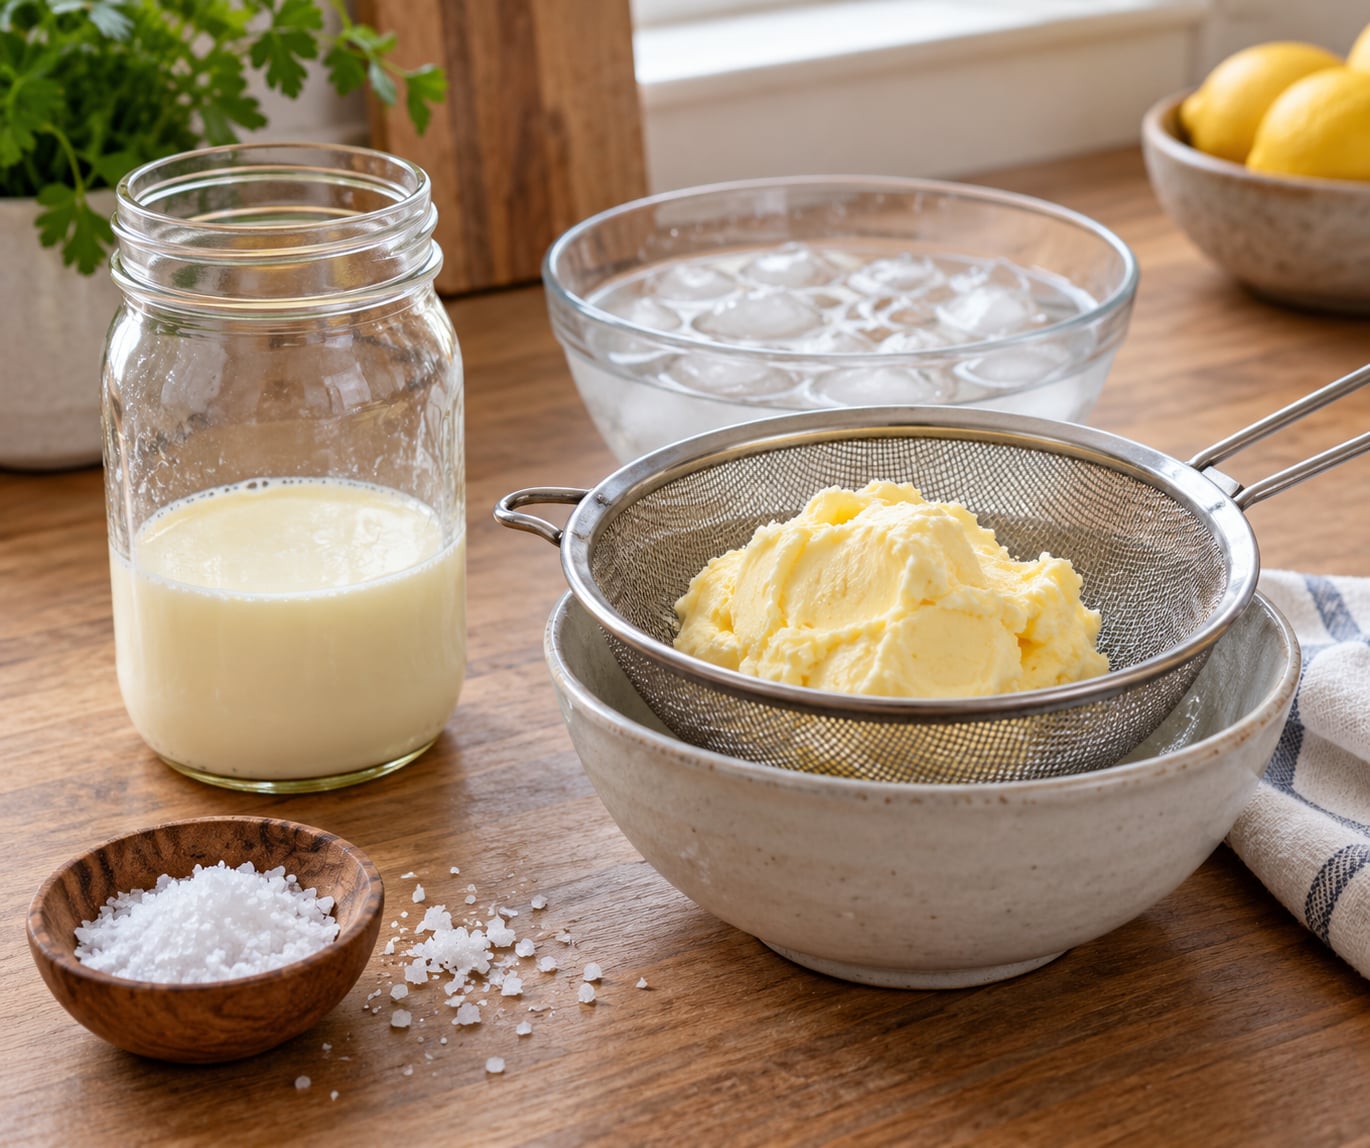
To make butter in a jar with kids, pour heavy whipping cream into a clean jar with a tight-fitting lid, fill it about one third full, and shake it for 10 to 15 minutes. The cream thickens into whipped cream, then suddenly breaks: pale yellow butter clumps to the bottom and a thin liquid called buttermilk pools around it. Strain off the liquid, rinse the butter in ice water, salt it, and eat it on toast.
There is no stove, no mixer and almost no cleanup. That is why this is one of my favorite kitchen science experiments to run with kids. They watch a liquid turn into a solid in real time, they get to shake something genuinely physical, and the experiment is edible at the end. Most families I know spend somewhere between 10 and 20 minutes of shaking, which is exactly long enough to feel like a project and short enough that nobody melts down.
A gallon of caution up front: an adult handles the jar until the butter is formed. Shaking a sealed glass jar hard enough to turn cream into butter is a genuine arm workout, and a lid that leaks at the wrong moment makes a mess of the kitchen. Kids can pour, pass, watch, strain and taste.
Table of Contents
- What You Need to Make Butter in a Jar with Kids
- Step-by-Step
- How to Make Butter in a Jar with Kids: Prepare the Cream
- Let the Cream Turn Into Butter
- Check the Butter and Buttermilk
- Remove and Rinse the Butter
- Taste and Store the Homemade Butter
- Common Mistakes
- Frequently Asked Questions
- How long does it take to make butter in a jar with kids?
- What kind of cream works best for making butter in a jar?
- Can toddlers make butter in a jar?
- Why is the cream not turning into butter?
- Can I use salted cream or regular milk?
- How should I store butter made with kids?
- Conclusion
What You Need to Make Butter in a Jar with Kids
- Heavy whipping cream (about 36% milk fat). This is the one ingredient you cannot substitute. Light cream and half-and-half are too thin to break into butter.
- A jar with a truly tight screw-top lid. A 4 oz or 8 oz Mason jar works well; a 16 oz jar works if only one third of it is filled. Skip canning lids, which are not built for vigorous shake.
- Fine sea salt, for kneading into the finished butter.
- A small strainer, sieve or colander plus a bowl, to separate butter from buttermilk.
- A bowl of ice water, for washing the butter.
- Optional: one clean marble or smooth pebble to act as an agitator, a pinch of honey or cinnamon for a flavored version, and a piece of parchment paper for wrapping.
Before anyone shakes anything, set the cream out on the counter for 15 to 20 minutes. Room temperature cream breaks into butter noticeably faster than cream straight from the fridge, though cream that has gone warm and loose can produce a greasy, separated result. You are aiming for cool, not warm. Meanwhile, wash hands, clear a stretch of counter, and put a towel under the jar. It will get damp on the outside.
Step-by-Step
How to Make Butter in a Jar with Kids: Prepare the Cream
Pour the heavy whipping cream into the jar so it fills about one third to one half. The empty space above the cream matters more than anything else in this recipe, because the cream needs room to fly, hit the lid and fall back. Fill the jar to the top and you have made a cream shaker, not a butter churn. Many parents call this headspace a butter concussion.
Let the kids look at the cream before the lid goes on. It is glossy, pale, and completely uniform. Ask them to predict what it will look like in ten minutes and write the prediction down. That single question turns a snack into an experiment. Then screw the lid on firmly, tighten it with a towel for grip if hands are small, and hand it over.
Let the Cream Turn Into Butter
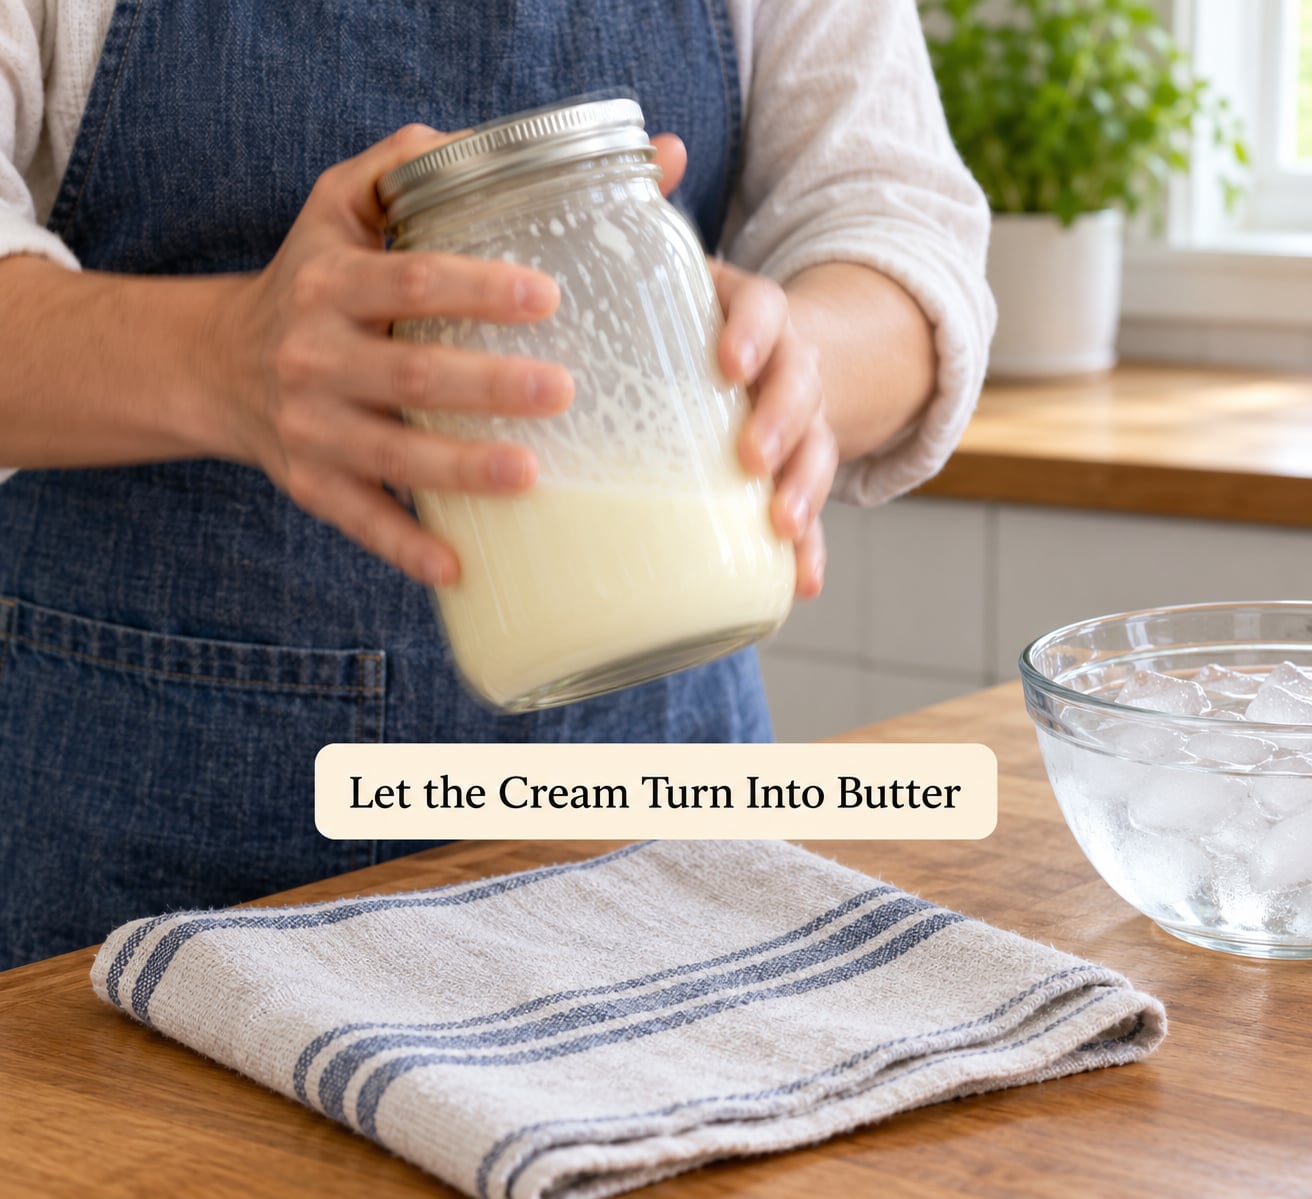
Shaking is the whole activity, so make it a game rather than a chore. If you landed here looking for how to make butter in a jar with kids in under five minutes, the honest answer is that the shaking is the activity, not a step in it. One-minute shake sprints with a rest between work really well, and so does a relay where each child takes a turn. Some families prefer the butter walk: instead of shaking in place, walk laps around the kitchen holding the jar at chest height. Kids who cannot yet grip a jar firmly can manage a walk, and it wears out arms just as effectively.
Here is roughly what you are watching for. Times vary with jar size, temperature and how vigorously the jar gets shaken.
| Time | What it looks like | What it sounds like |
|---|---|---|
| 2 minutes | Still pourable, maybe a little thicker | Steady sloshing |
| 5 minutes | Thick, like soft whipped cream, coats the sides | Louder, heavier churn |
| 8 to 10 minutes | Suddenly grainy, small yellow clumps appear | The sloshing goes quiet |
| 12 to 15 minutes | A soft butter mass at the bottom, clear liquid around it | A dull thud when you set it down |
That quiet stretch is not a failure, and it is where most families think something has gone wrong. The noise drops because the cream has stopped being a liquid that sloshes and become a foam that absorbs the movement. Keep going. Once the break happens it happens fast, and no amount of extra shaking will undo it.
Check the Butter and Buttermilk
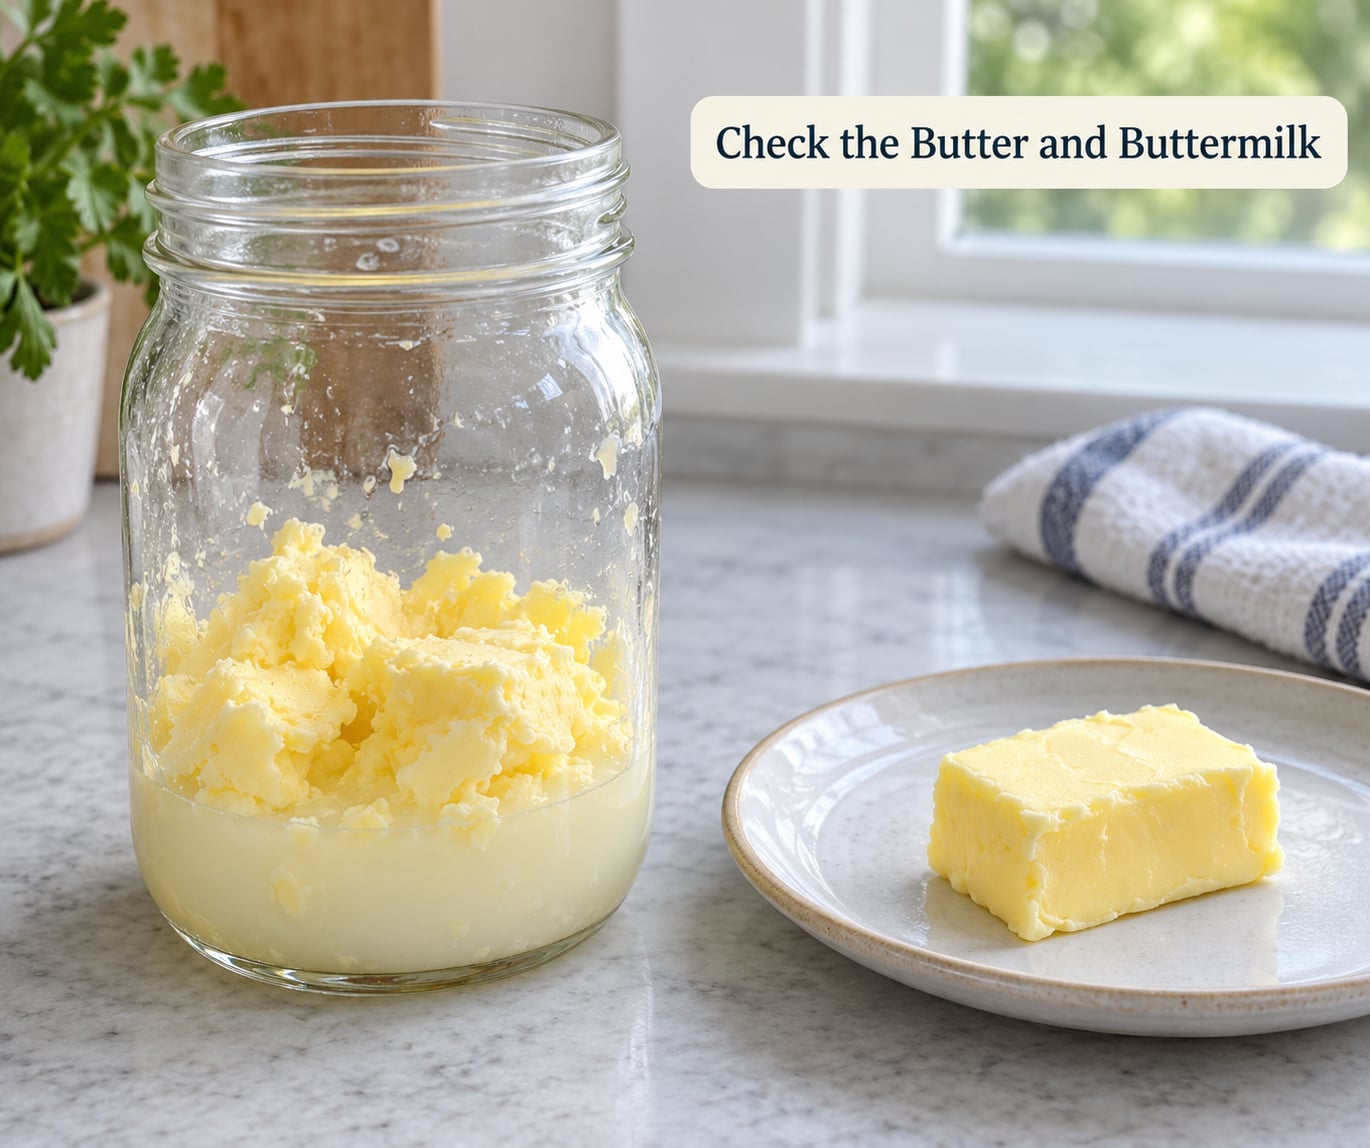
Open the lid over the sink or the bowl, not over the counter. Inside you should see soft, pale yellow clumps pressed into one lump at the bottom and a thin, slightly cloudy, faintly sweet-smelling liquid pooled around it. That liquid is the buttermilk, and it is not cultured buttermilk from the dairy aisle. It is thin, mild and faintly sweet, with no sour tang, because nothing fermented.
To test it, tip a little of the butter onto a plate and press it with a fingertip. If it holds its shape and dents like a soft crayon, it is done. If it melts into a puddle straight away, keep shaking for another two minutes. You cannot over-shake this method. Once the fat has separated, more shaking just works the butter into a tighter, more solid mass.
Remove and Rinse the Butter
Tip the jar into a small strainer set over a bowl and let the buttermilk drain through. Gather the butter clumps in the strainer, and press out the liquid with the back of a spoon or a clean spatula. Every bit of trapped buttermilk left on the butter is what turns homemade butter sour within a day, so this step is not optional.
Now rinse. Put the butter in a bowl of ice water, swish it gently with your fingers, and change the water when it runs cloudy. Repeat until the water runs clear, usually two or three changes. Use cold water every time, and never warm or hot, because warm water melts the butter and washes the flavor straight out of it. Grab the small butter bits that escape the strainer rather than letting them go down the drain. When the water is clear, squeeze the butter firmly one last time and pat it dry on a towel.
Taste and Store the Homemade Butter
Do the salting last, and this is the part most recipes get backwards. Add a pinch of fine sea salt to the drained butter and knead it through with your fingers. Salt early and the liquid you drain off is salted too, which wastes it, since that buttermilk is good for pancakes, biscuits and quick bread. Knead in a little honey and cinnamon instead if you are making a sweet butter for toast.
Then get it into the fridge promptly. Wrap the butter in parchment paper or press it into a small airtight container with a little extra salt on top, and refrigerate. It keeps about one to three weeks in the fridge, and three months in the freezer, which is the honest difference between this and a wrapped supermarket stick.
Use pasteurized cream rather than raw, especially for young children, and do not leave dairy sitting at room temperature for more than two hours while the activity drags on. Get any unsalted butter they are not eating straight into the fridge, and let the kids taste it with a cracker on a plate rather than straight off the spoon, so the mess stays contained.
Common Mistakes
The jar is too full. This is the number one reason nothing happens, and it is the one that makes how to make butter in a jar with kids look harder than it is. The cream needs air space to move; filled to the neck it just paints the walls and never breaks. Fill to one third, or at most half.
The lid leaks. A loose lid means cream sprayed over the ceiling and less agitation inside. Wipe the threads clean, dry them, and screw it down until it stops turning. A rubber ring from a canning jar helps if yours is a glass jar with a metal lid.
Everyone shakes too gently. A child shaking an inch a minute will still be at the whipped cream stage after twenty minutes. Fast, short, whole-arm strokes work better than a tired half-hearted sway, and one-minute sprints keep the effort honest.
Confusing the liquid with butter. The buttermilk is the liquid. If it pours, it drains off. If it holds a dent when you poke it, it is butter.
Rinsing with warm water. Warm water melts the butter and takes the flavor with it. Ice water or very cold tap water only.
Throwing away the small pieces. The bits that slip through the strainer are often most of the yield from a small jar. Fish them out and add them to the bowl.
Expecting it in three minutes. Plenty of honest parent reports land between 10 and 25 minutes of actual shaking. If the jar is overfilled or the cream is fridge cold, add time. Under-filling it and letting the cream warm up first are the two quickest fixes.
A quick aside on history. This activity is a scaled-down version of a butter churn, which is exactly why it appeals to kids studying how food is made. Amish families in particular kept hand-cranked and dash churns for generations, working cream into butter in small batches, and then packed the finished butter down hard in crocks or wooden containers to keep air out. Modern store-bought sticks are wrapped and frozen; yours gets wrapped in parchment and chilled the same day.
Frequently Asked Questions
How long does it take to make butter in a jar with kids?
Plan on 10 to 15 minutes of steady shaking, with realistic families landing anywhere from 10 to 25 minutes depending on jar size, cream temperature and how hard the jar actually gets shaken. Fill the jar only one third full and let the cream sit out for 15 to 20 minutes first, and you will sit at the short end of that range.
What kind of cream works best for making butter in a jar?
Heavy whipping cream with about 36% milk fat is the only reliable choice. It needs enough fat to clump into a solid mass, and that is why light cream, half-and-half and ordinary milk never break into butter. Pasteurized heavy whipping cream is the safest pick when young children will be eating the result. Read the label, not the front of the carton.
Can toddlers make butter in a jar?
A toddler can pour the cream, hold the marble, carry the jar in the butter walk, watch the stages and taste the butter, but should not shake the jar hard themselves. Vigorous shaking is a real arm workout and a leaking lid is a sticky floor hazard. Let the shaking be an adult job, and save the tasting for after the butter is washed and salted.
Why is the cream not turning into butter?
Most often it is still in the whipped cream stage, which feels far longer than it is. Other causes: the jar was filled too high so the cream cannot move, the lid leaks so you are losing the agitation, the cream is straight from the fridge, or the shaker is just too gentle. Fixes are one third full, lid tight, cream warmed for 15 to 20 minutes, and faster strokes in one-minute sprints.
Can I use salted cream or regular milk?
Regular milk will not work at any stage, because it is too thin in fat to clump into butter. Salted or already salted butter is not a practical substitute since you need the cream fat to separate first. Use plain unsalted heavy whipping cream and add your own salt at the end, which also keeps the drained buttermilk drinkable and usable for baking.
How should I store butter made with kids?
Squeeze the water out, pat it dry, wrap it in parchment or seal it in a small airtight container and refrigerate it straight away. It keeps about one to three weeks in the fridge and up to three months in the freezer. Unwashed butter turns sour fast because trapped buttermilk ferments, so rinsing until the water runs clear is what buys you those weeks.
Conclusion
Start by pouring cold heavy whipping cream into a jar with a tight lid and filling it only a third of the way. Shake in one-minute sprints until the sloshing goes quiet and yellow clumps appear, then strain off the liquid, rinse the butter in ice water until the water runs clear, and knead in a pinch of salt. Expect 10 to 25 minutes of shaking, keep an adult on the jar, and refrigerate whatever the kids do not finish within the hour.