To make fruit leather in the oven, blend ripe fruit smooth, spread it about 1/8 inch thick on a lined rimmed baking sheet, and bake at the oven’s lowest setting until the sheet is dry, leathery and no longer sticky to the touch. Most batches take three to eight hours, and you never have to stir anything.
It is a forgiving project. The fruit does the work, the oven does the drying, and the only real skill is spreading an even layer. It is also the fastest way to rescue a bag of soft strawberries or a bowl of peaches that will not keep.
Table of Contents
- What You Need
- Equipment
- Which Liner Works Best
- Ingredients
- Do You Need Sugar or Lemon Juice to Keep It Safe?
- Step-by-Step: How to Make Fruit Leather in the Oven
- Prepare the Fruit
- Spread the Puree
- Dry It in the Oven
- Oven Temperature and Time by Fruit
- Cool, Cut, and Store
- Common Mistakes
- Frequently Asked Questions
- What fruit works best for oven fruit leather?
- How thick should the fruit puree be spread?
- What temperature should I use to make fruit leather in the oven?
- How long does oven fruit leather take to dry?
- How long does homemade fruit leather last in the refrigerator?
- Can I freeze oven-made fruit leather?
- Get Started with a Small Batch
What You Need
Equipment
- A rimmed baking sheet (a cookie sheet works, and a rim matters because the purée runs before it sets).
- Parchment paper, a silicone baking mat, or microwave-safe heat-proof plastic wrap.
- A blender or food processor, plus a spatula for spreading.
- A pizza cutter or kitchen scissors for cutting strips once the sheet is cool.
None of that is specialized. If you have a sheet pan and something that blends, you have everything the job needs.
Which Liner Works Best
This is the question readers argue about most, so here is the honest version. Parchment paper is the cheapest liner and works fine for smooth purées like applesauce or mango, but a thin, sugary fruit will often cling to it and tear when you try to peel. A silicone baking mat is the pick for reliability.
| Liner | Stick risk | Peels cleanly? | Watch out for |
|---|---|---|---|
| Silicone baking mat | Lowest | Yes, usually lifts in one piece | Trim it to the exact pan size so nothing overhangs |
| Parchment paper | Moderate, higher for sugary fruit | Often tears at the edges | Rub a little neutral oil on the paper first if fruit is sticky-sweet |
| Heat-proof plastic wrap | Lowest | Yes | Must not touch the oven rack or sides; needs a rimmed pan to catch leaks |
Never use wax paper. The wax softens and can transfer onto the fruit as the oven gets hot.
Ingredients
- 4 cups ripe fruit, about 4 medium apples, 2 cups of berries, or 4 peaches, peeled and pitted.
- 1 to 3 tablespoons sweetener, optional. Honey, maple syrup, agave or sugar all work; start at 1 tablespoon and taste.
- 1 tablespoon lemon juice, optional. It keeps the color bright and stops peaches and apples from going brown.
- Cinnamon, vanilla or a pinch of nutmeg, optional.
About 3 cups of purée covers a 13 by 18 inch cookie sheet at the right thickness. A smaller pan just means a thinner batch and a faster dry.
Do You Need Sugar or Lemon Juice to Keep It Safe?
No. Drying the fruit until the moisture is gone is what preserves it, so sugar and lemon juice are flavor choices rather than safety requirements. A sheet dried properly, cooled, cut and stored airtight keeps for weeks without either one.
Step-by-Step: How to Make Fruit Leather in the Oven
Prepare the Fruit
Wash the fruit, then peel and pit anything with a pit or a tough skin. Berries only need to be rinsed and destemmed. Skip the rind on oranges, lemons and grapefruit; it turns bitter as the water leaves.
Blend until completely smooth. If you own a food mill or a chinois, push the purée through it for a silkier sheet, especially with berries that have small seeds.
Stone fruit is the exception that catches people out. Raw peaches, apples and nectarines blend into a stringy purée that never looks right and dries unevenly. Cook those first: simmer the chopped fruit in a saucepan for 10 to 15 minutes until soft, then blend. That step alone cuts an hour off the drying time.
Adjust the texture before it goes in the oven. Too thick and it scorches before the water leaves; too thin and it runs off the tray in the first hour. Thin a thick purée with a splash of water or apple juice, and thicken a runny one by simmering it down on the stove.
Spread the Puree
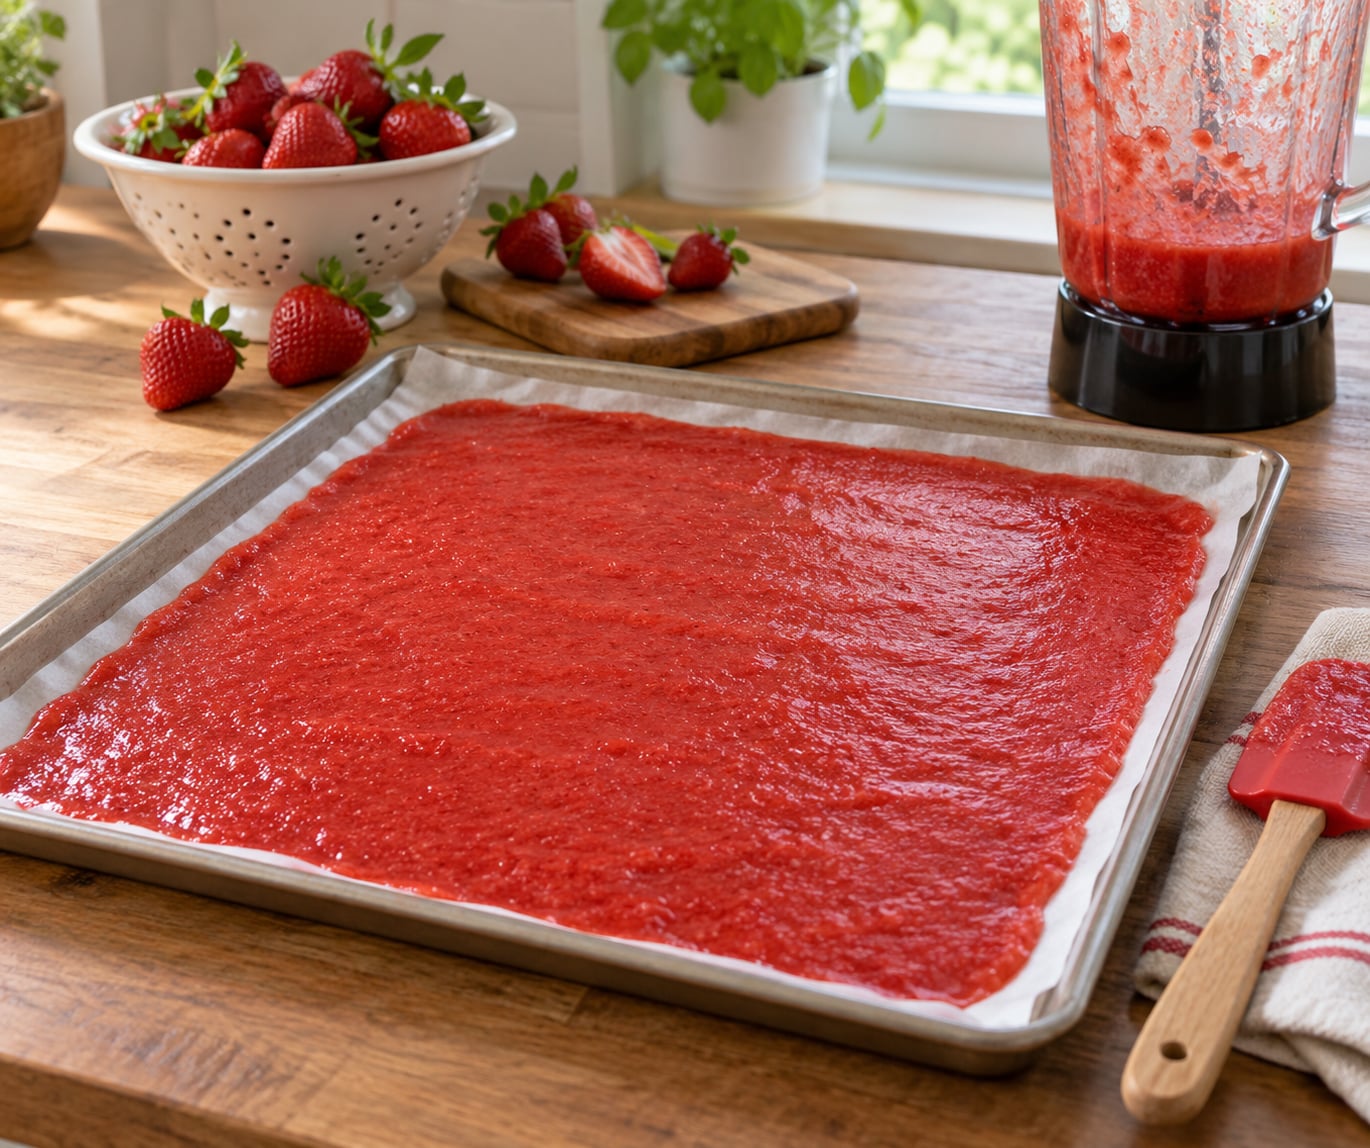
Heat the oven to its lowest setting first, then line a rimmed baking sheet. Set the sheet on the oven rack and use a silicone spatula to spread the purée from the middle outward in long strokes.
Aim for a layer about 1/16 to 1/8 inch thick, roughly the thickness of a heavy coin. A good visual test: you should be able to see the metal of the pan faintly through the layer in a few spots. Where the purée is thicker than that, it stays tacky in the middle while the edges over-dry.
Tidy up the edges. The rim of the pan runs hotter, so the outer inch of the sheet dries first and turns brittle. Two habits fix it: spread a slightly thinner layer around the border, and pull the sheet off the rack position where the edges sit.
Dry It in the Oven
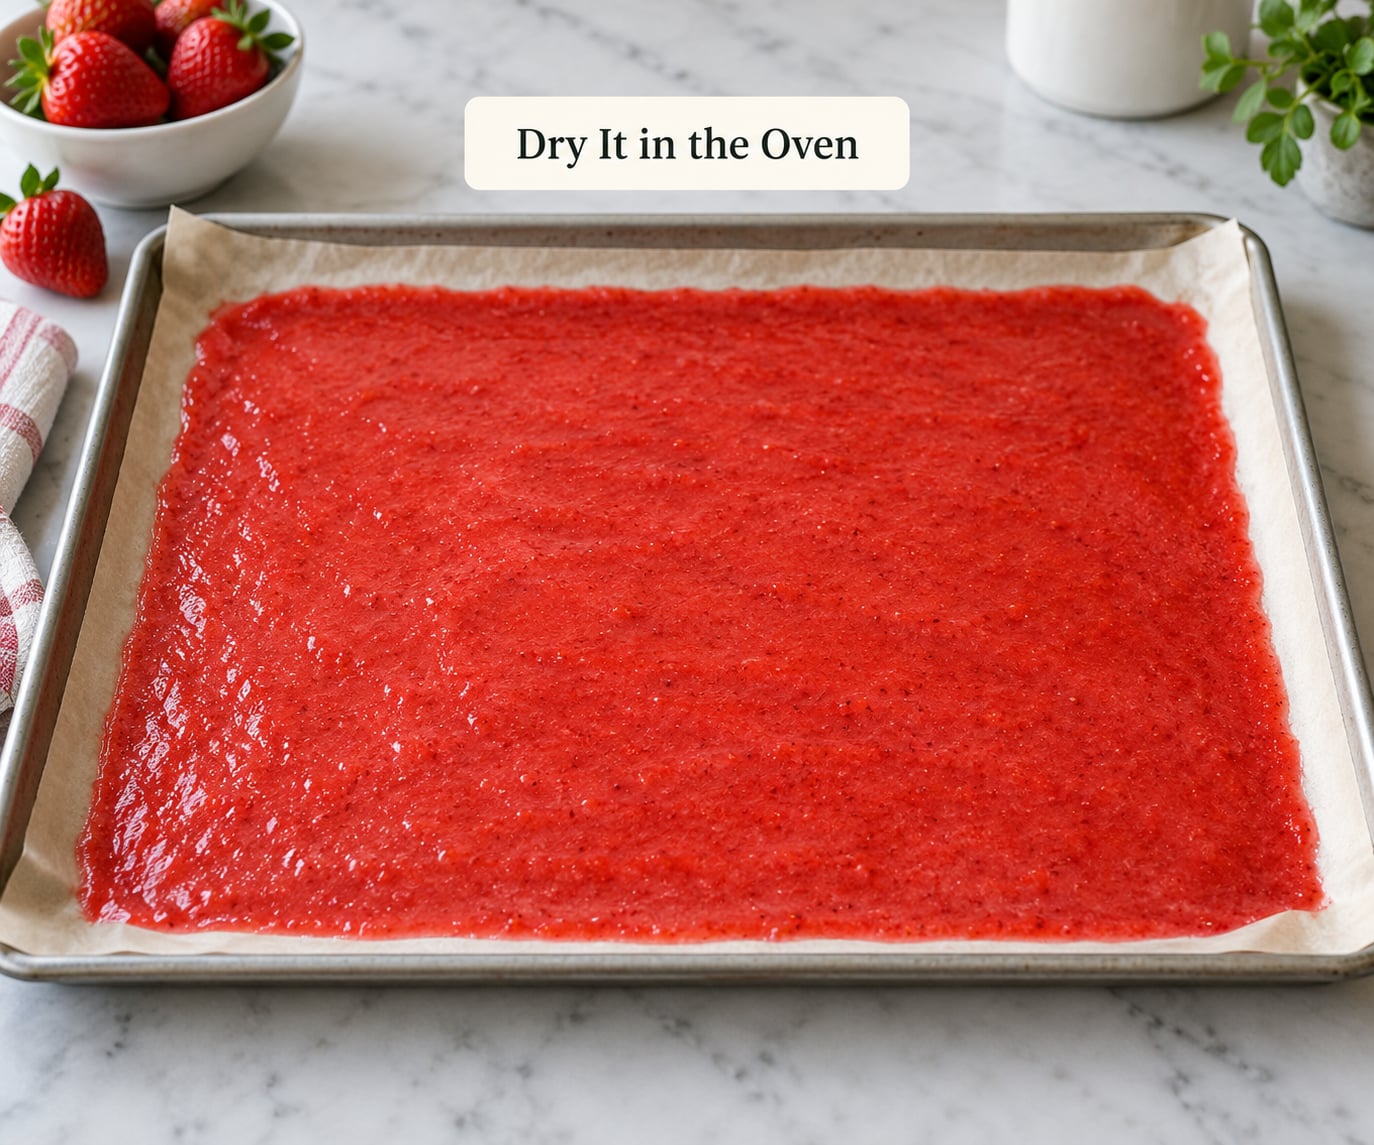
Put the sheet in the oven at 140 to 170°F (60 to 77°C). If your oven has a warm or keep-warm setting, that is usually the right one. Never raise the heat to speed things up; you are removing water, not cooking fruit, and above about 180°F the sugar starts to scorch before the middle dries.
Start checking at three hours for watery fruits and at five for purées made from cooked fruit. Rotate the pan halfway through if your oven runs hot on one side. If you have convection, use it and check about an hour early, since the fan moves more air past the sheet.
Oven Temperature and Time by Fruit
| Fruit | Oven setting | Bake time | Note |
|---|---|---|---|
| Strawberry, raspberry, blueberry | 150°F (65°C) | 4 to 6 hours | Seeds stay crunchy unless strained |
| Peach, nectarine, plum, apricot | 150 to 170°F (65 to 77°C) | 6 to 8 hours | Cook the fruit first to avoid a stringy puree |
| Apple, pear, plum sauce or applesauce | 140 to 150°F (60 to 65°C) | 3 to 4 hours | Fastest dry; no blending needed if you buy unsweetened sauce |
| Mango, pineapple, papaya | 140°F (60°C) | 5 to 7 hours | Sugar in low at first, then raises fast |
| Watermelon, cantaloupe | 150°F (65°C) | 6 to 8 hours | Strain through cheesecloth first; too much water will not set |
| Mixed vegetable (carrot, beet, sweet potato) | 150°F (65°C) | 6 to 8 hours | Cook until soft before blending |
You will know it is done when the sheet looks matte instead of glossy, feels dry with a faint tack in the very center, and lifts away from the liner in one piece with no wet spots underneath. Bend a corner gently: it should flex without cracking. Brittle or cracking means you have gone a little too far and it will be tough to roll.
A warm sheet peels and cuts far better than a hot one, so turn the oven off and let the pan sit for fifteen minutes.
Cool, Cut, and Store
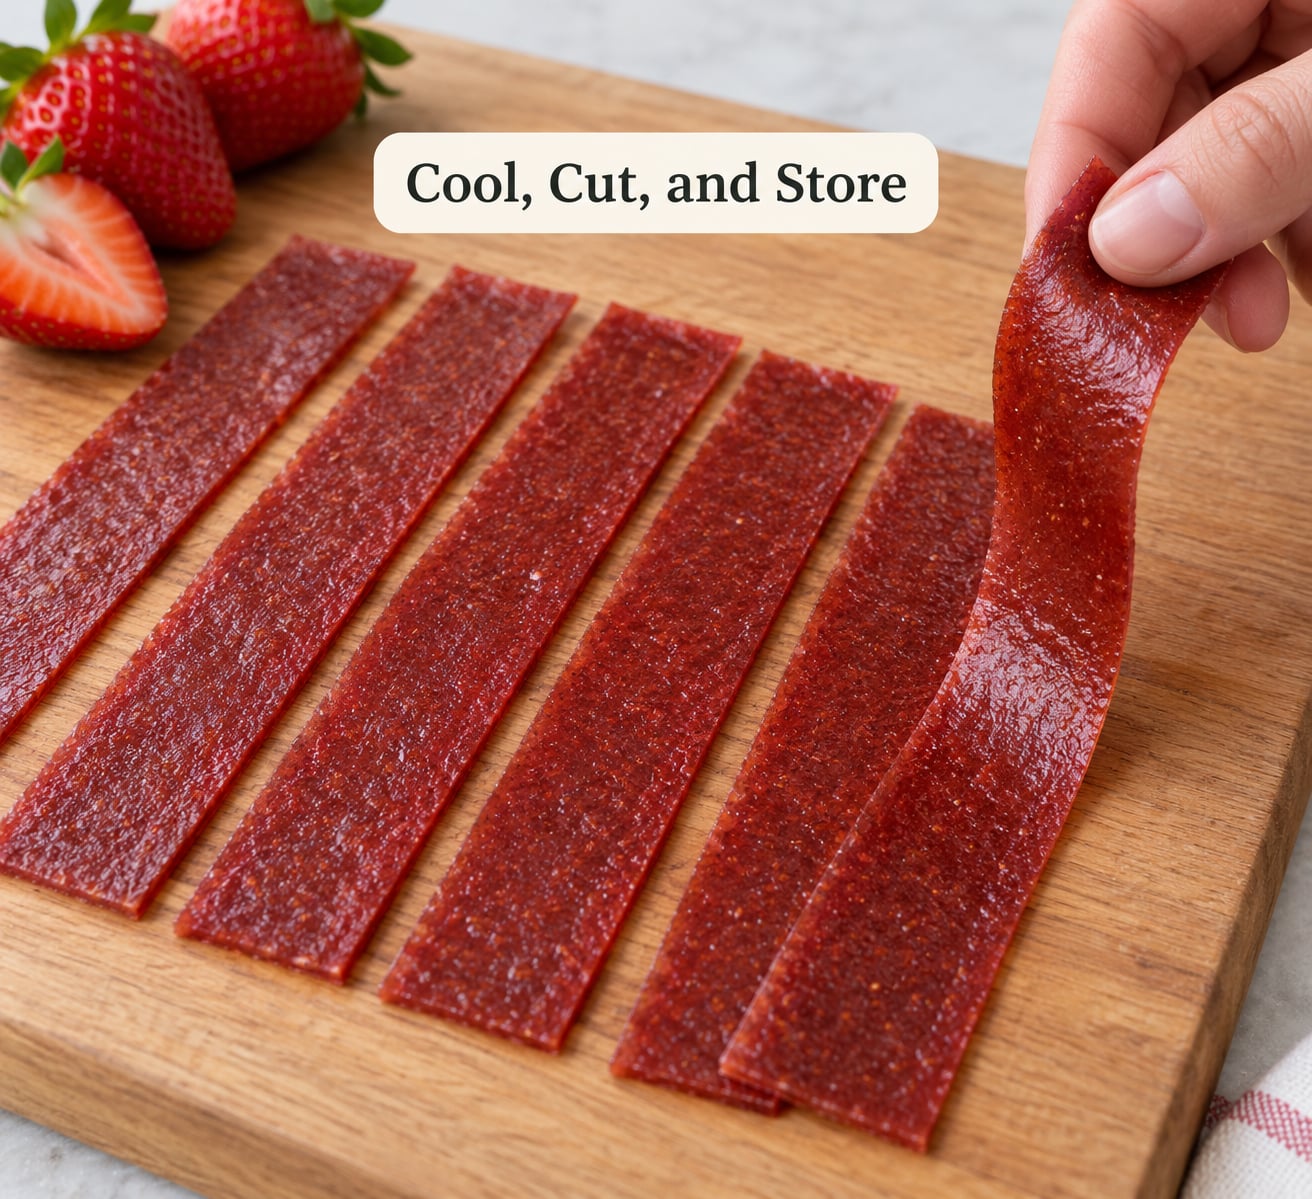
Cool the sheet completely on the pan, then peel it off the liner and cut it with a pizza cutter into strips about an inch wide. Rolling is optional; most families just eat the strips, and small kids like the finger-sized pieces.
Store the strips in an airtight container or a zip-top bag so they do not rehydrate from air. Airtight is the whole trick, because any moisture that gets back in softens the leather and shortens its life.
| Storage | Keeps for | Notes |
|---|---|---|
| Airtight, cool dark cupboard | 2 to 4 weeks | Fine in most kitchens; check for softness before eating |
| Refrigerator, airtight | Up to 6 months | Bring to room temperature before unrolling |
| Freezer, sealed and dated | Up to a year | Stack pieces with parchment between layers so they do not fuse |
| Vacuum sealed and frozen | About a year | The method people use for garden surplus and camping food |
If the strips are soft in the middle, put them back in the oven for another 30 to 60 minutes. Ten minutes will rarely fix it, but a short second bake almost always will.
Common Mistakes
The center is still sticky while the edges are brittle. That is the single most common result, and it comes from an uneven layer. Spread thinner overall, especially around the rim, and cut the pan edge loose from the rack so the outer inch does not cook at double speed.
The edges scorch before the middle sets. The pan rim runs hot. Use a rimmed sheet rather than a flat pan, and if your oven is convection or gas, drop the setting by 10°F (5°C) or rotate the tray halfway.
The finished sheet is rubbery. It either dried too fast at a high temperature, which caramelized the sugar, or the layer was too thick for the time you gave it. Next time go thinner and give it another hour.
There are wet spots and it will not release. Those wet spots turn into mold within days. Take it out and keep baking until nothing looks damp underneath, then cool before peeling.
It sticks to the parchment and tears. Very common, and readers on cooking forums hit it constantly. Switch to a silicone baking mat, or lightly oil the paper before spreading. Never scrape fruit off paper with a knife; you will lose half of it.
The puree leaks under the liner in the first hour. Too watery, or the liner is smaller than the pan. Cook the purée down for a few minutes, cut the liner to fit exactly, and always use a rimmed sheet with something underneath to catch drips.
It will not roll. Rolling needs a flexible, slightly tacky sheet, not a dry one. Pull it a little sooner; over-dried leather cracks along the roll and shatters into flakes.
Two habits cover most of the trouble. Warm the fruit and cook it briefly, and buy a second sheet so you can bake two trays at once and learn from the comparison. If your oven runs hot, an air fryer set to its lowest drying temperature works on a single tray for many of these fruits, though the timing shifts with every model.
Frequently Asked Questions
What fruit works best for oven fruit leather?
Berries, apples, peaches, nectarines, mangos and pears all work, and the deciding factor is water content. Peaches, apples and nectarines should be cooked for 10 to 15 minutes before blending or they turn stringy and dry unevenly. Watermelon and cantaloupe are the hardest because of their water, so strain them through cheesecloth first. Slightly overripe fruit is ideal since it blends smooth and sweetens itself.
How thick should the fruit puree be spread?
Spread the puree about 1/16 to 1/8 inch thick, roughly the thickness of a heavy coin. You should be able to see the pan faintly through the layer in a couple of spots. Any thicker and the middle stays tacky while the edges over-dry. Keep the outer inch slightly thinner than the center, since the rim of the pan dries first and turns brittle.
What temperature should I use to make fruit leather in the oven?
Use the lowest setting your oven offers, between 140 and 170°F (60 to 77°C). A warm or keep-warm setting works well. Do not go above 180°F to save time, because the sugar in the fruit will scorch long before the center dries. If your oven runs hot, drop the setting 10°F and rotate the pan halfway through the bake.
How long does oven fruit leather take to dry?
Plan on four to six hours for berries and three to four hours for applesauce-based batches. Stone fruit such as peaches and nectarines take six to eight hours, and watermelon can run eight. Start checking at the three-hour mark and judge by feel rather than the clock, since every oven and every pan thickness behaves a little differently.
How long does homemade fruit leather last in the refrigerator?
Stored airtight in the refrigerator, homemade fruit leather keeps for up to six months. In a cool, dark cupboard it stays good for two to four weeks. Frozen and sealed, it holds about a year; stack the strips with parchment between layers so they do not freeze into one block. Always cool the sheet fully before sealing it into a container.
Can I freeze oven-made fruit leather?
Yes, and it is the best way to keep a big batch. Let the strips cool completely, lay them flat in a freezer bag or sealed container with parchment between layers, and date the container. Thaw at room temperature for about ten minutes before rolling or serving. Fruit leather frozen without air sealing can absorb odors from the freezer.
Get Started with a Small Batch
Make one thin tray first and watch what your oven actually does with it. Fill about three cups of a smooth purée onto a lined sheet, spread it even, and set the oven to its lowest setting. Give it the full dry time, cool the sheet properly before you cut it, and taste a strip.
Only then change anything. Adjust the second batch for thickness or temperature based on how the first one behaved. Fruit leather rewards patience more than technique, and once you have your oven’s number dialed in, a tray of surplus peaches or strawberries turns into weeks of lunchbox snacks.