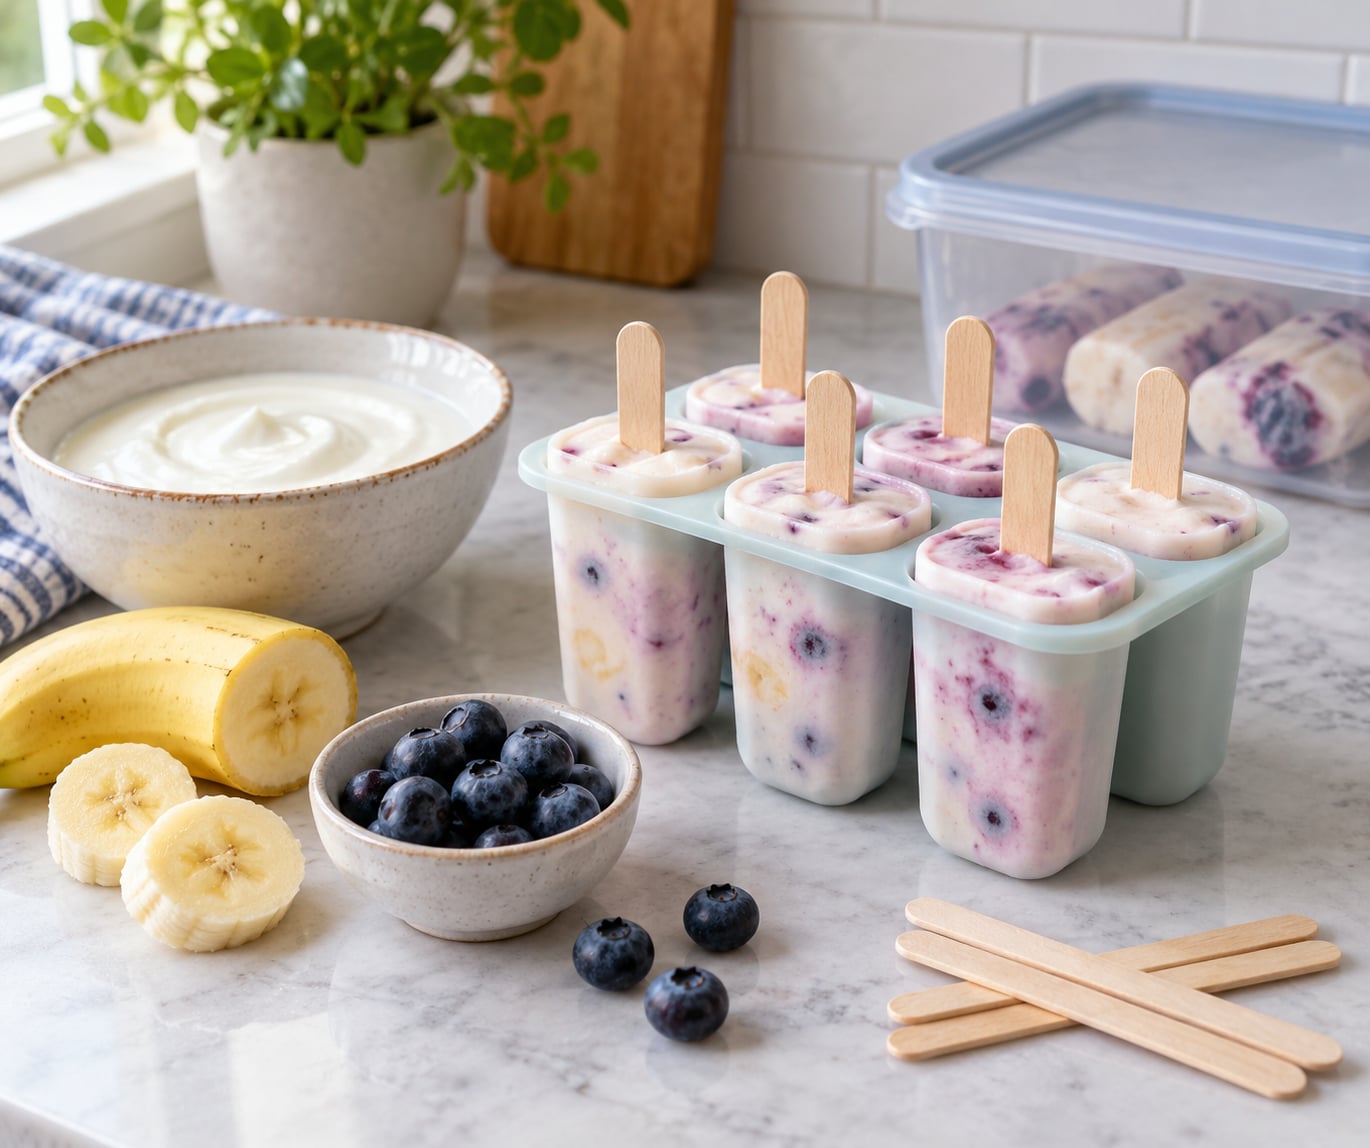
To make yogurt pops for toddlers, blend 1 cup of plain full-fat Greek yogurt with 1 cup of fresh or thawed fruit until smooth, pour it into small molds or a yogurt cup, and freeze for 4 to 6 hours or overnight. Let the pop sit at room temperature for 5 to 10 minutes before handing it over so it is soft enough to eat.
It takes about ten minutes of prep and then the freezer does the rest. You need one bowl or blender and a way to hold the mixture while it freezes — a silicone popsicle mold if you have one, or three things already in your kitchen if you don’t.
Toddlers eat these happily because the yogurt is cool and mildly sweet while the fruit does the flavor work. Parents make them because a homemade pop has fruit, calcium and protein in it, with no artificial color and no added sugar, which is not something most store-bought frozen treats can say.
Texture is the whole game at this age, so this guide sticks to a texture-by-age rule: fully smooth under 12 months, lightly chunky from 12 to 24 months, and as chunky as you like once your toddler is two.
Table of Contents
- What You Need
- How to Make Yogurt Pops for Toddlers: Step-by-Step
- Step 1: Choose a Toddler-Friendly Base
- Step 2: Mix in Simple Flavorings
- Step 3: Fill the Molds and Freeze
- Step 4: Remove and Serve Safely
- Simple Yogurt Pop Variations
- How to Store Yogurt Pops
- Common Mistakes
- Frequently Asked Questions
- What age can toddlers eat yogurt pops?
- Can I make yogurt pops without added sugar?
- How long do homemade yogurt pops take to freeze?
- Are yogurt pops choking hazards for toddlers?
- Can I use Greek yogurt or dairy-free yogurt?
- How should yogurt pops be stored and thawed?
- Conclusion
What You Need
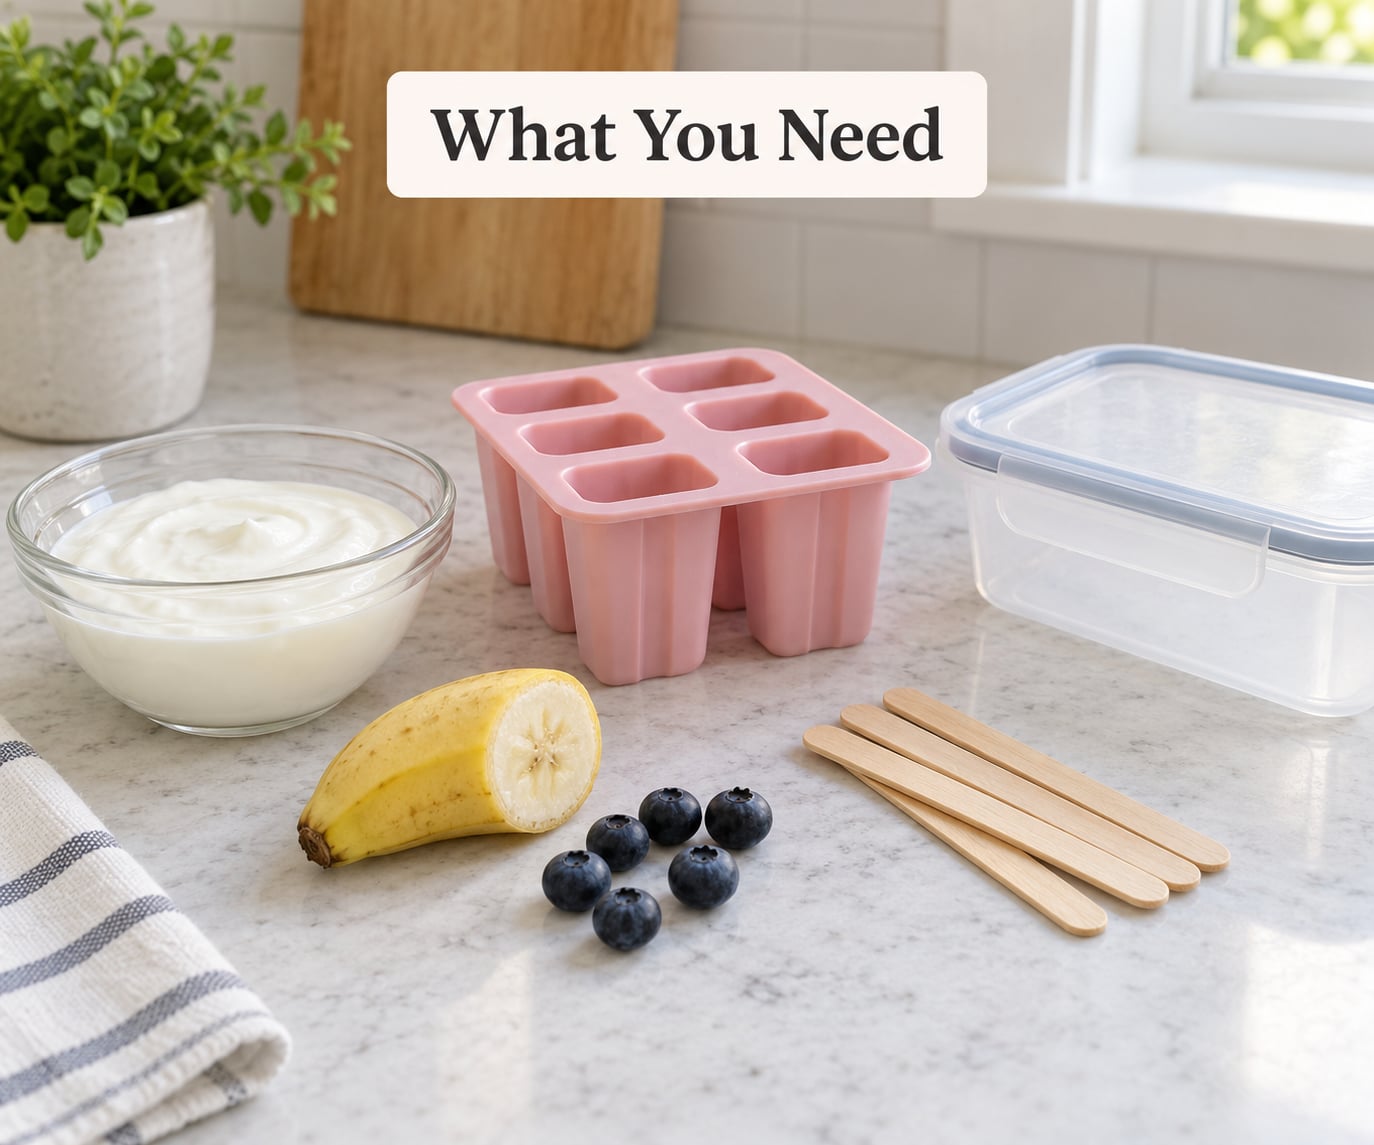
The basic formula is two ingredients. Everything else is optional.
- 1 cup plain full-fat yogurt — whole-milk Greek yogurt is the best pick for a creamy pop; regular yogurt works, it just needs less liquid.
- 1 cup fruit — fresh, frozen, or thawed, depending on what you already have. Berries, banana, mango, peach and pineapple all freeze well.
- Optional: a natural sweetener — maple syrup or ripe banana for toddlers over 12 months.
- Optional: 1 to 2 tablespoons milk or water — for thinning thick Greek yogurt until it pours.
Skip honey entirely if your child is under 12 months old. Maple syrup, ripe banana, and one or two chopped Medjool dates are the swaps parents reach for instead, and they work just as well in the 9-to-12-month crowd.
For equipment, you need something to freeze the mixture in. A silicone mini popsicle mold and wooden or reusable sticks are ideal. If you do not own those, an ice cube tray, a silicone cupcake liner, or even a store-bought yogurt cup with a baby spoon poked through the lid all work.
A blender or food processor is handy but not required. A fork and a bowl get you a slightly textured mixture, which many toddlers actually prefer over perfectly smooth.
How to Make Yogurt Pops for Toddlers: Step-by-Step
Five steps, ten minutes of work. Most of the waiting happens in the freezer.
Step 1: Choose a Toddler-Friendly Base
Full-fat yogurt freezes into something creamy; low-fat and nonfat yogurt freezes hard and watery, and toddlers usually refuse it. That is not a fuss about taste, it is a fat-and-water difference in how the mixture sets.
Greek yogurt gives you the most protein and the creamiest result, but it is thick and tangy on its own. Thin it with a splash of milk or water until it falls slowly off the spoon, and let a ripe banana do the sweetening so the tang has something to balance against.
Regular plain yogurt is the easier starting point if your toddler is new to pops. It pours smoothly, freezes soft, and tastes mild enough that a single fruit flavor comes through clearly.
If your child cannot have dairy, use an unsweetened plant-based yogurt. Coconut yogurt is the creamiest of those; almond and soy run thinner, so add a spoon of coconut milk or a peeled ripe banana to give the pop some body.
Step 2: Mix in Simple Flavorings
Blend or mash the yogurt with the fruit until there are no lumps. Under 12 months means fully smooth — no berry skins, no chunks of any size. From 12 to 24 months a little texture is fine and kids often prefer it.
Fruit does all the sweetening in the base recipe. Ripe banana and mango are sweet enough on their own that most families never add anything else, and fruit is what makes the pop a snack rather than plain frozen yogurt.
A spoonful of nut butter or seed butter works for a 3-year-old with no allergy in the family, stirred into the yogurt before the fruit goes in so it smooths out. Skip it under 12 months, and skip it entirely if nut allergy runs in the family.
A few mint leaves blended in during hot weather is a parent-invented trick that works because mint reads as cool rather than sweet. Keep it to two or three leaves and only after your toddler is past one.
Step 3: Fill the Molds and Freeze
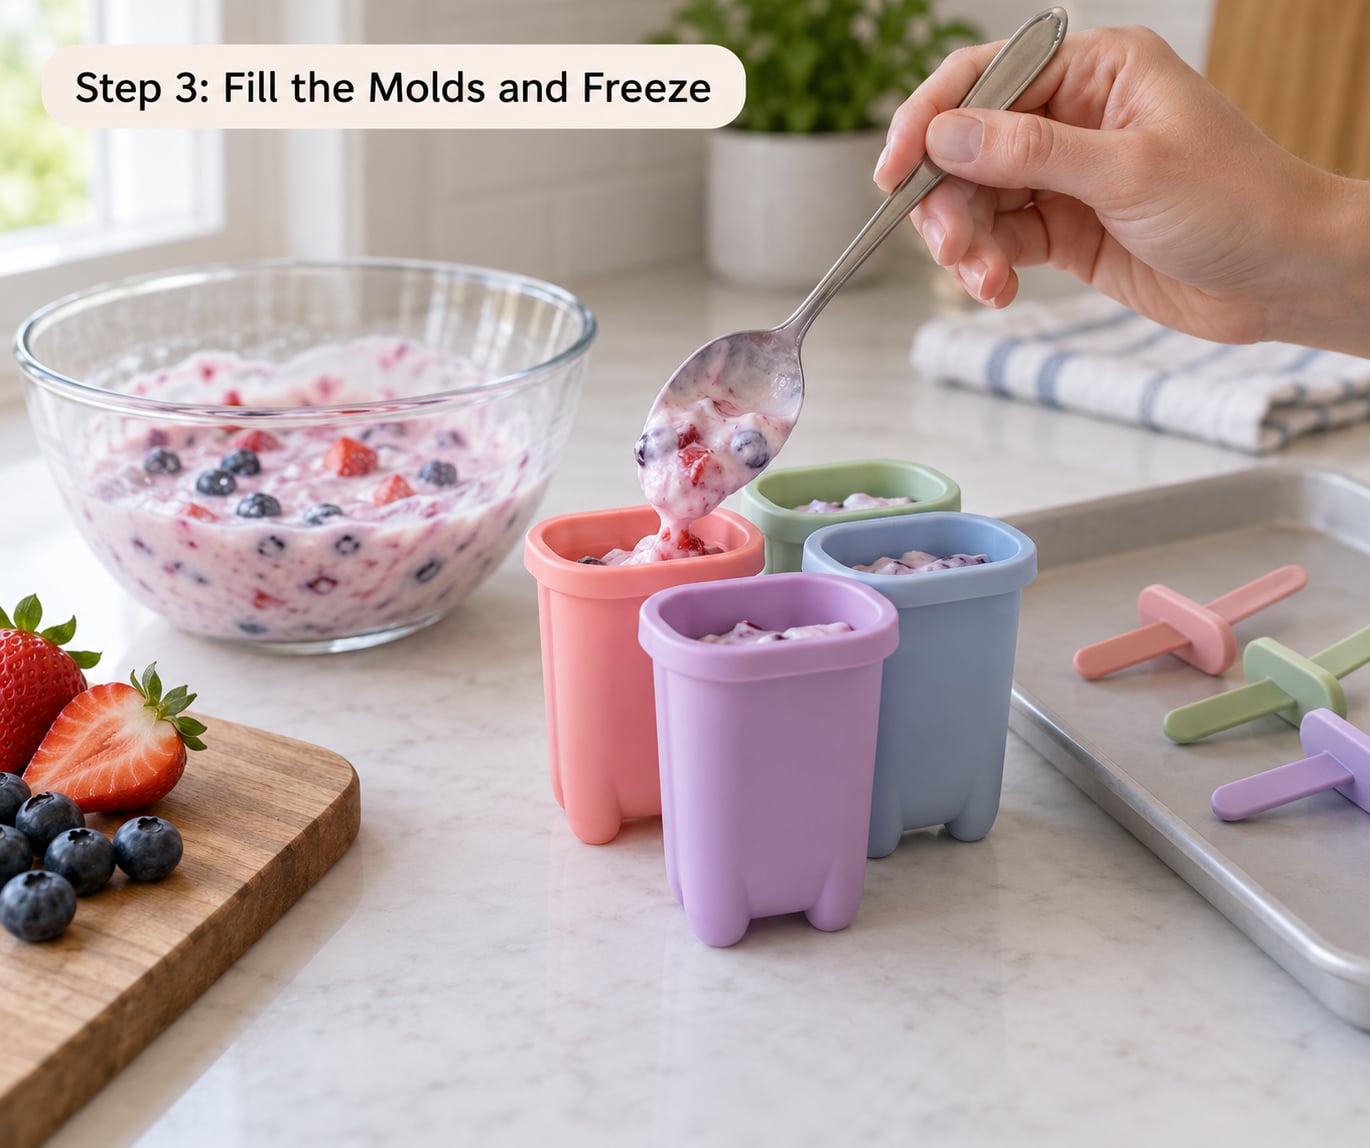
Fill the molds three-quarters full. Leaving a little room stops the mixture from pushing over the top as it expands, and the smaller portion is easier for a small child to finish.
Wait about an hour before adding the sticks. If you push one in while the mixture is still liquid, the stick leans and you end up with a pop that is off-center and hard to grip. An hour in, the surface has firmed just enough to hold it upright.
Freeze for 4 to 6 hours, or overnight if your schedule allows. Mini bites poured into an ice cube tray set in about 2 to 3 hours. Move the molds to the back of the freezer where the temperature stays coldest and the texture stays even.
No mold? Put the mixture straight into a yogurt cup and push a baby spoon through the foil lid so the handle sticks up as a handle. That method needs no blender and no popsicle sticks at all, which makes it the one that works for babies who gum a stick instead of eating from it.
Treat the dairy the way you would any leftover dairy food: keep it cold, keep it covered, and throw it away if it has been sitting out at room temperature for more than two hours.
Step 4: Remove and Serve Safely
Run the outside of the mold under warm water for 15 to 30 seconds, or leave it on the counter for five minutes. Either one loosens the surface enough that the pop slides out instead of snapping in half.
Then temper it. Five to ten minutes at room temperature takes the pop from rock hard to something a toddler can bite without scraping their gums.
Serve one pop at a time and stay in the room. For children under about 18 months, skip the stick entirely and serve spoonfuls from a cup, or freeze the mixture in a silicone cup the child can hold — gum on a stick is a choking and splinter risk, and most babies that age cannot grip one properly anyway.
For pops with sticks, give the stick a quick scrape with a butter knife or a damp cloth before handing it over. It takes two seconds and stops most of the dripping that leads to sticky clothes.
To manage the mess, set the child up on a tray, outdoors, or over a high chair mat. Frozen yogurt that runs down a chin onto a shirt is the normal outcome, not a parenting failure.
Simple Yogurt Pop Variations
Keep the 1 cup yogurt to 1 cup fruit ratio and swap what goes in. Texture and age notes matter more here than the fruit name.
- Berry — blend strawberries, blueberries, raspberries or blackberries until completely smooth. Under 12 months only, because the skins stay in the mix.
- Banana — mash one ripe banana into 1 cup yogurt. Naturally sweet, no added sugar needed, and safe at any age over 6 months.
- Peach or mango — dice and blend, or use unsweetened purée straight from the freezer. Both are soft enough that no straining is required.
- Yogurt and oat — stir 2 tablespoons of blended oats into the yogurt and let it sit 10 minutes so the oats soften. Fine from 12 months up.
- Yogurt and avocado — half a ripe avocado blended with banana and yogurt gives the creamiest pop of the bunch with no added sugar at all.
- Dairy-free — unsweetened coconut yogurt plus coconut milk and fruit. Check that the plant yogurt is fortified and unsweetened, since many are flavored.
- Chocolate-style — blend cocoa powder and a very ripe banana into yogurt. Two-year-olds tend to love it; expect a sticky face.
Hold off on whole nuts, nut butters, and any hard seeds until your child is past the age their pediatrician recommends, and keep whole grapes and cherry tomatoes out of the mixture entirely — those are round, and round is the shape that causes choking.
How to Store Yogurt Pops
Frozen pops keep their texture best for 2 to 3 months. After that they stay safe but pick up freezer odors, especially if your freezer holds bread or uncovered leftovers.
Pop them out of the molds once frozen and store them in an airtight container or freezer bag, standing up between layers of parchment paper so they do not freeze into one solid block. Label the container with the date — you will not remember what Sunday’s batch was.
Thaw the pops in the fridge for 20 to 30 minutes, or at room temperature for the 5-to-10-minute temper before serving. A fridge thaw is the slow, even option; the counter is faster but softer.
Keep pops below the ready-to-eat line in the freezer if you have one. If a pop has been sitting out, melted and refrozen, toss it.
Sunday batching is the routine that makes this work in a real week. Make a double batch, portion it into six or eight mini molds, and pull one out a day. The leftover mixture in the bowl is a smoothie for whoever did the pouring.
Common Mistakes
- The pop is rock hard. You froze it too long or used low-fat yogurt. Move it to the back of the freezer, temper it for a full ten minutes, and switch to full-fat next time.
- The mixture is loose and slushy. Too much fruit and not enough yogurt. Drain thawed fruit, or spoon out a little extra yogurt until the mixture holds its shape on a spoon.
- It tastes too sweet. Usually sweetened yogurt plus maple syrup plus ripe fruit. Use plain yogurt and let the fruit do the work.
- It breaks when you pull it. Pull too early or too fast. Warm the mold, wait five minutes, then push the stick out from below rather than tugging the top.
- Your toddler spits out every chunk. Blend longer. Most texture complaints at 12 months are just under-blending, not a preference.
- There are ice crystals in it. Over-blending aerates the mixture and partial thawing refreezes it large. Blend until smooth but no longer, and never refreeze a thawed pop.
- Little bites rather than pops. Use an ice cube tray and freeze 2 to 3 hours. This is also the answer to parents searching for yogurt bites — same mixture, smaller shape, no stick.
One more practical tip: freeze a test pop the night before you make a big batch. Ten minutes of work tells you whether your toddler likes the flavor at all, and a rejected batch of twelve is a lot of wasted fruit.
Frequently Asked Questions
What age can toddlers eat yogurt pops?
Most babies can start around 9 months, once they are eating well-pureed foods. Keep the mixture fully smooth with no chunks under 12 months, and skip honey completely until after the first birthday. From 12 to 24 months, light texture is fine and most toddlers handle it well.
Can I make yogurt pops without added sugar?
Yes, and that is the standard version of this recipe. Fruit is sweet enough on its own when you use ripe banana, mango, peaches, or blended berries. Use plain unsweetened yogurt and skip maple syrup entirely for a no-added-sugar pop. Kids rarely miss sugar they never had.
How long do homemade yogurt pops take to freeze?
Small pops in a mini mold need 4 to 6 hours, and overnight is the safe bet if you want them rock solid. Yogurt bites poured into an ice cube tray set in about 2 to 3 hours. A thermometer is not needed — if the stick will not budge, it needs more time.
Are yogurt pops choking hazards for toddlers?
Frozen fruit and hard chunks are the real risk, not the yogurt. Blend smooth for under 12 months, keep whole grapes, nuts and cherry tomatoes out of the mixture, and supervise every pop. Skip wooden sticks before about 18 months and serve spoonfuls from a cup instead.
Can I use Greek yogurt or dairy-free yogurt?
Greek yogurt gives the creamiest, highest-protein pop; thin it with a splash of milk or water so it pours. For dairy-free, use unsweetened coconut yogurt, which sets soft, or almond or soy yogurt, which run thinner and benefit from coconut milk. Check that any plant yogurt is fortified and free of added sugar.
How should yogurt pops be stored and thawed?
Pop them out of the molds once frozen and store them in an airtight container or bag with parchment between layers, then label the date. They keep their best texture for 2 to 3 months. Thaw in the fridge for 20 to 30 minutes or at room temperature for 5 to 10 minutes before serving.
Conclusion
Start with 1 cup of plain full-fat yogurt and 1 cup of ripe fruit, blend it smooth, pour it into whatever container you already own, and freeze it for 4 to 6 hours. Temper for five minutes, scrape the stick, and hand it over at the table.
Once that works, adjust the texture to your toddler’s age, skip honey before 12 months, and keep the fruit sweet rather than adding sugar. Everything else is a variation you can try once the basic pop is a hit.