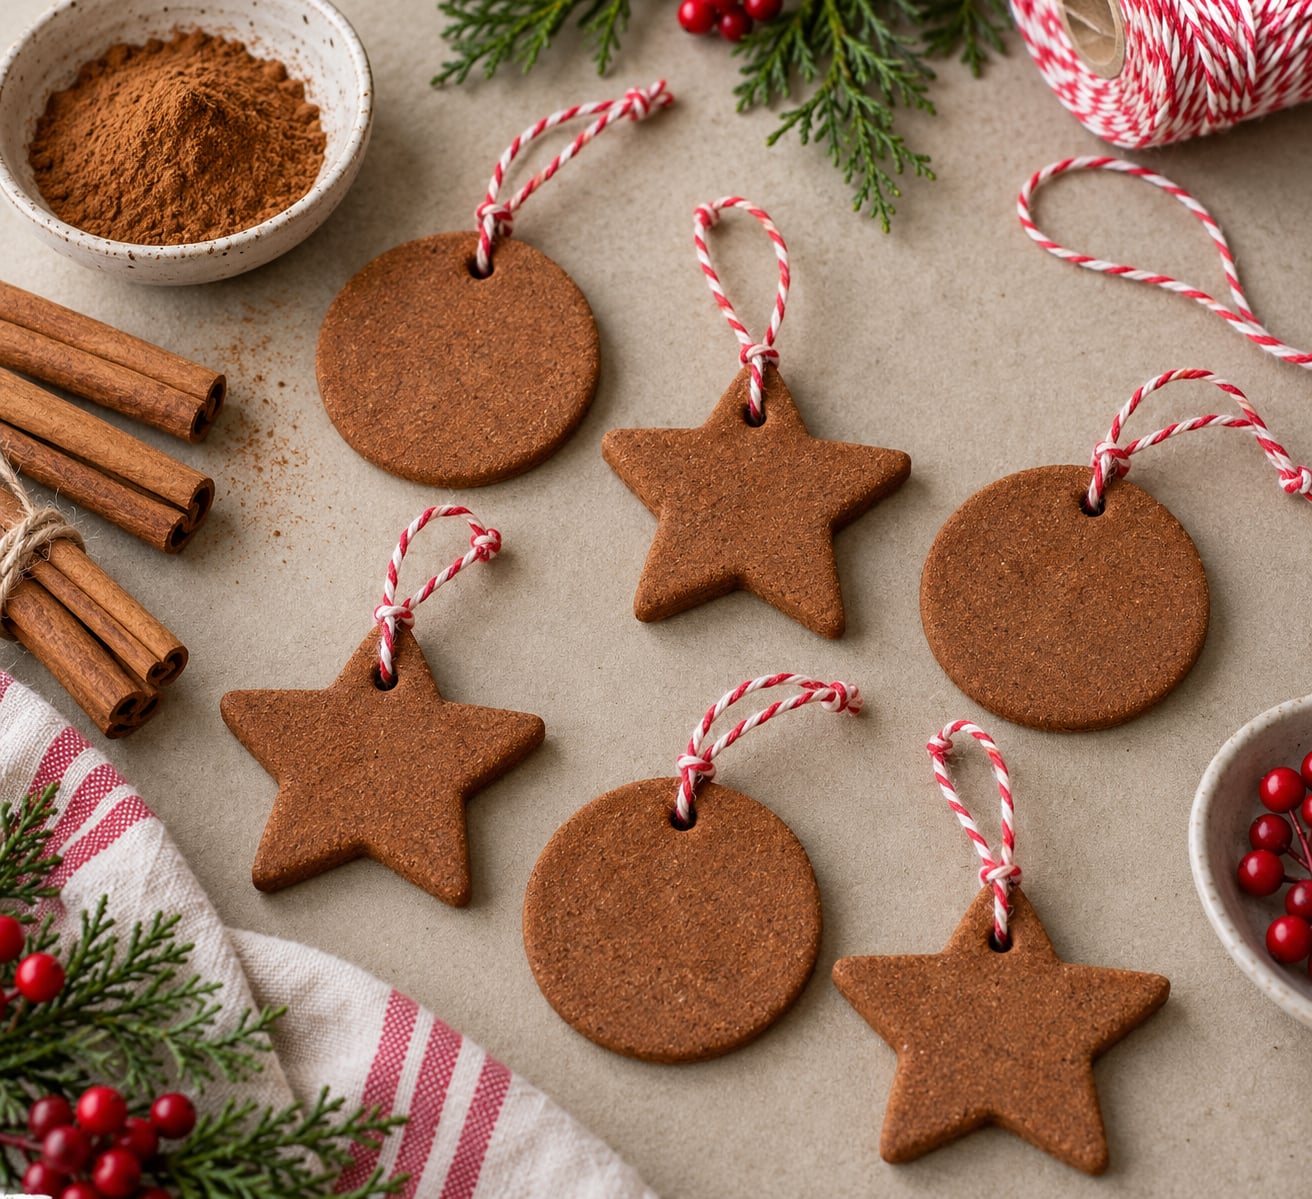
To make cinnamon ornaments you mix ground cinnamon with unsweetened applesauce, roll the dough about a quarter inch thick, cut shapes, poke a hanging hole, and bake low and slow. Add 2 tablespoons of white school glue if you want ornaments sturdy enough for small hands. The house smells like Christmas the entire time, and the finished ornaments are decorative only, not edible.
A batch takes roughly three hours from mixing to cooled and ready to hang, plus a day of extra setting time if you want them rock solid. The tricky part is not the recipe. It is thickness, oven temperature, and knowing which of the common failures you just hit.
Table of Contents
- What You Need
- Step-by-Step: How to Make Cinnamon Ornaments
- Choose and Prepare the Ornament Shape
- Glue the Cinnamon Pieces Together
- Let the Ornaments Dry Completely
- Paint and Decorate the Ornaments
- Add String and Hang the Ornaments
- Common Mistakes
- Frequently Asked Questions
- Are cinnamon ornaments edible?
- Is it better to bake or air dry cinnamon ornaments?
- Why are my cinnamon ornaments cracking as they dry?
- Do I need glue in cinnamon ornament dough?
- Why do my cinnamon ornaments puff up like pillows?
- How long do homemade cinnamon ornaments last?
What You Need
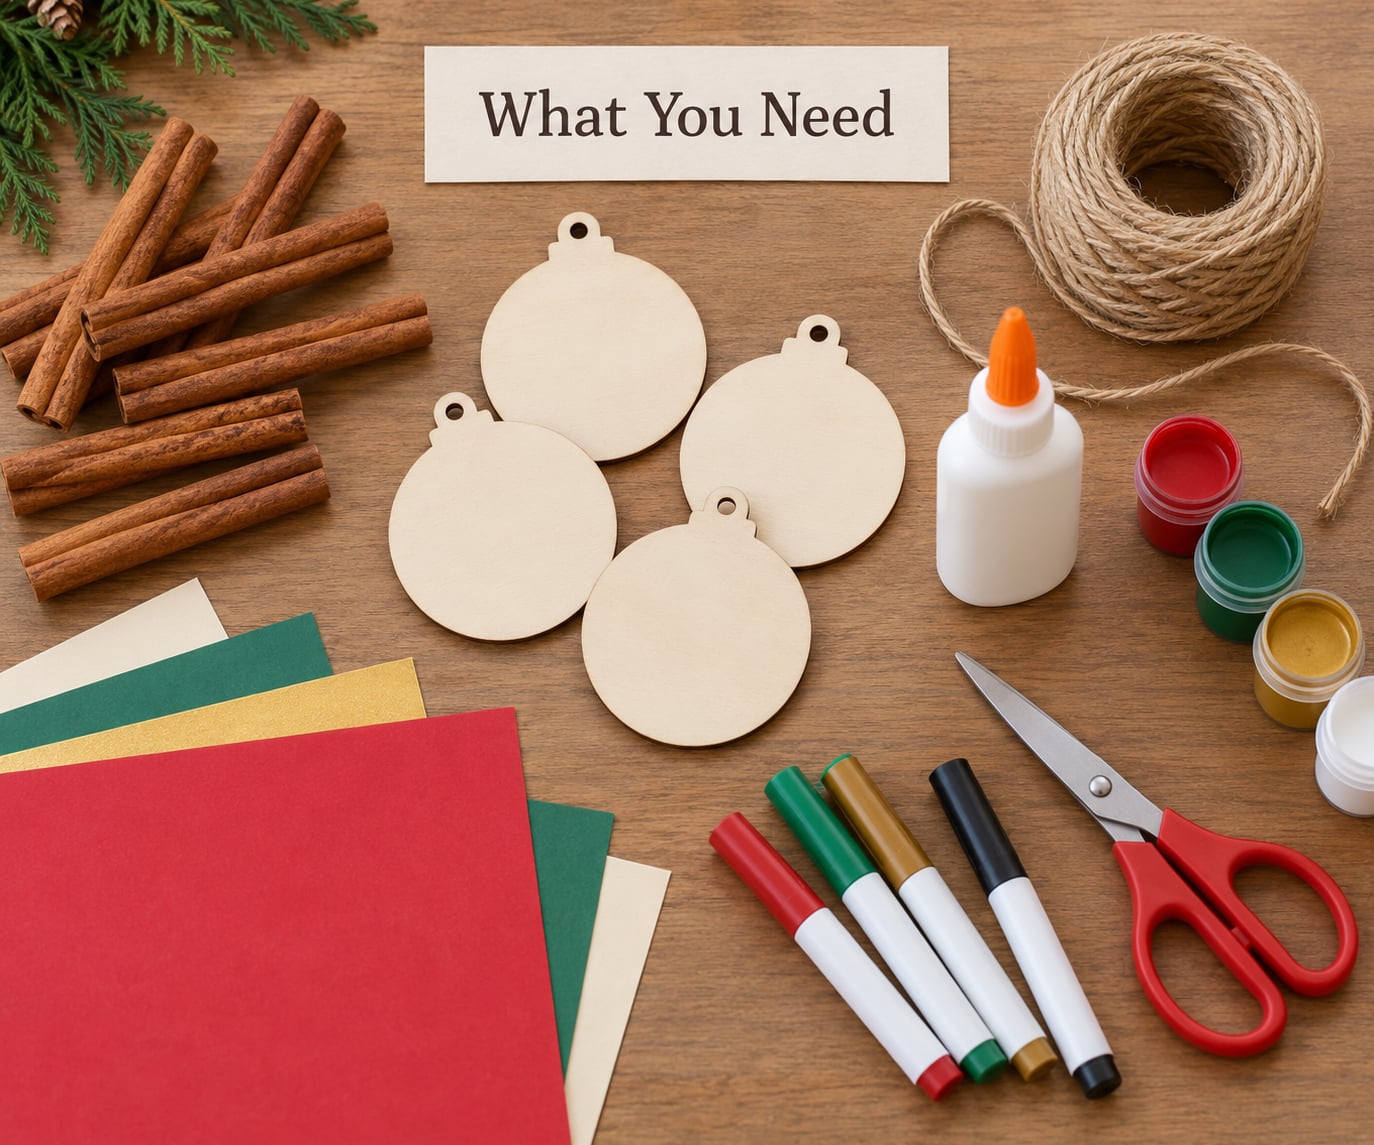
Every ranking recipe I checked uses the same short ingredient list, which is why this craft keeps coming back year after year. Here is the working dough, followed by the tools you actually touch.
For the dough
- 1 to 1.5 cups ground cinnamon
- 3/4 cup unsweetened applesauce, strained if it is chunky
- 2 tablespoons white school glue, optional but recommended if kids will handle them
For shaping
- A rolling pin and two sheets of parchment paper
- Cookie cutters in whatever shapes you want, or a sharp knife for squares
- A drinking straw, a chopstick, or a skewer for the hanging hole
- A rimmed cookie sheet lined with parchment
- A bench scraper or thin spatula for lifting finished shapes
For decorating and hanging
- Acrylic or glitter paint, markers, buttons, ribbon, or baker’s twine
- Optional: ground cloves, pom-poms, seed beads, a drinking straw for tiny circles
- Fine sandpaper or a nail file for smoothing rough edges
Plain ground cinnamon from the grocery store aisle works fine. I have never had a batch fail because the cinnamon was a cheaper brand, and the scent comes from the cinnamon itself rather than the grade.
Two swaps work without drama. Unsweetened applesauce is the safe default, but a cup of mashed pumpkin or plain yogurt behaves similarly in a pinch. If your dough stays sticky and sticky to the counter no matter how much cinnamon you add, stir in another two tablespoons of cinnamon rather than reaching for flour.
If children are making these, choose non-toxic acrylic paint, a washable school glue, and scissors with rounded tips for their age group. The dough smells delicious and children will try to eat it, so put the finished shapes out of reach during the drying stage. These ornaments are for decoration only.
Step-by-Step: How to Make Cinnamon Ornaments
Warm the oven to 200F first so it is already at temperature when the shapes go in. A cold start is part of why fresh batches puff and crack.
Choose and Prepare the Ornament Shape
Pour the cinnamon and applesauce into a bowl and stir for a full minute until it looks like play dough. Push it back together once or twice if it crumbles at first, and let it sit for fifteen minutes so the applesauce soaks into the cinnamon.
Roll it between two sheets of parchment to about a quarter inch thick. Aim for the thickness of a thin coin. If you can see light through the dough, it is too thin and will split as it dries.
Squares are the easiest shape for a first batch and they are also the cheapest to cut. Beyond that, cookie cutters do the work: stars, gingerbread people, hearts, mittens and circles all hold up well.
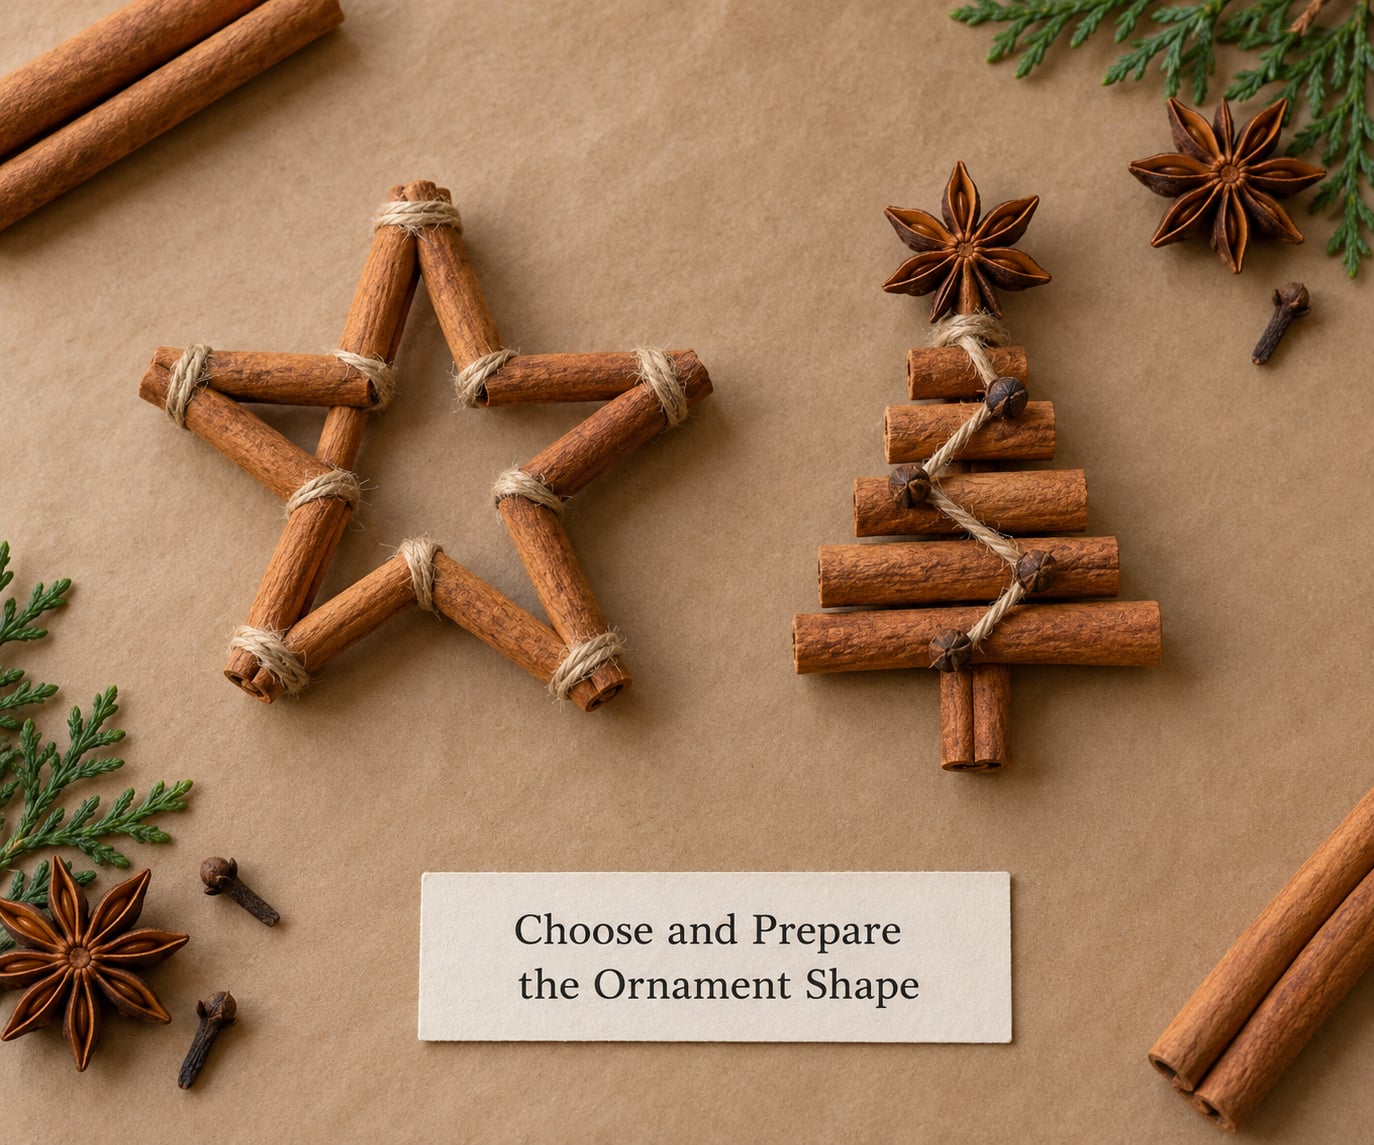
You can also build shapes from real cinnamon sticks rather than rolling dough. Break sticks to length, arrange them into stars, circles, trees or a simple frame, and glue the joints. That version is stiffer and rougher, so it reads as rustic folk decor rather than a smooth baked ornament. Both work on the same tree.
Glue the Cinnamon Pieces Together
For dough ornaments, stir the 2 tablespoons of white school glue into the finished dough rather than pouring it on top. Mixed in, it dries clear and behaves like a binder, which is what stops small pieces crumbling off the tree.
For stick ornaments, run a thin line of glue along the ends of the sticks and press the joints together. Use less glue than you think. Squeeze-out is the reason a finished piece looks lumpy and takes forever to dry, so you can always slide a piece into place within the thirty seconds before the adhesive grabs.
Wooden craft sticks work as the skeleton under a dough shape too, and they make the ornament noticeably harder to snap. Lay two sticks in a cross, leave an inch of overlap, and roll the dough over the top.
Let the Ornaments Dry Completely
Slide the parchment with your shapes onto the cookie sheet and bake at 200F for 2 to 2.5 hours. If the oven runs cool or your shapes are thick, give it closer to the three-hour mark. The pieces should feel dry and hard at the center when you pull them out.
Salt dough takes a different schedule. That version bakes at 250F for about 2 hours, since it has flour and water rather than just fruit.
Let the shapes cool on the sheet for ten minutes before moving them, then leave them on a rack for a full 24 hours before anything is painted, punched further or hung. Warm dough dents, and dents turn into cracks a week later.
Press a fingernail into the back of one piece. No give means it has set. If it dents, give it another day of air drying rather than baking it longer, which is what turns the surface pale.
Paint and Decorate the Ornaments
Paint on a scrap sheet of paper or newspaper, not on the counter. A thin coat of acrylic or glitter paint keeps the cinnamon grain visible, and one coat is usually enough since you only want the color to tint the surface.
Press whole cloves into a still-slightly-soft ornament for a traditional look that smells stronger than paint. Buttons, pom-poms, seed beads and small ribbon bows all stick well with a dot of hot glue.
For a garland or a tree skirt, thread the finished shapes onto a length of twine instead of hanging them individually. Wrap the twine around dry branches outdoors, or lay it along a stair rail.
Run fine sandpaper along any jagged cut edges before you decorate. Children notice rough edges more than adults expect, and it takes ten seconds per piece.
Add String and Hang the Ornaments
Push a drinking straw through the top of each shape before baking rather than trying to cut a hole afterward. That is the single biggest reason hanging holes fail, since a wet knife or a thick straw closes the hole back up as the dough expands.
The straw matters. A wide bubble straw makes a hole that fits 3/8 inch ribbon or twine. A narrow straw works fine for thin string but bakes into a hole too small for anything thicker.
Thread the ribbon through and tie it before the ornaments go on the tree, then reinforce any joint that feels shaky with a dot of glue. Test each hanger by lifting the ornament in the kitchen before it goes up on a branch.
Hang them out of direct sunlight and away from a fireplace or radiator. Heat drives the last of the moisture out, and an ornament that bakes in the sun outdoors will crack within a season.
Common Mistakes
Most failures trace back to one of a few familiar things. Match the symptom to the fix and the next batch usually turns out right.
Ornaments crack or split while drying. The dough was rolled thinner than a quarter inch. Thin pieces shrink unevenly as the moisture leaves, and the edge goes first. Roll thicker next time, and if some pieces are already hairline-cracked, gluing a bead of craft glue along the crack before painting hides it completely.
Ornaments puff up like little pillows. Either the oven was too hot or the pieces were too thick. Puffy shapes mean the moisture inside turned to steam with nowhere to go. Drop to 175F for the next batch and roll a little thinner.
Ornaments crumble or snap off the tree. There was no binder in the dough, or the piece was handled roughly before it finished setting. Stir in the 2 tablespoons of school glue, and wait the full 24 hours before hanging anything.
A white or pale coating appears after baking. This is salt or cinnamon oils blooming to the surface. It is harmless, but it makes the ornaments look pale rather than brown. Dab it on with a barely damp cloth, or brush on a very thin coat of brown acrylic paint.
The holes close up during baking. You punched them after baking, or used a straw that was too narrow. Dough expands in the oven, so a hole only made at the end is half the size you wanted.
Shapes stick to the parchment. Parchment is doing its job, and the ornament welded itself down. Slide parchment with the shapes straight onto the hot cookie sheet rather than transferring each one, and let them release as they cool rather than peeling them while hot.
The dough sticks to the counter and to your hands. The applesauce was thinner than expected, so the mix went wet. Add cinnamon a spoonful at a time until it rolls cleanly. Dusting flour works too, though it dulls the finish slightly.
On baking versus air drying: baking takes two to three hours and produces a firmer, darker, more fragrant ornament that is ready the same day. Air drying takes 24 to 48 hours on a rack and leaves a paler, softer piece that keeps working for a week. Air drying is quieter and cooler for a preschool room with a heat-sensitive paint project nearby, and it costs you nothing.
My rule of thumb is to bake when you want ornaments that survive being handled, and to air dry when the shape is simple and the tree will be decorated gently. Many people do both, baking the star shapes and leaving the squares to dry overnight on a cookie sheet.
Frequently Asked Questions
Are cinnamon ornaments edible?
No. Even though the dough is made from food ingredients, it is treated with school glue, baked for hours, and decorated with non-food paints, beads and glitter. Some kids will assume the finished ornaments are candy because they smell like a kitchen. Set them somewhere out of reach until they are fully decorated and hung, and keep any fresh dough away from toddlers.
Is it better to bake or air dry cinnamon ornaments?
Bake for durability and air dry for convenience. Baking at 200F for 2 to 2.5 hours gives a hard, dark, strongly scented ornament that is ready the same day and tolerates being handled. Air drying on a rack for 24 to 48 hours needs no oven, suits a classroom, and produces a paler, softer piece that works fine if you handle it gently.
Why are my cinnamon ornaments cracking as they dry?
Almost always thickness. Anything rolled thinner than a quarter inch shrinks unevenly and splits along the edges first, because the moisture leaves faster at the surface than in the middle. Roll to about a coin thickness and press the dough down firmly as you go. A fine line of craft glue along an existing crack hides it before painting.
Do I need glue in cinnamon ornament dough?
It is optional but worth adding. Two tablespoons of white school glue mixed into the finished dough act as a binder, and the ornaments come out noticeably harder and less crumbly once baked. Skip it for soft, light shapes and for older children who handle ornaments carefully. The glue dries clear, so it does not dull the cinnamon finish.
Why do my cinnamon ornaments puff up like pillows?
Two causes, and they happen together. The oven was too hot, or the shapes were rolled too thick, so moisture turned to steam and puffed the dough without a way to escape. Drop the temperature to 175F for the next batch and roll closer to a quarter inch. Puffy shapes are also a sign the pieces need longer drying time before they are handled.
How long do homemade cinnamon ornaments last?
Stored correctly they last for years. The scent fades first, usually within a few months, though a drop of cinnamon essential oil brushed into the surface brings it back. Keep the ornaments in a sealed container so they do not absorb kitchen odors, and leave them off hot surfaces, which dry them out and cause cracking over time.
Start with one batch of 1 cup cinnamon and 3/4 cup applesauce, roll everything a quarter inch thick, and bake at 200F. That single change to thickness and temperature solves most of the problems people run into. A batch makes roughly 18 to 30 ornaments depending on size, so one mix is usually plenty for a tree plus a few homemade gifts.