To take better photos of your kids, change three things before you buy anything: put them near a window, drop the camera to their height, and take a lot of frames while they play. Light and angle do more for a photo than a pricier camera, and the whole routine takes about ten minutes.
Most disappointing kid photos come from the same three places. The light was overhead or behind the child, the shutter was too slow for a moving five-year-old, and everyone was told to smile and hold still. Fix those and ordinary afternoons start producing pictures worth printing.
- Change your perspective. Kneel or sit so the camera is at your child’s eye level.
- Find good light. Turn them toward a window, or step into open shade outdoors.
- Shoot more frames. Take short bursts around a natural action instead of asking for one perfect pose.
- Keep the shutter fast. On a phone, fine. On a camera, 1/250s or faster.
- Skip the flash. It flattens faces and adds that red-eye look everyone hates.
- Watch the background. A plain wall or a step away from the mess.
- Let the moment run. Lower the camera after the shot and wait for the real laugh.
Table of Contents
- What You Need
- Light you can rely on
- A background that stays out of the way
- Something to do
- A small tripod or a steady surface
- Free editing
- Step-by-Step: How to Take Better Photos of Your Kids
- Choose a comfortable setting
- Use soft natural light
- Keep the camera steady and close
- Why better photos of your kids happen when nobody poses them
- Shoot a short burst
- Common Mistakes
- Blurry photos
- Harsh shadows across the face
- Backlighting and squinting
- Using flash indoors
- Cluttered backgrounds
- Shooting from the wrong height
- Checking the preview screen
- Too many photos of the same thing
- Frequently Asked Questions
- How do I get my child to smile for photos?
- How do you photograph kids who won’t sit still?
- How do I get photos of myself with my kids?
- Why do my kid photos look blurry?
- Should I turn off geotagging before posting photos of my kids?
- Start With One Easy Shoot
What You Need
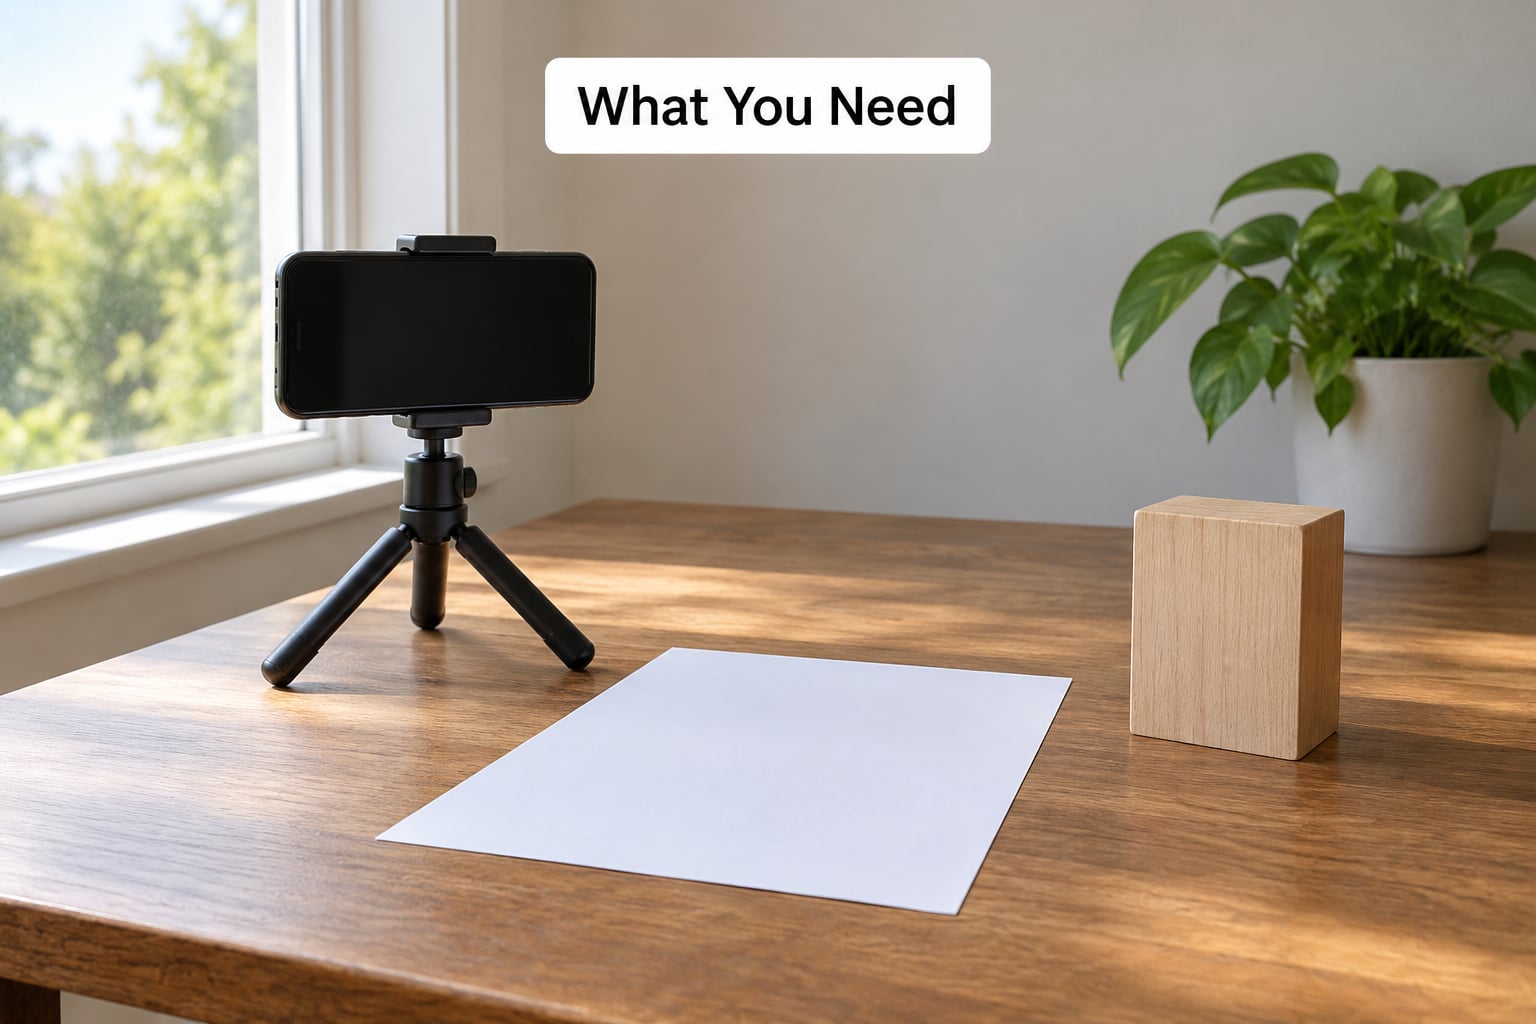
A phone is genuinely enough. Most parents shoot hundreds of kid photos a year on the device already in their pocket, and the gap between phone and camera results shrinks to almost nothing once the light is decent.
If you shoot with a camera, you need nothing beyond what came in the box. A 35mm or 50mm lens covers most of it, and a wider lens is useful indoors where you cannot back up.
Light you can rely on
A window is the cheapest and best light source in the house. A sheet of white paper or a piece of white card on the opposite side bounces light back into shadowed faces. That reflector trick replaces expensive fill panels, and it works every time.
A background that stays out of the way
A plain wall, a bedspread hung over a door, or an uncluttered patch of carpet. Background clutter is the most common reason a good photo feels cheap, and it costs nothing to fix: move two steps and check what is behind the child before you take a single frame.
Something to do
Blocks, a puzzle, dough, drawing, a blanket fort. Giving a toddler a job to do instead of asking them to perform is the difference between a stiff portrait and a photo of a person.
A small tripod or a steady surface
A phone tripod, a stack of books, or a ledge at the right height. This matters for two reasons: it keeps frames sharp, and it lets you get into the shot yourself.
Free editing
The built-in editor on your phone handles crop, brightness and warmth. That is enough for a first pass, and it takes about ten minutes per shoot once you know where the controls are.
Step-by-Step: How to Take Better Photos of Your Kids

Choose a comfortable setting
Pick somewhere your child already likes and where you have space to move. A familiar playroom or the kitchen table beats a staged corner of the living room, because kids read a set the second they walk into it.
Give them something to do, then give them a minute before you shoot anything. Most of the good frames arrive after the first thirty seconds, once they stop checking whether you’re still holding the phone up.
Use soft natural light
Stand your child a foot or two from a window with the window behind or beside you, lighting the face rather than the back of the head. Turn them to face the light.
If the room feels dark, open the curtains wider or move to a brighter room. Indoors in the evening, turn on every lamp and ignore the ceiling light, which throws harsh shadows straight down across the eyes.
Outdoors, the equivalent is open shade: the soft grey light under a big tree, beside a wall, or on a cloudy day. Harsh sunlight at midday is harder to work with than almost any indoor light, because it blows out the highlights and puts dark circles under the eyes.
You can tell it worked when the shadows on the face are soft and the skin tones look even from cheek to chin.
Keep the camera steady and close
Get down to your child’s height. For a toddler this means kneeling or sitting on the floor, and the whole character of the photo changes once you’re at their level rather than looking down at the top of a head.
Stay close enough that your child fills most of the frame, and use the longest zoom you have rather than stepping back. Zooming in from further away keeps the light on them and throws the background out of focus, which is what makes the shot feel polished.
On a phone, tap the screen on your child’s face to focus and keep your thumb off the screen, because a stray tap moves the focus point. Hold the phone with both hands or prop it up. On a camera, set shutter priority to 1/250s or faster for slow movement and 1/500s or 1/1000s for running kids, then let the camera pick the aperture and raise ISO only as much as the light demands.
If a photo comes out grainy at high ISO, that’s the honest trade-off: a little grain beats a blurred face, and you can fix grain in editing far more easily than motion blur.
Why better photos of your kids happen when nobody poses them
The fixed smile kids give the camera is called the camera face, and it looks tense in every age. The genuine version comes out of play, concentration or a joke told to someone other than the camera.
Three tactics work reliably. Give them a task and photograph the hands and the face doing it rather than the posed conclusion. Stay in the conversation and shoot over the top of the phone. Or shoot from behind and slightly to the side, which usually produces a relaxed profile instead of a performance.
Some kids genuinely do not want to be photographed, and that is worth respecting. Ask, and take the no.
Shoot a short burst
Take a handful of frames around each natural action rather than one shot and hope. On most phones, press and hold the shutter button, or swipe the shutter on iPhone. On a camera, switch to burst or continuous shooting and hold the back button through the action.
Change your angle slightly between bursts rather than firing fifty identical frames. You want variety, not volume for its own sake.
Then cull. Delete the near duplicates and the ones where eyes are closed, and you are left with a handful of real options instead of a camera roll full of blinking faces.
Common Mistakes
Blurry photos
Usually a slow shutter speed, a shaky grip, or both. Speed up the shutter, brace your elbows against your body, and shoot in bursts so you have something sharp in the set.
Harsh shadows across the face
Overhead light or direct sun. Turn the child toward the window instead of away from it, or move into open shade. Indoors, turn off the ceiling fixture and use lamps at face level.
Backlighting and squinting
A bright window behind the child renders the face dark and makes them squint. Step around so the light falls on them, or move them so the light comes over your shoulder.
Using flash indoors
Direct flash flattens the face, casts a hard shadow behind your child, and produces that bright-eyed red reflection. Bounce it off a ceiling or a wall if you must, or just find more window light.
Cluttered backgrounds
Toys, cables, laundry and bins behind the subject pull the eye away. Change your angle, or move the child closer to a plain surface. A step sideways fixes more bad photos than any camera setting.
Shooting from the wrong height
Standing and pointing down makes a child look small. Kneel or sit so the lens is at their eye level, and put yourself slightly below their eye line for portraits and level with it for play.
Checking the preview screen
Looking at the back of the camera to frame the shot means you stop watching the moment. Turn on the grid lines or the rules-of-thirds overlay so you can frame without looking down.
Too many photos of the same thing
If a single session produces hundreds of near-identical frames, you are still thinking in single shots. Wait for a change in the action, then shoot a short burst.
Frequently Asked Questions
How do I get my child to smile for photos?
Stop asking. A smile produced on request is the stiff camera face you can see in most family albums. Give your child something to do, talk to them about it, and keep shooting while they play. The real smile arrives mid-laugh, usually about a minute after you start. If you must have eye contact for a holiday card, try asking them to look at something you hold up beside the lens, then check the frames.
How do you photograph kids who won’t sit still?
Change the goal from a portrait to an action shot. Toddlers move, so photograph the movement: their hands on the blocks, a side profile mid-run, feet under the table. Use a fast shutter speed around 1/500s or 1/1000s, shoot in short bursts and pre-focus on the space where the action is about to happen. Parents on photography forums report that photographing from behind also settles reluctant kids faster than asking for a repeat.
How do I get photos of myself with my kids?
Set the camera or phone on a tripod or a sturdy shelf at your child’s height, frame the shot, then use a ten or three second timer and press the button before you sit down. Ask another parent to press it instead, which is easier than it sounds. A Bluetooth remote or a watch shutter release gives you back the ten seconds and cuts the blur from walking into frame. Take twenty frames and keep the two where everyone looks normal.
Why do my kid photos look blurry?
Three causes cover most cases: a shutter speed too slow for movement, an unsteady grip, and focusing on the background instead of the face. Speed up the shutter to 1/250s or faster for slow play and 1/500s or faster for running, brace your elbows against your body, and tap the screen on your child’s face on a phone. Raising ISO to keep a fast shutter is worth the grain; blurred faces cannot be fixed later, grain can.
Should I turn off geotagging before posting photos of my kids?
Yes, it costs one tap and it is worth doing on every post. Phone cameras record location data by default, and it shows up on shared photos along with the school name on a uniform, the street sign in the background, or the name badge on a first-day-of-school picture. Check your camera and social app settings for location sharing before you upload, and crop out details that identify where your child goes. Keep the originals backed up privately.
Start With One Easy Shoot
Pick one ordinary thing your child already loves doing this week, put them beside a window, kneel to their height, and shoot for ten minutes while you take short bursts. You are aiming for about eight usable frames, not forty identical ones.
Keep the candid ones, delete the blinking duplicates, and back the whole set up somewhere that is not your phone. Once that one shoot works, everything above it is just repetition. That is how to take better photos of your kids without a single piece of new gear.