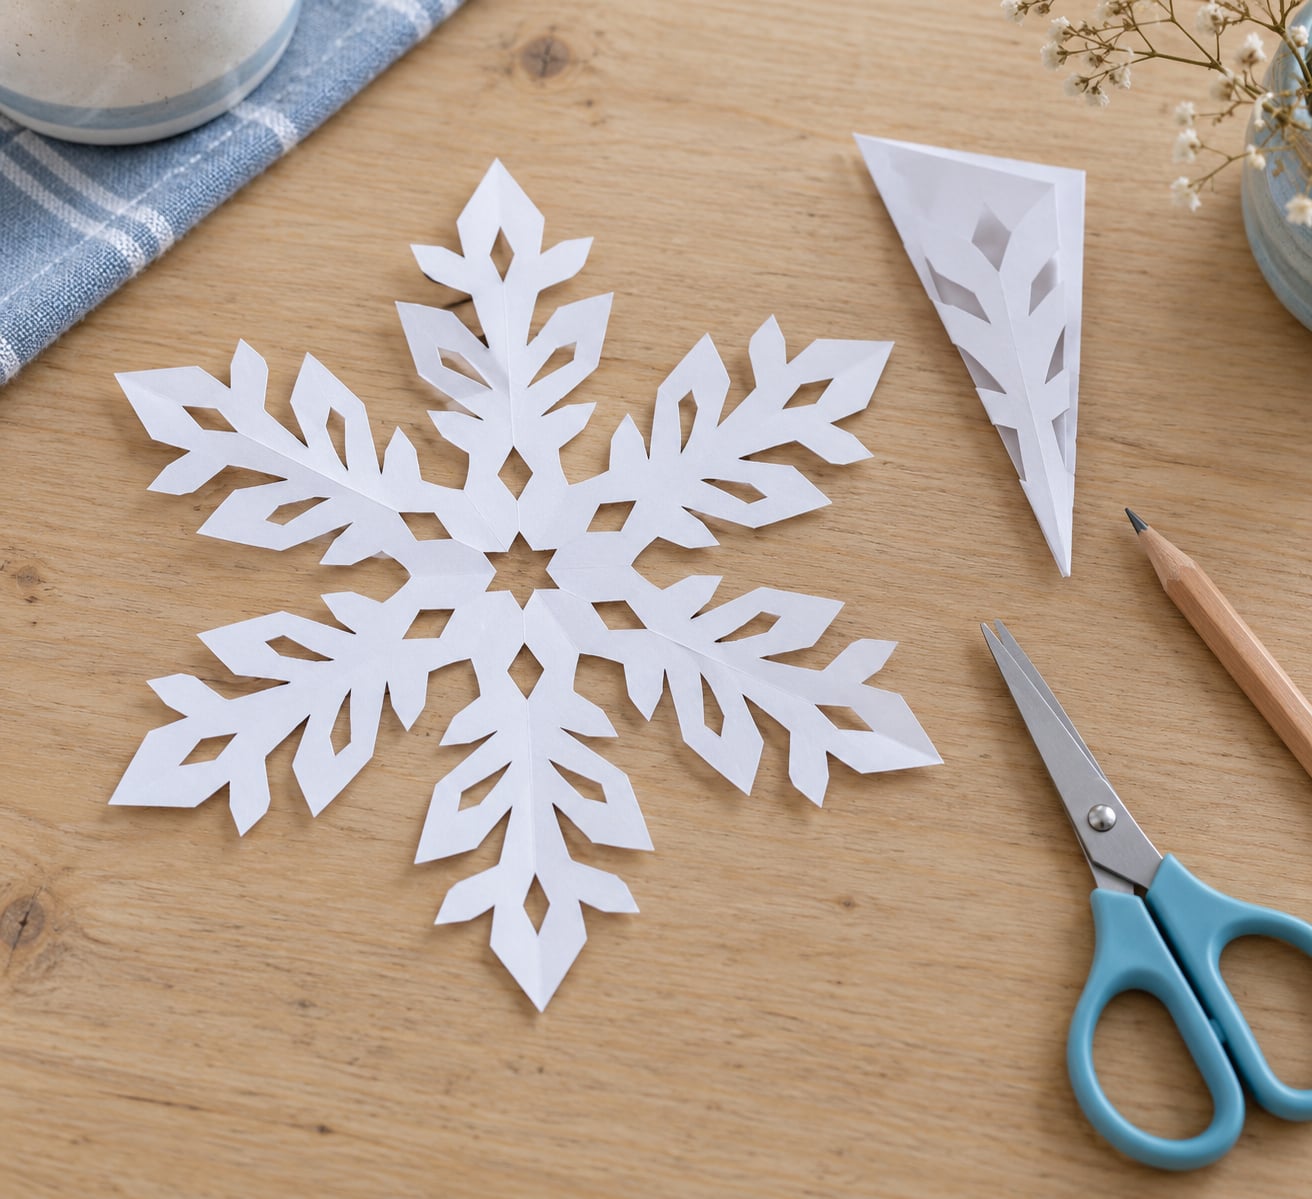
A paper snowflake starts as one ordinary sheet of paper. You fold it into a small stacked wedge, snip shapes through every layer, then open it out and the cuts appear mirrored into a six-pointed flake. The whole thing takes about fifteen minutes and costs nothing but paper, scissors and a pencil.
I’ve made dozens of these with my kids, and the part that trips everyone up isn’t the cutting. It’s the fold into thirds, the one that decides whether you end up with a symmetric snowflake or a lopsided one that snaps in half when you open it. I’ll walk through it corner by corner so you can follow along with paper in front of you.
Table of Contents
- What You Need
- How to Make a Paper Snowflake Step by Step
- Fold the Paper in Half
- Fold the Paper in Half Again
- Fold the Triangle in Half
- Mark the Cutting Guide
- Cut the Paper Shape
- Make the Snowflake Cuts
- Unfold and Shape the Snowflake
- Common Mistakes and Tips
- Frequently Asked Questions
- What type of paper is best for cutting paper snowflakes?
- How do you fold a sheet of paper to make snowflake cutouts?
- How do I make a six-pointed paper snowflake?
- Why did my paper snowflake fall apart when I unfolded it?
- Can small children make a paper snowflake without sharp scissors?
- How do I flatten a paper snowflake so it hangs flat?
- Conclusion
What You Need
The list is short because the whole craft is built on cheap supplies you probably already own.
- One sheet of printer or copy paper, roughly 8.5 by 11 inches
- A pair of sharp scissors with a fine point
- A pencil for marking the cutting guide
- A flat surface you can press down on with your palm
- Optional: a fine-tip marker, glue stick, or a length of clear thread for hanging
Start with standard copy paper if you’ve never done this before. It’s stiff enough to hold a crease but thin enough for small hands to cut through, and the finished flake is opaque enough to read nicely against a window.
The right paper changes how the flake folds and cuts, and the trade-off is always crisp creases against easy cutting.
- Standard copy paper. Your first snowflake, and most adults. It folds to sharp creases and cuts crisply, but it’s too stiff for a four-year-old to cut through sixteen layers.
- Tracing paper. Delicate, see-through flakes. It cuts beautifully and shows every line, though it’s too floppy to hold a crease without pinning it flat.
- Onion skin paper. Layered, lacy patterns with kids. Very easy to cut, but nearly invisible on a pale wall.
- Parchment or baking paper. Younger children, ages three to six. Soft, forgiving and unlikely to tear, though creases fade, so lay it flat under a book first.
- Coffee filter. The easiest method for small hands. Thin and quick to cut through, and already round, so there’s no trimming to a square.
Coffee filters deserve their own mention because they solve the two biggest beginner problems at once. You skip the step of trimming a rectangle into a square, and a child can cut through the folded stack without fighting the paper. Some makers dip the folded filter into diluted food colouring afterwards, and the colour wicks up through the fibres into a mottled tie-dye effect.
How to Make a Paper Snowflake Step by Step
The method below produces a six-pointed snowflake, which is the shape real ice crystals take because water molecules lock together at sixty-degree angles as they freeze. Most people fold in halves twice and end up with four or eight points instead, which looks fine but doesn’t match nature.
Work on a table with good light, and press each crease firmly with the side of a spoon or your thumbnail. Sharp creases are the difference between a flake that opens flat and one that springs back lumpy. Before you start, decide whether you want an open centre or a closed one. Snipping off the pointed tip gives you an open centre; leaving the tip alone gives you a closed one.
Fold the Paper in Half
Lay the sheet flat and fold the top edge down to meet the bottom edge, running your finger along the fold to sharpen it. Unfold, then fold left edge to right edge and press again.
Check the corners. All four should line up squarely before you go further. If the edges don’t meet, the sheet is crooked on the table, and everything downstream will be crooked too.
Fold the Paper in Half Again
Turn the paper so a corner points up toward you, then fold it corner to corner into a triangle. Press along the diagonal, then open it back out flat again so you have a visible centre line.
Some people fold straight to a triangle here and stop. That’s a four-pointed snowflake, which is honestly easier and looks good on a card. The next step is the one that gets you six points.
Fold the Triangle in Half
Fold the triangle in half by bringing one corner down to meet the other, so the long straight edge runs along the bottom. Press firmly and this becomes your starting shape for the thirds fold.
You should now have a small right triangle. Check that the folded edge on the bottom is straight and even, because that straight edge is what makes the outer points of your snowflake line up.
Mark the Cutting Guide
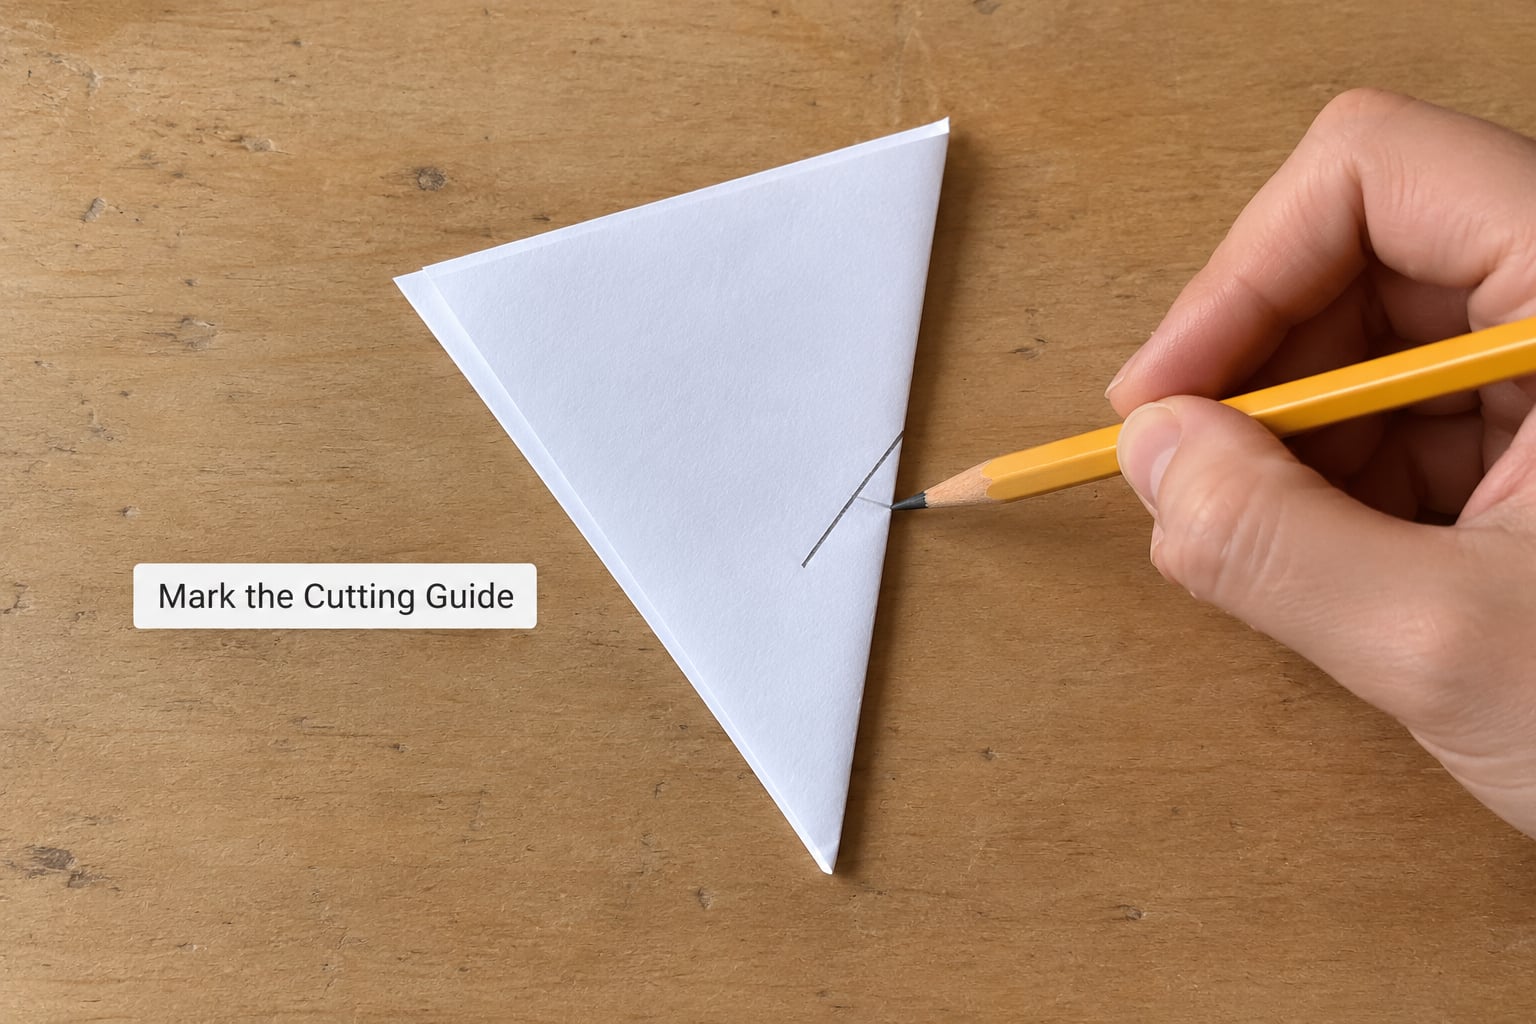
Look at the triangle you just folded. It has two straight edges meeting at a point on the left, and a folded corner on the right. Fold the right-hand corner over toward the left point by about a third of the width, and run your pencil lightly along that fold line to mark it.
Now unfold that corner slightly and fold the left section over to match the first fold, so the two edges meet at exactly the same place. This is the fold everyone finds confusing. The trick is to measure by eye against the marked line you just drew rather than guessing a third each time.
Once both thirds line up, trim off the leftover flap at the top so you have a clean right triangle with one straight cut edge. That trimmed edge is the top of your snowflake.
Cut the Paper Shape
Cut straight across the top of the folded wedge at a slight angle to remove the ragged flap. Small trimmed strips come loose here, and if a child is doing the cutting, have them carry those scraps straight to the bin rather than carrying them in one hand.
Once the top is flat, run a fingertip along every edge. Any little flap left behind will rip the snowflake when you unfold it, and this is the moment to press it down instead.
Make the Snowflake Cuts
Now cut your design into the folded wedge. Because the paper is stacked, every snip passes through all the layers, so one cut becomes twelve mirrored shapes when you open it.
Cut small triangles out of both straight sides and the trimmed top edge to make points. Cut shallow, wide arcs instead of straight lines and you get a rounded, softer flake. A steep angle makes a sharp snowflake, a shallow curve makes a calm one.
The trick that makes a flake look designed rather than random is to nestle shapes so the leftover paper forms lines. Cut a small triangle, then a slightly larger one beside it, and the gap between them reads as a stripe when it opens.
Unfold and Shape the Snowflake
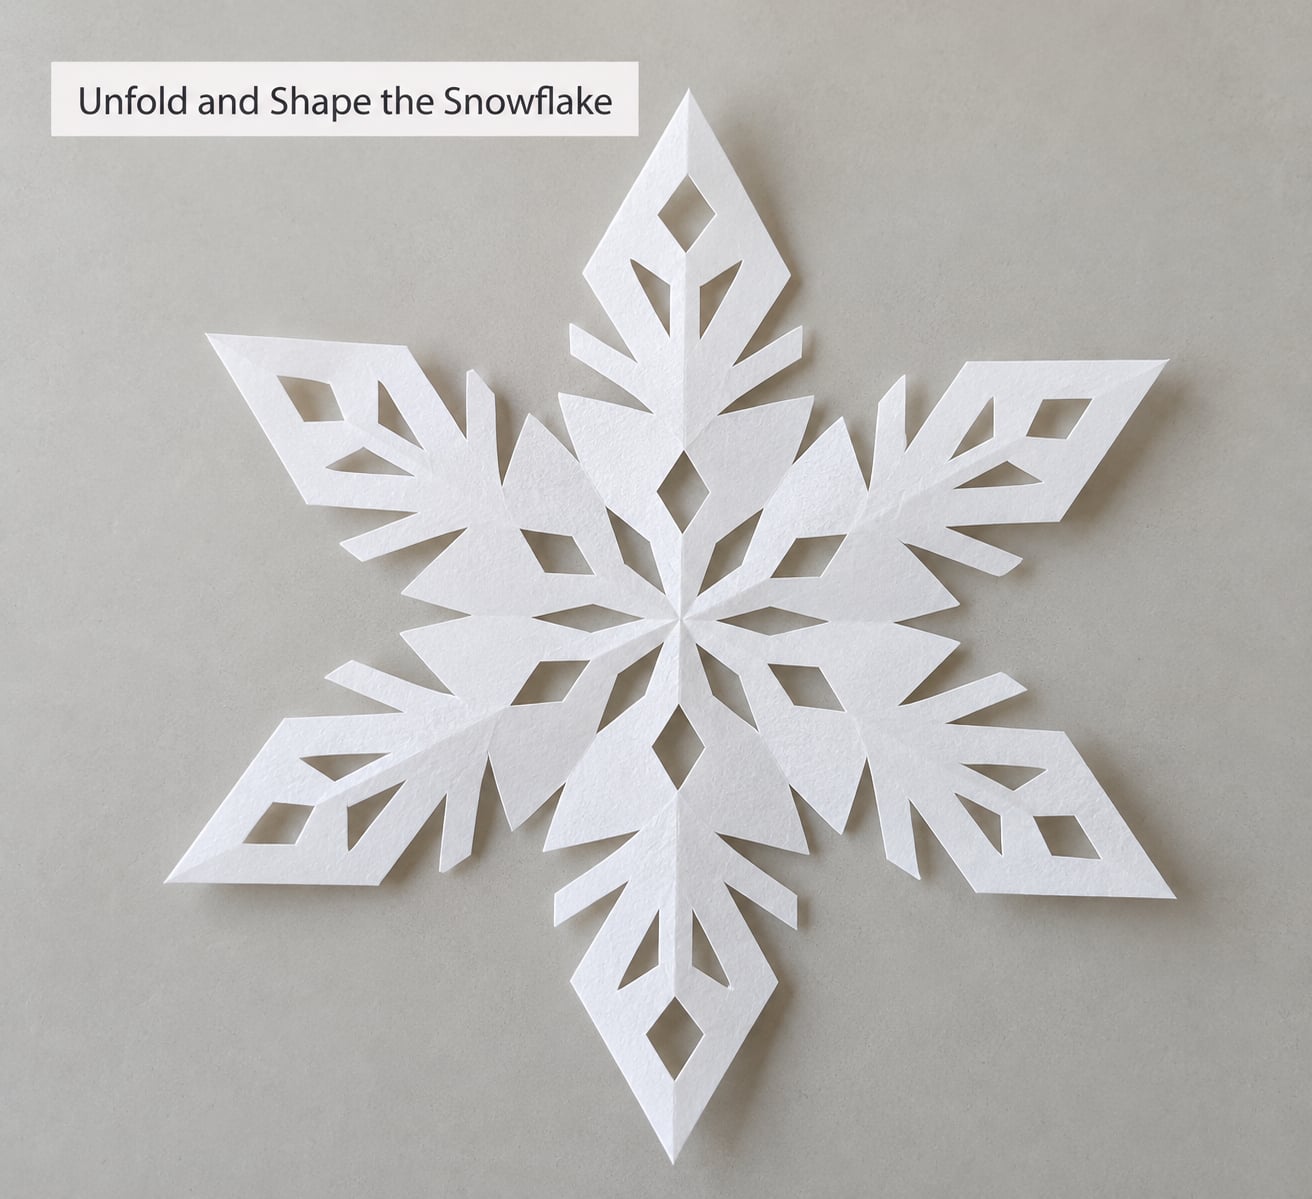
Open the paper slowly, one crease at a time, from the outside in. Peel layers apart gently rather than pulling opposite ends, and support the middle with your palm so the points don’t hinge and tear.
If it curls, lay the flake between two sheets of plain paper and press it with a warm iron on the lowest setting. A light mist of spray starch under the top sheet gives you a stiffer flake that hangs flat on a window.
Common Mistakes and Tips
Almost every lopsided snowflake traces back to one of five fixable problems.
The thirds don’t line up. This is the number one reason a snowflake falls apart on opening. Because the two thirds are uneven, the layers don’t mirror correctly and the cuts land in the wrong places. Fix it by making that pencil mark first, then folding each side to the line instead of eyeballing it.
Cuts go across the wrong edges. Only the folded edges and the trimmed top edge produce a snowflake that opens out flat. A shape cut out of the single raw edge at the bottom of the wedge will just leave a hole in the finished flake.
The paper tears as you unfold. The cuts went too close to a point, or the scissors were dull. Press along each crease with your thumbnail as you open, and keep a finger under the section you’re peeling back.
Small scissors, big kid. Any child under about six struggles to cut sixteen layers of copy paper. Use parchment paper, onion skin, or a coffee filter folded into thirds and skip the trimming. The result is softer, but it works when the scissors are the problem.
Dull scissors tear instead of cutting. A torn edge looks ragged no matter how good the fold was. Test the blades on a scrap of paper first, and use small pointed-tip scissors for tight inner shapes rather than forcing a full-size pair open.
Once you’ve got the hang of it, a few extras keep the whole table happy. For a three-dimensional snowflake, glue three finished flat flakes together at their centres with alternating pieces of scrap paper as spacers, then add a loop of thread for hanging. For a no-scissors version, tear the paper along the marked fold lines instead of cutting, which gives a softer, feathery result. And if you’re doing this with a group, print the fold guide on a sheet of paper so children can hold it beside their own work rather than watching a demonstration once and losing the thread.
For display, tuck them into window corners where the light catches the paper, glue them to a card for a holiday greeting, string them along a garland above a window, or hang a handful from a branch instead of a tree. The kids who make fifteen in a row usually end up with a garland.
Frequently Asked Questions
What type of paper is best for cutting paper snowflakes?
Standard copy paper is the best starting point because it holds a crease firmly but still cuts cleanly. Tracing paper and onion skin are thinner and easier to cut, though they crease less well and look faint on a pale wall. For children under six, parchment paper or a coffee filter is far easier because small hands cannot cut through many layers of copy paper.
How do you fold a sheet of paper to make snowflake cutouts?
Fold the sheet in half twice to find the centre, then fold it corner to corner into a triangle. Fold that triangle in half, then fold each side into thirds so the edges meet exactly, and trim off the leftover flap to leave a clean right triangle. Cut shapes out of the folded wedge and open it along the creases to reveal the snowflake.
How do I make a six-pointed paper snowflake?
Six points come from folding the paper into thirds rather than into halves. Fold the sheet into a triangle, fold it in half again, then bring each side over to a pencil-marked third so the edges line up exactly. Cutting this wedge and opening it produces six evenly spaced points, the same six-fold symmetry real snow crystals have as water molecules freeze.
Why did my paper snowflake fall apart when I unfolded it?
Almost always the thirds were uneven, so the layers no longer mirrored each other and the cut shapes landed where nothing supported them. Mark the first third with a pencil and fold the second side to that line instead of guessing. Cutting only through folded edges, keeping cuts a little way in from each point, and opening slowly with a finger under the paper also prevents tearing.
Can small children make a paper snowflake without sharp scissors?
Yes. A coffee filter is already round, so fold it into thirds and cut straight through with rounded-tip scissors and you skip the trimming step entirely. The folded filter is thin enough for small hands to manage, and dipping the finished flake in diluted food colouring gives a mottled tie-dye result once the colour dries.
How do I flatten a paper snowflake so it hangs flat?
Lay the opened snowflake between two sheets of plain paper and press it with a warm iron on the lowest setting. A light mist of spray starch beneath the top sheet stiffens the finished flake enough to hang flat on a window without curling at the points. For a thicker result, glue a second snowflake behind the first.
Conclusion
Start by folding your sheet in half twice to mark the centre, then trim it down to a square. Everything after that is practice with the thirds.
Fold into thirds, cut a few triangles from the folded edges, open it along the creases and you have a six-pointed snowflake made from one sheet of paper. Hang a batch in the window, glue them onto holiday cards, or string them into a garland above the glass. Then hand the pencil to whoever is next in line and let them design their own cut pattern into the same wedge.