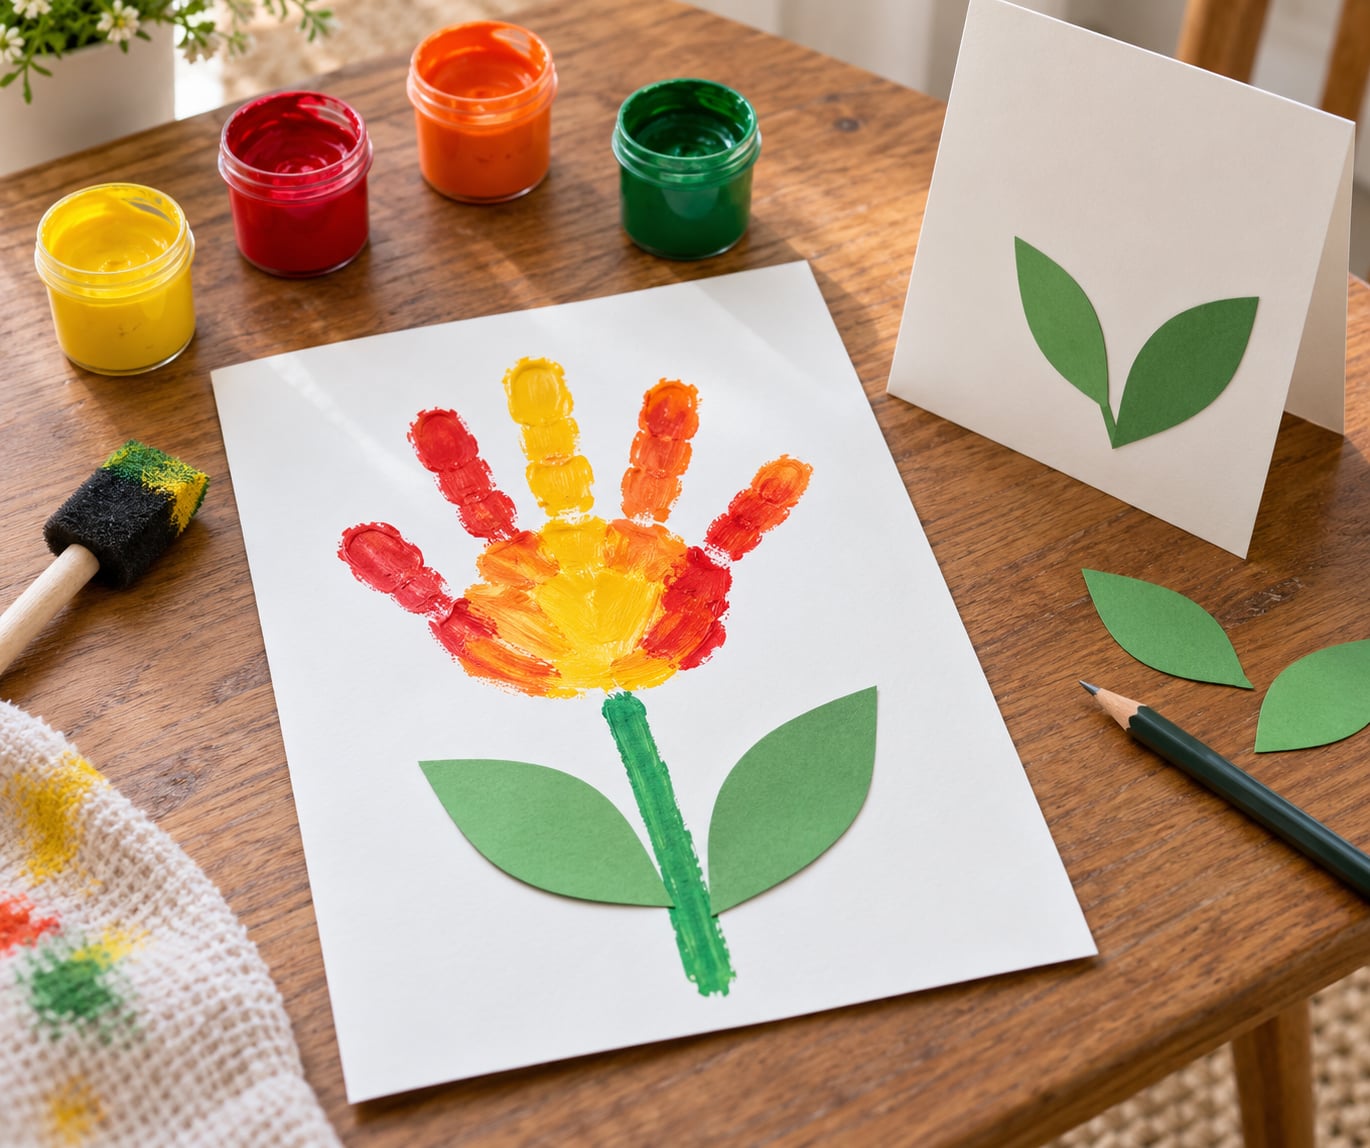
The easiest homemade Mother’s Day gift to make with kids is a handprint keepsake: a painted handprint turned into a flower, mounted on cardstock with a short handwritten message. It needs only materials most homes already have, works from toddler age up, and takes about 45 minutes including drying time.
I’ve made these for nieces and nephews over the years, and the same pattern keeps working. A preschooler can stamp a hand, a seven-year-old can cut the leaves, and both of them still feel they made the gift themselves.
Table of Contents
- What You Need
- How to Make a Homemade Mother’s Day Gift With Kids: Step by Step
- How to make a homemade Mother’s Day gift with kids: prepare the cardstock
- How to make a homemade Mother’s Day gift with kids: paint the handprints
- How to make a homemade Mother’s Day gift with kids: assemble the keepsake
- Common Mistakes
- Frequently Asked Questions
- What is the best homemade Mother’s Day gift for toddlers?
- Do I need washable paint for this Mother’s Day craft?
- How long does the handprint gift need to dry?
- What if my child does not want to put their hand in paint?
- Can I make this gift without a large sheet of cardstock?
- What message should I write on the homemade Mother’s Day gift?
- Conclusion
What You Need
Gather everything before the child sits down. Scrambling for glue halfway through is what turns a fun craft into a bad afternoon.
- Cardstock — one sheet about 8.5 by 11 inches, cut in half for two prints or kept whole for one large bouquet.
- Washable tempera or finger paint — two or three colours. This is the one item worth buying fresh if you don’t have it.
- A shallow plate or tray — for pouring a thin puddle of paint. A lid from a jar works too.
- A sponge brush or wide flat brush — a clean kitchen sponge cut in half does the job.
- Green paint or green paper — for stems and leaves.
- Paper towels and a damp cloth — one for wiping hands, one for the table.
- Scissors and a glue stick — adult-only.
- A pen — for the dedication at the bottom.
Cheap substitutions work fine. Plain watercolour paint is too transparent for a strong print, but a bottle of tempera from a dollar-store craft aisle behaves exactly like the name brand. Heavy drawing paper tears when wet, so if that’s all you have, tape a sheet of cardstock over the back before painting.
For children under three, choose paint labelled non-toxic and keep everything else out of reach while they work. Beads, small pom poms and loose buttons are choking hazards, which is why this project uses paper shapes and nothing small enough to swallow. If you want a specific safety answer for your own child, your paediatrician is the right person to ask.
Age range for the whole project: 2 and up, with an adult handling paint and scissors. Preschoolers can manage the stamping; school-age kids can take over cutting and layout entirely.
How to Make a Homemade Mother’s Day Gift With Kids: Step by Step
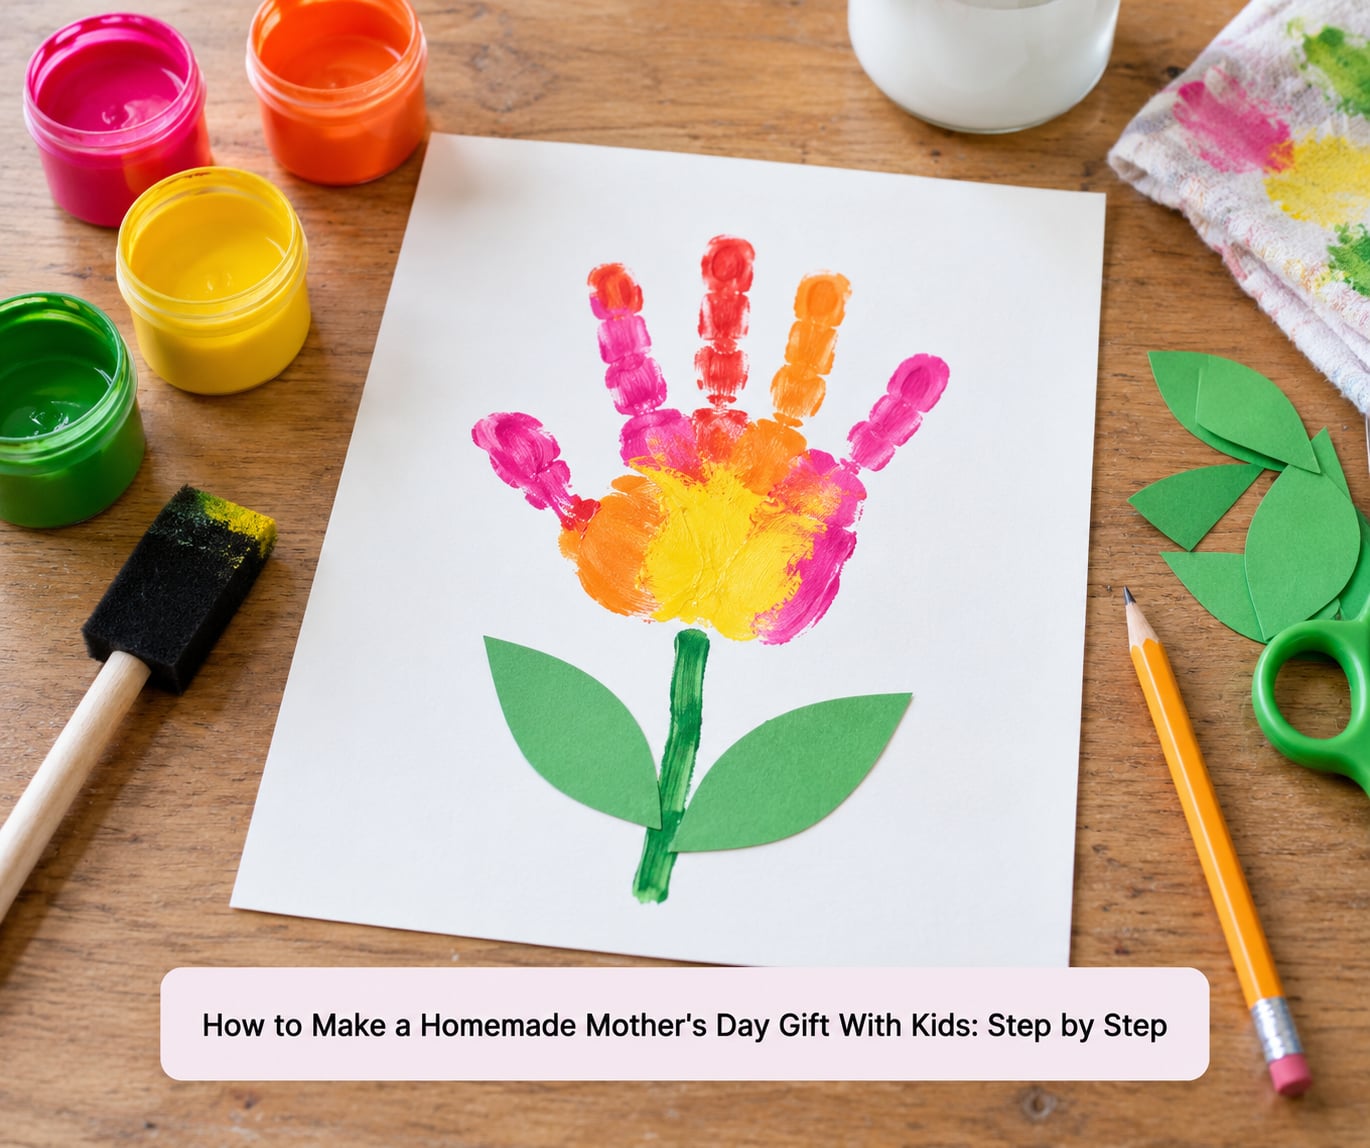
How to make a homemade Mother’s Day gift with kids: prepare the cardstock
Lay a sheet of cardstock on a table you don’t mind losing paint to, or cover the surface with newspaper or a plastic tablecloth. That single step prevents most of the cleanup panic that stops parents halfway through.
Let the child pick the flower colours before any paint comes out. Two colours look intentional; five look muddy. Set the paints in order from light to dark so nobody reaches for the wrong one mid-stamp.
Have them sketch the plan lightly in pencil first: one big print, or a fan of four prints in a row. A traced hand outline works even better for younger kids who find the stamping part hard, since they can paint inside the lines instead of aiming for a straight-on press.
How to make a homemade Mother’s Day gift with kids: paint the handprints
Pour a thin puddle of paint into the plate. Thin is the whole trick — a thick puddle spreads past the edges of the hand and smears the outline you were aiming for.
Wash and dry the child’s hands first, then press the palm down firmly for about two seconds and lift straight up. Rolling or twisting at the end drags the paint and rounds off the fingertips.
Do one or both hands, depending on the layout. Two prints make a paired flower on the front of a card; one large print mounted on its own sheet reads more like a poster.
Let the print dry flat and untouched. Ten minutes for tempera, closer to twenty in a warm room, and considerably longer for anything labelled acrylic. Test the edge with a clean fingertip before moving the sheet.
How to make a homemade Mother’s Day gift with kids: assemble the keepsake
Once the prints are fully dry, add the stems. Paint or draw a line running down from the base of each handprint, curving slightly so it reads as a stem rather than a stick.
Cut leaf shapes from green construction paper and glue them along the stems. Older kids can cut the leaves themselves; for toddlers, stick a handful of pre-cut leaves within reach and let them choose where each one goes.
Mount the finished sheet on a slightly larger piece of cardstock so you get a clean white border, and glue it to card folded to make a standing card. Trim the edges with a craft knife or scissors held by an adult.
Write the dedication last, in the child’s own words if they insist. Date it. In five years the date is what turns a nice card into the thing you actually keep.
Common Mistakes
Paint smears when you move the sheet. The paint is still wet. Keep the cardstock flat on the table for the full drying time instead of carrying it to the sink or stacking it under books.
Prints come out faint or blotchy. Either the paint puddle was too thin or the plate had water in it from the last wash. Change the water between colours and paint in two light coats rather than one heavy one.
The cardstock buckles or tears. You painted a drawing-paper weight. Back it with a second sheet of cardstock, or use proper cardstock from the start.
The hand is too small or the fingers too short to read. Trace the hand with a pencil first and paint inside the outline. Younger children often press too lightly, so add a second coat while the first is still damp.
It looks like a craft project instead of a gift. The message is doing half the work. A simple line in a clear hand, plus a clean border, changes how the whole thing reads.
The child wanted to do it differently. Let them. An off-centre print in the wrong colour is still a handprint their mother will keep for years, and forcing a “correct” version teaches nothing except that you wanted a gift more than they wanted to give one.
Preserving the finished piece takes about five minutes. Once everything is dry, brush on a thin coat of clear acrylic sealer or a matting medium, let it cure overnight, and the colours stay bright for years instead of fading within a few months.
Frequently Asked Questions
What is the best homemade Mother’s Day gift for toddlers?
A painted handprint flower on cardstock is the most reliable toddler project. There are no small parts, the steps are short, and a single stamp produces a finished result that looks deliberate even when the print is wonky. Pair it with a short written message the child dictates to you, and the gift reads as thoughtful rather than messy.
Do I need washable paint for this Mother’s Day craft?
Yes, washable is worth the small extra cost. It comes out of skin, hair and cotton clothing with warm water and a little scrubbing, which matters when a two-year-old is involved. Tempera or finger paint labelled non-toxic is the safest choice for children under three, and a rinse cup and damp cloth nearby handle most of the mess.
How long does the handprint gift need to dry?
Washable tempera paint usually dries to the touch in 10 to 20 minutes but needs closer to an hour before you can safely press leaves or card over it. Keep the sheet flat and uncovered in the meantime. Thick acrylic paint takes several hours, so tempera is the better choice if children are waiting to add the next step.
What if my child does not want to put their hand in paint?
Switch to a traced outline. Draw around their hand on the cardstock, let them paint inside the line with a brush or sponge, and fill in any gaps with the paper colour. Thumbprints work the same way for a single small flower. Some children simply prefer to decorate a premade shape instead, and that is a fine outcome too.
Can I make this gift without a large sheet of cardstock?
Yes. Use three standard 8.5 by 11 inch sheets cut into quarters, and make one handprint flower per square with a stem drawn to the bottom edge. Tape the four squares together in a grid for a bouquet effect. A half sheet also works if you are stamping one pair of hands rather than a full arrangement.
What message should I write on the homemade Mother’s Day gift?
Keep it short and let the child dictate it if they are old enough to speak in sentences. Write their words down as closely as you can, even if the grammar is wrong, then add the date. A note that says something like “I made this for you because you do the hard stuff” carries more weight than a polished printed card.
Conclusion
Start tonight by setting out the cardstock, the paint and the plate. Let your child choose the colours and decide whether the print goes in the middle or the corner, then give them one job at a time and let the drying happen in between.
Fold the card, write what they said, and put their name and the date on the back. That is the whole gift, and it is enough.