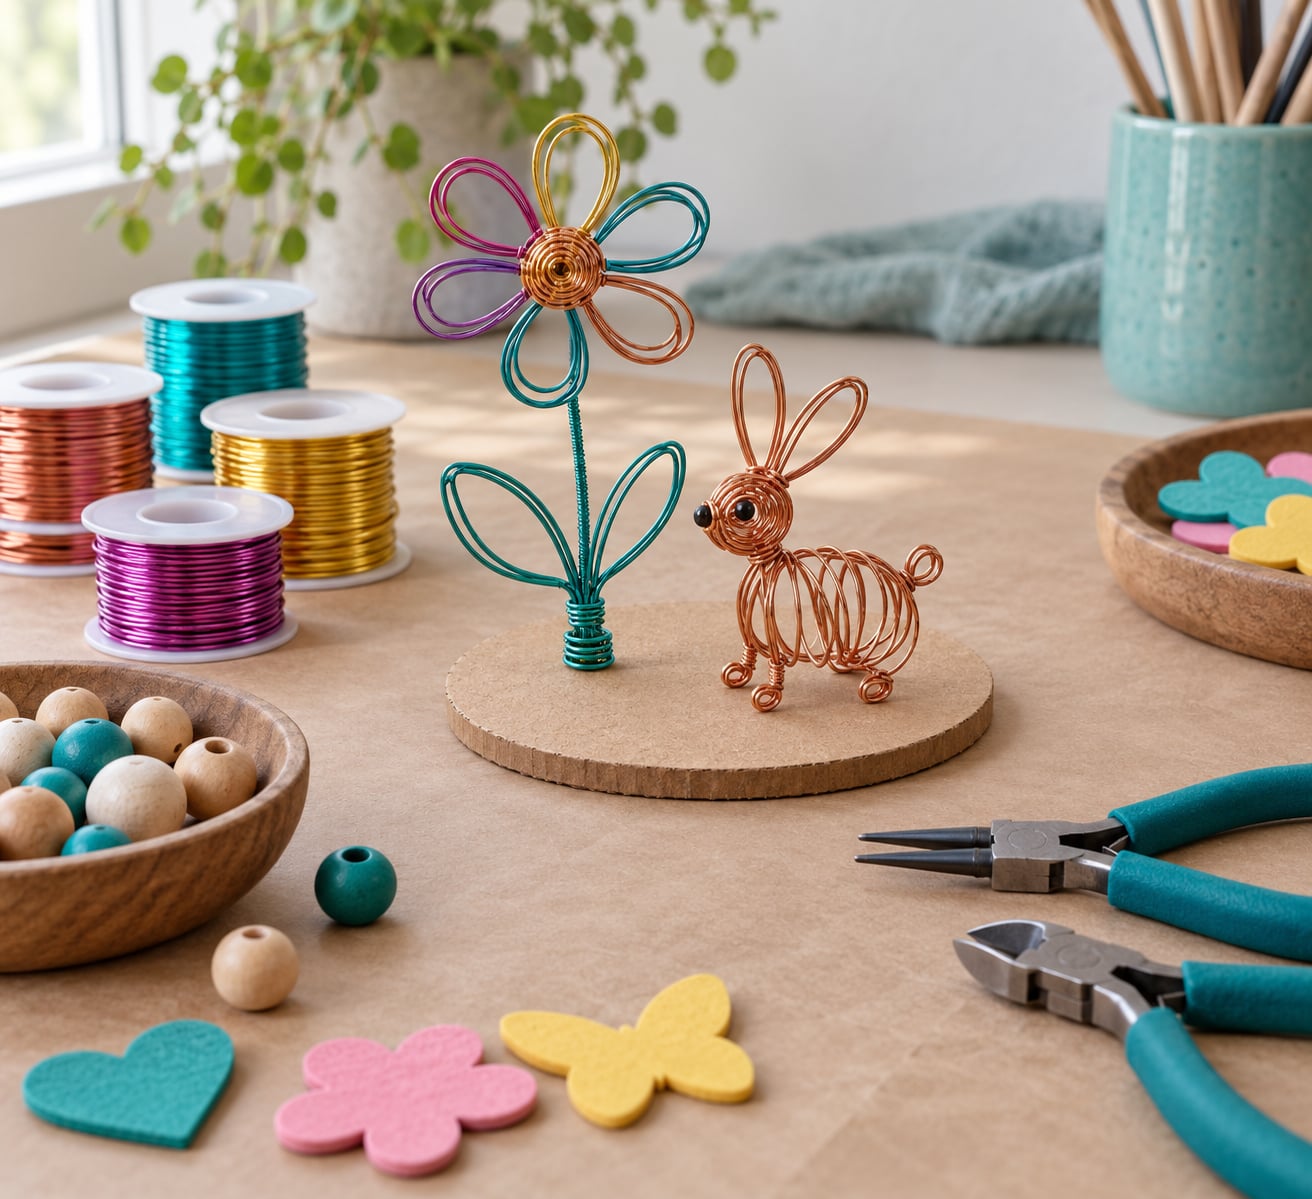
To make a wire sculpture with kids, you bend soft craft wire into one simple shape, anchor it in a base such as a wood block or a jar lid full of playdough, then decorate it with beads, foam shapes, or paint. Give yourself 30 to 45 minutes for the first one. The whole thing is beginner-level, and the results look like real sculpture rather than a school craft.
Wire is one of those materials kids think is off-limits, so handing it over changes the energy in the room. What surprises most parents is how much fine motor control and spatial thinking goes into it. A child who can draw a house flat on paper has to work out how that house looks from the corner of the table before the wire will cooperate.
The one rule that matters: an adult handles the cutting and any wire with sharp ends. Everything else, kids can genuinely do themselves from around age four, and preschoolers from three if you sit with them the whole time.
Table of Contents
- What You Need
- Step-by-Step: How to Make Wire Sculptures with Kids Step by Step
- How to Shape Wire Without Making It Too Difficult
- How to Add Bases and Join Wire Safely
- How to Decorate and Display the Sculpture
- Common Mistakes
- Safety Tips for Making Wire Sculptures with Children
- Easy Variations for Different Ages and Skill Levels
- Frequently Asked Questions
- What kind of wire is best for kids crafts?
- What materials are needed for a wire sculpture?
- How do I stop a wire sculpture from falling over?
- Is wire safe for toddlers?
- How do you make wire hold its shape?
- How long does a wire sculpture project take with kids?
- Conclusion
What You Need
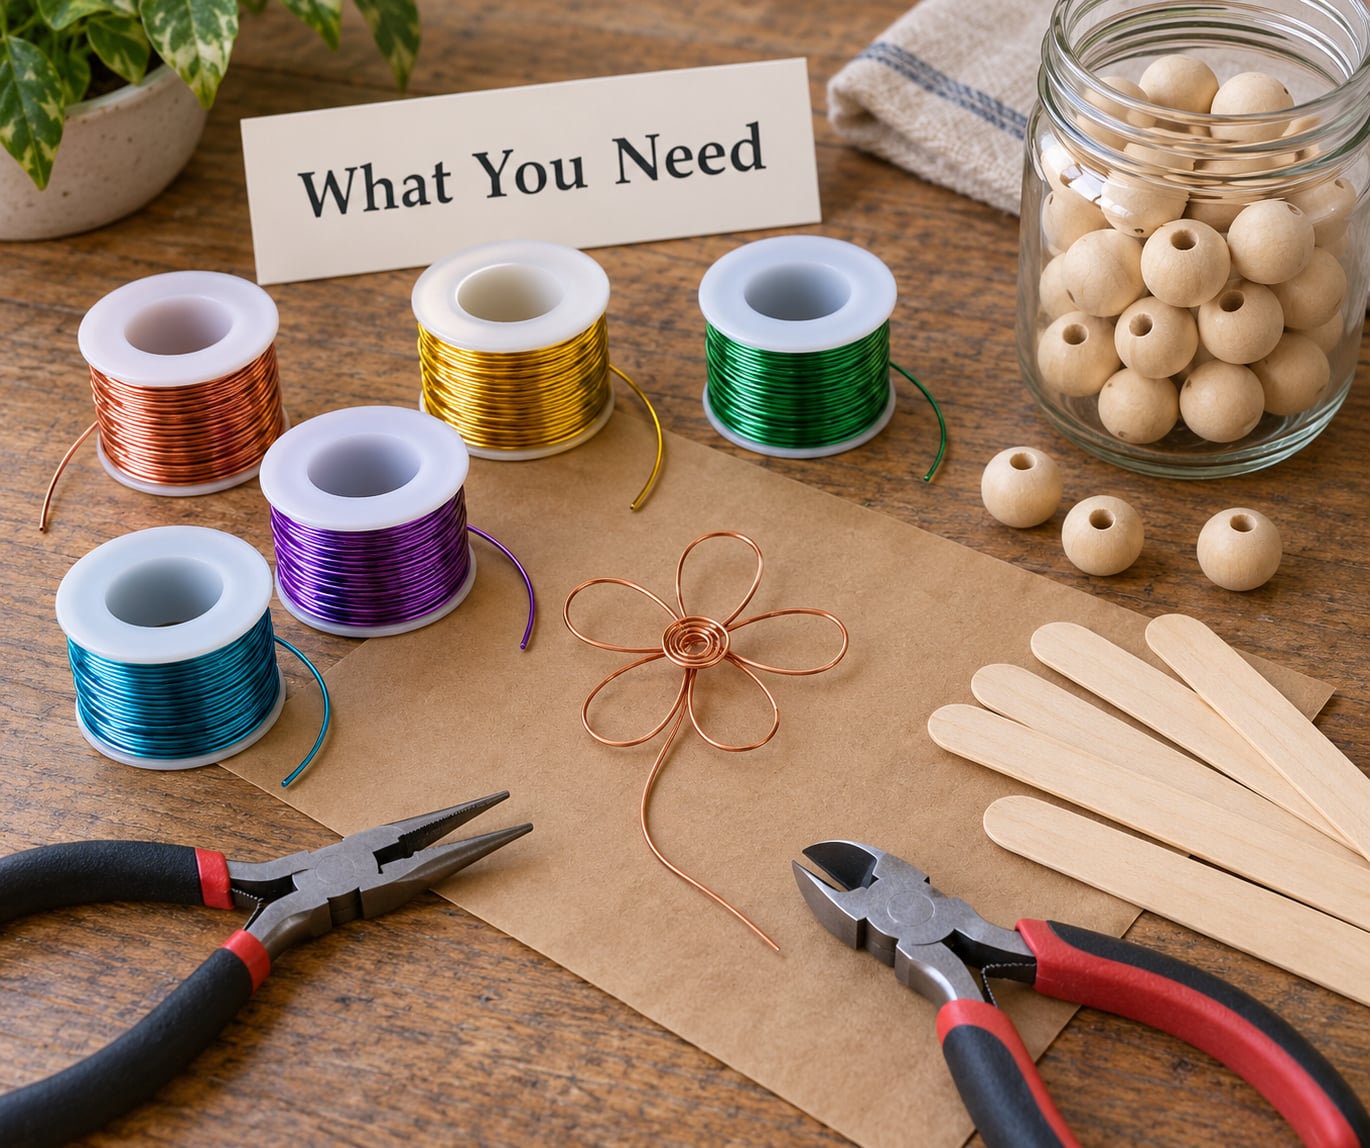
| Item | What to look for | Amount per sculpture |
|---|---|---|
| Craft wire | Colored aluminum craft wire, dead-soft, 18 to 22 gauge | 2 to 3 lengths, 12 to 18 inches each |
| Base | Wood block, small cutting board, thick cardboard disc, or a jar lid | 1 |
| Anchoring material | Air dry clay, playdough, or tape | A small fist-sized lump |
| Beads | Large wood beads, 8 mm or bigger | 3 to 8 |
| Decoration | Craft foam shapes, pom-poms, small paper pieces, acrylic paint | A handful |
| Tools | Round-nose pliers, small wire cutters, a pencil or wooden dowel for bending | 1 set, adult handled |
| Surface | Brown paper or a tray, plus an old towel underneath | 1 |
Set the paper down first and work on top of it. Wire springs off the table when you cut it, and it finds every gap in your floor. A folded towel under the paper catches anything that drops.
Cut wire lengths ahead of time if you are working with younger children. Snips of 12 to 18 inches are easier for small hands to control than one long piece, and they give kids a reason to make multiple shapes instead of one complicated one.
On which wire to pick: soft aluminum craft wire, the kind sold in colorful spools, is the workhorse for kids. It bends with fingers alone, so a five-year-old does not need pliers for most of the project. Chenille stems work for the youngest kids, and aluminum craft wire handles everything from a preschool spiral to an elementary-age figure.
| Wire type | Good for kids? | Why |
|---|---|---|
| Colored aluminum craft wire | Yes, best all-round choice | Bends by hand, comes in colors, resists snapping |
| Chenille stems | Yes, ages 3 and up | Softest option, but too floppy to hold tall shapes |
| Plain aluminum wire | Yes, with close supervision | Holds shape better, ends can be sharp, harder to cut |
| Steel, galvanized, or jewelry wire | No | Springs back, needs pliers, snaps and cuts hands |
| Coated or plastic-jacketed wire | Avoid | Coating peels and gives nothing to grip or twist |
| Baking wire | No | Fumes are not safe around children |
Wire gauge just means how thick it is, and thinner numbers are thicker wire. For a first project, stay in the 18 to 22 gauge range. Anything much thinner folds instead of holding, and anything much thicker needs pliers your hands have to squeeze hard.
Step-by-Step: How to Make Wire Sculptures with Kids Step by Step
Keep every sculpture to one shape. The first attempt should take under 20 minutes of actual making, because a small piece that stands up on its own gives a child more confidence than a big one that sags.
1. Sketch the shape on paper first. Have your child draw the thing they want to build, then simplify it down to three or four lines. A cat becomes two triangles on a loop. A flower becomes a circle on a stick. You are looking for an outline, not a drawing.
2. Cut the wire. An adult cuts each piece to length, ideally 12 to 18 inches for a first try. Snip with small wire cutters, not household scissors, and always cut away from your body.
3. Anchor the wire into the base. Press the first end about an inch into playdough or air dry clay, or slide it into a slot in the wood block. If it springs back out when you let go, the base is too hard or too smooth, and you need a firmer push or a dab of glue.
4. Make the first two bends. Children get the most stuck on this. Have them mark the bend spot with a finger, hold the wire on either side with their thumbs, and push the middle over a pencil or wooden dowel. One steady push beats five tiny wiggles.
5. Twist on more wire where you need a joint. Overlap two ends by about an inch, then twist them together with your fingers until they lock. If a joint keeps springing open, wrap it tighter or add a short piece of wire around it like a tie.
6. Add loops and coils. Loops give hands and feet something to hold, and a coil made around a pencil makes a spring shape. Both are worth teaching because they let a child build up from the same simple line.
7. Test the balance before decorating. Set it on the table and nudge it. If it tips, add a foot wire that runs back along the base, or press more clay on the light side. Do this before beads go on, since beads change the weight.
8. Decorate. Beads, foam shapes, pom-poms, and painted sections go on last. Beads do more than add color: a child has to count the holes and orient the piece, which is quietly harder than it looks.
You will know it worked when the sculpture stands up unsupported and looks different from every side. That last part is the real reward of this project.
How to Shape Wire Without Making It Too Difficult
Most beginner frustration comes from trying to make a curve where a straight angle would do. Start with corners and straight runs, then add one curve only where the design needs it.
Give kids a bending guide. A pencil, a wooden dowel, or even a fat marker makes a clean arc every time, and the wire keeps that curve after you let go. Fingers work too, but they produce a lumpy shape that is harder to build on.
Hand strength varies more than people expect. Some eight-year-olds can twist a joint tighter than an adult using fingertips. If a child cannot close the twist with two hands, let them stand the wire upright and wind it around a pencil instead, which needs less grip strength.
Four techniques cover almost everything a kid will build:
- Twist for joining two pieces, used at ankles, necks, and branch points.
- Loop for hands, feet, flower centers, and closed shapes like a body or a head.
- Coil around a pencil for springs, tentacles, hair, and curly details.
- Bend for the structural lines that make the piece stand.
Looping is usually the step where kids need a hand. Have them make the loop by holding the two ends together, bending them away from each other in a U, then rolling the wire between thumb and forefinger until the ends cross.
How to Add Bases and Join Wire Safely
Two tool-free base options work well for families without a drill. The first is a jar lid or a shallow tin filled with playdough, where the wire is pressed straight down into the clay. The second is a thick cardboard disc taped to the table with wires wrapped around the outside edge.
If you do own a drill, a small wood block with holes drilled in it gives a sturdier, longer-lasting anchor. Put a dab of clay in each hole and press the wire down into it. That version survives being moved, which the playdough base does not.
Two tips hold a base steady. Run a foot wire backward along the base surface so the sculpture can not pitch forward, and keep the weight low and centered. Tall thin shapes topple; short wide ones stand.
Every joint deserves a test. Tug gently on it with two fingers. A joint that opens up was not tight enough, and it will fail later on a shelf rather than on your work table, which is worse.
Cut ends are the real hazard. File them down with a metal file, fold them back on themselves, or slide a bead over the tip. A bead on the end reads as decoration and solves the poking problem at the same time.
How to Decorate and Display the Sculpture
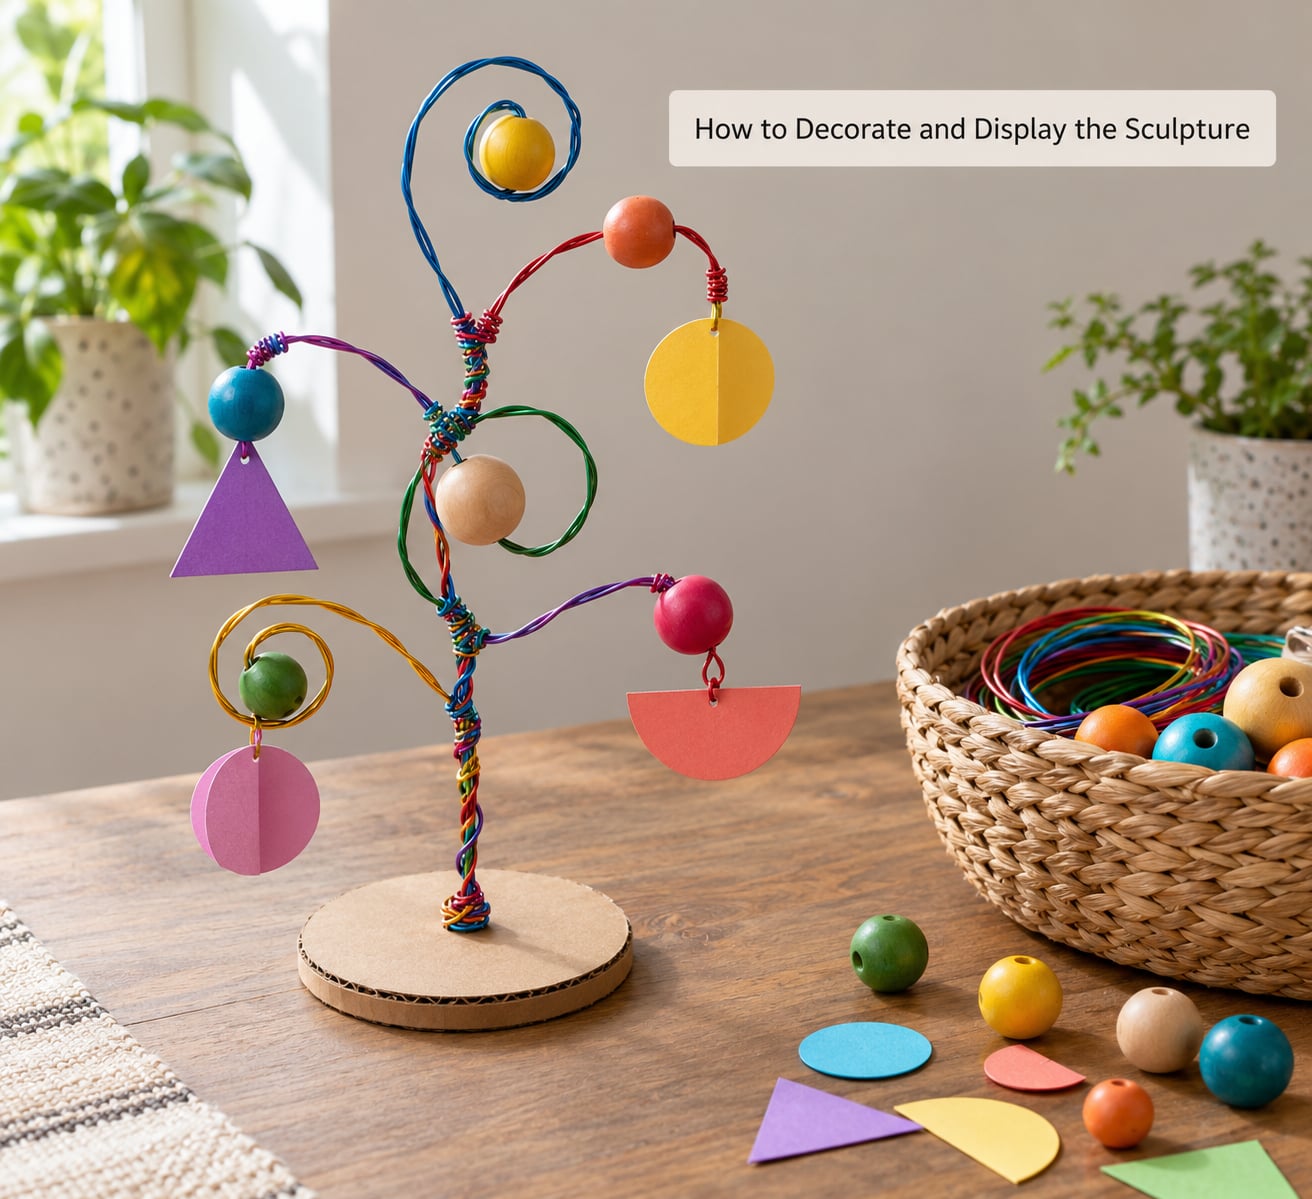
Thread beads on before the sculpture is finished if the beads go at the top, since they are easier to slide on while the wire is straight. Decoration choices scale by age without much extra effort: pom-poms and tape for three-year-olds, foam shapes for preschoolers, beads and paint for older kids.
Let kids choose their own color story rather than imposing one. Two colors, done deliberately, usually looks better than four added by accident. If they want everything rainbow, that is still a decision they made.
For display, the least damaging option is a dedicated shelf spot away from the edge, or a wall hook used as a hanger if the piece is light enough. Avoid hanging anything heavier than a few ounces from a hook, and skip the mantel if you have a dog.
Photograph the sculpture before it moves. That photo becomes a record of the thinking behind it, which matters more to a child five years later than the object itself.
Common Mistakes
The wire is too stiff to bend by hand. You have probably picked steel or a heavier gauge than you need. Soft aluminum craft wire bends with fingers; if yours does not, swap it rather than asking a child to fight it.
The wire snaps or creases instead of bending. That is thin wire being overloaded, most often at a twist point. Use the next thicker gauge, and re-twist joints over a pencil rather than by hand so the wire stays round.
Arms and legs collapse the moment you let go. The structure needs cross-bracing. Run a second wire from the shoulder back into the body, and give every limb a loop at the joint instead of a simple twist.
Joints keep coming undone. Twist further, then wrap a short collar of wire around the connection in the opposite direction. Two twisted pieces gripping each other hold far better than one.
The base tips over. Move the weight lower and add a counterweight foot. If the center of gravity sits above the base edge, nothing else will fix it.
Sharp ends poke fingers. File, curl, or cap every cut end before the child walks away from the table. Do it as you go rather than at the end.
The design is too complicated to finish. Cut it down to three or four lines and only add detail once the piece stands on its own. The most common wire sculpture mistake is not bending failure, it is over-design.
Wire leaves green or black marks on the table. Bare aluminum oxidizes and transfers a gray smudge. Put down brown paper or a tray, and expect to wipe the surface afterward.
Safety Tips for Making Wire Sculptures with Children
An adult should always cut the wire, since wire cutters slip and small fingers are close by. Use cutters rather than household scissors, cut away from your body, and keep kids seated or standing on the same side of the table rather than wandering mid-cut.
Choose wire with no sharp cut ends and no spring temper. Steel, galvanized, and jewelry wire are for adults, and plastic-coated wire is not worth the trouble because it peels and gives nothing to grip.
Wire is not a toddler activity on its own. Under age three, the poking risk outweighs the fun, so stick with chenille stems and thick beads under 8 mm, which cannot fit through a toilet paper roll. From age three, close adult supervision makes aluminum craft wire workable.
Beads and small parts are a separate choking hazard from the wire itself. Pick beads that are large enough not to disappear down a toddler’s ear canal or into a rolled-up piece of wire.
Work at a stable surface with good light, and keep the floor clear of offcuts. Young children often drop the wire they are holding, and a bent piece of wire underfoot is the injury nobody plans for.
No one needs protective gear for craft wire, but clear the space of anything the child could step on. Twenty minutes of tidying before you start is worth it.
Easy Variations for Different Ages and Skill Levels
| Age | Wire and tools | Project that works |
|---|---|---|
| 2 to 3 years | Chenille stems, no tools | Big loops and spirals taped to paper; no base needed |
| 3 to 4 years | Chenille stems or thin craft wire, playdough base | Coil a wire around a pencil, press the end into a lid of dough |
| 5 to 7 years | Soft aluminum craft wire, fingers only | Flowers, fish, or a simple figure on a jar lid |
| 8 to 10 years | Aluminum craft wire, round-nose pliers with help | Human figure with looped hands and feet, beads added |
| 11 and up | Heavier aluminum wire, pliers, drilled wood base | Layered forms, wire wrapping, unbalanced standing abstract shapes |
For a group or homeschool co-op, prep kits in advance: cut lengths, portion the beads into cups, and set out one playdough lid per child. Fifteen minutes of setup turns a forty-minute project into a thirty-minute one.
Older kids who finish early can add a second element. A wire flower wrapping around a stem, or a small figure standing beside a larger one, adds challenge without needing different materials.
Seasonal versions are easy swaps: name initials as gifts, wire stars or bare-branch shapes for winter decorations, or wrapped wire spirals for spring mobiles.
Frequently Asked Questions
What kind of wire is best for kids crafts?
Soft aluminum craft wire in the 18 to 22 gauge range is the best all-round choice for children. It bends with fingers alone, comes in many colors, and resists snapping when a child twists it. Chenille stems are softer still, which suits ages three and up but will not hold a tall shape. Avoid steel, galvanized, jewelry wire, and baking wire entirely.
What materials are needed for a wire sculpture?
You need soft craft wire, a base, something to anchor it, and decorations. The base can be a wood block, a thick cardboard disc, or a jar lid. Playdough or air dry clay holds the wire in place. Decorations include large wooden beads, craft foam shapes, pom-poms, and paint. Round-nose pliers, a pencil, and small wire cutters help, though the pliers and cutters stay with the adult.
How do I stop a wire sculpture from falling over?
Keep the weight low and centered, and add a foot wire that runs backward along the base to counter the lean. Short wide structures stand; tall thin ones tip. If the base itself is unstable, press the anchoring clay harder or use a wider base. Balance the sculpture before decorating, since beads and foam shapes change the weight after the fact.
Is wire safe for toddlers?
Wire alone is not a toddler activity, because cut ends can poke and beads can be a choking hazard. Under age three, use chenille stems with large decorations and skip the wire entirely. From age three, soft aluminum craft wire is reasonable with an adult sitting alongside for the whole session. The adult should always do the cutting, no matter how old the child is.
How do you make wire hold its shape?
Soft craft wire holds a bend once it is made, but it does not stiffen like metal armatures do. The trick is structure rather than force: add cross-bracing, use loops at joints instead of simple twists, and anchor the base firmly in clay. Wrapping a short collar of wire around a joint in the opposite direction locks it in place. Never try to stiffen wire by hammering it with children nearby.
How long does a wire sculpture project take with kids?
Budget 30 to 45 minutes for a first sculpture, with about 15 of those minutes on actual shaping. Most of the rest is setup, choosing beads, and cleaning up. Kids who have done it before finish in about 20 minutes. Breaking the project into two sessions, shaping one day and decorating the next, works well with older children who lose focus halfway through.
Conclusion
Start with one shape, three or four lines long, cut from soft colored craft wire and pressed into playdough in a jar lid. That is the whole first project, and it takes under half an hour.
Let your child sketch the shape before any wire comes out, keep the first attempt simple, and fix the sharp ends before you put the scissors down. When the sculpture stands on its own, walk around it together and notice how it changes from every angle. Then photograph it and leave the next idea to them.