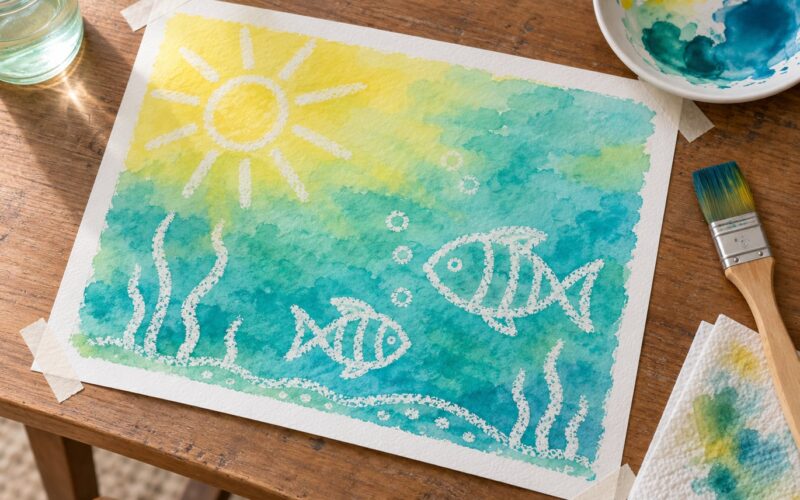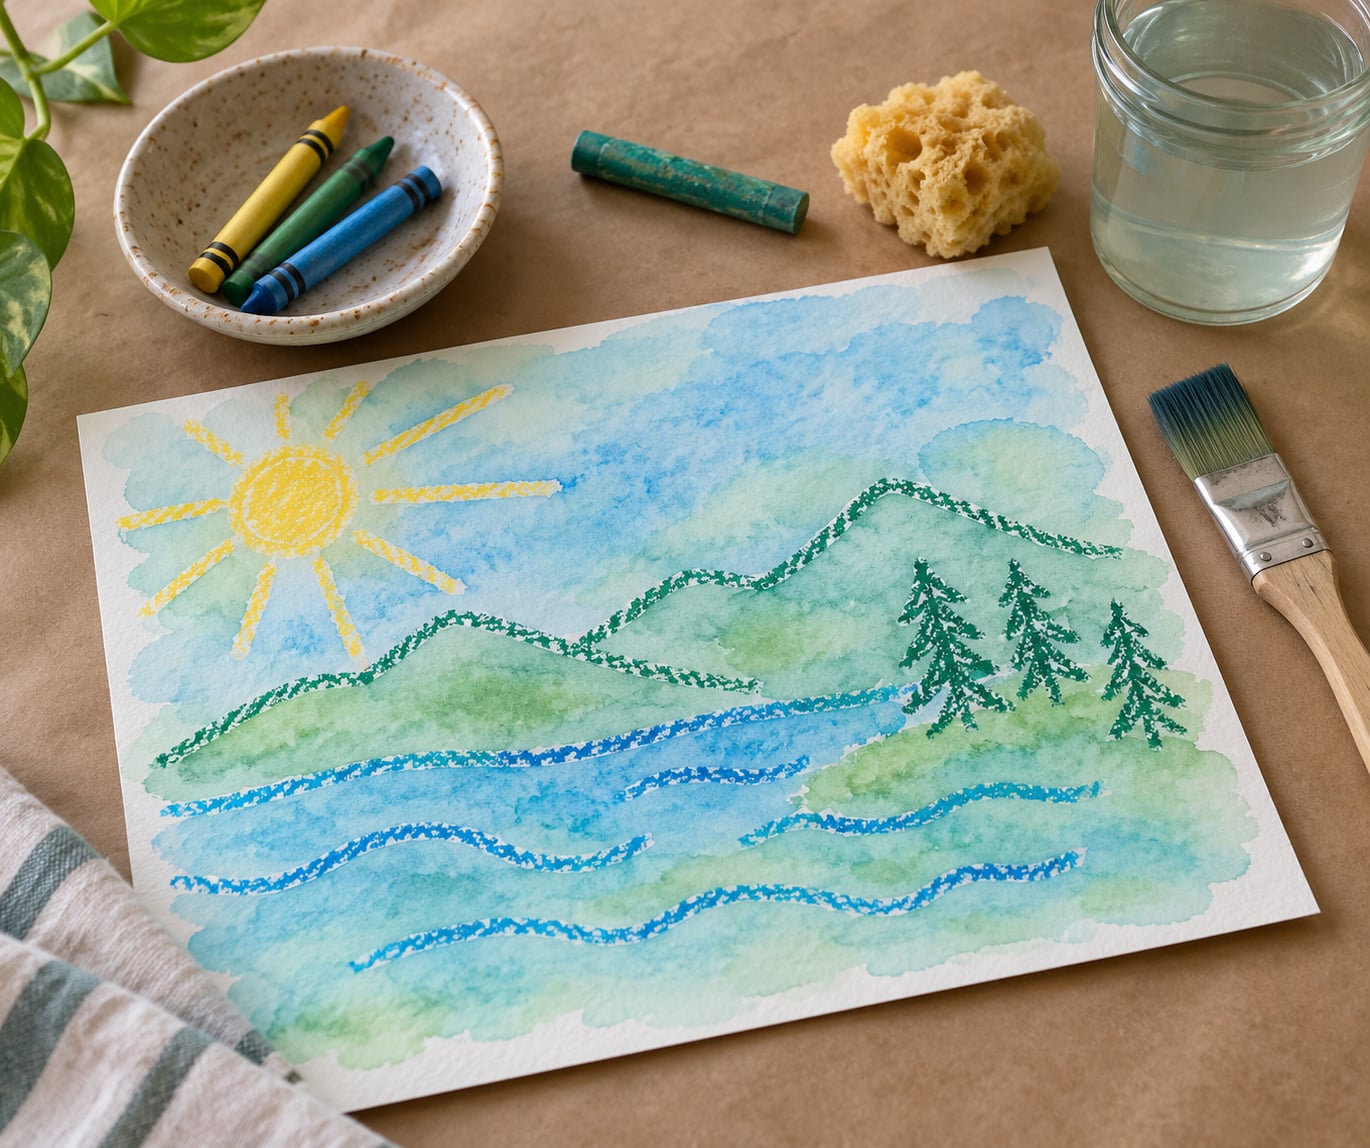
To do wax resist art with kids, draw your design on paper with a wax crayon or oil pastel first, then brush thin water-based paint over the top. The wax pushes the paint away, so your lines stay bright and clean while everything around them takes colour.
The whole thing takes about 25 minutes, works with materials most homes already own, and is very hard to paint wrong. Kids as young as three can get a good result, because the technique is forgiving: messy crayon lines still read as a drawing once the colour goes on around them.
Wax resist works best with light, watery paint. Thick tempera is the classic mistake, because it sits on top of the wax instead of sliding off it, and you lose the effect entirely. I’ll walk you through the whole process, then the mistakes that trip people up and how to fix each one.
Table of Contents
- What You Need
- Step-by-Step
- 1. Prepare the Paper and Workspace
- 2. Make the Wax Resist Marks
- 3. Add Water-Based Paint
- 4. Let the Artwork Dry and Finish It
- Common Mistakes
- Frequently Asked Questions
- What age is wax resist art suitable for?
- Can I make wax resist art without crayons?
- How long does wax resist art need to dry?
- What paper works best for wax resist art?
- How do I clean up melted wax or paint?
- Can children use wax crayons instead of melted wax?
- Conclusion
What You Need
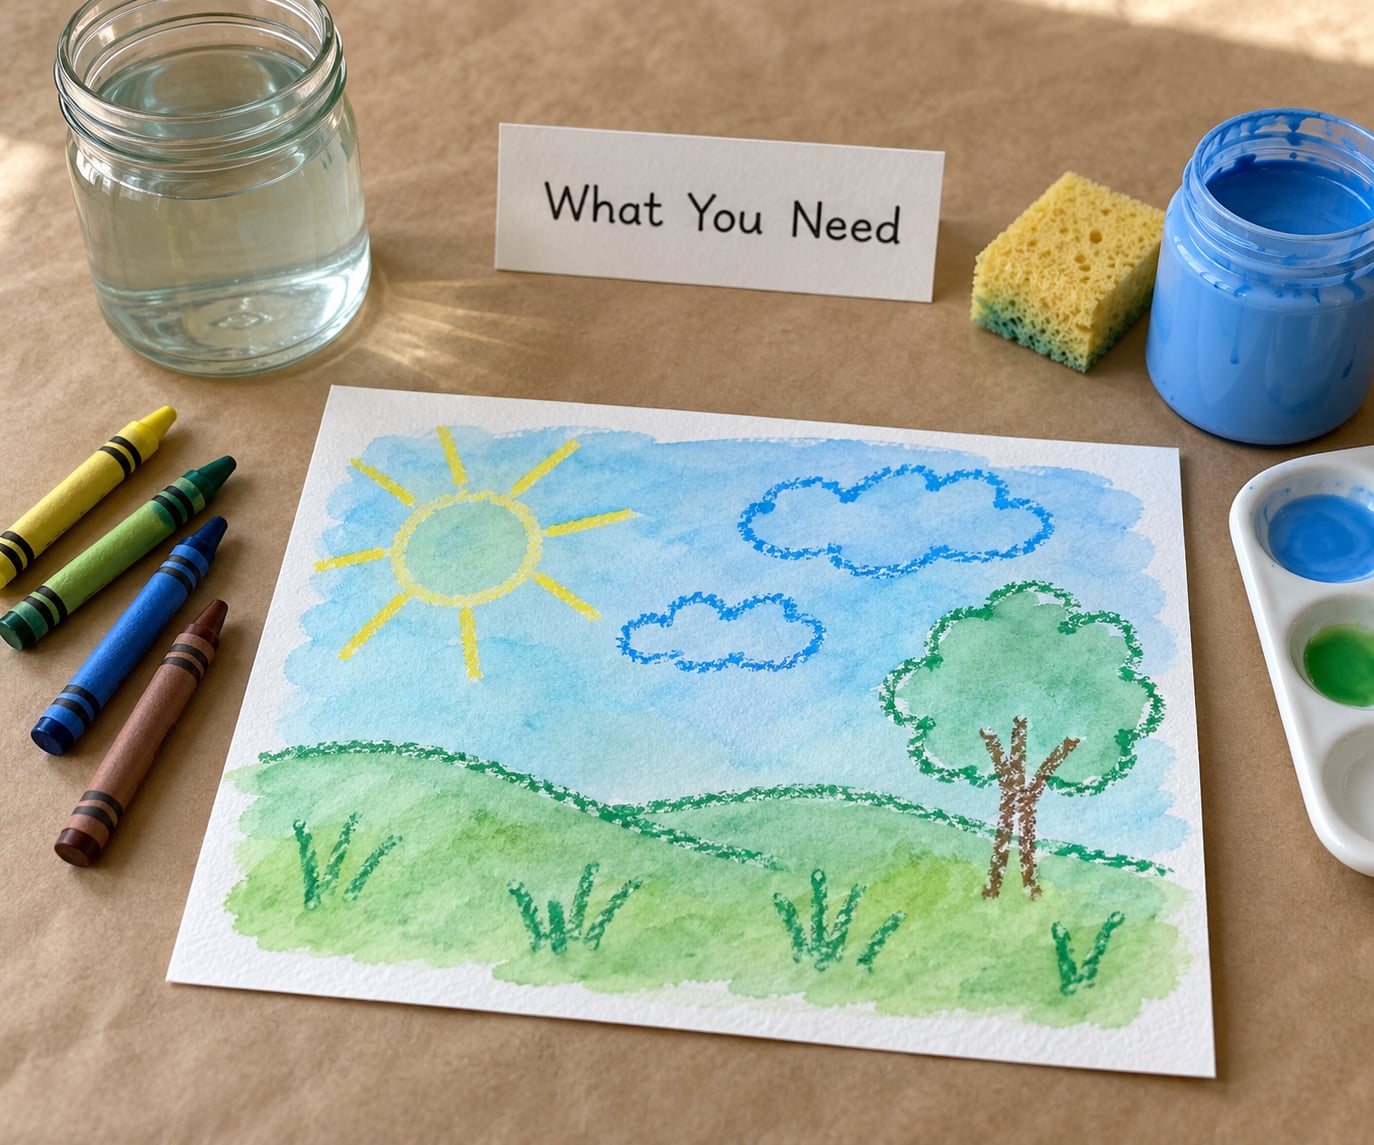
Six categories of supply, and you can substitute almost all of them. Nothing here is specialised, which is the best part of this activity.
- Paper: watercolor paper or heavy cardstock both work. Anything smooth and sturdy that can take a wet brush without tearing is fine.
- Wax source: wax crayons or oil pastels for the classic version. A chunky wax stick or a chunky crayon with a lot of wax in it gives a stronger resist line.
- Paint: washable watercolor, liquid watercolours in a cup, or diluted washable tempera. Thinner is better.
- Brushes: one broad brush for washing colour over the paper, plus a small one for details.
- Water: a jar or cup for rinsing, plus a sponge for dabbing.
- Protection: a sheet of kraft paper, newspaper or a plastic tablecloth for the surface underneath, and an old shirt or apron for the child.
Budget substitutions work fine. Plain printer paper taped to cardstock beats flimsy paper that buckles. A sponge used like a stamp replaces a brush for toddlers. And if you have no washable paint at all, diluted acrylic works, though it does not wash out of clothes as reliably.
One safety note worth reading: skip melted wax and lit candles entirely if children are under five nearby. The oldest online version of this activity uses a candle as the wax source, and that is a burn and fire risk in a room where a three-year-old is drawing. Cold wax from crayons, oil pastels and solid wax sticks gives an excellent resist line with no heat at all.
Step-by-Step
1. Prepare the Paper and Workspace
Set the paper on a protected surface before anything else, and lay your supplies out where the child can reach them without standing up.
Cover a table with kraft paper or newspaper and tape the sheet down at the corners. Tape matters, because a curling or sliding sheet ruins the painting and it is a frustrating thing to hand a child mid-project.
Pour the paint into small cups and put one brush in each, before anyone starts. Filling cups takes thirty seconds and it means you are not interrupting the painting ten minutes in to open a bottle. A good setup looks like this: paper down and taped, paints poured, brushes in, water jar within reach, towel hanging nearby.
2. Make the Wax Resist Marks
Draw directly on the paper with a wax crayon or oil pastel. Press harder than feels natural, and let wobbly lines be wobbly.
Pressure is the whole trick. A light crayon line is a thin barrier that paint creeps across, and the drawing disappears under the colour. A firm, chunky line holds the paint off the paper.
Keep the lines thick enough to stay visible after painting, roughly the width of a thick marker. Kids can make lines, shapes, dots, letters, numbers or simple pictures, and the best ones tend to be full-coverage designs rather than sparse outlines, since bare paper takes colour while waxed paper does not. Let the paper sit for a minute or two while everyone washes their hands.
3. Add Water-Based Paint
Load your thinnest paint, brush it across the paper, and work around the wax instead of scrubbing at it.
Dab first, then sweep. Start with a sponge or the flat side of the brush, and move to thin strokes once the first colour is on. Scrubbing breaks the wax, and broken wax means paint sitting on top of your lines.
You will know the resist is working as soon as the first colour lands. The waxed areas stay pure paper while everything else changes, and the paint beads up slightly at the edges of each line. Expect one colour to dominate before you reach for the next, and resist the urge to add all six colours at once.
Layering is where the technique really opens up. Let each colour dry, then add another and the earlier lines stay visible underneath. That layering is what gives wax resist its depth compared with a single flat wash.
4. Let the Artwork Dry and Finish It
Lay the finished piece flat and leave it for 30 to 60 minutes before touching it, or it will smudge.
Watercolour-dry artwork will curl at the edges. Press it under something flat and heavy once it is fully dry, or leave the curl; most children do not mind a slightly wavy page and it adds to the handmade feel.
Write the date and your child’s name on the back in pencil while you are waiting. Wax resist artwork stacks well in a scrapbook, and a dated page is far more fun to look back on five years from now.
Common Mistakes
Almost every disappointing wax resist result comes from one of six problems. Each has a simple fix, and all of them are recoverable if you catch them mid-project.
The wax lines are too thin, so the drawing vanished under the paint. The wax was applied too lightly or with a skinny, waxy crayon. Go over the lines a second time with more pressure and a chunkier crayon, then paint again. Test a corner first before covering the whole sheet.
The paint looks thick and the wax disappears. You used undiluted tempera or heavy-bodied acrylic. Wax repels watery paint, not thick paint, so thin your paint with water until it behaves like weak tea. Then wash over the top again.
Everything turned muddy brown. Too many colours went on before the first dried, and the wax lines are so crowded together that the paper barely had room to change colour. This is the most common failure in a group setting, where a whole tray gets finished in one sitting. Use two colours for under-fives, three for older children, and let each dry.
The wax flaked off the paper. Wax bonds best when the paper is slightly cool and the crayon is warm from being rubbed. If lines lift as you draw, rest the crayon briefly on the paper first to warm it. Light pressure also flakes; press instead.
The paper buckled or tore. The sheet was too thin for the amount of water. Tape thin paper to a thicker backing before you start, or switch to cardstock.
The table and clothes are a disaster. Set up outside on a towel, or put the paper on a plastic tablecloth over a tray with a lip. An apron and a wet towel on the chairback handle most of the rest, and the cleanup takes under five minutes if you start it while the paint is still damp.
Frequently Asked Questions
What age is wax resist art suitable for?
Wax resist art works from about age three upward, with the wax stage always done by an adult. Three and four year olds can scribble, press hard and stamp a sponge over the top. From five they can draw recognisable shapes, letters and numbers. Older children can layer three or four colours and plan a design on scrap paper first.
Can I make wax resist art without crayons?
Yes. Oil pastels give a stronger, thicker resist line than crayons because they contain more wax. Solid wax sticks work well too, and are easier for small hands to grip. You can also melt broken crayon pieces in a heat-safe bowl with an adult handling the heat, though that adds mess. Avoid candles and open flames around children.
How long does wax resist art need to dry?
Thin washable paint on watercolor paper dries in about 30 to 60 minutes at room temperature. Thicker tempera takes a few hours. For best results let each colour dry before adding the next, and leave the finished piece flat for an hour before handling or stacking it.
What paper works best for wax resist art?
Watercolor paper is the best choice because it stays put when wet and takes a soft wash. Heavy cardstock works well too and is more forgiving for small children. Thin printer paper buckles, but you can tape it to a sheet of cardstock before drawing and it will behave well enough.
How do I clean up melted wax or paint?
Wipe fresh wax from a surface with a paper towel, then warm the cloth briefly and press it against the wax mark, which lifts it. Washable paint rinses out under cool water, so rinse brushes while they are still wet. Cold water on a dried paint mark does nothing, so start before it sets.
Can children use wax crayons instead of melted wax?
Yes, and for most projects crayons are the better choice. They need no heat, create almost no mess and children can do the drawing themselves. If you want a stronger resist line or a more even edge, go over the crayon drawing with an oil pastel or a wax stick after the wax crayon layer dries.
Conclusion
Start with thick wax marks and one thin layer of paint. That is the entire technique, and getting those two things right means the rest has room to be fun.
Once the basic version works, let your child decide what the hidden drawing is. Fish, robots, mazes, a quilt pattern, their own name in bubble letters, a winter scene with bare trees holding back the snow. The reveal is the part they remember, and once they have seen it happen they will want to try again the next rainy afternoon. Put the paper down, press the crayon hard, and let them take it from there.