Most families can carve and paint pumpkins with kids safely by splitting the job in two: an adult handles every cutting task, and children take on painting, pattern drawing, decorating and seed scooping. State Farm’s widely cited guidance puts independent carving at ages 9 to 12 with age-appropriate tools. Younger kids get the fun parts without ever touching a blade.
Set aside about 90 minutes for the whole thing, plus drying time. If you have a toddler and a preteen, the plan below keeps both busy on the same pumpkin instead of one child watching from a chair.
Table of Contents
- What You Need
- For carving
- For painting
- How old does your child have to be to carve
- Step-by-Step
- How to Carve Pumpkins with Kids Safely
- How to Paint Pumpkins with Kids
- Common Mistakes
- Frequently Asked Questions
- What age is safest for kids to carve pumpkins?
- Can children use kitchen knives to carve pumpkins?
- How do you keep a carved pumpkin from rotting?
- What kind of paint is best for pumpkins?
- What can kids do if they are too young to carve?
What You Need
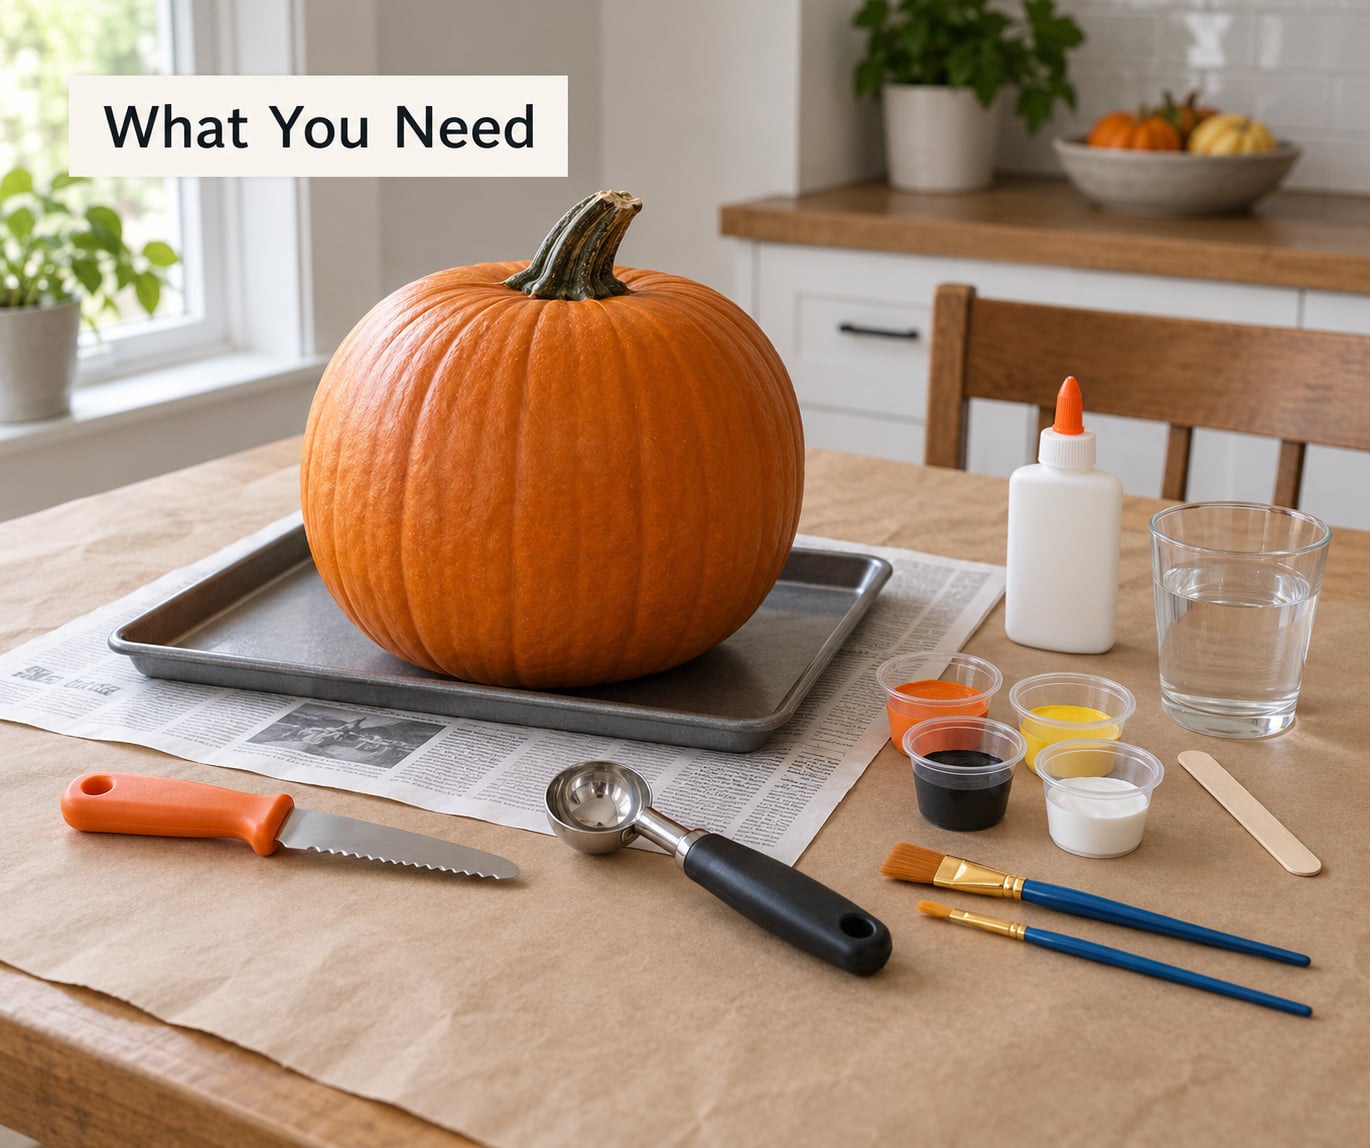
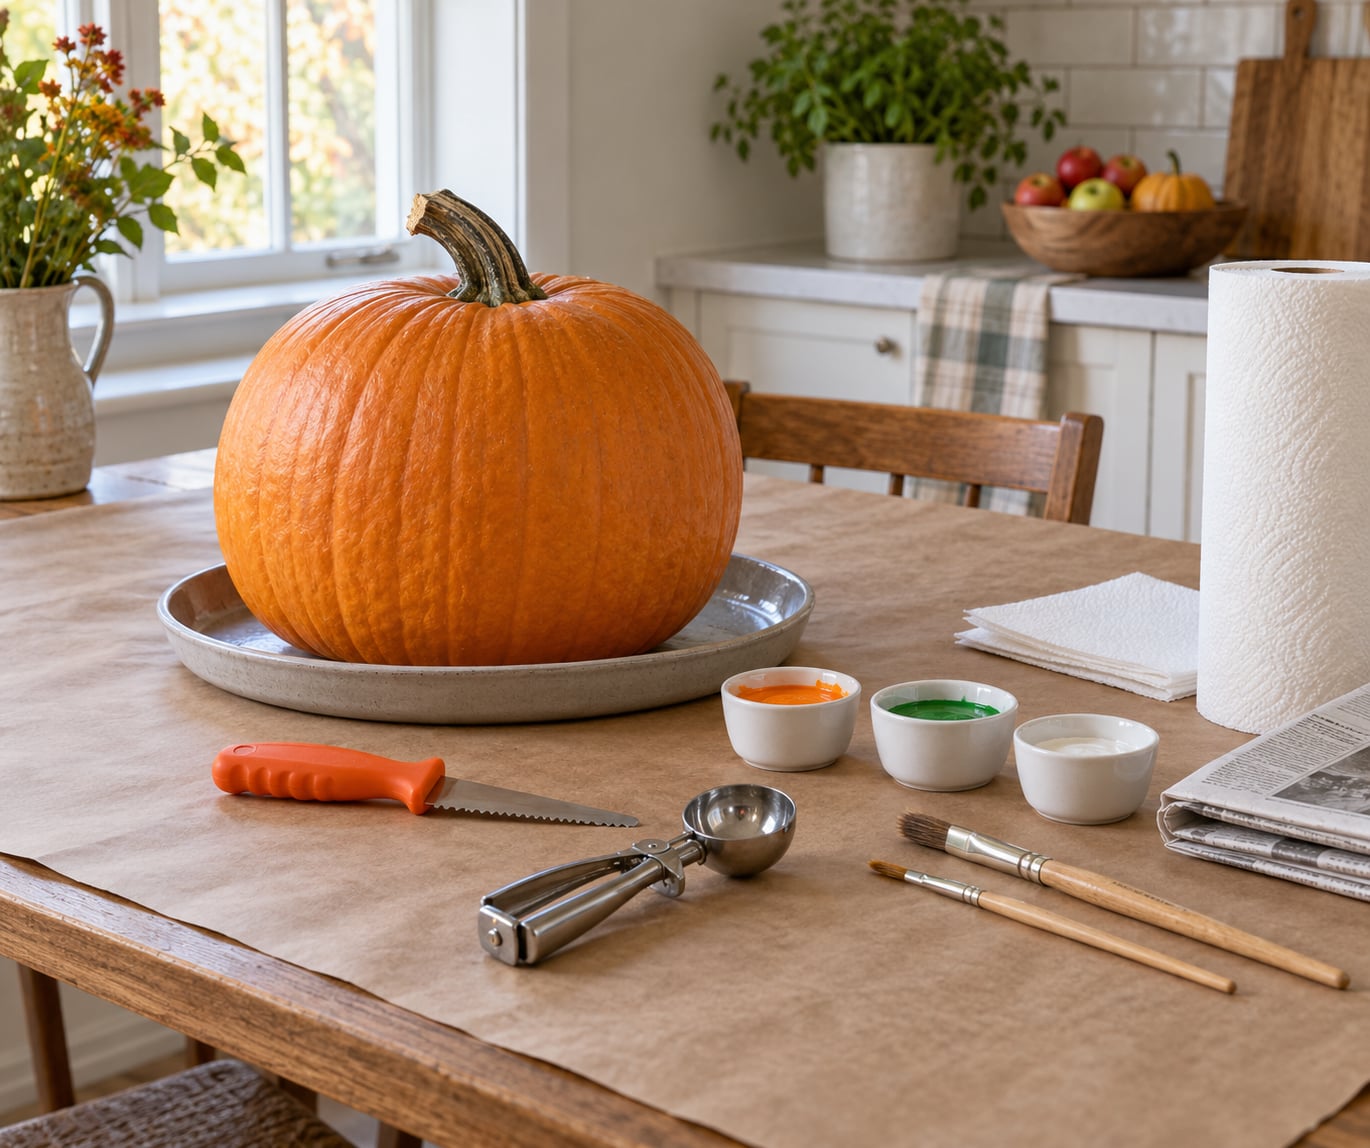
Gather everything before the kids come to the table, because a half-set-up station is how mid-project trips to the kitchen happen. Group supplies into a carving kit and a painting kit and keep them on separate trays.
For carving
- Pumpkins with a flat bottom. They sit still instead of rolling, which is the single best safety feature you can pick at the store. A sturdy stem also helps you lift without crushing the walls.
- A carving kit with a blunted serrated blade. These are designed for children and adults who are not confident with a kitchen knife. Skip paring knives, box cutters and chef’s knives around kids entirely.
- An ice cream scoop or large metal spoon for scraping seeds and pulp, so no sharp tool is needed for that job.
- Newspaper or a plastic tablecloth under the work area. Pumpkin innards are sticky and the pulp goes everywhere.
- An old towel or damp cloth to wipe hands between the carving and painting stages, since damp hands slip on a knife handle.
For painting
- Washable, water-based paint labelled non-toxic and AP-certified. AP certification means the product was independently tested for toxicity through the Art and Creative Materials Institute.
- School glue for the adhesion trick described in the steps below.
- Wide flat brushes, foam daubers and cotton swabs. Foam daubers are easier for small hands than thin brushes.
- Paper towels, a rinse cup and smocks or old T-shirts. Paint and pulp both end up on clothes.
- Glue, washi tape, stickers and cookie cutters for the no-carve options if anyone is under 5.
Do not buy aerosol or spray paint for this activity. Aerosol coatings give off fumes and are hard to control around children, and they are not needed when a brush and a sealant work just as well.
None of this requires a big purchase. Washable tempera from the craft drawer, a school glue stick, leftover stickers and a dollar-store brush will carry a whole project, and foam craft pumpkins on clearance are reusable year after year for the kids who are not ready for a blade. A kid who is under 4 will be just as thrilled by a plastic pumpkin as a real one, and the reusable one survives being dropped.
Decide indoors or outdoors before you pour anything. Outdoors suits glitter, glue and big messy scooping because nothing has to be protected. Indoors suits fine detail work, paint pens and stenciling, and a window-side table in daylight beats a porch after dark.
How old does your child have to be to carve
| Age | Can hold a knife | Best job on the project | Tools to use |
|---|---|---|---|
| 2 to 3 | No | Push-in teasers, sticker and washi tape patterns, sponge painting, scooping into a bowl | Hands, sponge daubers, plastic cookie cutters |
| 4 to 5 | No | Drawing the design, painting, hammering cookie cutters into the lid, scooping seeds | Washable markers, paint, plastic mallet |
| 6 to 8 | Only with an adult’s hand over theirs | Tracing and cutting shapes out of paper, painting the smaller details, choosing the design | Blunted kit blade, held by the adult |
| 9 to 12 | Yes, with close supervision | Scraping, cutting the lid, and carving simple faces with a blunted kit tool | Blunted serrated blade, small controlled strokes |
| 13 and up | Yes, with a safety briefing | Full carving including detailed designs, and helping supervise younger siblings | Blunted kit blade, small paring knife with guidance |
Readiness is about the child rather than the birthday. BabyCenter community members describe one 8-year-old carving independently while a nearly 11-year-old had no interest and let a parent carve for them. Both families did it safely.
Step-by-Step
Follow this order and the pumpkin holds together. Prep comes first, carving second, painting third, because paint on a wet or waxy surface peels off within days.
1. Set up the station. Cover the table, lay out a tray for pumpkin debris, put rinse cups within reach and park anything sharp on a separate high shelf before the activity starts.
2. Wash and dry the pumpkins. Scrub the skin under cool water and dry it completely. A wet surface causes slips, and dirt under the knife drags the blade sideways.
3. Have kids draw the design first. Paper first is the cheapest insurance in the whole process. A design sketched on tracing paper can be taped to the pumpkin, and a printed stencil cut to size and wrapped in cling film works as a reusable transfer method.
4. Cut the lid as an adult. Make a circle in the stem with a scoring cut first, then cut along it. Score the line all the way around before going deeper, and keep the blade pointed away from the body.
5. Scrape the inside thinner where you plan to carve. Leave about 1 to 1.25 inches of wall, and scrape down to roughly half an inch in the areas you will cut. Carving thin walls makes the blade easier to control, and the rind gives you a clear stopping point.
6. Let children scoop. Hand the ice cream scoop to whoever wants it. Scooping is genuinely messy and satisfies most kids who are not allowed near the blade. Save the seeds if you plan to roast them, and keep an eye out since seeds are a choking hazard for under-3s.
7. Assign the carving by age. Nine-year-olds and up cut with a blunted serrated tool, one adult per child, hands on the pumpkin and not the blade. Six to eight year olds can trace the blade path with a marker and cut the first line with an adult guiding their hand.
8. Paint. Once the carving is done and the surface is dry again, move to the painting station. See the section below for the technique.
9. Light it safely. Use battery-operated tea lights, a glow stick or a string of lights inside. A real candle needs a ventilation hole cut into the back of the lid, and even then it is easier to skip.
10. Time it to the holiday. A carved pumpkin looks its best for about two days and wilts fast in warm weather. Parents on r/pumpkincarving describe carving closer to Halloween for exactly this reason. Painted pumpkins last weeks, so those can be done early.
How to Carve Pumpkins with Kids Safely
Safe pumpkin carving for kids comes down to eight rules. Children aged 9 to 12 may carve their own with an age-appropriate tool, and an adult does all the cutting below that age.
- Keep the adult in control of the knife at every age.
- Cut away from your body and never toward another person.
- Use short, controlled motions instead of long sawing strokes.
- Work in a well-lit room, ideally daylight or a bright lamp over the table.
- Use a stable surface with a flat-bottomed pumpkin, and keep hands and tools dry.
- Wash the pumpkin before cutting and wipe the blade between kids.
- Stay within arm’s reach the entire time, not across the room.
- Stop the moment attention wanders. A distracted kid with a blade is the whole problem.
Have a first-aid kit open on the counter before you start. If someone gets cut, rinse the cut under running water, apply gentle pressure with clean gauze or a cloth, and keep pressure on. A cut that keeps bleeding after 15 minutes of firm pressure, one that is deep or gaping, one involving a fingertip or joint, or any cut that needs stitches needs medical care. When in doubt, call your pediatrician or an urgent care clinic.
How to Paint Pumpkins with Kids
Painting is the safer half of the project and the half that lasts longer. Washable water-based paint in squeeze bottles or small cups works well, and the trick that makes it stick is glue.
1. Wipe the surface. A quick wipe with a damp cloth removes wax and dirt. Let it dry fully before the first coat.
2. Mix the adhesion base. Combine equal parts school glue and paint in a cup. The glue is what keeps the color from flaking off a few days later. A thin coat of plain glue painted on first and allowed to dry gives you the same result in two steps.
3. Base coat first. One thin coat over the whole pumpkin, then let it dry completely. Thick coats stay tacky and peel later, so thin beats heavy every time.
4. Add the design. Polka dots, stripes and single-color statements work for beginners. Chalkboard paint with a chalk message looks good for weeks, and metallic paint reads well on white or orange pumpkins without much technique.
5. Let kids do the detail work. Cotton swabs for dots, foam daubers for stamps, paint pens for lettering. For a toddler, a sponge dauber gets more paint on the pumpkin and less on the child.
6. Dry between coats. A hair dryer on cool, held by an adult and kept moving, cuts drying time noticeably.
7. Seal for outdoor display. A water-based sealant brushed on after the paint is fully dry gives a clear finish that holds up to weather. Skip it if the pumpkin stays indoors.
One note on paint choice: watercolor and tempera paint will not stick to a waxy pumpkin skin, so parents often end up disappointed with their first attempt. If you only have tempera, mix it 50/50 with school glue as described above and it will hold.
No-carve ideas if anyone is too young: sticker and washi tape patterns need nothing but a steady hand. Glue and glitter gives a toddler fine motor practice with no blade in sight. Hammering plastic cookie cutters into the pumpkin lid with a wooden mallet is loud, satisfying and entirely safe. Push-in teasers, stacking rings and pom-poms work well for the under-3 crowd.
For extra developmental value, put the pumpkins in a tub of soapy water with sponges and scrub brushes afterwards. Pediatric occupational therapists recommend this sensory extension for hand strength, bilateral coordination, visual-motor planning and sensory regulation, and most kids stay in it far longer than expected.
Common Mistakes
Almost every carving injury traces back to one of a handful of avoidable setups. Here is what goes wrong and the fix.
- Handing a child a kitchen knife. A chef’s knife on a round, wet surface is the single highest-risk move in this activity. Use a blunted serrated kit tool, and keep the adult holding it for anyone under 9.
- Carving on a damp or unstable surface. A pumpkin that rolls mid-cut is how fingers get hurt. Choose a flat bottom, set it in a shallow bowl or tray, and dry your hands first.
- Leaving walls too thick. Thick walls force long, heavy strokes. Scrape to 1 to 1.25 inches, and thinner in the areas you will cut.
- Skipping the wash before carving. Dirt on the blade makes it wander. Rinse the pumpkin, dry it, and wipe the blade between children.
- Letting kids stand near the blade path. Seat the carvers and keep the scraper and the knife on opposite sides of the table.
- Forgetting the ventilation hole. If you use a real candle, cut a hole in the back of the lid so heat and smoke escape. Battery tea lights remove the issue entirely.
- Carving too early. Plan on about two good days for a jack-o’-lantern, or carve a painted pumpkin early and save the carving for the last weekend.
- Painting straight over wax. Paint peels off in sheets within days. Wipe the skin, prime with glue, and use a glue-and-paint mix.
- Pouring water over paint to rinse. Thick coats crack and flake. Peel off dried stickers and washi tape instead, and rinse paint under a slow stream.
- Leaving seeds and small craft supplies within reach. Pumpkin seeds, googly eyes, small stickers and glitter caps are choking hazards. Sweep the table before the kids climb up to look at the finished pumpkins.
Set the cleanup expectation before the first cut rather than after. Lay newspaper you can roll up and bag, use smocks, and keep a wet cloth in the rinse cup. Confetti-style supplies belong outside, not on the kitchen table.
Final safety reminders: the adult handles every blade, the kids stay within sight, the work happens in daylight, and a rinse-and-press first aid response handles the small knocks. Everything else is just pumpkin guts, and those wash out of most fabrics if you soak them overnight.
Frequently Asked Questions
What age is safest for kids to carve pumpkins?
Most safety guidance puts independent carving at ages 9 to 12, using an age-appropriate tool with a blunted serrated blade and close adult supervision. Below 9, the adult should do all cutting. Kids aged 4 to 8 can draw the design, trace the cutting lines, paint, scoop seeds and hammer plastic cookie cutters into the lid. Under 4, keep the activity to painting, stickers, tape patterns and push-in teasers.
Can children use kitchen knives to carve pumpkins?
It is better not to. Kitchen knives, paring knives and box cutters are designed for food, not for a rounded, wet, unstable surface, and a child cannot control the force needed. A pumpkin carving kit with a blunted serrated blade is the safer choice at any age. If you do use a kitchen knife as an adult, cut away from your body, use short controlled motions, score the line before cutting deep, and keep the pumpkin steady in a bowl.
How do you keep a carved pumpkin from rotting?
Choose a firm pumpkin with no soft spots, wash it before carving, and scrape the inside down to about 1 to 1.25 inches so less moist flesh is left behind. Wipe the inside with a clean damp cloth, then cover it with a lid or plastic wrap and keep it in the refrigerator until display. Carve about two days before Halloween, because a jack-o’-lantern usually looks best for only a few days. A small fan nearby slows the collapse a little.
What kind of paint is best for pumpkins?
Use washable, water-based paint labelled non-toxic and AP-certified, which means it was independently tested for toxicity. Acrylic works well and mixes with equal parts school glue so it sticks to the waxy skin. Tempera and watercolor need that glue mixture or they will flake off. Avoid aerosol and spray paint around children, and do not skip ventilation if you use any scented or solvent-based product. Paint pens and chalkboard paint also work well and are easier for small hands.
What can kids do if they are too young to carve?
Under-4s can push plastic teasers into the pumpkin skin, press stickers and washi tape into place, sponge on washable paint, or hammer plastic cookie cutters into the lid with a wooden mallet. Scooping seeds and pulp into a bowl with an ice cream scoop counts as a real job rather than a consolation prize. Washing the finished pumpkins in a tub of soapy water with sponges and scrub brushes adds hand strength, bilateral coordination and sensory play without a sharp tool anywhere near them.
If you only remember one thing, make it this: you carve, they paint. Put the knife down before anyone walks away from the table, and the whole evening works. Set out the paint, the paper for sketching and a newspaper-lined surface, and the kids will happily stay busy for the better part of an hour.