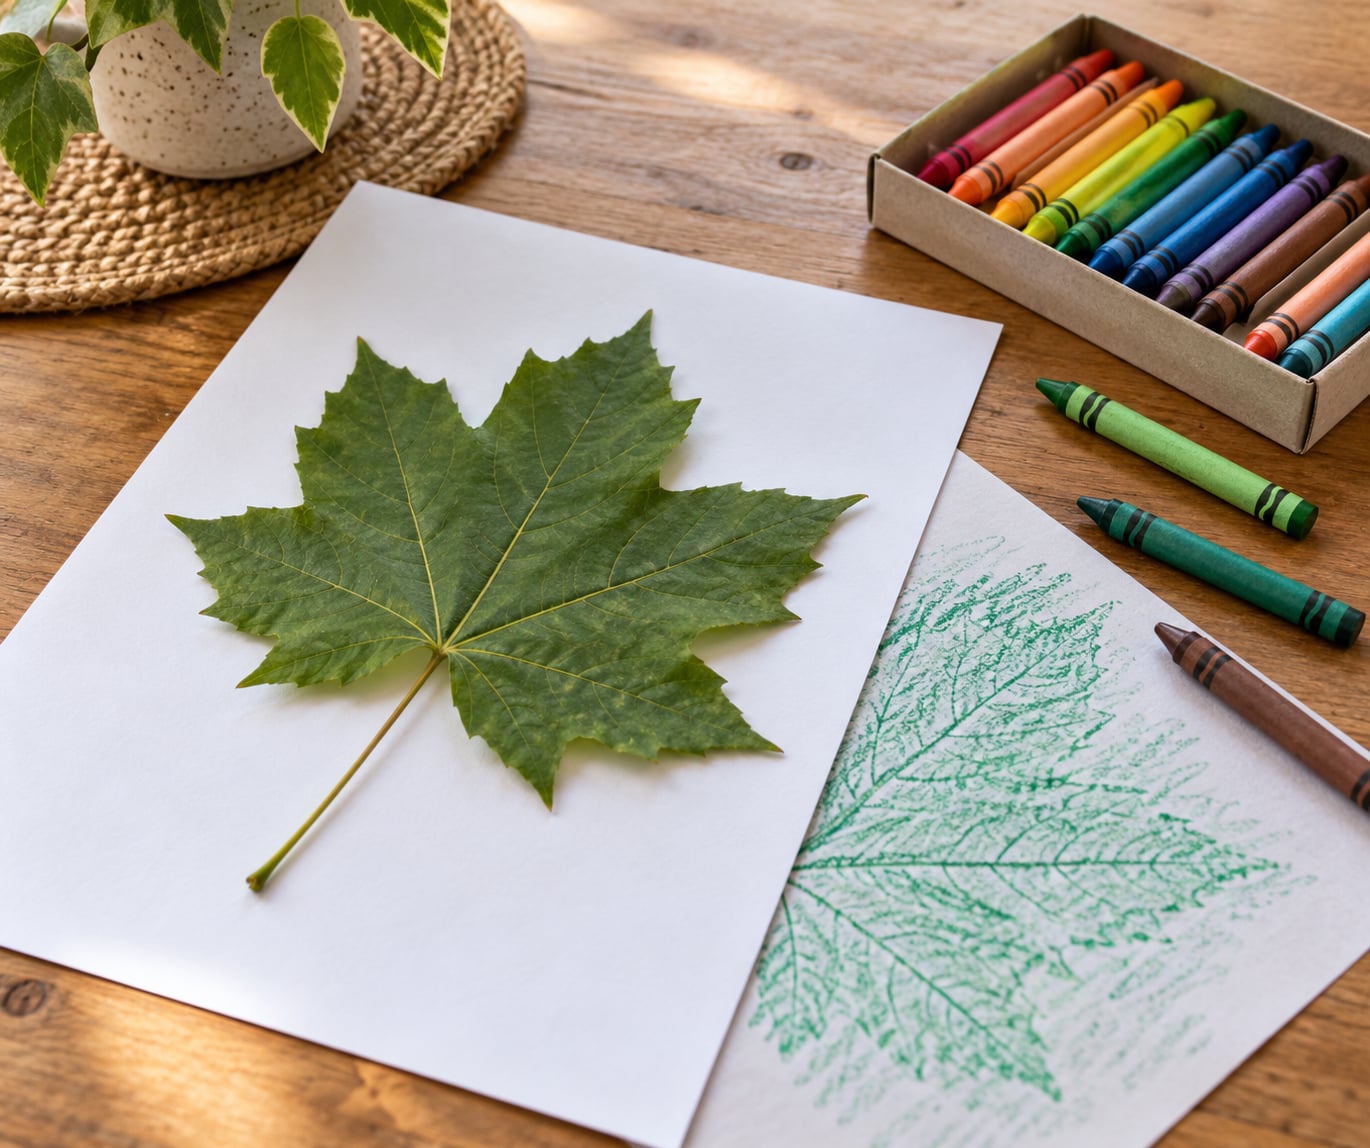
How to make leaf rubbings with crayons takes about five minutes a leaf and needs almost nothing: paper, one crayon, and a flat leaf from the sidewalk. Lay the leaf face down on the paper, hold the crayon on its side, and rub in short overlapping strokes until the veins and outline show up underneath.
The technique is called a leaf rubbing, and when you follow up with watercolors or paint it takes on the name crayon resist. It works for three-year-olds holding a chunky triangular crayon and for older kids doing careful nature study, because the whole result depends on how patiently you rub.
One thing to decide early: where the leaves come from. Raking a neighbor’s yard or a park bed for good specimens is not worth it. Pick what has already fallen, or ask a tree owner before you take anything attached.
Table of Contents
- What You Need
- How to Make Leaf Rubbings with Crayons: Step-by-Step
- How to Make Leaf Rubbings with Crayons Step 1: Choose and Prepare the Leaves
- How to Make Leaf Rubbings with Crayons Step 2: Set Up the Paper and Leaf
- How to Make Leaf Rubbings with Crayons Step 3: Rub the Crayon Over the Leaf
- How to Make Leaf Rubbings with Crayons Step 4: Finish, Label, and Display
- Common Mistakes
- Frequently Asked Questions
- What is the best type of leaf for a crayon rubbing?
- Can I use any kind of paper for leaf rubbings?
- How hard should I press the crayon when making a leaf rubbing?
- What colors of crayons work best for showing leaf details?
- Can I use leaves that are curled, dry, or already yellow?
- How should I store or display finished leaf rubbings?
- Make Your First Leaf Rubbing
What You Need
Six things cover the whole project, and you probably own most of them already.
- A crayon per child. Dark colors such as black, navy, brown, or deep green hold the most pigment. Metal twist crayons work best because the paper wrapper is easy to peel off with no wrapper fragments left on the paper.
- Standard copy paper, printer paper, or cardstock. Heavier cardstock resists tearing and holds more wax, while thin copy paper catches finer vein detail. Avoid anything already printed on the side you are using.
- A pile of broad, flat leaves. Maple, oak, beech, sycamore, and elm all give strong results. Gather more than you think you need, since a few will always be curled or torn.
- A hard work surface. A table, counter, or clipboard. This matters more than any other supply: leaves slide on soft surfaces, and a sliding leaf ruins the outline.
- Something to hold the paper down. Painter’s tape at the corners, a clipboard clip, or a second hand resting on the paper.
- Optional finishing supplies. A fine-tip marker or pencil for labels, cardstock or mat board for mounting, and clear spray sealant or a frame for display.
How to Make Leaf Rubbings with Crayons: Step-by-Step
How to Make Leaf Rubbings with Crayons Step 1: Choose and Prepare the Leaves
Look for leaves with a wide blade and visible vein ridges. Turn it over: the side with the raised veins is the side that should face down against the paper, because those ridges are what the crayon catches on.
A fresh leaf straight off the ground works better than one that’s been sitting for a week. If a leaf has curled up, soak it in a bowl of cool water for ten minutes or so, then press it flat between two sheets of newspaper under a stack of books. Dry, brittle leaves crumble under the crayon instead of transferring cleanly.
How to Make Leaf Rubbings with Crayons Step 2: Set Up the Paper and Leaf
Tape the paper to the work surface and place the leaf vein-side down near the center, leaving a margin of blank paper around it. Tape only the corners and edges, never across the middle where the leaf will sit.
For a first attempt, choose a leaf that fits fully inside the paper with room to spare. A leaf that overhangs the edge gets cut off mid-rub, and children notice that immediately.
How to Make Leaf Rubbings with Crayons Step 3: Rub the Crayon Over the Leaf
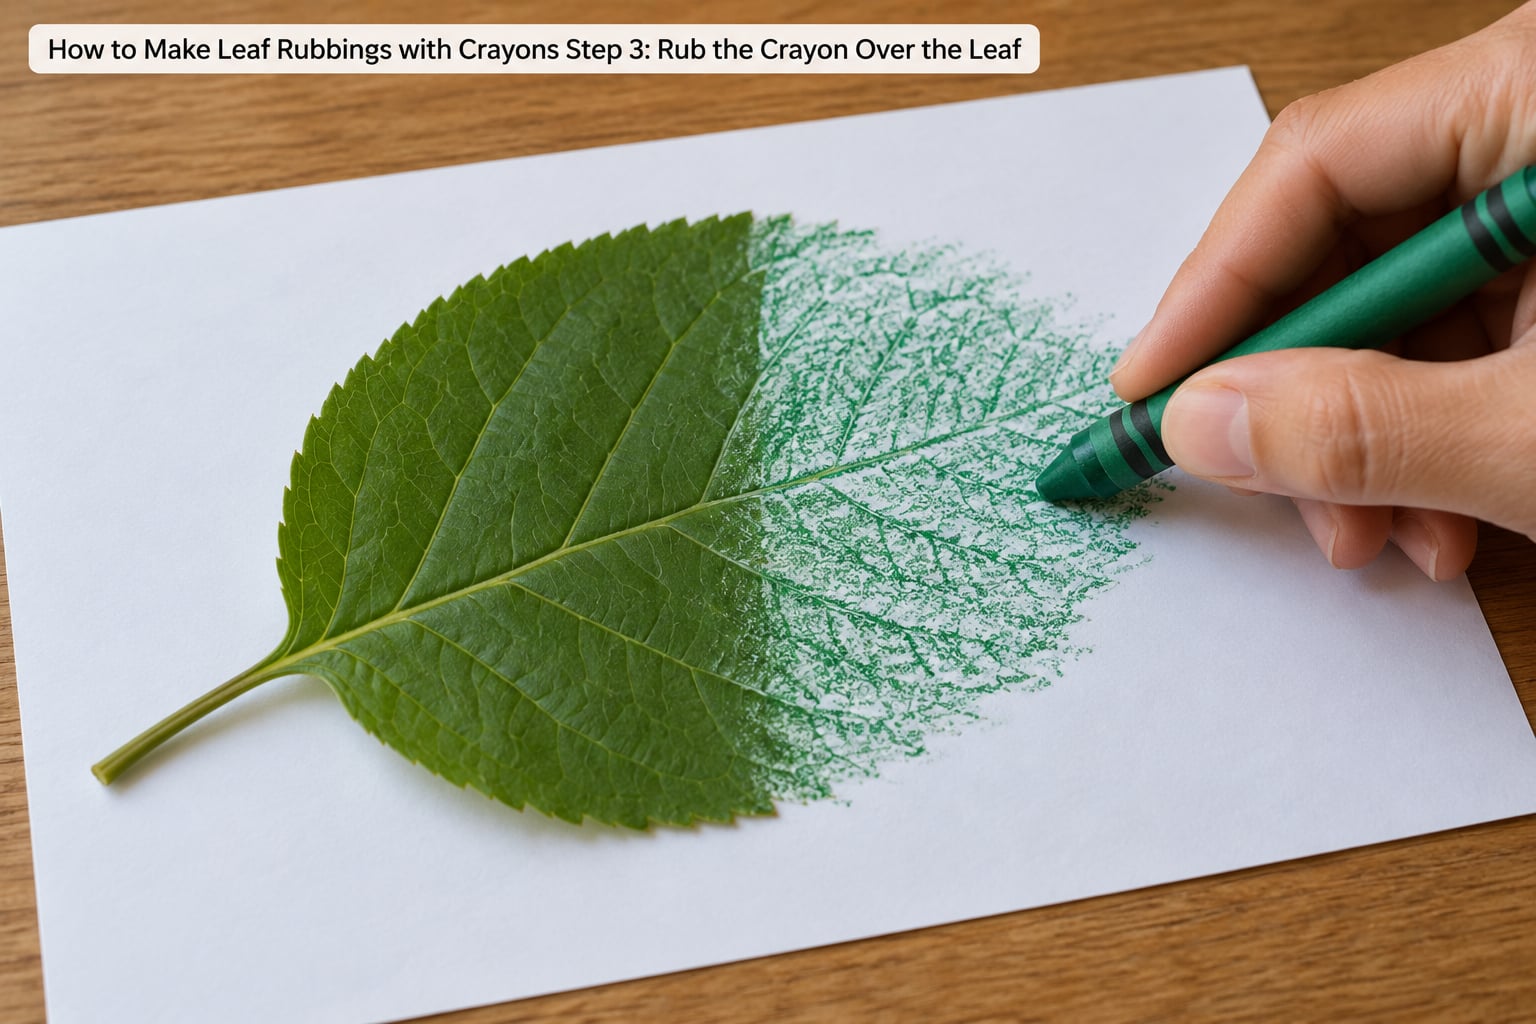
Hold the crayon on its side, not on its tip, and lean it so the barrel is nearly parallel to the paper. Starting at the stem end, rub in short overlapping strokes the way you color very lightly, working outward toward the tip.
Pressure should be light enough that the crayon glides. When you press harder, the paper dents and the leaf shifts instead of the pigment transferring. You’re watching for a faint dotted texture to appear first, then fill in the gaps with more strokes over the same area.
The veins are the prize, and they show up last. Once the blade looks evenly covered, go back over the center line and the branching side veins with slightly firmer strokes. Two light passes beat one hard pass every time.
How to Make Leaf Rubbings with Crayons Step 4: Finish, Label, and Display
Peel the leaf up from one corner rather than pulling it straight off, and if a spot looks too faint, put the leaf back down and rub that patch again. Set each finished rubbing aside on a flat surface while you work on the next one.
Label the bottom corner while the paper is still on the table: the tree name if you know it, the date, and where the leaf was found. Write in pencil first so nothing gets smeared, then trace over it in marker once the crayon is safely away from the page.
For display, mount rubbings on cardstock with a small border, or lay several in a grid on a sheet of brown paper and tape them down with washi tape. Spray sealant holds wax crayon in place for framed pieces, and it keeps a rubbing from smearing onto a wall for good.
Common Mistakes
Nearly every disappointing leaf rubbing traces back to one of five problems.
- Pressing too hard. The crayon gouges the paper, the leaf slides, and you get a torn gray patch instead of a shape. Fix: hold the crayon flatter and lighten up until you can barely feel resistance.
- A curled or brittle leaf. The blade arches away from the paper, so the middle never touches and the rubbing comes out hollow. Fix: soak for ten minutes, press flat under books overnight, or swap the leaf.
- The leaf moving. This is the most common complaint from parents doing this at a kitchen table, and it ruins the outline every time. Fix: tape the leaf itself with two small pieces of tape along its edges, or hold it down with fingertips from your other hand.
- Losing the vein detail. Children stop too early, when the surface looks solid but the fine branching hasn’t come through. Fix: zoom in and spend an extra minute on the midrib and its side veins with light strokes.
- Smudging. Fresh wax transfers to anything it touches, including the next page. Fix: rest finished rubbings face up on a spare sheet, not stacked, and wait a few minutes before framing or mounting.
One habit worth teaching from the start: let each child make one leaf, then a row of three, then a full page. Working small to large keeps beginners from smearing finished work and teaches the light pressure that makes every later step easier.
Frequently Asked Questions
What is the best type of leaf for a crayon rubbing?
Broad, flat leaves with raised veins give the best result, including maple, oak, beech, sycamore, and elm. Fresh leaves that fell recently work better than dried, brittle ones because the blade stays pliable and the vein ridges stay pronounced. Skip pine needles, thin grass blades, and anything too small to cover the tip of a crayon.
Can I use any kind of paper for leaf rubbings?
Standard copy paper and printer paper work well for most rubbings. Cardstock takes more wax and resists tearing, while thinner paper captures finer vein lines but dents under the crayon. Parchment or wax paper laid over the leaf gives a softer mottled print, and aluminum foil produces a bright metallic result once you rub hard enough.
How hard should I press the crayon when making a leaf rubbing?
Press as lightly as you can while still moving the crayon continuously. The crayon should glide across the paper and skip over the raised veins rather than dig into them. Signs of too much pressure are dents, torn paper, and a leaf that slides out from under the crayon.
What colors of crayons work best for showing leaf details?
Dark, saturated crayons show vein detail best, including black, navy, dark brown, and deep green. A two-color approach works nicely too: lay down a light color first, then trace over it with a darker one for shading. White and pastel crayons pick up very little from a leaf surface.
Can I use leaves that are curled, dry, or already yellow?
Yes, with preparation. Soak curled or stiff leaves in cool water for about ten minutes, then press them flat under a stack of books between sheets of newspaper. Dry leaves that crumble when rubbed will only shed color onto the paper, so replace those. Color has no effect on the rubbing itself, since the crayon picks up texture rather than pigment.
How should I store or display finished leaf rubbings?
Lay finished rubbings face up until the wax has fully set, then mount them on cardstock or keep them flat in a folder. For walls, frame them behind glass or spray them with a clear sealant so the wax cannot transfer onto the wall. Label each one with the tree or leaf type and the date collected.
Make Your First Leaf Rubbing
Start with one large, flat leaf that fits well inside the page. Tape the paper down, lay the leaf vein-side up so your child can see the pattern, and rub lightly with a dark crayon until the shape appears. Once that first one looks good, the rest get easier fast.