How to make juggling balls with rice is easier than most people expect: cut two circles from firm cotton, sew them into a pouch, and fill it with about a third of a cup of dry rice before closing the opening. Three of them take around 40 minutes from first cut to finished ball, and the only real skill involved is a straight running stitch.
Fabric beats balloons for this if small children are in the house. A balloon pops, and popped latex is a genuine choking risk. Sewn cotton balls take a hammering instead, they land quietly on a hard floor, and a worn seam can be patched in under a minute.
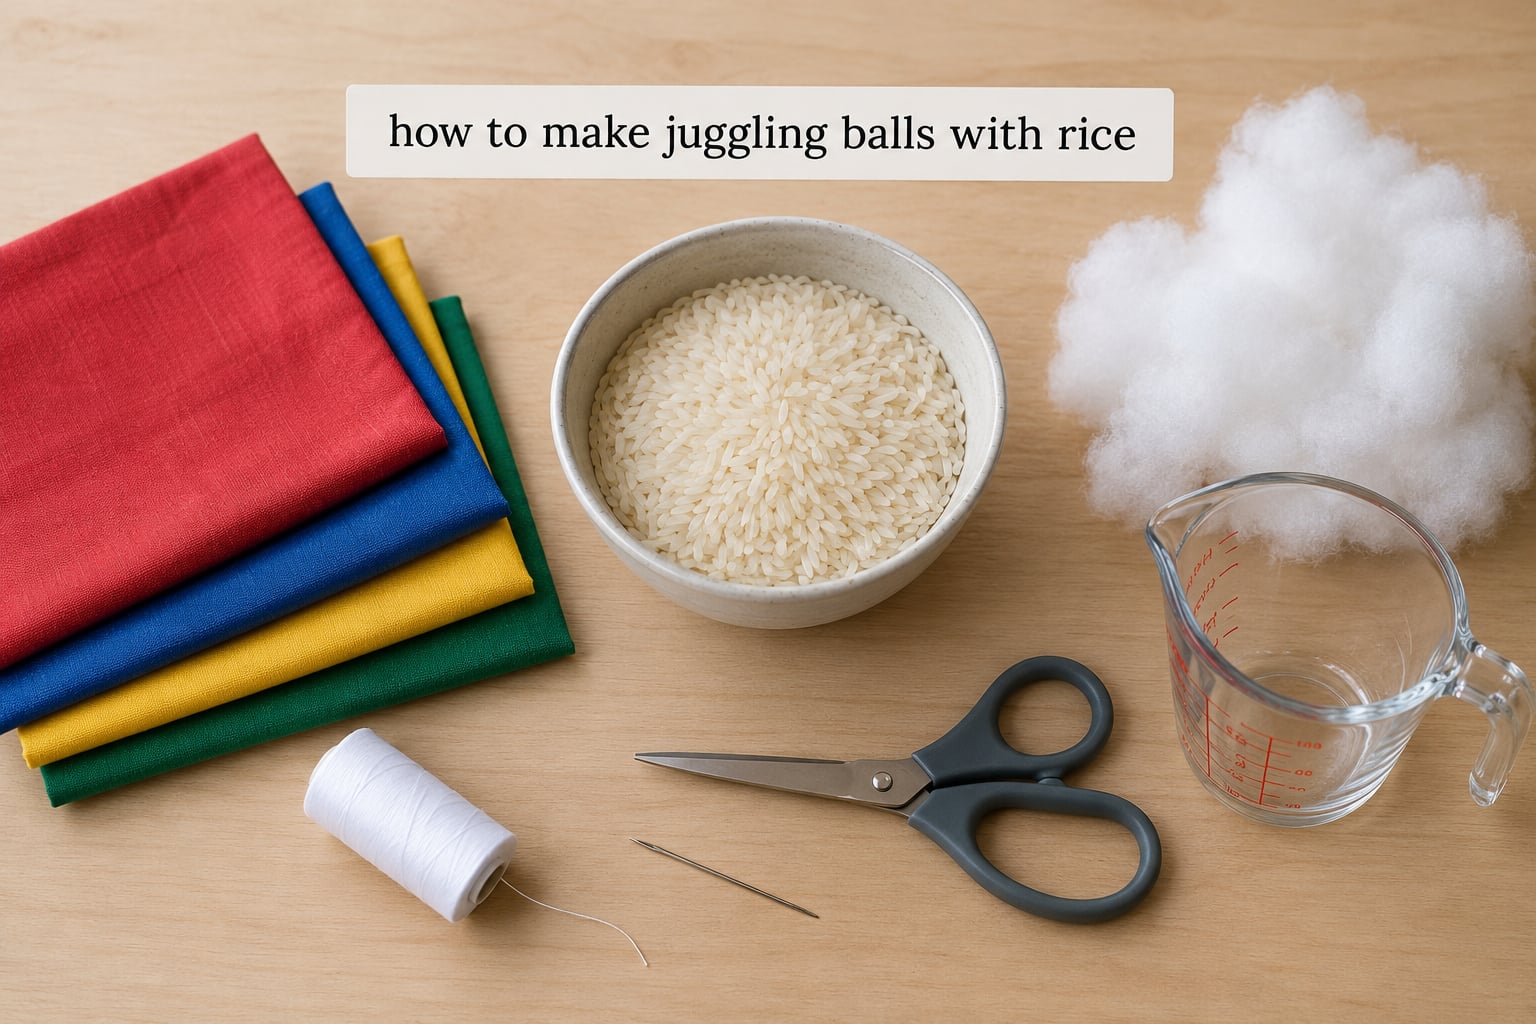
Table of Contents
- What You Need
- Step-by-Step: How to Make Juggling Balls with Rice
- Step 1: Choose the Fabric and Size
- Step 2: Cut the Fabric Pieces
- Step 3: Sew the Ball Closed
- Step 4: Add Rice and Shape the Ball
- Step 5: Test and Finish the Juggling Balls
- Common Mistakes
- Safety and play tips
- Frequently Asked Questions
- How much rice should I put in one homemade juggling ball?
- Can I use something other than rice to fill juggling balls?
- Are homemade rice juggling balls safe for young children?
- How do I keep the rice from coming out of the seams?
- Can I wash juggling balls filled with rice?
- What size should beginner juggling balls be?
- Conclusion
What You Need
Quantities below cover three balls, which is the number you need for the basic three-ball cascade.
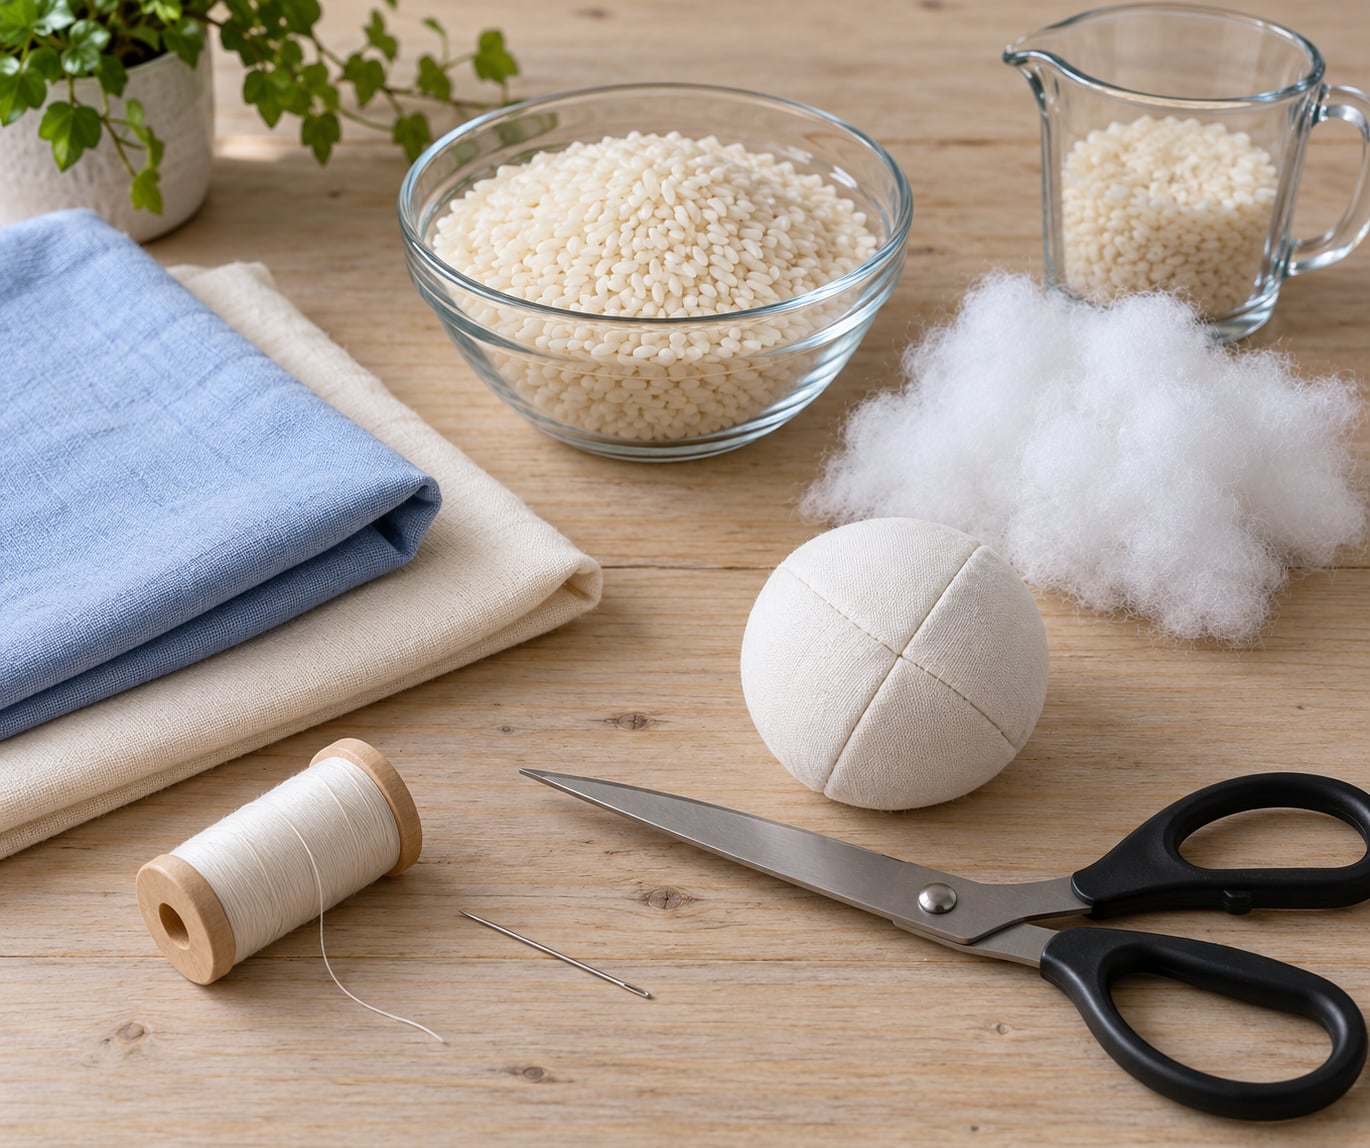
- Fabric: about 30 cm (12 inches) square of medium-weight cotton per ball. Quilting cotton, canvas or cotton dress fabric all work. Anything sheer or loosely woven is a mistake, because the seams will eventually leak rice.
- Rice: roughly 1 cup total, so about one third of a cup per ball. Ordinary long-grain white rice works fine. Avoid brown rice, which leaves oily streaks, and avoid rice that has been sitting near spices.
- Thread: heavy-duty or doubled regular thread. You want it to survive a rice load for months.
- Needle: a blunt tapestry needle makes turning the shell right side out far easier. A sharp needle works but is slower.
- Scissors, a measuring cup and a small funnel (a cut-off plastic bottle neck works as well).
- Polyester fiberfill (optional): a small handful stops the rice shifting and deadens the rattle.
Step-by-Step: How to Make Juggling Balls with Rice
Step 1: Choose the Fabric and Size
Beginner juggling balls sit somewhere between 7 and 9 cm (roughly 3 to 3.5 inches) across. That is small enough for a child’s hand and large enough to track in the air.
Fabric weight matters more than people expect. Medium cotton gives a soft catch and holds a seam; lightweight cotton goes slack and lumpy after a week of use; thick canvas feels too hard and hurts on a bad catch. Pick something firm and tightly woven, and press it before cutting so the circles come out even.
Step 2: Cut the Fabric Pieces
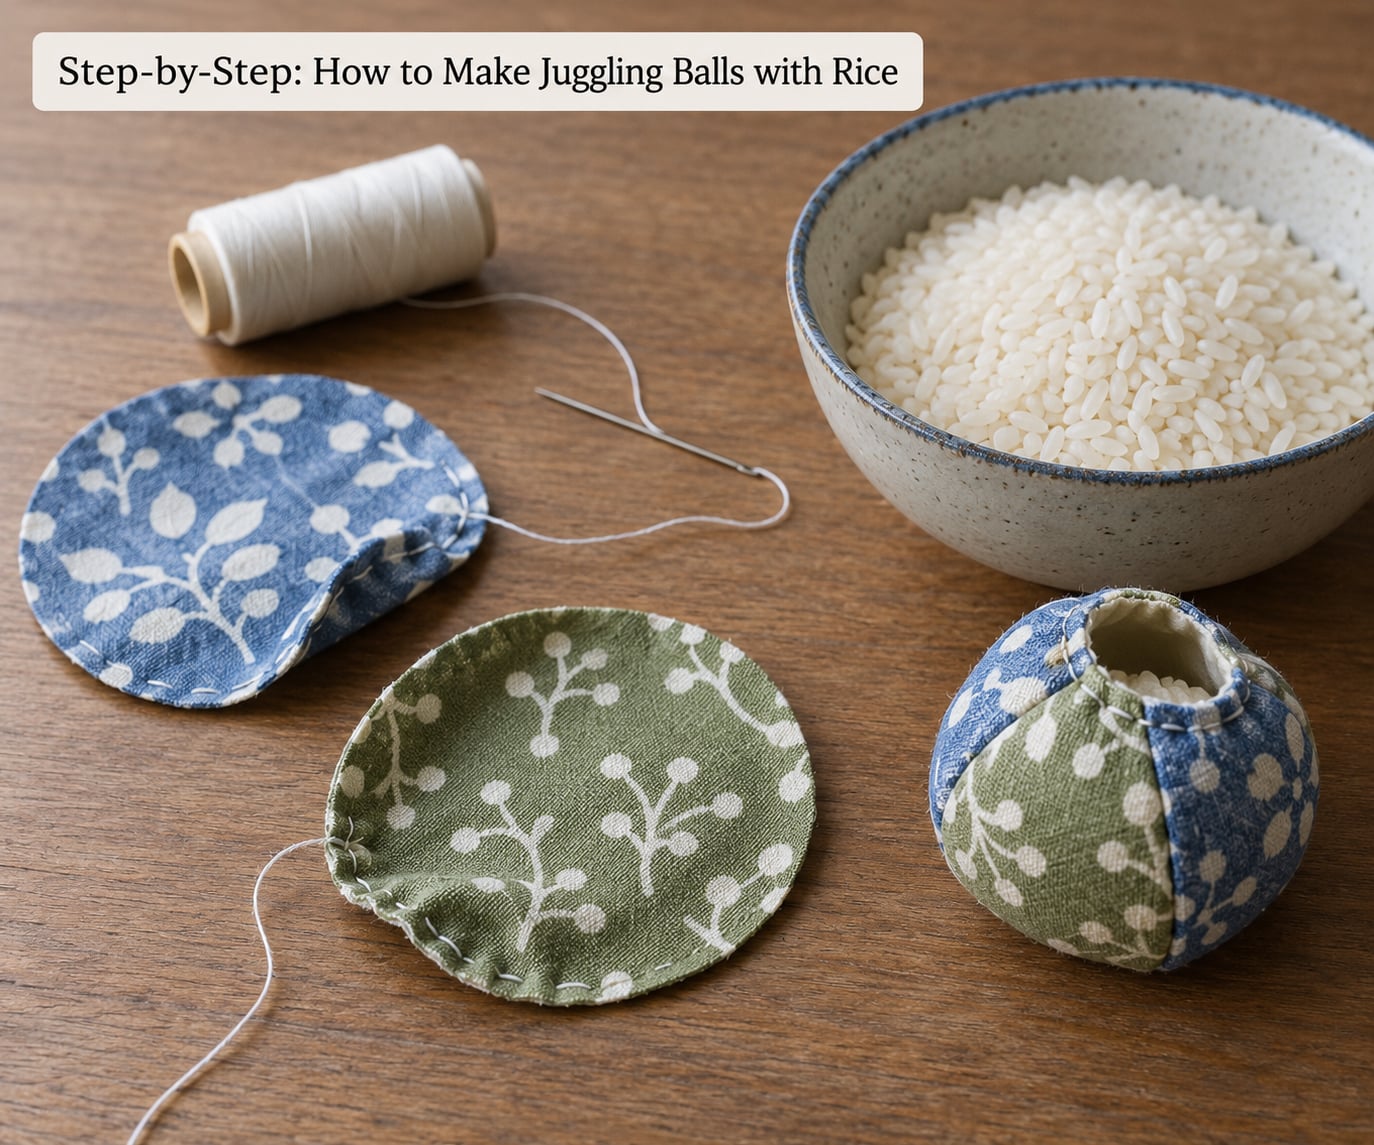
You need two circles per ball, so six in total for a set of three. Trace a bowl, a lid or a coaster to get a clean round, cut one template piece, then use it to cut the rest.
Check that every circle is the same size by laying them all in a stack and looking at the edges. Mismatched halves leave you with a teardrop, and a teardrop does not sit level in the palm.
Step 3: Sew the Ball Closed
Pin two circles right sides together at the edge and sew around the perimeter with a double layer of stitching. Pass through both layers on every stitch, and leave a gap of about 4 cm (1.5 inches) for filling.
Stitch twice around the whole edge and add a third pass across the raw seam allowance if you want the ball to last. Before turning it right side out, run a finger along the seam and check for any hole where a grain of rice could escape. Reinforce anything you find.
Step 4: Add Rice and Shape the Ball
Turn the shell right side out and push the fabric down into the corners so it forms a pouch. Pour in the measured rice through the funnel or bottle neck, tapping the ball gently so the grains settle rather than bridging.
One third of a cup per ball gives a light, easy weight for a first set. Add a small wad of fiberfill after the rice if you want a softer feel and less noise, then close the opening with a tight ladder stitch. Tug the thread after every few stitches to cinch the neck down.
Work the ball between your palms for a few seconds, and the shape comes out round. A ball that stays lumpy has rice sitting in one pocket, which you fix by rolling it more, not by squeezing harder.
Step 5: Test and Finish the Juggling Balls
Tug hard on each seam and hold the ball up to a light. Any speck of light means a gap, so stitch it now while the thread is still on the needle.
Test one ball at a time: bounce it on the floor, catch it underhanded, then throw it gently across a room and see whether it flies straight. Heavier balls travel faster and land harder, so lighter ones suit small hands.
Make all three balls from the same fabric and fill them with identical amounts of rice. A set that matches in weight feels balanced in the hand, and beginners notice the difference within a few minutes of practice.
Common Mistakes
Rice escaping through the seams. Almost always a stitching problem rather than a fabric problem. Double your rows, leave no gaps bigger than a pinhead, and add a dab of fabric glue inside the seam if you are sewing a thin cotton.
The ball is too hard. Too much rice, or a fabric that is too stiff. Remove some grains through the filling gap before you close it, and if you already closed it, unpick four stitches rather than fighting the fabric.
The ball is too light and hard to see. Add another tablespoon of rice at a time. A ball that vanishes against a dark background gets dropped instead of caught, which teaches the wrong habit in the first five minutes.
Lumpy filling. The rice has bridged rather than settled. Tap the ball against a table, massage the lumps with your thumbs, and finish shaping it between your palms.
The fabric pills after a few weeks. That is normal abrasion at the seam, and it does not affect the ball. Trim the pills with scissors, or wrap the worn area in a strip of iron-on tape.
Uneven sizing between balls. You cut freehand. On the next set, cut one template and trace it, then check every circle against the template before sewing.
Safety and play tips
Keep these away from children under three, since a ball small enough to fit in a mouth is a choking hazard in any filling. Adult supervision beats supervision-free, and check the seams after a heavy session.
Count how long each ball lasts. A homemade ball that has been thrown hard for a few weeks may have started to split at the seam, and that is the moment to make a new one rather than patch it.
Drill five throws across a room and see who lands the most catches. Children who are not ready for three balls still enjoy this one, and it teaches the same hand-eye coordination and timing.
Frequently Asked Questions
How much rice should I put in one homemade juggling ball?
Start with one third of a cup for a child learning the three-ball cascade, which lands at roughly 60 grams. That is light enough to catch without thinking and heavy enough to track in the air. Add a tablespoon at a time until the ball flies straight, and keep all three balls within a few grams of each other so the set feels balanced.
Can I use something other than rice to fill juggling balls?
Yes, and the filling sets the weight and the feel. Dry lentils give a slightly heavier, harder ball that flies well in wind. Fine sand is the heaviest and feels most like a shop-bought ball. Flour or salt are softer but pack down and go lumpy over time. Birdseed is light and squishy, though large seeds can work toward the seam.
Are homemade rice juggling balls safe for young children?
A sewn fabric ball is far safer than a balloon version, because it cannot pop into small choking pieces. Even so, keep it away from children under three, since a small ball is still a choking hazard regardless of what it is made of. Sit with younger children while they play, and inspect the seams after heavy throwing.
How do I keep the rice from coming out of the seams?
Stitch through both fabric layers on every pass, then sew a second and third row right on top of the first. Tight woven cotton holds grains far better than jersey or anything sheer. Before you fill the ball, run a finger along the seam and repair any hole you can feel. A dab of fabric glue inside the seam gives extra insurance on thin cotton.
Can I wash juggling balls filled with rice?
No. Once the rice is in, the ball needs to be surface-cleaned instead. Wipe it with a barely damp cloth and a little mild soap, then let it air dry completely, because trapped moisture turns the rice into a paste and encourages mildew. Keep the filling gap small and closed so no water reaches the inside in the first place.
What size should beginner juggling balls be?
Aim for 7 to 9 cm, or roughly 3 to 3.5 inches, across. That fits a small hand comfortably and is still visible against a dark wall. Match the size to the person throwing, not to an adult, and cut all three from one template so none of them ends up noticeably heavier or lighter than the others.
Conclusion
Cut six circles first, all the same size, and pin two of them right sides together. That single cutting and pinning step is where nearly every homemade juggling ball goes wrong, so it is worth getting right before the sewing starts.
Make one ball, fill it with one third of a cup of rice, and let the child who will use it catch it a few times. If the weight feels right, build two more to match and you have a set that will last.