Weaving is passing one thread over and under other threads held in place on a frame, and for kids it is one of the simplest ways to practise fine motor skills with paper, cardboard or yarn scraps. These beginner weaving projects for kids start with flat paper strips, move up to card frames and straws, and finish with a hanging piece for the wall. Most need nothing you do not already have in a kitchen drawer.
Every project here works with scraps. That matters, because weaving gets interesting when the yarn runs out halfway through and you switch colours on purpose.
A few ground rules before you start. An adult cuts any notches or slots, and any cutting for a child under five happens out of reach. Choose thick yarn rather than thin, loose yarn rather than a tight twist, and give children a blunt plastic lacing needle instead of a steel one. And plan on roughly half an hour for a first attempt.
Table of Contents
- Beginner Weaving Projects for Kids at a Glance
- 1. Simple Paper Strip Weaving
- What you need
- Why this makes a good first project
- 2. Cardboard Tube Weaving
- Getting the spacing right
- 3. Yarn-Wrapped Paper Plate Weaving
- 4. Paper Taper Weaving
- 5. Yarn Card Weaving
- When it goes wrong
- 6. Recycled Cardstock Weaving Wall
- 7. Drinking-Straw and Yarn Weaving
- 8. Paper Loom Nature Weaving
- 9. Woven Paper Gift Basket
- Keeping the sides straight
- 10. Beginner Weaving Projects: Simple Yarn Chandelier
- Trimming and hanging
- Frequently Asked Questions
- What age is weaving appropriate for?
- What supplies do children need to start weaving?
- What are the easiest beginner weaving projects for kids?
- How can I help a child who keeps losing the over-under pattern?
- How can I make a weaving project easier or harder?
- Start with Paper Strip Weaving
Beginner Weaving Projects for Kids at a Glance
Here is the whole list before the details: main material, best age, setup time, difficulty and the skill each one practises.
| Project | Main material | Best age | Setup time | Difficulty | Skill practised |
|---|---|---|---|---|---|
| 1. Simple Paper Strip Weaving | Coloured paper strips | 4 and up | 5 minutes | Easy | Over-under rhythm |
| 2. Cardboard Tube Weaving | Square cardboard tube | 5 and up | 10 minutes | Easy | Direction and spacing |
| 3. Yarn-Wrapped Paper Plate Weaving | Paper plate and yarn | 3 and up | 10 minutes | Easy | Tension and pattern |
| 4. Paper Taper Weaving | Rolled paper tubes | 6 and up | 10 minutes | Medium | Checkerboard logic |
| 5. Yarn Card Weaving | Notched card frame | 5 and up | 15 minutes | Easy | Counting and stripes |
| 6. Recycled Cardstock Weaving Wall | Large cardstock panel | 6 and up | 15 minutes | Medium | Colour blocking |
| 7. Drinking-Straw and Yarn Weaving | Plastic drinking straws | 5 and up | 10 minutes | Easy | Fine motor threading |
| 8. Paper Loom Nature Weaving | Cardboard loom and raffia | 6 and up | 15 minutes | Easy | Repeating patterns |
| 9. Woven Paper Gift Basket | Paper strips and a box | 7 and up | 15 minutes | Medium | Structure and edges |
| 10. Simple Yarn Chandelier | Cardboard rings and strips | 7 and up | 20 minutes | Medium | Even spacing and finishing |
1. Simple Paper Strip Weaving
This is the easiest of the beginner weaving projects for kids because flat strips lie down and never tangle. Cut long strips from coloured paper, tape half of them side by side, then lay the rest across them, alternating over and under with each row. Tape the ends to something, slide the last strip under the second-to-last one and lift it all off the tape.
What you need
- Coloured paper, cut into strips about 2 cm wide
- Masking tape
- Child-safe scissors, with the cutting done by an adult for under-fives
For a four-colour example, cut strips in red, blue, yellow and green, then use the over-under rhythm first, second, first, second. Each colour gets its own row, and the pattern repeats until the paper runs out. Line the finished mat under a book to press it flat, or curl it into a tube for a pencil holder.
Why this makes a good first project
There is no needle, no yarn to pull tight and nothing to spill. If the rows go crooked, a child can lift the whole thing off and start again in seconds, which keeps the practice going instead of ending in tears. Three years old is plenty for this one with an adult laying out the strips.
2. Cardboard Tube Weaving
A square cardboard tube is the frame for this one, and it makes something sturdy enough to hang on a wall. Ask an adult to cut small notches an equal distance apart around both open ends of the tube. Wind the yarn around and through the notches on the front face, then carry it down to the next row, moving one notch along so the diagonal lines lean across the tube.
A good example is a decorative hanging shape: alternate two yarn colours so each row changes direction, and stop four rows before the end so the diagonal has somewhere to go. Finish by tucking the last yarn end inside the tube, where it stays out of sight.
This one teaches direction rather than just over-under, which makes it a nice follow-up to paper strips.
Getting the spacing right
Even notches are the whole trick. Measure the height of the front face, divide it by the number of rows you want, and mark every row in pencil before cutting a single notch. Notches that are uneven are the reason a finished piece leans, and it is much harder to fix later than to plan.
If a child pulls hard as they wind, the yarn will bite into the corrugation and flatten the edge. Loosen it as you go rather than pulling tight and easing back.
3. Yarn-Wrapped Paper Plate Weaving
Cut a paper plate in half, then cut 20 slits down from the straight edge, stopping about 3 cm short so the plate holds together. An adult makes those cuts. The plate now works as a curved frame, with the slits standing in for the notches on a card loom.
For the first row, tape the yarn end to the back of the plate, bring it up through the first slit, then down through the next. Keep going along the row and the yarn will sit across the front like a line of stitches. From row two, work the opposite way, passing the yarn over and under each slit in turn. Carry the yarn around the outside edge to the next row rather than cutting it.
The obvious example is a plate that fills with simple stripes, one colour per row, with a single dot of a contrasting colour in the middle to show a deliberate change. Children learn two things at once here: that tension controls how the piece looks, and that a pattern is only a pattern once it repeats.
Keep the yarn slack. A plate warp is short, so a tight pull shows up immediately as a gap or a curl at the curve.
4. Paper Taper Weaving
Roll paper strips around a pencil or a chopstick to make sturdy tubes, then tape them together in pairs. Now you have warp threads that will not fold, and children can push weft strips through the gaps without any glue at all. Line up eight tubes, tape the ends to a piece of card, then work strips across them, over and under as always.
The clear example is a checkerboard. Lay black strips across every second row and white strips across the rows between them, and the pattern is unmistakable. Changing to a cup shape takes one extra step: keep weaving until the sides are as tall as you want, then fold the tubes upward and tape them to the rim.
Nothing is glued inside the weave itself, so the piece comes apart cleanly and can be rewoven with different colours. Children who found paper strips too fiddly usually manage this well.
5. Yarn Card Weaving
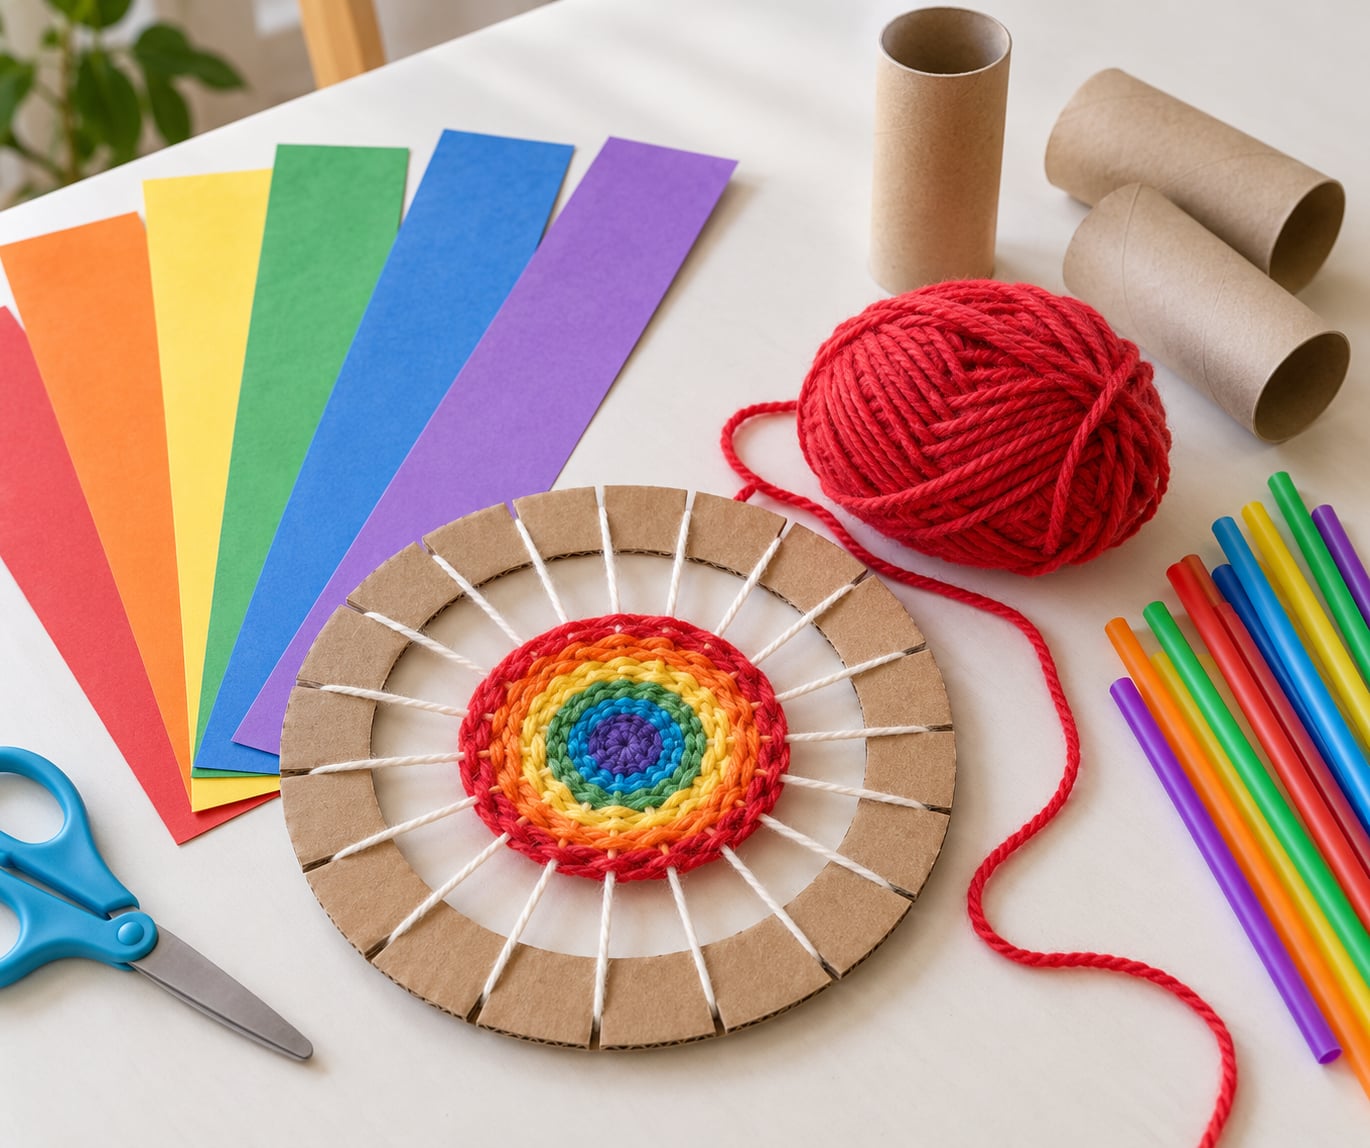
This is a traditional card weaving frame and the most traditional answer to what kids can make with weaving. Cut a rectangle from thick card, then cut evenly spaced slits along the top and bottom edges, leaving the card as a frame with an open middle. Warp the loom by winding yarn in and out of the slits from back to front, then tie the last warp thread to the first so the frame stays square.
Weaving is the same rhythm: bring the yarn from front to back over two warp threads, back to front under two, and repeat along the row. Carry the yarn down one notch at the end of each row. That is the whole tabby stitch, and once a child has it, everything else on this page is a variation.
A stripes-and-dots example suits preschool or early elementary: one colour per row for stripes, then swap to a second colour for two rows, add one dot row and swap back. Kids start predicting what comes next before they can explain why.
Two rules keep a card weaving square. Wind the warp threads at an even tension, and push each row down toward the previous one instead of pulling sideways.
When it goes wrong
Gaps between rows are the most common problem, and the fix is to push rather than pull. A child who tugs the yarn to tighten a row pulls sideways, which leaves a gap and bunches the middle. Pushing the row down with a finger closes the gap without touching the tension.
If a piece cinches in the middle, the weft was pulled too hard. There is no fixing that after the fact, so call it a design choice and let the child keep going.
Short yarn tangles, especially with thin yarn. Use one long length wound onto a piece of card instead, and let a tangle be pulled out rather than yanked.
Finally, weave loose ends in rather than taping them. Tape on the front of a weaving comes off within a few months; a small knot on the back stays for as long as the yarn does.
6. Recycled Cardstock Weaving Wall
One panel of cardstock becomes a shared project when several people add to it. Tape a strip of card across the top of a large sheet of cardstock, cut a row of slits along it, and warp the panel with yarn so the loose ends hang at the sides to be tied on later. Children then weave in whatever colours they like, working in bands so the finished panel reads as blocks rather than noise.
Simple colour blocking works best: red across the bottom third, a band of yellow in the middle, blue at the top. With one child, leave gaps between the bands for a future session. With a group, set one band per child and let them take turns.
Secure loose ends by knotting them to the yarn on the back, not with tape on the front. Tape loses its grip after a few months, while a knot lasts as long as the yarn.
7. Drinking-Straw and Yarn Weaving
Cut drinking straws in half lengthwise, then lay them out in a row on a table. Children thread yarn through the first straw, out the far end and into the next one, zigzagging down the row. The straws move around freely, so this mat can be taken apart and rethreaded whenever someone wants a different colour order.
For a rainbow example, work in bands: all the red rows first, then orange, yellow, green, blue and violet. Change yarn at the end of a row rather than in the middle, and keep the straw spacing even so the finished mat lies flat.
This is the most portable option in the list because the straws slot together instead of being glued. It suits a long car journey, and the threading motion is the part that does the most for pencil grip.
8. Paper Loom Nature Weaving
Take the cardboard loom from project 5 and give it a subject. Natural materials suit an autumn theme, plain raffia gives a clean summer basket, and cut paper strips work at any time of year. The loom does not change, only the weft does.
For a leaf theme, work two rows of brown, then one row of green, and repeat the green row with a slight shift so it looks scattered rather than striped. A wave theme alternates one row of blue and one row of pale blue. A rainbow theme just runs the colours in order and is usually the first project a child asks to repeat.
The rule is to change one thing at a time. When a theme gets complicated, go back to a single colour and change the colour after the pattern is steady.
9. Woven Paper Gift Basket
Small cardboard boxes with the top removed make a good base for a basket that holds something. Cover the base and sides with strips of paper, then weave long paper strips up and over the edge, inside and out. Turn the strip a quarter of the way around the rim on every pass, and the sides stiffen on their own.
For a striped basket, use brown paper strips for the base and one bright colour for the rim. For a checkerboard, weave two colours alternately and finish with a paper tape around the rim to lock it in.
Expect this one to take about forty minutes for a beginner, and set it up for children aged seven or older because the sides need holding steady while strips go over the edge. An empty box works fine, which also makes it a good project for wrapping something.
Keeping the sides straight
Baskets go out of shape when strips are cut different lengths, so cut every strip for one direction at the same time and lay them against each other before weaving. If the sides bow outwards, the strips were pulled too tight around the rim. If they lean inwards, they were too loose.
A strip of paper tape around the rim does two jobs: it hides the raw paper edges and holds the whole weave rigid. Add it as the last step.
10. Beginner Weaving Projects: Simple Yarn Chandelier
Everything so far comes back to one movement: over, under, over, under, moving one thread along each row. A yarn chandelier is that same sequence arranged as a hanging object, so it is a good final project for a child who already has the rhythm and needs something with more structure.
Cut two cardboard rings, mark eight evenly spaced points on each, and notch them so the yarn can jump between rings. Wind yarn between ring one and ring two, then add paper strips or cut drinking straws as weft between those verticals, again over and under. Repeat down the page to make the tiers, joining each tier at the points you marked.
Build it flat on a table first, then hang it from a single strip of paper. Keep hanging loops short so the piece stays out of reach of small children and away from doorways.
The extension for a confident weaver is to plan the colours before threading anything. Decide the pattern row by row on paper, then follow it. Anything beyond that is off the loom entirely and needs a sewing needle, which is a different project.
Trimming and hanging
Even spacing matters more here than anywhere else, because eight uneven points will show on every tier. Mark all the notches with pencil first and cut them together in one pass.
When it is finished, trim the fringe to an even length with sharp scissors held level rather than following the shape of the strands. For hanging, one strip of paper at the top is enough, and keep it well away from anything a child could walk into.
Frequently Asked Questions
What age is weaving appropriate for?
Paper strip weaving works from about age three, because flat strips need almost no finger strength. Card frames and plate weaving suit ages four and up, while a plastic lacing needle usually waits until five or six. From eight, children can manage tension, patterns and the finishing knots on their own. Start lower than you think and stop while they are still asking for another one.
What supplies do children need to start weaving?
Start with paper strips and tape, and add nothing else for a first project. After that, thick card, a pair of yarn scraps, a blunt plastic lacing needle, drinking straws and an old paper plate cover almost everything in this list. Skip thin lace yarn, which tangles and splits, and skip anything needing a sewing needle until an older child is ready.
What are the easiest beginner weaving projects for kids?
Paper strip weaving is the easiest because the strips lie flat and cannot tangle. Cardboard tube weaving and yarn card weaving come next, since notched frames guide the child through the pattern. Save paper plate weaving for children who lose their rhythm easily, because its short curve makes gaps obvious and easy to fix. Project 10 is the least forgiving of the ten.
How can I help a child who keeps losing the over-under pattern?
Say the pattern out loud together as you weave: over, under, over, under. On the return row, the child starts under where they finished over, and saying that one rule aloud fixes most of the trouble. Mark the first warp thread with a sticker so there is always a fixed starting point. Fewer threads also helps, since six is easier than twelve.
How can I make a weaving project easier or harder?
Make it easier by using wider strips, fewer warp threads and thicker yarn, and by building any notches for them. Make it harder by moving to a plastic lacing needle, adding a second colour on the return row, or setting a target such as twelve rows. You can also scale the whole thing up, because a large frame with wide gaps lets a child copy the same motion with less precision.
Start with Paper Strip Weaving
If you only do one thing today, make the paper strip mat. It takes five minutes to set up, it can be repeated as often as a child wants, and the over-under sequence is exactly the one every later project on this page builds on.
Keep the first attempt to one or two colours, six strips each way, and about a dozen rows. Once the rhythm is steady, add more colours, a yarn needle and a frame. Everything else follows from there.