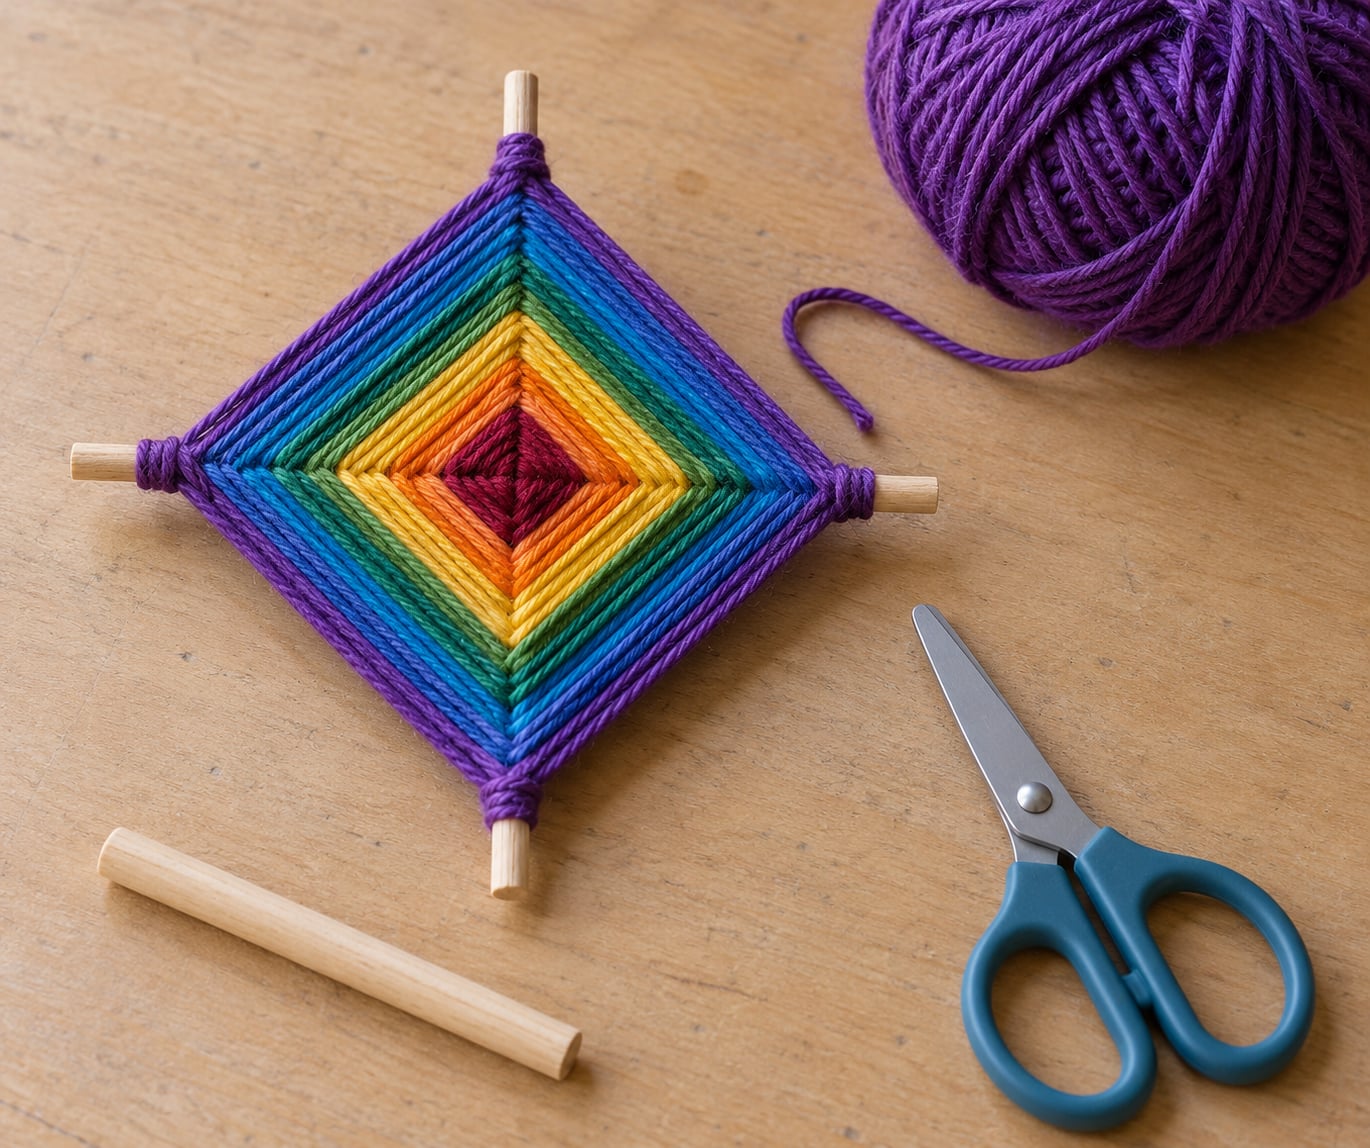
A God’s eye yarn craft is a woven diamond that starts as a cardboard loom and ends up as a bold wall piece, and this version works well for kids because there is no glue, no hot iron and no fiddly knot work in the middle. Learning how to make a God’s eye yarn craft takes about 45 to 60 minutes for a first-timer, most of it spent pulling yarn through a small hole and keeping the rows tight. You need two squares of stiff cardboard, yarn in two or more colours, a blunt tapestry needle and a pair of scissors. Here is the whole process, stage by stage, with the fiddly parts spelled out.
The pattern is also known as an Ojo de Dios or a yarn eye, and it comes from the Wixárika (Huichol) people of Mexico, where the four points of the traditional diamond stand for earth, air, fire and water. The woven centre is the eye itself. Most children just see a bright diamond, which is honestly the point of the craft.
Table of Contents
- What You Need
- How to Make a God’s Eye Yarn Craft Step by Step
- How to Make a God’s Eye Yarn Craft Base: Form the Loom
- Step 2: Weave the Yarn Through the Centre
- Step 3: Tie the Outer Edge
- Step 4: Shape the Classic God’s Eye
- Step 5: Finish and Display the Craft
- Common Mistakes
- Frequently Asked Questions
- How long does a God’s eye yarn craft take to make?
- What age is this yarn craft suitable for?
- Can I make a God’s eye craft without cardboard?
- Why is my God’s eye weaving loose or crooked?
- Can I use embroidery floss instead of yarn?
- Conclusion
What You Need
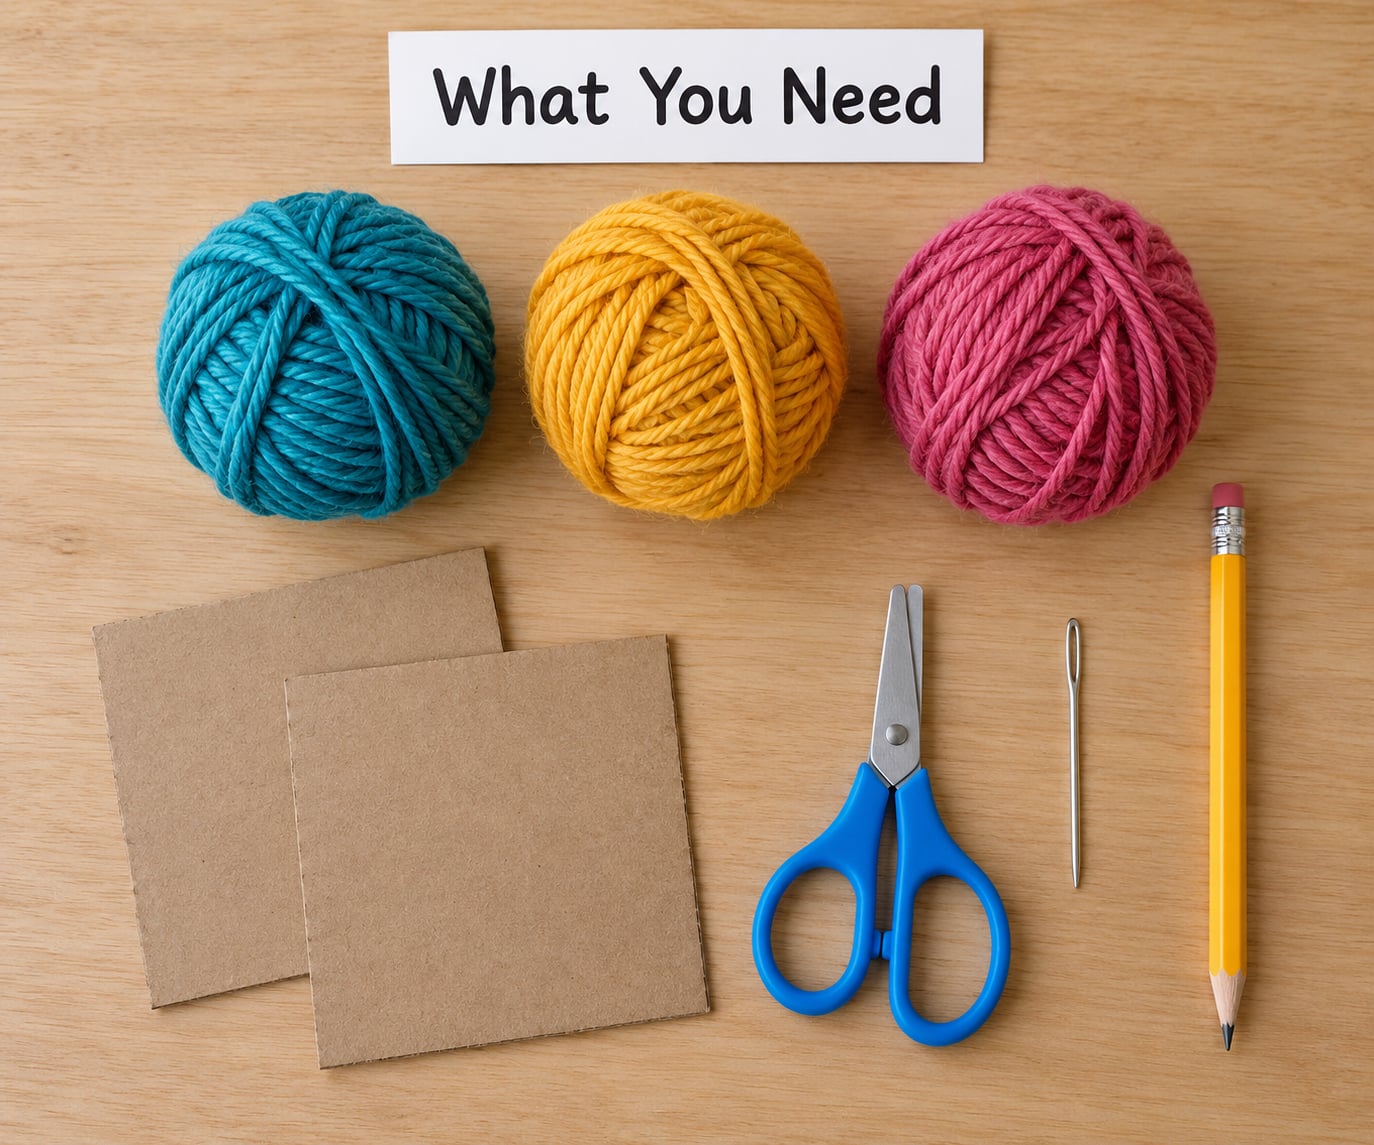
- Two cardboard squares — cereal box backs work well. Cut two matching squares roughly 15 to 20 cm (6 to 8 inches) across. They must be the same size, or the loom sits crooked and the finished diamond leans.
- Yarn in two or more colours — about 20 to 30 metres (20 to 30 yards) in total for one piece. Medium-weight acrylic or cotton yarn works best; chunky yarn is hard to pull through the hole and thin thread breaks when pulled tight.
- A blunt tapestry needle or a thick pencil — a plastic yarn needle with no point, or the blunt end of a pencil if a child is doing the poking.
- Scissors — regular scissors for adults, rounded-tip scissors for children.
- Optional extras — a wooden dowel for hanging, a dab of craft glue, a length of yarn for a hanger loop, and a small bell or tassel if you want to dress it up.
A quick note on safety: an adult should handle the cutting and the poking for anyone under about six. The needle goes through stiff cardboard, and that needs a steadier hand than a small one has.
If you have no cardboard, a thick cereal box flattened and cut twice works. Failing that, two layers of stiff card taped together, or even two pieces of sturdy cardboard from a craft cupboard, will do the job.
How to Make a God’s Eye Yarn Craft Step by Step
Learning how to make a God’s eye yarn craft comes down to one repeated motion: yarn through the centre hole, around one cardboard point, through the hole again, then on to the next point. Do that motion in order and the diamond builds itself. The five stages below take you from a flat square of cardboard to a finished woven eye.
How to Make a God’s Eye Yarn Craft Base: Form the Loom
Stack your two cardboard squares and mark the exact centre of the top one with a pencil. Then mark four points, evenly spaced around the edge, each one a few millimetres in from the rim — top, bottom, left and right. These four marks become the corners of your diamond, so they need to be spaced evenly or the finished piece pulls to one side.
Push your blunt needle through both squares at the centre mark to make the big weaving hole. Then make four small holes at the edge marks. The holes should be big enough to pass yarn through without fighting it, and the same size on both squares so the layers line up exactly.
Cut a piece of yarn about 60 cm (24 inches) long and tie a knot on one end so it cannot pull back through. Thread it from below up through the centre hole, leave a short tail, and now lace it through the four edge holes: up through the bottom hole, under the cardboard, up through the right hole, under, up through the top hole, under, then up through the left hole and back to the centre hole.
You now have a diamond-shaped loom with four points and a hole in the middle. Tie off that lacing yarn with a double knot and trim the tail. If your base looks loose, or one point hangs lower than the others, the cardboard squares were probably not identical — pull them apart, restack them aligned, and pinch the corners until the diamond sits flat and symmetrical.
Step 2: Weave the Yarn Through the Centre
Thread a new colour through the needle and bring it up from underneath through the centre hole. Leave a 5 cm (2 inch) tail and pin it against one side of the hole so it gets trapped by the first rows.
Now weave back and forth through the centre hole. Pass the yarn over the front of the loom, push it down through the hole, bring it back up a few millimetres to one side, and repeat on the other side. Each pass lays a line of yarn across the centre opening, and the diamond colour block starts to grow on the face of the loom.
Change to a new colour after every pass or two. Tuck the old yarn tail flat against the cardboard, start the new colour in the same place, and keep going.
Tension is the whole game here. Pull each pass snug so the rows touch but do not overlap or crush each other. A tidy woven centre looks like an even block of colour with a small diamond hole left in the middle — no bare cardboard showing, no gaps, no lumpy ridge where the yarn bunched up. Keep the rows close without covering earlier rows, and rotate the loom a quarter turn between passes if it helps your hand position.
Stop weaving when the centre diamond is roughly 4 to 5 cm (about 2 inches) across. Leave the centre hole partly visible; it becomes the eye.
Step 3: Tie the Outer Edge
Now move from the woven centre out to the perimeter. Remove the needle if it is in the way, and work the yarn around the cardboard points instead of through the centre hole.
Take the yarn from the centre, bring it up and over one cardboard point, wrap it around the point once or twice, then pull it back across the face of the loom toward the next point. Repeat around all four points, keeping the same direction each time so the rows stack neatly.
The route to use is a simple diagonal: across the front, around the outer edge of a point, back across toward the next point, around that one too. Each circuit adds one full layer of yarn to every point. Pull each circuit snug with your fingers, never yanking hard, so the cardboard does not buckle.
Pull the knots tight at every point. A lopsided edge here usually means one point got more wraps than the others, so count your circuits out loud and keep them equal. When all four points are wrapped and you are back at the start, tuck the working end under a wrap and knot it off.
Step 4: Shape the Classic God’s Eye
The cardboard comes off now, and this is the moment kids enjoy most. Bring the four cardboard corners in toward the centre so they meet, then pinch them together and wrap yarn tightly around the gathered bundle several times. Tie a secure knot to hold it.
Trim away the cardboard tabs with your scissors, cutting close to the yarn wrapping so nothing pokes out. Then wrap yarn over the trimmed area to conceal the tabs completely.
To finish the eye, work the yarn back to the woven centre and tie a small knot right in the middle of the diamond. Some makers add one more colour ring around that centre knot and tie another knot on top. The result is the characteristic yarn eye: a diamond centre inside a radiating woven star. Keep the cultural note light here — the pattern is widely known as a God’s eye or yarn eye, and it is a good one to make with children.
Step 5: Finish and Display the Craft
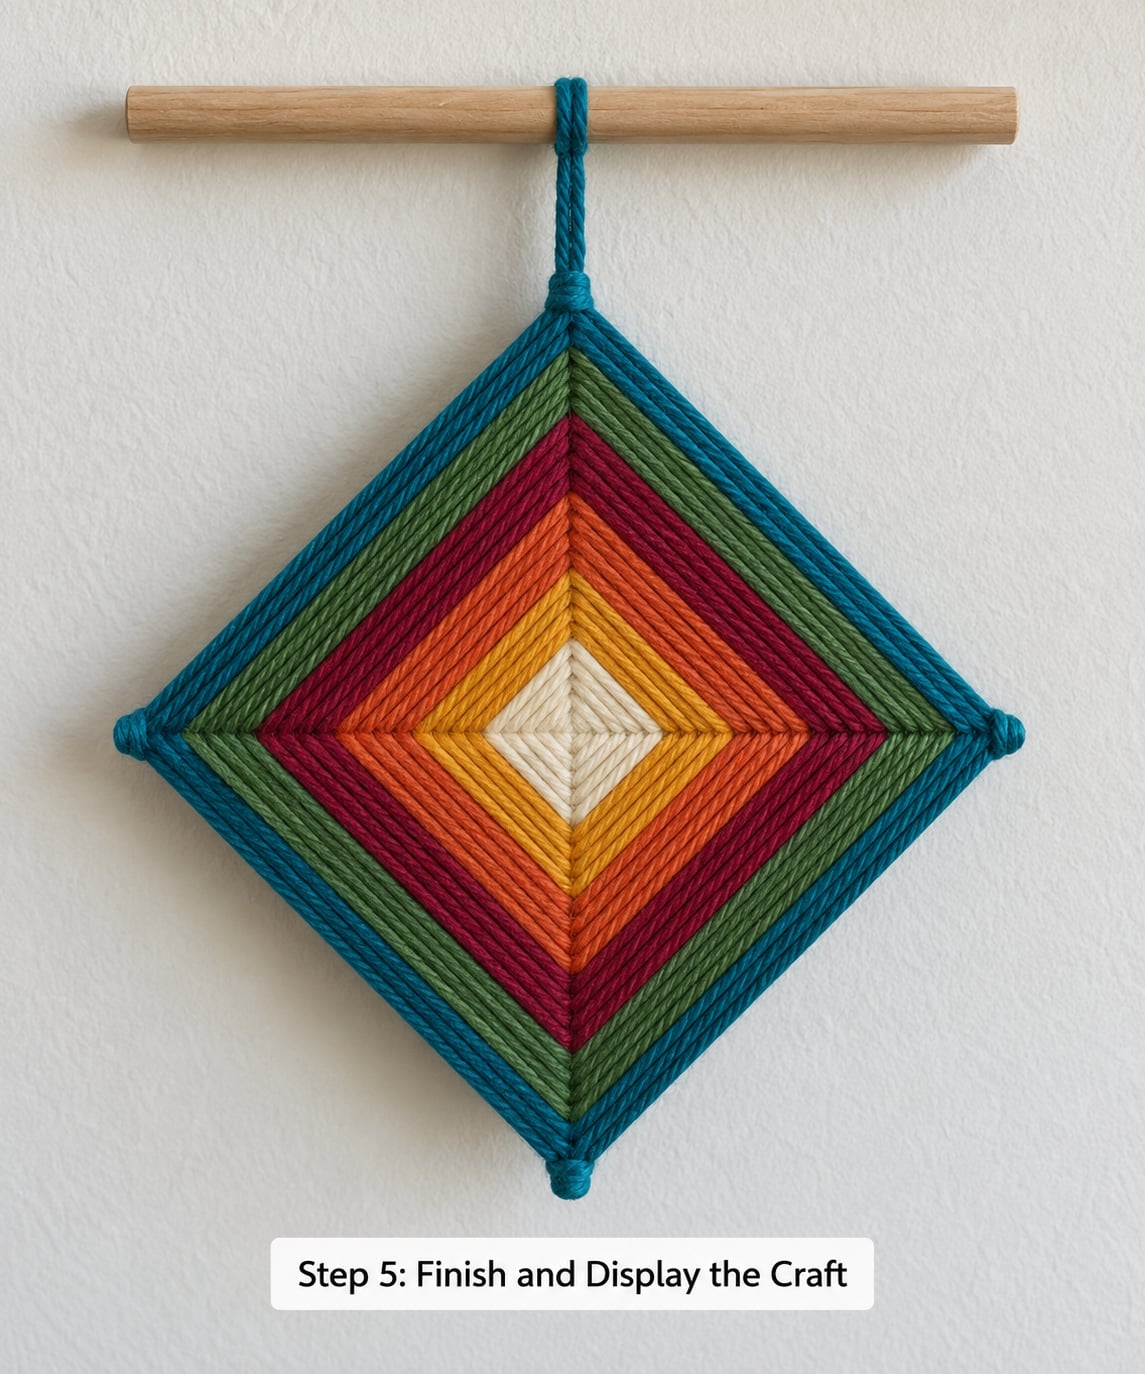
Tuck every remaining yarn tail into the wrapping behind the piece, or clip them close. Give the outer wrapping one more gentle pull in each direction so the diamond sits flat rather than cupped.
To hang it, thread a long piece of yarn through the gathered top point and tie a loop, or glue a short dowel to the back for a wall piece. A tassel at the bottom hides the tied-off bundle and gives the piece a little movement.
If the finished diamond curls, press it flat under a heavy book for an hour with a clean cloth on top. If it looks lopsided, the rows were uneven as you wove — turn it over and check that the woven centre is centred on the loom, then add a matching ring of yarn on the thin side to balance it. Uneven edges are normal. Nobody makes two the same.
Common Mistakes
- Uneven edge holes. Measure the marks before cutting. Four points that are not evenly spaced pull the diamond out of shape, and no amount of careful weaving fixes it afterwards.
- Loose weaving in the centre. Pull each pass snug before moving on. If it is already loose, thread a length of yarn back through the row and pull it tight.
- Skipped loom points. Count out loud as you wrap: one, two, three, four. A missed wrap shows as a bare corner.
- Gaps between rows. Add more yarn and push the rows closer together, or pull the whole woven centre gently toward the middle.
- Cardboard showing after wrapping. Stop about half an inch short of the ends. You want the tips covered but the sticks still visible at the points.
- A lopsided finished shape. Wrap the thin side with another ring of yarn, or accept it as a feature and hang it at a slight angle.
Work in good light, since the weaving pattern is hard to see in a dim room. Contrasting colours help children follow the rows, and matching colours hide mistakes beautifully. Let an adult do the cutting and the poking, and let the child pick the colour sequence — that part is where the craft actually belongs to them.
Frequently Asked Questions
How long does a God’s eye yarn craft take to make?
Allow 45 to 60 minutes for a first attempt, and about half that once you have the rhythm. Cutting and marking the cardboard takes 10 minutes, weaving the centre is the longest stage at 20 to 30 minutes, and wrapping the outer edge and finishing takes another 10 to 15. Working in short sittings across two evenings works just as well.
What age is this yarn craft suitable for?
Children from about six upward can usually manage the threading and weaving with an adult nearby. Younger children can do the cutting, choosing colours and wrapping the outer edge, while an adult handles poking the needle through cardboard. Plan on the yarn pulling back through any hole that is too small, which is the most common frustration for first-timers.
Can I make a God’s eye craft without cardboard?
You can, but the cardboard is what gives the piece its four points and its shape. Without it you would need to build a frame from wooden sticks or dowels crossed and taped together, then weave over and under around the crossing. That version takes longer and gives you a more open, lattice-style result, so the cardboard loom is much easier for a first project.
Why is my God’s eye weaving loose or crooked?
Loose weaving usually means each pass was not pulled tight enough before the next one went in, so pull the yarn snug and let the rows sit touching without overlapping. A crooked piece almost always traces back to the base: either the two cardboard squares were different sizes, or the four edge holes were not spaced evenly. Re-mark carefully and the diamond straightens up.
Can I use embroidery floss instead of yarn?
You can, and the result looks like a delicate, detailed piece rather than a chunky wall decoration. Use two or three strands of floss together, since a single strand is difficult to pull tight and can snap. Keep the same process: up through the centre hole, across the face, around each point, back to the centre. Floss works best with a needle that fits the hole comfortably.
Conclusion
A God’s eye yarn craft is five short stages: mark and pierce the loom, lace the base, weave the centre, wrap the outer edge, then gather, trim and tie off. The whole thing runs on one repeated motion and one skill, which is why it works so well with children.
Start where the loom starts. Cut two identical cardboard squares, mark the centre and four evenly spaced edge points, poke the holes, and lace the base before a single length of decorative yarn goes in. Have an adult handle the cutting and poking, and let your child choose the colour sequence.
Spend your time on yarn quantity and tension rather than technique. Budget 20 to 30 metres of yarn per piece, pull every pass snug, and let a lopsided edge stay. That uneven finish is the part children point at proudly.