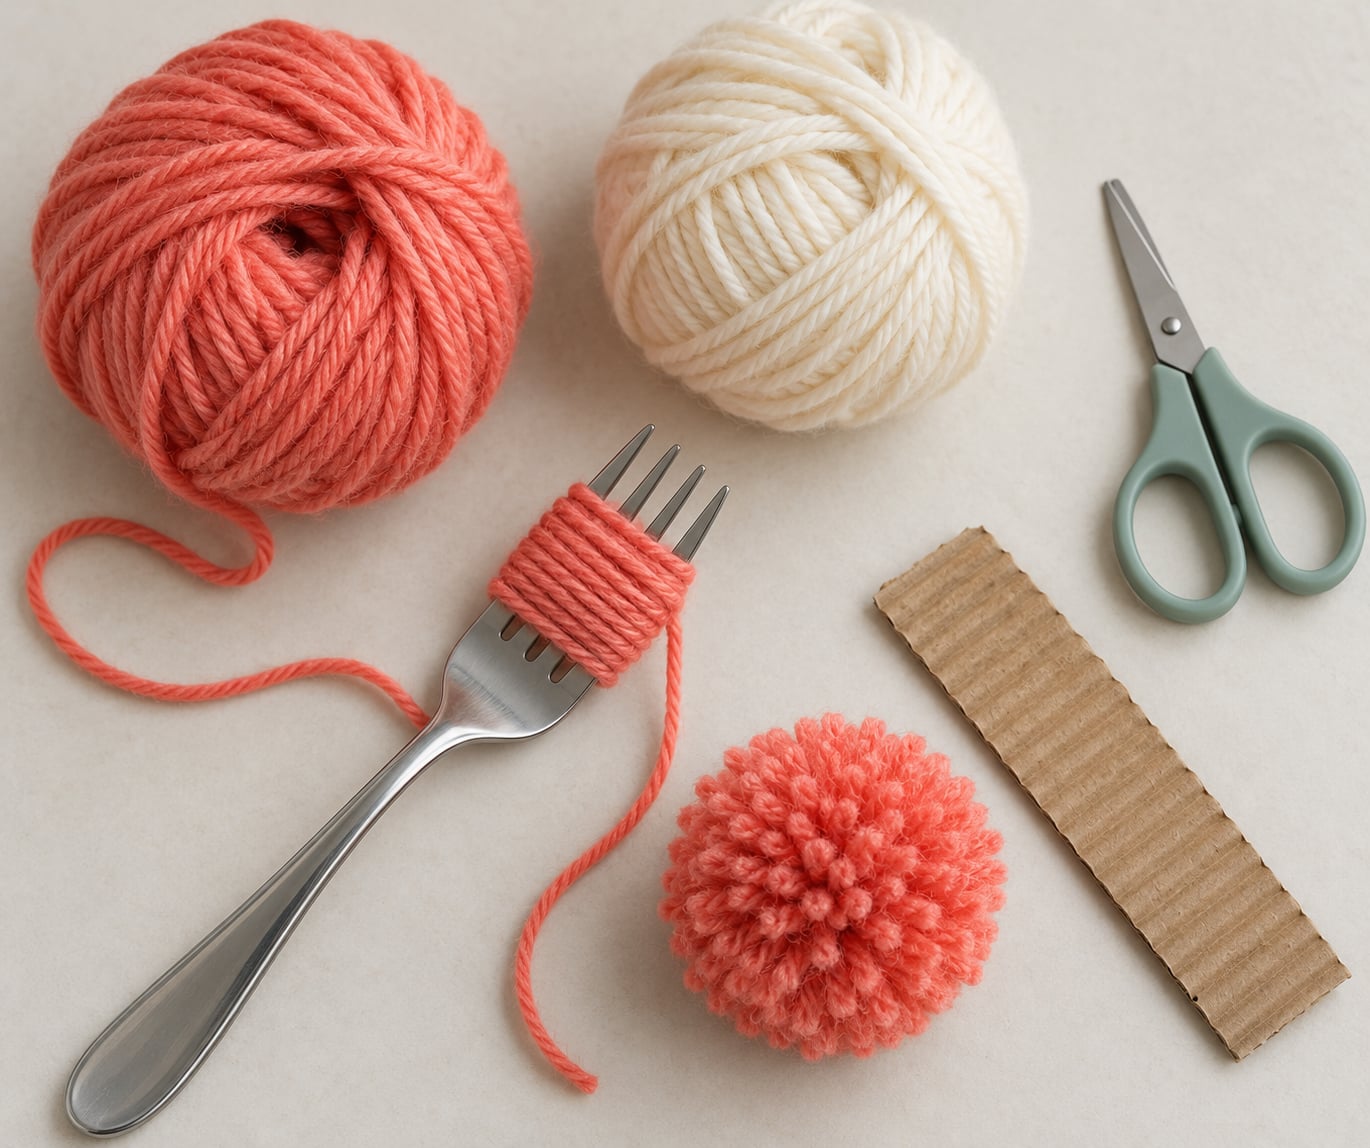
To make a pom pom with a fork, wrap yarn around all four tines, tie the bundle tightly in the middle with a second strand, slide it off the fork, snip the loops all the way around, then fluff and trim. It takes under a minute per pom pom and costs nothing beyond a ball of yarn.
The fork is doing something clever here. Each tine is a loop former, and four identical loops line up at the same width and spacing, so the finished ball comes out round instead of lopsided. Finger-wrapping gets you an approximate shape; the fork gets you a consistent one every time.
I keep a fork in the craft drawer specifically for this. My kids make them while I cook, and the yarn scraps in the basket become hat toppers, keychain charms and doll hair within the hour.
Table of Contents
- What You Need
- Step-by-Step: How to Make Pom Poms With a Fork
- Step 1: Wind Yarn Around the Fork Tines
- Step 2: Tie the Wound Yarn
- Step 3: Cut the Loops
- Step 4: Shape and Finish the Pom Pom
- Common Mistakes
- Frequently Asked Questions
- What is the easiest way to make pom poms with a fork?
- What kind of yarn is best for making pom poms with a fork?
- How do I make small pom poms using a fork?
- How do I make a larger pom pom with a fork?
- Can kids make fork pom poms without help?
- What can I do with yarn pom poms after making them?
- Conclusion
What You Need
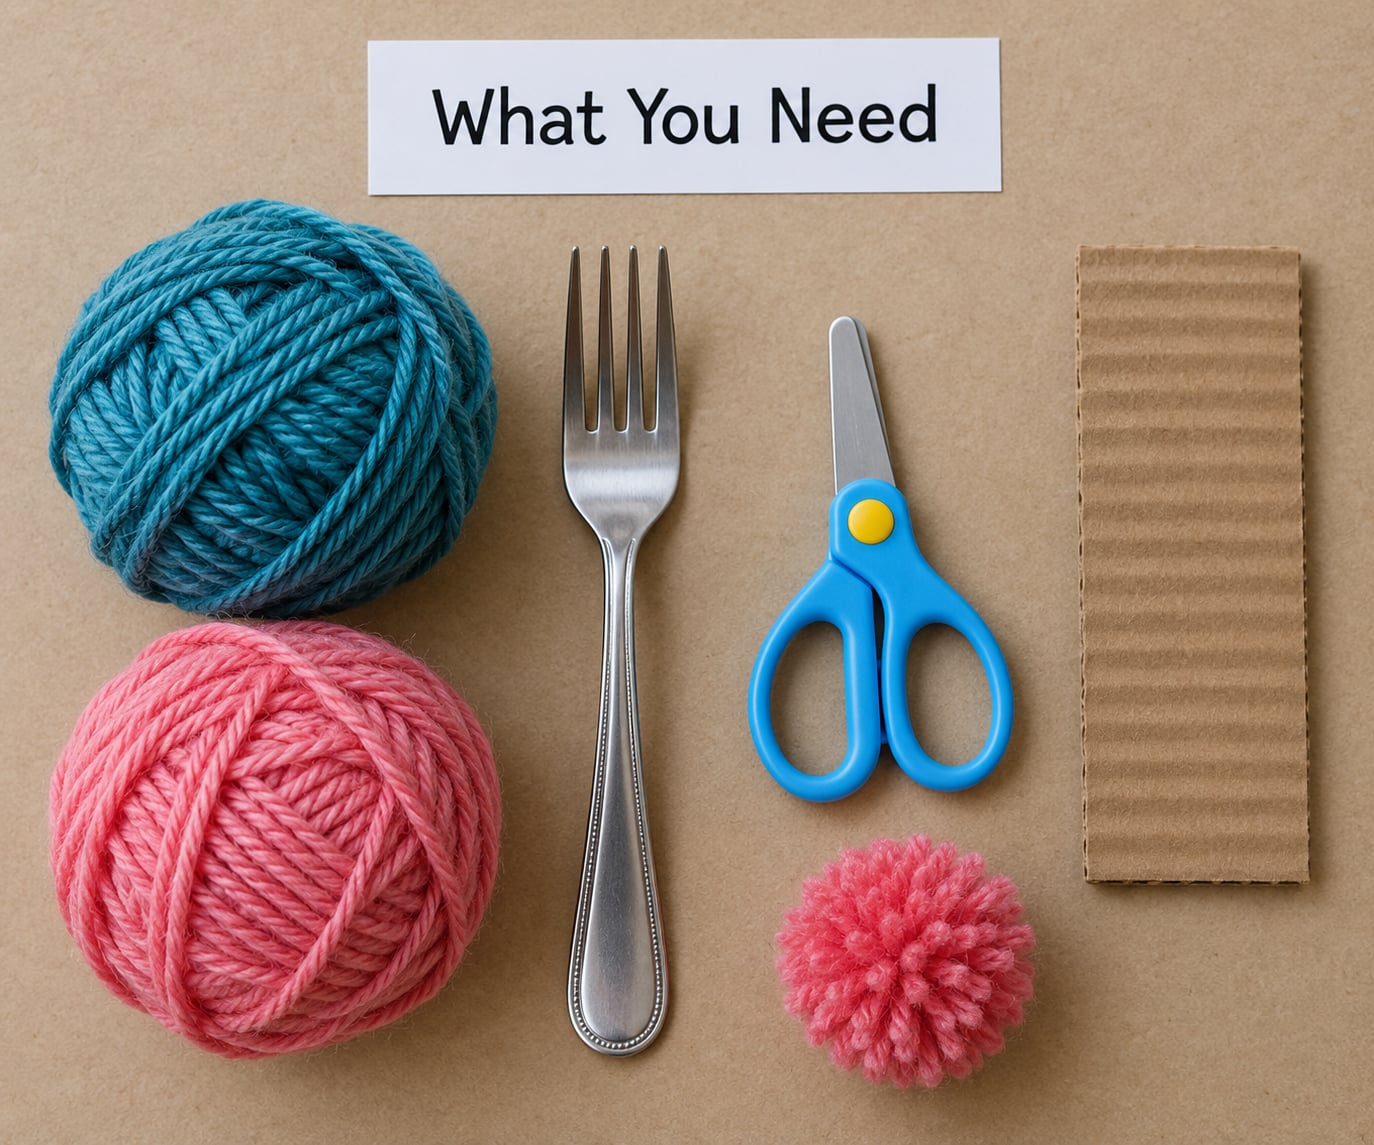
Three things do the actual work, and everything else just makes it easier for small hands. For one medium pom pom, or two small ones, you need:
- A sturdy metal fork — a standard dinner fork gives roughly a 2 inch pom pom. A barbecue fork with wider tines gives you a bigger one; a small cocktail fork gives a tiny one.
- Yarn — one skein makes several pom poms. Medium worsted weight works best. Thin yarn needs more wraps, chunky yarn needs fewer.
- Sharp scissors with a fine point — blunt blades cannot reach into the loops between the tines, and that is where children usually get stuck.
Then add the helpers. A strip of corrugated cardboard gives the scissors something harmless to cut against, which is the single best way to keep small pieces of yarn under control. A scrap of yarn about 20 inches long is your tying string. A small bowl catches the trimmed ends.
For children, swap the pointed scissors for rounded-tip craft scissors and stay within arm’s reach for the cutting step. Everything else a child can do alone.
Step-by-Step: How to Make Pom Poms With a Fork
Step 1: Wind Yarn Around the Fork Tines
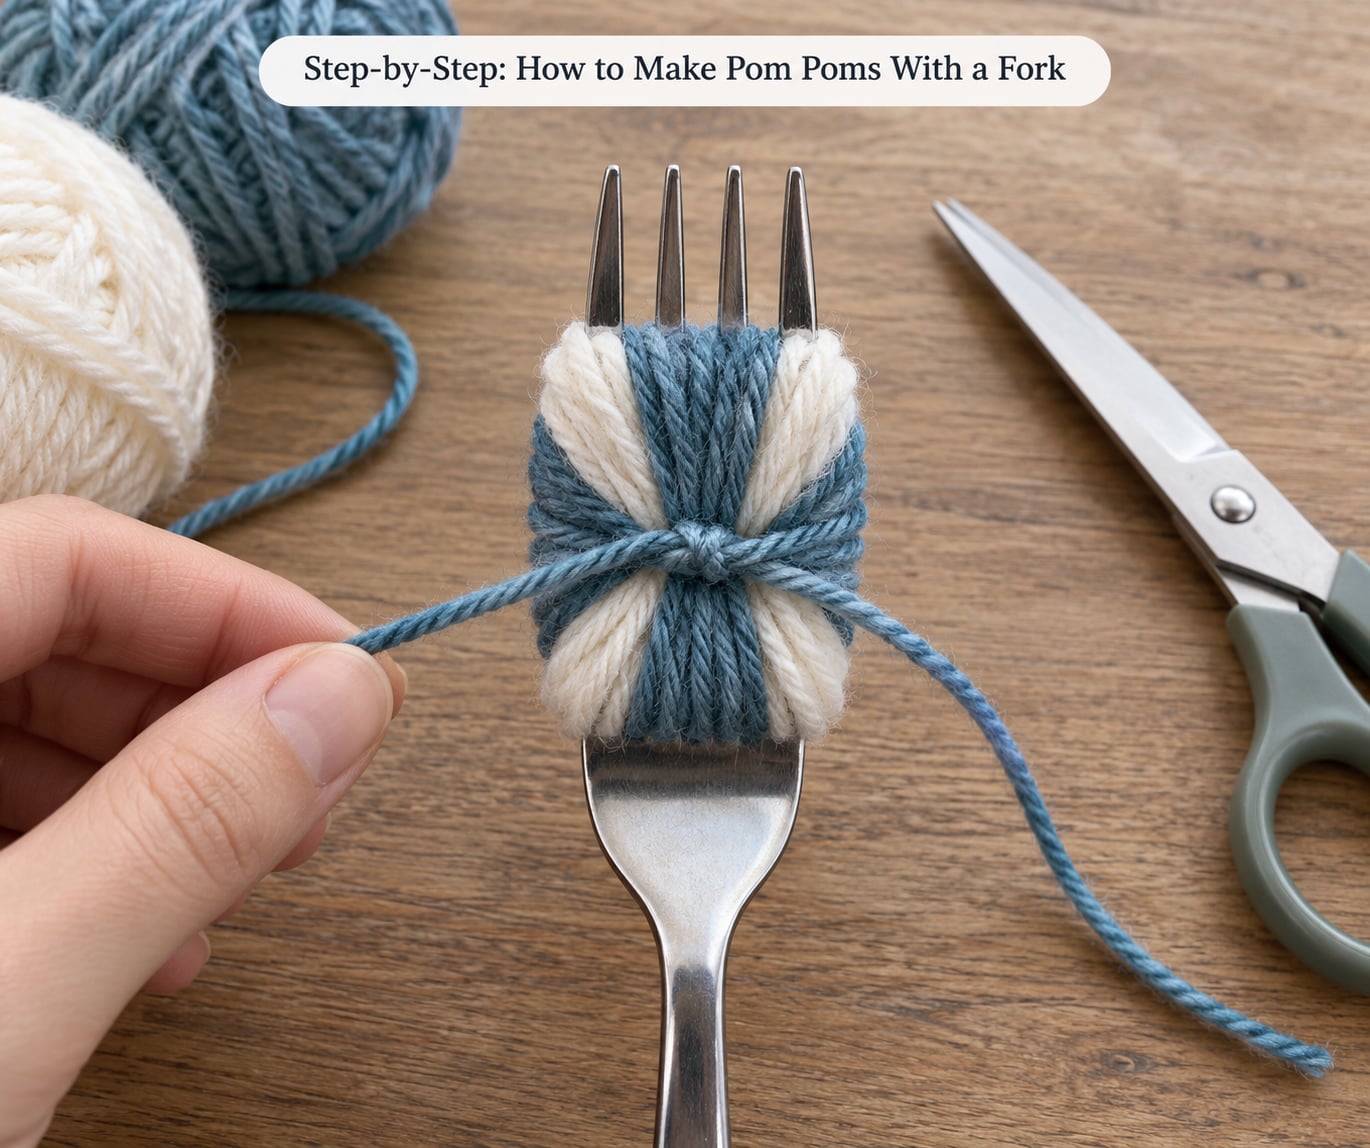
Hold the fork by the handle with the tines pointing up or sideways, and wind the yarn around all four tines together. Keep the yarn coming from behind, under, then back over, and keep a light, even tension as you go.
How many winds you need depends on the yarn, not the size you want. Thin yarn takes roughly 80 winds, medium yarn about 50, and thick yarn around 40. Counting helps more than eyeballing, especially for a child’s first attempt.
| Yarn thickness | Winds per colour | Typical result | Good for |
|---|---|---|---|
| Fine or thin acrylic | About 80 | Around 2 inches | Keychains, tiny doll hair |
| Medium worsted | About 50 | Around 2 to 3 inches | Garlands, gift toppers |
| Aran or textured | About 40 | Around 3 inches | Hat toppers, doll wigs |
You know the layer is thick enough when the fork feels full and the tines are almost hidden. Wind too loosely and the bundle slides off; wind too tightly and you cannot get it off without a fight. Firm but not forced is the target.
For two colours, finish one block of about 25 winds, start the second colour in the same spot, and continue for another 25. Blocks look better than stripes because the boundary stays crisp once the pom pom is fluffed.
Step 2: Tie the Wound Yarn
Cut a separate strand of yarn about 20 inches long. Slide it under the wound loops from one side, running it across the middle of the bundle between the second and third tines.
Bring both ends up and around, cross them, then pull hard in opposite directions. Do it a second time to make a double knot. That double knot is the whole ball’s future, and it is where nearly every pom pom fails if you rush it.
You will feel the bundle pinch in the middle when the knot is right. If the yarn still slides, the winds were too sparse, so add another layer before moving on.
Step 3: Cut the Loops
Lay the bundle on the cardboard strip, then push the scissors through from the outside edge and cut around the perimeter. Snip every loop that lies along that outer line.
Work slowly and keep the blades pointed away from the middle. Cutting into the center tie is the fastest way to end up with a loose pile of yarn, and it cannot be undone.
When every loop is cut, lift the ball out and give it a shake. Most of the strands are still joined at the center knot, so it should hold together in your palm. If it does, the tie worked.
Step 4: Shape and Finish the Pom Pom
Fluff with your fingers, rotating the ball as you go, and pull any flat or lumpy side inward. Trim the longest strands with the scissors, turning the ball a quarter turn after each cut.
One straight cut across the flattest side is a useful shortcut: it turns an oval into a ball in about two seconds. Then trim lightly, because you cannot add yarn back.
For a 3 inch pom pom, add a second tie a few inches from the first knot and leave a longer tail you can sew or glue to a hat or garland. Mini pom poms need no second tie at all.
Common Mistakes
Uneven winding. The thick side ends up lopsided. Fix it by counting winds out loud and keeping the yarn taut the whole way around rather than letting it sag on the back passes.
The center knot slips. Nearly every fallen-apart pom pom traces back to one loose tie. Wrap twice and pull in opposite directions, then tug the finished knot upward so it cinches against the bundle.
You cut through the middle. Stop as soon as the scissors reach the tie and move the ball, not the scissors. Cutting over cardboard catches stray bits so they are not lost on the floor.
The finished ball looks lumpy. Roll it firmly between both palms for a few seconds, then trim. The heat and pressure rounds it faster than finger-fluffing alone.
The pom pom sheds fuzz. Cheap thin acrylic does this. Ring the ball between your hands over a sink or the bin for a few seconds and most of the loose fibre goes straight into the air.
The fork will not come off. You wound too tightly. Slide it off at an angle rather than straight up, and next time keep the tension on the yarn rather than on the fork itself.
Frequently Asked Questions
What is the easiest way to make pom poms with a fork?
Wrap yarn around all four tines, slide a separate yarn strand under the bundle, tie it twice around the middle, then snip every loop along the outer edge. Slide the bundle off the fork before cutting. Fluff and trim last. Nothing else is required.
What kind of yarn is best for making pom poms with a fork?
Medium worsted acrylic or wool gives the neatest result on a dinner fork. Fine yarn needs around 80 winds, thick yarn about 40. Wool is warmer and springier, while acrylic is easier to find and washes well. Avoid very fuzzy novelty yarn, which sheds into the finished ball.
How do I make small pom poms using a fork?
Use a cocktail or fruit fork instead of a dinner fork, and wind roughly 40 winds of fine yarn instead of 80. Keep the bundle on the fork as you tie so it does not stretch, and use small detail scissors for the cutting step. Tiny sizes are fiddly, so let an adult handle those.
How do I make a larger pom pom with a fork?
Switch to a wider fork such as a barbecue or serving fork, use thicker aran or textured yarn, and wind about 40 times. Bulky yarn slides off less easily, so hold the fork by the handle and push the bundle off sideways. Add a second tie if you want a long tail for attaching.
Can kids make fork pom poms without help?
Winding and tying are easy for a child around five or older. Adults should stay close for the cutting step, or substitute rounded-tip craft scissors and have the child snip over a piece of cardboard. Everything else can be done independently once the winding technique is demonstrated.
What can I do with yarn pom poms after making them?
Sew them onto hats, scarves and knit or crochet projects, thread them onto key rings or ribbon for keychains, string them along twine for a garland, glue them onto paper for a gift topper, or use small ones as doll hair. To join two pom poms, thread a long yarn tail through both centres and pull it tight.
Conclusion
Start with the winding. Twenty-five turns of one colour, twenty-five of a second, keeping the yarn taut around all four tines, is the whole skill. Everything after that is tying twice and cutting around the outside.
Once the first one works, change the fork size and the wind count to get a whole range of pom poms from the same yarn bag. My kids now make their own party garland while the kettle boils.