Sewing projects for kids beginners rarely need a machine, a pattern or more than one stitch to finish. A felt bookmark, a paper plate threaded with yarn, or a strip of fabric with elastic will do it. The easiest beginner sewing projects all share three traits: felt or fabric that does not fray, pre-punched or pre-cut shapes, and a single running stitch a child can repeat. Start there, then move up as confidence grows.
Most families who get this right describe the same thing: the first project matters more than the tenth. A child who finishes a scrunchie in one sitting will ask for the next one. A child who tangles thread for forty minutes and never sees a result usually walks away.
Below are ten projects, roughly ordered from easiest to hardest, with the age that usually suits each one.
Table of Contents
- Beginner Sewing Projects for Kids at a Glance
- 1. Felt Heart Ornament
- How to make a felt heart ornament
- 2. No-Sew Felt Monster
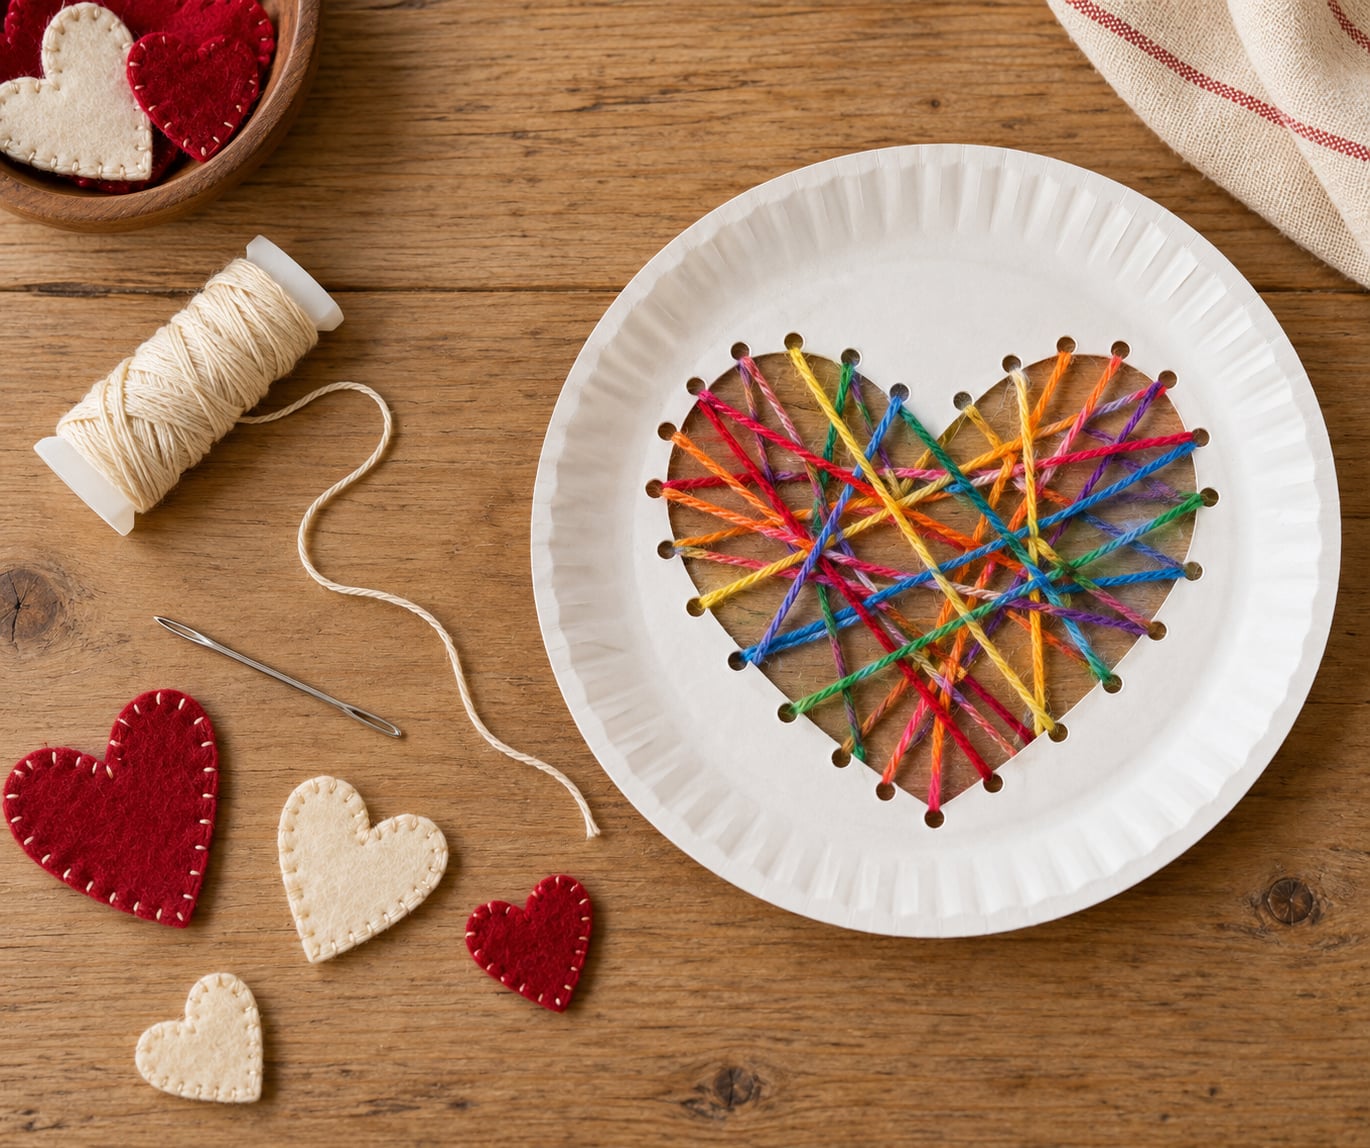
- 3. Paper Plate Colour Wheel
- How to thread a colour wheel
- 4. Simple Yarn Picture Frame
- 5. Cardboard Tube Pencil Case
- Step-by-step for the tube pencil case
- 6. Felt Bookmarks
- 7. Mini Fabric Scrunchie
- How to sew a scrunchie
- 8. Hand-Stitched Gift Bag
- 9. Button Design Card
- 10. Simple Cloth Doll
- Making a beginner cloth doll
- Frequently Asked Questions
- What age can children start beginner sewing projects?
- What type of needle and thread should I use for a child learning to sew?
- What is the easiest first stitch for kids?
- Do children need a sewing machine for these projects?
- How can I make sewing safer for young children?
- How do I stop yarn and thread from coming loose while a child sews?
- Start With One Simple Project
Beginner Sewing Projects for Kids at a Glance
The fastest way to pick a first project is to match it to your child’s patience rather than their ambition. Here is the short version of everything below.
| Project | Best age | Hand or machine | Time to finish | Difficulty | Skill taught |
|---|---|---|---|---|---|
| No-sew felt monster | 3-5 | No sewing | 15 min | Very easy | Shape design, cutting |
| Paper plate colour wheel | 4-6 | Hand | 20 min | Very easy | Stitch path, spacing |
| Felt heart ornament | 5-8 | Hand | 25 min | Easy | Running stitch, knots |
| Yarn picture frame | 5-8 | Hand | 25 min | Easy | Outline stitch, tension |
| Felt bookmarks | 6-9 | Hand | 30 min | Easy | Straight stitches, alignment |
| Cardboard tube pencil case | 6-9 | Hand | 35 min | Easy | Blanket stitch, measuring |
| Mini fabric scrunchie | 7-10 | Hand | 40 min | Moderate | Casing, elastic, turning |
| Button design card | 7-10 | Hand | 30 min | Easy | Stitching through holes |
| Hand-stitched gift bag | 8-12 | Hand | 45 min | Moderate | Reinforcing, handle loops |
| Simple cloth doll | 8-12 | Hand or machine | 60 min | Moderate | Perimeter stitch, turning |
1. Felt Heart Ornament
This is where most children learn their first real stitch, and it is worth starting with felt because the edges do not fray, so nothing needs hemming or trimming afterwards.
How to make a felt heart ornament
- Draw a heart on paper, roughly the size of a coaster, and cut it out.
- Pin the template on a folded square of felt and have an adult cut around it, so you get two matching halves.
- Thread a blunt tapestry needle with doubled thread and tie a knot at the end.
- Stitch up one side, through both layers, using evenly spaced running stitches. Aim for stitches the same length as the gaps between them.
- Add a simple embroidered line across the middle or a few French knots, then stitch the second side.
- Knot off on the back and trim the thread close.
If the stitches wander, that is normal for a first attempt. Children who can see a consistent line of their own stitches by the third heart usually have the running stitch down well enough to move on.
2. No-Sew Felt Monster
Not every child is ready for a needle, and there is no reason to force it. A no-sew felt monster gives a three-year-old or a reluctant seven-year-old the same finished-object feeling using glue and pre-cut shapes.
Cut a body, two arms, two feet and three eye circles from coloured felt. Let the child arrange them on the floor first and move pieces around until the monster looks right, then glue everything down. Small details matter more than symmetry here: googly eyes, felt triangles for spikes, a yarn smile. The finished monster hangs on the fridge or stands up on a windowsill.
This project teaches the parts of a sewing pattern without a needle: cutting, placing and securing shapes in a deliberate order.
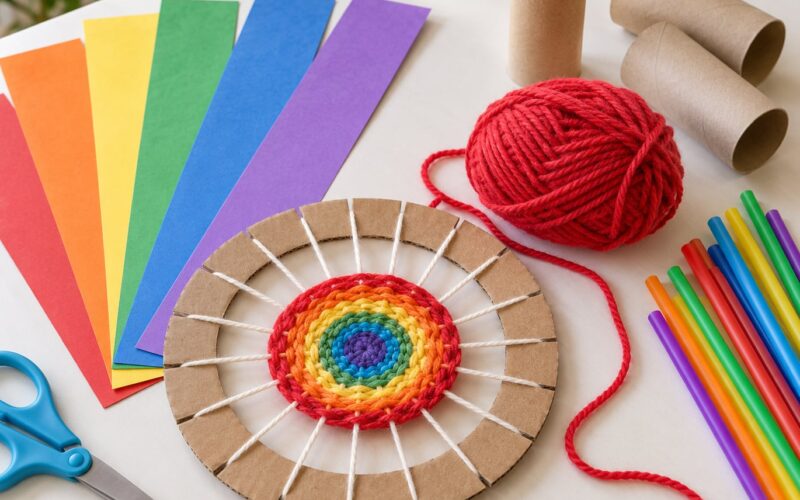
3. Paper Plate Colour Wheel
A paper plate gives you a circle for free and takes about twenty minutes. It is also a genuine art lesson once the stitching is done.
How to thread a colour wheel
- Paint six pie slices in the primary and secondary colours, or let the child colour them in.
- Ask an adult to punch holes along the outer edge, spaced evenly, about half an inch apart.
- Cut a length of yarn and tape a paper strip of it to one end, like a shoelace.
- Thread the yarn through each hole and bring it back through the next one on the underside, forming a loop at every hole.
The finished plate looks like a woven ring around the rim, and the alternating stitches are the first sign a child is controlling yarn tension rather than just poking through fabric. Hang it in a window when it is done.
4. Simple Yarn Picture Frame
This one teaches outline stitching on a stiff surface, which is much easier than managing a small square of fabric. Draw a bold shape such as a house, a fish or a star on thick card, and an adult punches a line of holes along the outline.
Work the yarn through the holes with simple up-and-up stitches, keeping the yarn snug but not tight, since tight yarn bows the card. When you reach the first hole again, run the yarn through it two more times to lock the last stitch in place, then tie off at the back.
Cut a small hole at the top of the card and thread a ribbon through it for hanging. Children who finish this usually move straight to the felt bookmark with real confidence.
5. Cardboard Tube Pencil Case
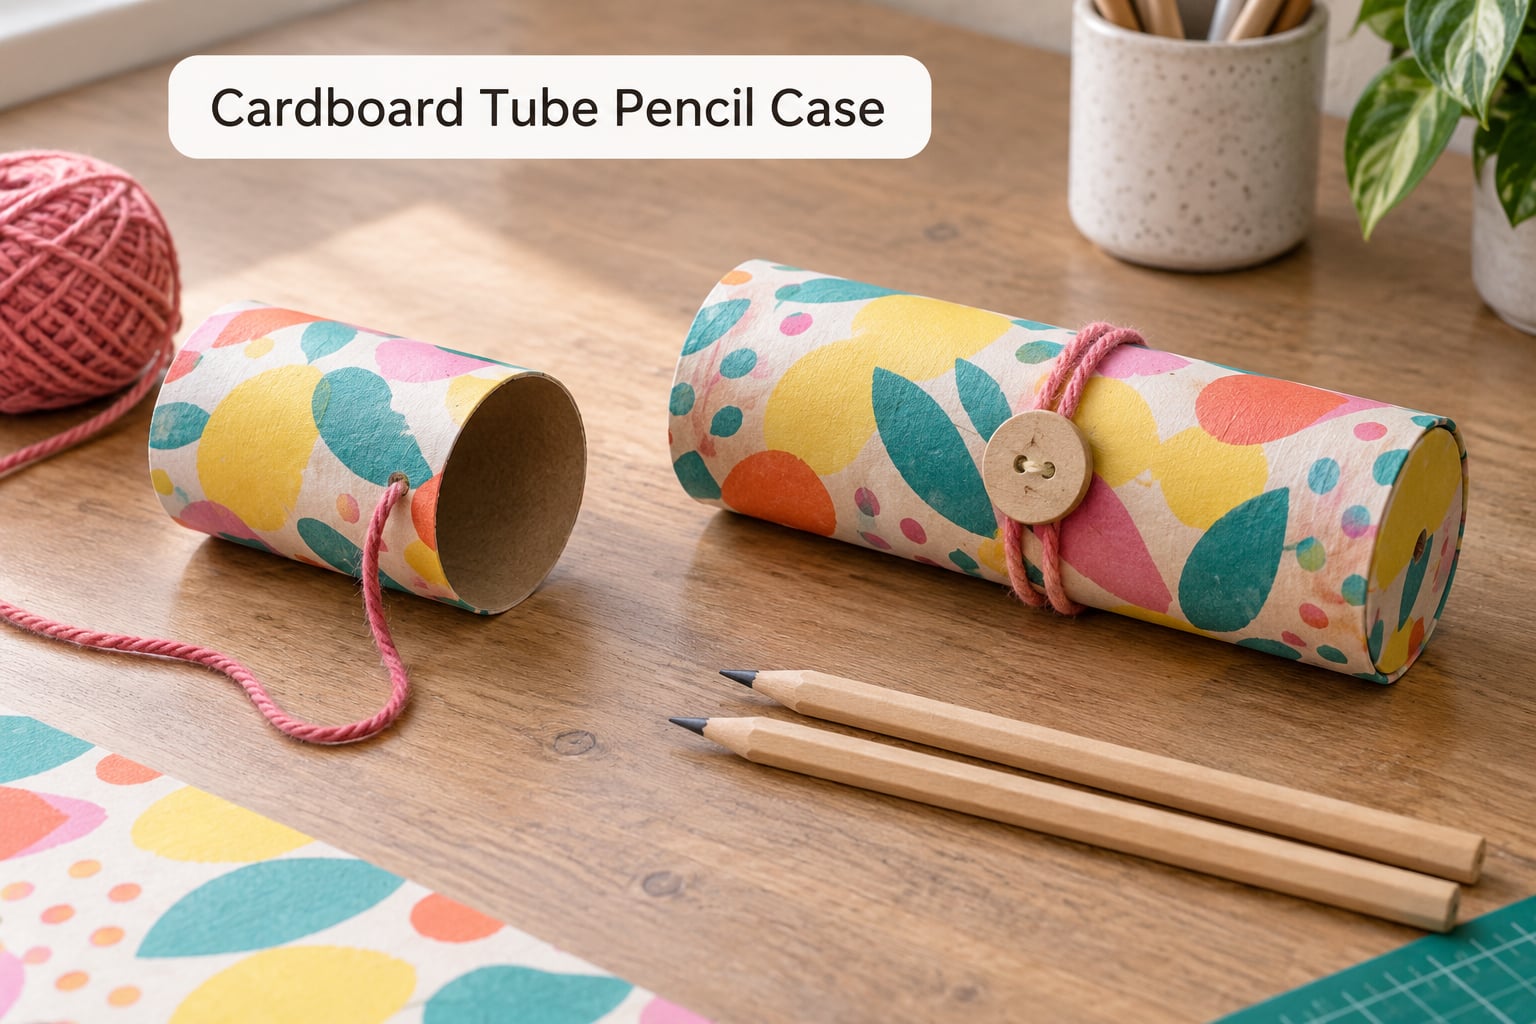
Toilet-paper or paper-towel tubes turn into pencil cases that actually get used, which matters more than almost anything else in a first project. This is also the best answer to the question of what to do with leftover fabric scraps, because the tube itself supplies the structure.
Step-by-step for the tube pencil case
- Wash and dry a cardboard tube completely and cut it to the length you want.
- Wrap it in fabric, paper or a felt offcut and glue the seam flat. Trim the ends so the wrap sits flush.
- Mark the top opening and punch evenly spaced holes on both sides, about a quarter inch down from the rim.
- Thread yarn through the holes using a blanket stitch, looping around the edge and through each hole in turn.
- Finish with a threaded yarn tie, then push pencils or pens inside.
Ten minutes of prep plus twenty minutes of stitching makes this a good rainy-day project with older children, and it survives a school bag.
6. Felt Bookmarks
Felt bookmarks are the cheapest project here, needing two small rectangles and a scrap of yarn, and they teach straight stitches plus the discipline of matching two edges.
Cut two felt rectangles the same size, about two inches by six, and have an adult punch a line of holes along both long edges. Hold the pieces together with pins, then sew with a straight stitch from hole to hole. If the two rectangles drift apart as the child sews, that is the skill this project is really about, so stop and re-pin before continuing.
Finish by sewing the short ends, hiding the knot inside the felt, and cutting a fringe across one end with sharp scissors. A name written in contrasting thread on the front turns it into a gift.
7. Mini Fabric Scrunchie
This is the first project that introduces elastic, and the first one where sewing something that must stretch changes how a child handles thread tension. It is also the project experienced sewists most often recommend, because the finished thing is small, useful and hard to lose.
How to sew a scrunchie
- Cut a strip of lightweight cotton about 3 by 18 inches, and a piece of elastic roughly half that length.
- Fold the strip lengthwise with right sides together and sew the short edge with a running stitch to make a tube.
- Thread the elastic through the tube using a safety pin or bodkin.
- Overlap the ends of the elastic and stitch them together firmly, then turn the tube right-side out through the open gap.
- Fold the open edge inward, tuck it under the elastic, and stitch closed with a tight running stitch.
Fleece and jersey knit are forgiving here because they stretch with the elastic. Heavy cotton works too, though it takes more tugging to turn.
8. Hand-Stitched Gift Bag
A plain paper gift bag becomes a reusable one with about fifteen minutes of sewing, and it is a good project for a child who has outgrown felt and wants something more grown-up.
Punch two holes on each side of the top edge, spaced evenly. Cut two pieces of ribbon or yarn, and stitch through the holes with a whip stitch that wraps over the edge, pulling the stitch fairly tight so the bag holds weight. Repeat on the other side for the second handle.
The part that trips children up is the top seam, where the thin bag wall tears easily if the stitches are pulled hard. If the paper starts to crease or split, back-tack the area instead of tugging, and test the handle with a handful of tissue paper rather than a stack of books. Experienced sewists on sewing forums repeatedly name a drawstring bag as the ideal first machine-sewing project for the same reason: the straight seams teach exactly what most beginners need.
9. Button Design Card
Button design cards are part sewing project, part art project, and they teach one specific skill: getting thread through a small hole without losing your place.
Cut a shape such as a heart, a star or an initial from felt, lay it on a folded piece of card, and stitch the two together around the edge with a whip stitch. Position two or three buttons on the felt and sew through them with three or four stitches, posting back through the same button hole each time so it stands firm. Trim the thread, glue the felt to the card front, and add a folded strip of coloured card at the bottom as the card base.
Children who have struggled with larger sewing often find buttons manageable, because the button itself holds the work steady while both hands stay in one place.
10. Simple Cloth Doll
The cloth doll is the longest build on this list and the best confidence finisher, since it combines almost every stitch learned along the way. Plan on an hour with an adult nearby.
Making a beginner cloth doll
- Draw a simple body and head shape on paper, cut two of each from cotton or fleece, and cut a small dress shape.
- Sew around the perimeter of the body with a running stitch, leaving a gap of about an inch for turning.
- Turn the piece right-side out through the gap using a pencil to push the corners out, then fill with polyfill stuffing.
- Close the gap with a ladder stitch, and repeat for the head.
- Sew the head to the body with a few firm stitches, add yarn hair with loops of yarn tied on top, and stitch on the dress.
- Finish the face with black thread: two dots for eyes and a single line for a mouth.
Because the pattern is drawn freehand on paper, children can make a second one completely different. That freedom is usually what turns a one-off craft into a hobby.
Frequently Asked Questions
What age can children start beginner sewing projects?
Children can start at any age if the project matches their fine motor skills. Around age three or four, work is lacing cards, gluing pre-cut felt shapes and threading large plastic needles with thick yarn. From age five or six, blunt needles with real thread and a running stitch become possible. Ages eight and up are usually when a child can manage a straight seam on a sewing machine with an adult nearby.
What type of needle and thread should I use for a child learning to sew?
Use a blunt tapestry needle, which is a thick needle with no sharp point, for any project where a child is likely to poke a finger. Embroidery needles with blunt tips also work. Pair it with doubled embroidery floss or thick yarn rather than sewing thread, since fine thread breaks, tangles and disappears into the fabric. A plastic yarn needle handles chunky yarn and cannot injure anyone.
What is the easiest first stitch for kids?
The running stitch is the easiest first stitch because it is one step, one hole at a time, with no thread loop to manage. Teach the child to push the needle from the back to the front, pull the thread most of the way through, then repeat evenly along the line. Practise it on a scrap of felt for ten minutes before starting a project, so the motion becomes automatic.
Do children need a sewing machine for these projects?
No. Every project on this list can be completed by hand, and hand sewing is genuinely better for children under about seven because they can see the whole stitch at once. A machine only becomes useful once a child can sew a reasonably straight line by hand, usually around age eight, and even then an adult should run the machine for the first few sessions.
How can I make sewing safer for young children?
Pre-punch all holes and cut all shapes yourself, since sharp scissors and rotary cutters cause most injuries. Use blunt needles for younger children and keep sharp ones out of reach entirely. Work in good light at a clear table with no clutter, thread in a single clear colour so it is easy to see, and unplug or switch off the machine whenever nobody is sewing. Seat the child rather than letting them stand and sew downward.
How do I stop yarn and thread from coming loose while a child sews?
Knots are the weak point, so tie them twice and trim close. For yarn work, tape a paper strip to one end and wind the yarn round it, which stops the yarn from pulling out of the needle entirely. For ending off, run the thread through a few stitches on the back before knotting, and run yarn through the felt itself before tying, since felt grips the thread and holds it in place.
Start With One Simple Project
Pick the row in the table that matches your child’s age, then put everything on the table before they sit down. A project that starts with hunting for supplies loses about five minutes of attention a six-year-old will not get back.
If you want one safe starting point, make the felt heart ornament or thread the paper plate colour wheel first. Both finish inside half an hour, both use materials you probably already own, and both teach the single motion everything else builds on. Once a child can sew a neat line of even stitches without watching their own fingers, move up to the bookmarks or the scrunchie, and save the cloth doll for when they have two or three finished projects under their belt.
Keep the first few sessions short and let the finished object go home with them. Sewing sticks when the result is something they use, not something you made for them.