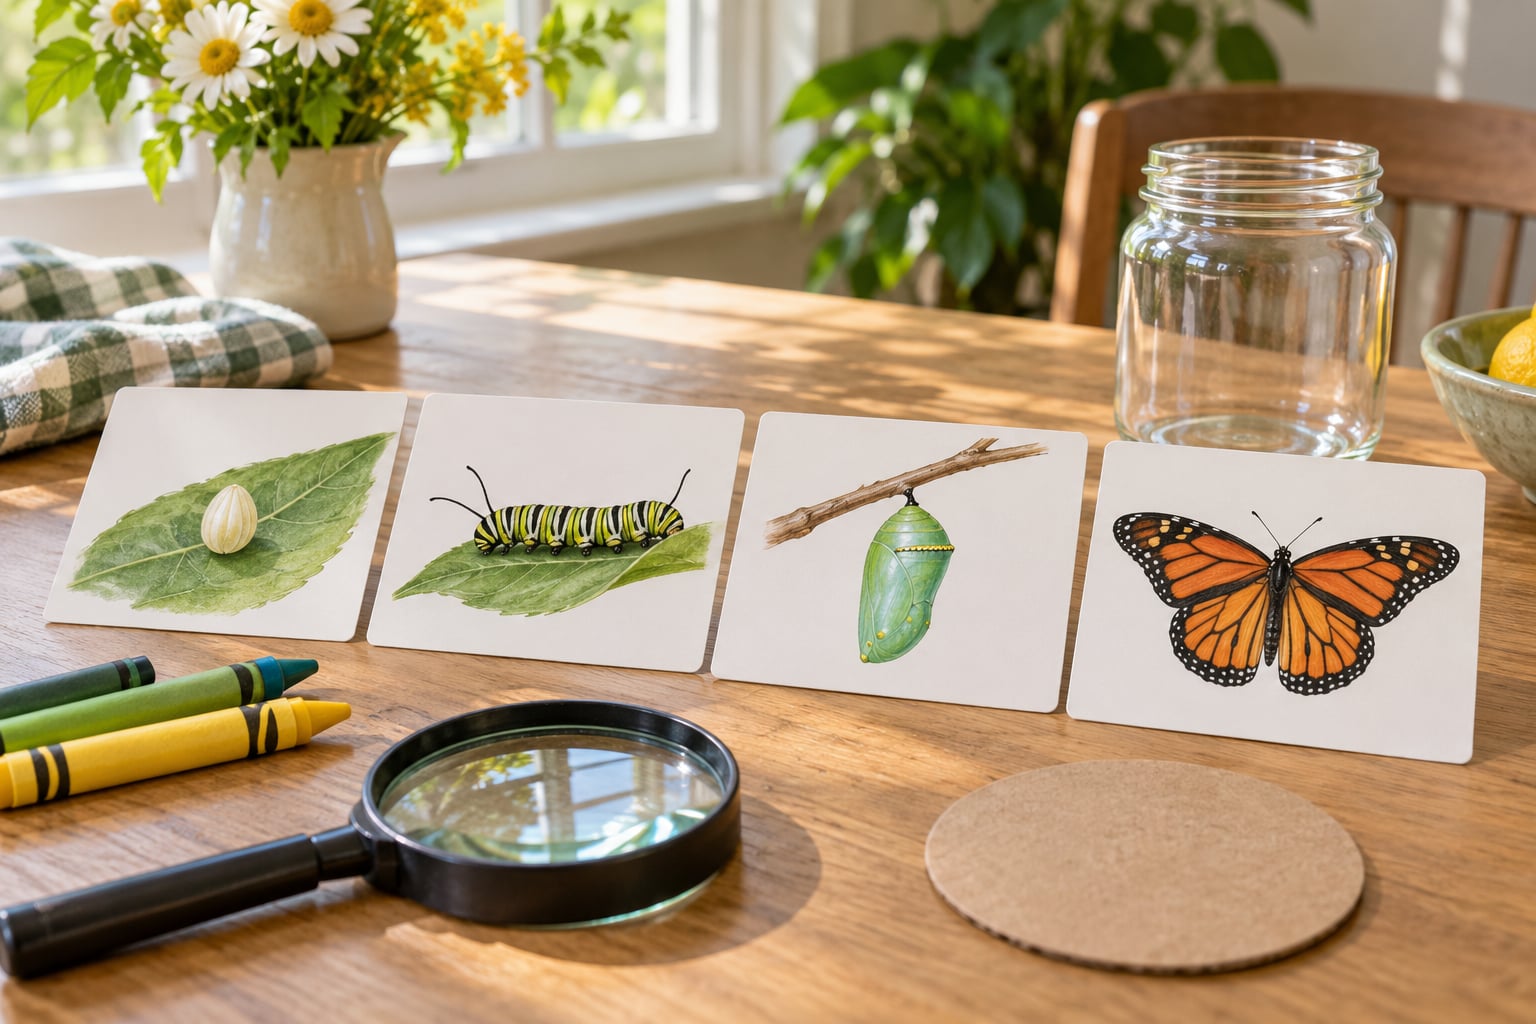
To teach the life cycle of a butterfly to kids, you only need four pictures and about three weeks. Show the four stages, let your child watch a real caterpillar change if you can, and finish with a craft they make themselves. The whole lesson costs almost nothing and works indoors.
A butterfly goes through four stages: egg, caterpillar, chrysalis, adult butterfly. That is called complete metamorphosis, and it is one of the clearest examples of a living thing rebuilding itself from scratch. Kids remember it because they watched it happen rather than read about it.
The catch is time. An adult butterfly usually lives only about two to four weeks after it emerges, so the whole project runs three to six weeks from egg to release depending on the species. Start it when you can give it a sunny spot on a windowsill and roughly ten minutes of attention each day.
Table of Contents
- What You Need
- Step-by-Step: How to Teach the Life Cycle of a Butterfly to Kids
- 1. Introduce the Four Butterfly Stages
- 2. Observe an Egg or Caterpillar
- 3. Compare the Caterpillar and Chrysalis
- 4. Track the Emergence of the Adult Butterfly
- 5. Sequence and Illustrate the Butterfly Life Cycle
- 6. Extend the Lesson With Questions and Play
- Common Mistakes
- Calling the chrysalis a cocoon
- Presenting the change as instant
- Handling the caterpillar too much
- Feeding the wrong plant
- Using grown-up words only
- Frequently Asked Questions
- How can I teach the butterfly life cycle to preschoolers?
- Do I need a live caterpillar to teach the butterfly life cycle?
- How long does it take a caterpillar to become a butterfly?
- What is the difference between a chrysalis and a cocoon?
- What age is appropriate for learning about butterfly metamorphosis?
- How can I check that my child understands the butterfly life cycle?
- Conclusion
What You Need
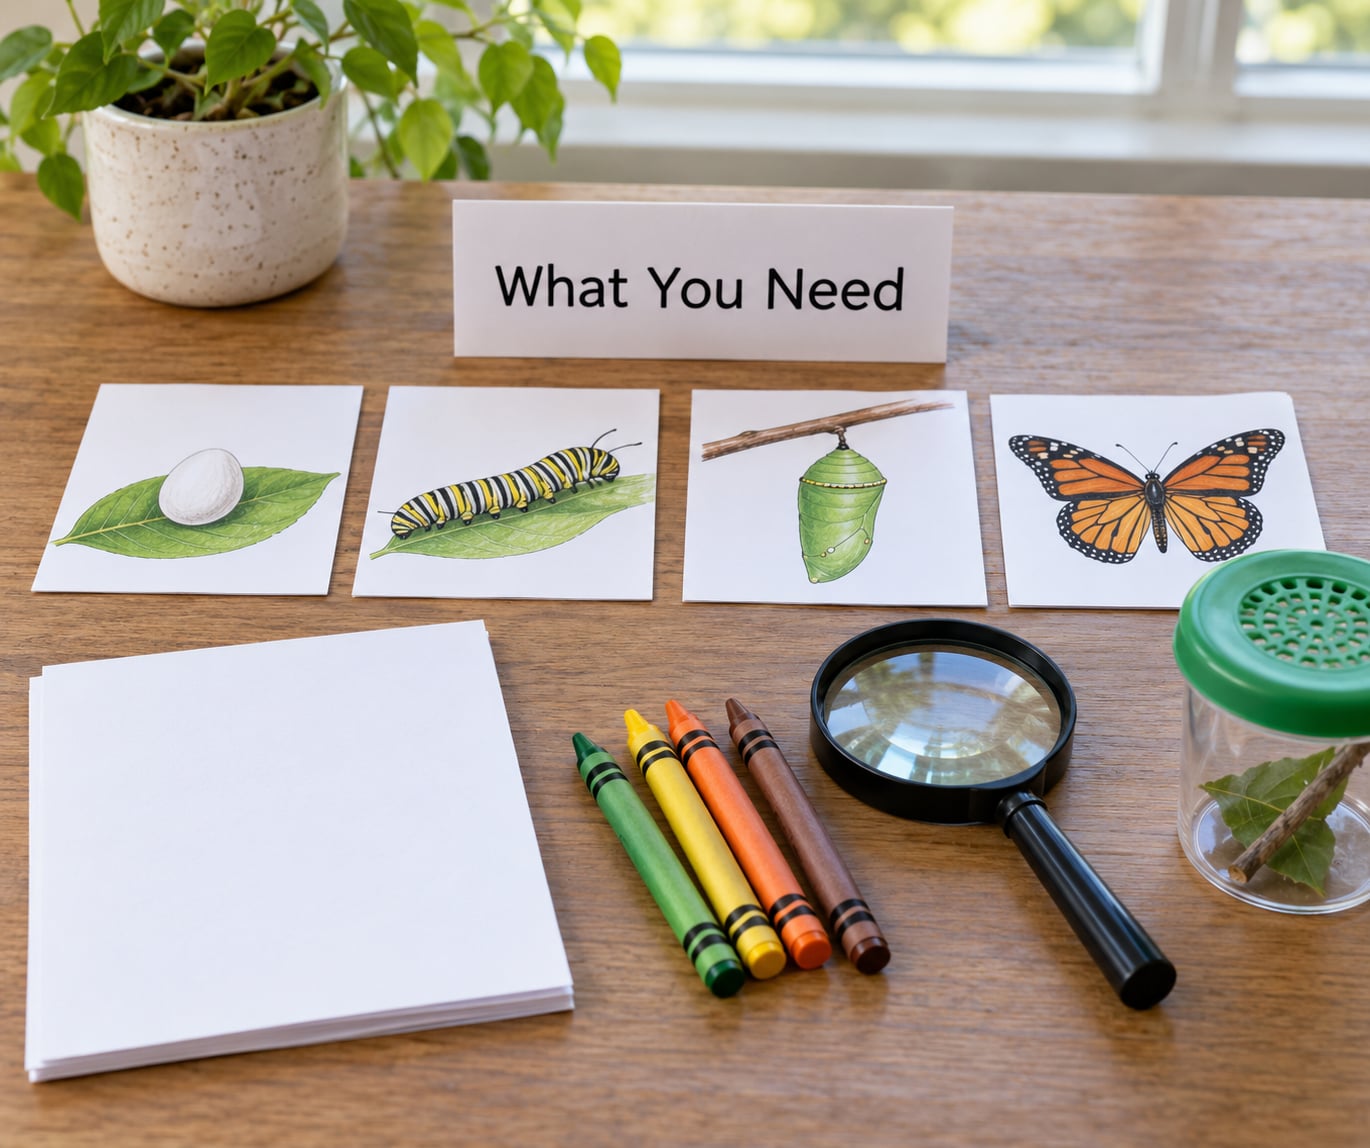
Everything you need is either free or already in a kitchen drawer. Nothing on this list requires a printer, which matters most for families without one.
- Four pictures, one each of an egg, a caterpillar, a chrysalis, and a butterfly. Photos on a phone work fine.
- Three or four blank index cards or scraps of card stock, plus crayons or colored pencils.
- A small clear container with a lid, a clean stick or pencil for the caterpillar to hold onto, and a paper towel to line the bottom.
- A magnifying glass for looking at legs, spiracles, and tiny markings up close.
- Fresh host plant leaves, a small cup of water, and scissors for cutting more each day.
- A jar or cardboard circle for a life cycle wheel, plus string for a paper-chain model.
- Optional: a butterfly picture book, a bug habitat from a school supply shelf, or a short explainer video on a tablet.
Step-by-Step: How to Teach the Life Cycle of a Butterfly to Kids
1. Introduce the Four Butterfly Stages
The butterfly life cycle has four stages, and naming them in order is the first thing your child should be able to do. Say the names, point to the matching picture, and let your child repeat them: egg, caterpillar, chrysalis, butterfly. Use “chrysalis” from the start, and add “pupa” later as the grown-up word for the same thing.
| Stage | What it looks like | How long it lasts | What your child does |
|---|---|---|---|
| Egg | Tiny, round, often on the underside of a leaf | About 3 to 5 days | Looks closely, counts the eggs, draws them |
| Caterpillar (larva) | Long, soft, striped, constantly eating | About 1 to 2 weeks | Measures, journals, changes the leaves |
| Chrysalis (pupa) | Still, jewel-like, attached underneath or on a twig | About 1 to 2 weeks | Checks quietly, predicts the day |
| Adult butterfly | Wings that start small and crumpled, then harden | About 2 to 4 weeks | Feeds on nectar, releases, retells the cycle |
You may have seen “five stages” in a children’s book. That version splits the caterpillar stage into hatching and growing. Four is the scientific answer, and you can mention the five-stage version when you read a book that uses it.
2. Observe an Egg or Caterpillar
Look at the egg or caterpillar without touching it, and let your child list what changes. How big is it? What is it doing? What is it eating? The questions matter more than the answers.
Live caterpillars are optional. If you get them, a classroom or school supply supplier is more reliable than a kit from a discount aisle, because species are often mislabelled. Set up the container with a stick laid across the top, line it with a paper towel, and mist the wall lightly once a day. Keep it out of direct sun and away from drafts.
What to feed them depends entirely on the species, and this is where most home-reared caterpillars die. Monarchs eat milkweed and nothing else. Black swallowtails eat dill, fennel, or parsley. Cabbage whites eat brassicas such as kale and broccoli. Fresh host plant leaves in a cup of water, replaced daily, are the whole menu. Prepared food, and leaves picked from a park, do not work.
3. Compare the Caterpillar and Chrysalis
The caterpillar sheds its skin one last time and attaches itself in a J shape, then hardens into a chrysalis. Inside, most of its body breaks down into liquid and rebuilds. That is the part children find hardest to believe, so say it plainly: it stops being a caterpillar and becomes something else.
Have your child draw the caterpillar beside its own chrysalis and label the two shapes. Do not handle a chrysalis to show it off. If it is on a stick, move the whole stick, and keep it out of reach of curious siblings.
4. Track the Emergence of the Adult Butterfly
One morning the chrysalis will look transparent, and the butterfly’s wing pattern will show through like a stained window. Watch for that instead of for the moment itself, since the actual eclosion usually happens while nobody is looking.
Play the emergence on a phone if you miss it, then let your child narrate it. The butterfly hangs upside down and pumps fluid into its crumpled wings for a couple of hours before they straighten. Only when the wings look firm is it ready to fly.
Set up a nectar station outside: one part sugar to ten parts water, on a shallow dish with a stick laid across it. Real butterflies usually live about two weeks after emerging, so release within a day or two, in warm daylight and away from birds.
5. Sequence and Illustrate the Butterfly Life Cycle
Shuffle the four cards and ask your child to put them in order. Then make a life cycle wheel by cutting a cardboard circle into quarters, gluing one stage in each quadrant, and adding a paper arrow back to the start. That arrow matters. It shows the cycle repeats rather than ends.
A paper chain is the better version for older children: one loop per stage, a drawing on each, and a small written label. Add the timeline underneath. Counting the days as your child does math quietly is one of the nicest side effects of this project.
6. Extend the Lesson With Questions and Play
Different ages carry very different weight in the same activity. Use this to set what you expect, not to limit what they try.
| Activity | Toddler (2 to 3) | Preschool (4 to 5) | Kindergarten (6) | Grade 3 and up |
|---|---|---|---|---|
| Naming the stages | Two stages, egg and butterfly | All four, in order | All four plus pupa | All four, with metamorphosis defined |
| Sequencing cards | Point and say it together | Place them in order | Place and explain why | Place, then narrate the cycle |
| Observation journal | Sketch only | Date each drawing | Date, measure, describe | Measure, graph, compare species |
Questions that stretch thinking: which stage does most of the growing, why is the chrysalis attached upside down, and what would happen if the caterpillar had no host plant. For play, let your child build a pretend habitat from an egg carton and a toilet roll tube, then act out each stage with a sock puppet or a paper bag puppet.
Finish by reading a picture book. Eric Carle’s The Very Hungry Caterpillar is the one most children already know, and Maria Merian’s work, reprinted as Summer Birds, gives older children a seventeenth-century naturalist’s view. Let your child retell the cycle to you without the cards in hand. That retelling is the real test.
Common Mistakes
Almost every problem in this lesson has a simple fix, and most come from rushing it.
Calling the chrysalis a cocoon
A chrysalis is made by the butterfly itself; a cocoon is spun by the insect from silk. Fix: say chrysalis from day one, and use the five-finger hand trick to show a chrysalis is a shell, not a wrapped bundle.
Presenting the change as instant
Children who miss the two-week caterpillar stage assume a caterpillar simply turns into a butterfly overnight. Fix: keep a dated journal with a drawing every two to three days, and put the two drawings side by side at the end.
Handling the caterpillar too much
Picking a caterpillar up transfers oils from fingers, and a chrysalis moved around will not attach properly. Fix: hands off, container on a tray, and the child observes through the plastic.
Feeding the wrong plant
Milkweed will kill a swallowtail caterpillar and dill will kill a monarch. Fix: identify the species before you bring anything home, and if you cannot identify it, keep looking and photograph it instead.
Using grown-up words only
Metamorphosis, pupa, and eclosion are useful later, but they crowd out understanding at first. Fix: teach egg, caterpillar, chrysalis, butterfly, then add one grown-up word at a time.
Two more things worth knowing. Caterpillars frequently die for reasons no parent can fix, and it happens often enough that teachers expect it, so treat it as part of the lesson rather than a failure. And milkweed grows back from its root crown once the monarchs stop eating, so a stripped plant is not a dead plant.
Frequently Asked Questions
How can I teach the butterfly life cycle to preschoolers?
Use four pictures and a repeatable story. Say egg, caterpillar, chrysalis, butterfly while pointing to each picture, then let your child repeat the names and shuffle the cards back into order. Preschoolers learn the sequence in one or two sessions. Add a paper-plate life cycle wheel they can spin, and keep the words simple. Jargon like pupa and metamorphosis can wait until later.
Do I need a live caterpillar to teach the butterfly life cycle?
No. Four accurate pictures, a magnifier, and a craft teach the whole cycle, and many classrooms run the lesson that way every year. Live caterpillars make the change unforgettable, but they also add humidity, host plant, and timing problems. If you want one, get the species named before you buy, and raise it outdoors on a host plant where possible.
How long does it take a caterpillar to become a butterfly?
Roughly two to three weeks from egg to adult for a monarch, and three to four weeks for most swallowtails. The caterpillar stage eats up about half of that, and the chrysalis stage usually takes one to two weeks. A female butterfly then lives only about two to four weeks. Plan a three to six week window, longer if you are waiting for eggs to hatch on a garden plant.
What is the difference between a chrysalis and a cocoon?
A chrysalis is the hard case a butterfly makes from its own body, split at the top so the adult can push out. A cocoon is a silken bag spun from a thread the insect produces, like the ones moths make. Moths often cocoon, butterflies almost always form a chrysalis. Correcting this early saves children from repeating it.
What age is appropriate for learning about butterfly metamorphosis?
From about two years old, using two stages and lots of pointing. By four or five, children can sequence all four stages and draw them. Kindergarteners can date a journal and measure growth. Third graders and up can compare species, define metamorphosis, and explain what is happening inside the chrysalis. The same lesson works at every age, only the expectations move.
How can I check that my child understands the butterfly life cycle?
Hide the pictures and ask your child to lay out the four stages in order, then ask them to tell you what happens in each one. Ask what a caterpillar eats and where a chrysalis is attached. If they can sequence, name, and retell the cycle without help, the lesson landed. Vague answers usually mean the pictures are still doing the work, so try a second retelling a few days later.
Conclusion
Teaching the life cycle of a butterfly to kids works because the evidence arrives on its own: a caterpillar eats, hangs still, and comes out with wings. That sequence is the lesson, and everything you add is support for it.
Start today with the smallest version. Find four pictures of an egg, a caterpillar, a chrysalis, and a butterfly, shuffle them, and ask your child to put them in order. Then talk about what comes next. Updated for 2026, this is a three-to-six week project you can begin with materials already in the house.