Oil pastels are one of the quickest ways for a beginner to get color onto paper, but the first hour is usually where people give up. The fix is simple: learn a relaxed grip, use light pressure, layer colors instead of grinding them together, and blend only the areas that need it. Seven short exercises on one sheet of textured paper will teach you more than an afternoon of scribbling.
What makes the medium friendlier than crayons or colored pencils is the binder. Oil pastels are pigment suspended in a wax-and-oil mix, which means they smear, blend and stick with a light touch, no solvent and no water. That same stickiness is why they smear on your coffee table later, so a sealing spray matters once the drawing is done.
This guide is written for parents, caregivers, teachers and anyone learning alone at a kitchen table. No art background, no expensive kit. If you have a box of sticks, some paper and twenty minutes, you can work through the whole thing.
Table of Contents
- What You Need
- Choosing Materials for Oil Pastel Techniques for Beginners
- Step-by-Step
- 1. Set Up a Simple Practice Area
- 2. Learn a Comfortable Grip
- 3. Practice Pressure and Stroke Control
- 4. Layer Colors Instead of Mixing Them
- 5. Blend Select Areas Without Turning Everything Muddy
- 6. Add Highlights and Dark Contours
- 7. Complete a Simple Beginner Project
- Common Mistakes
- Frequently Asked Questions
- What paper is best for oil pastels?
- How do I fix an oil pastel drawing after it smudges?
- Can you use water to fix oil pastel artwork?
- Are oil pastels safe for young children?
- What is the easiest first oil pastel project?
- Start With One Small Practice Sheet
What You Need
You can start with very little. Most beginners already own something usable in a kitchen drawer, and a full art kit is not required.
Choosing Materials for Oil Pastel Techniques for Beginners
The single most important choice is paper. Oil pastel pigment needs something with tooth, meaning a surface with grain that the wax can grab onto. Smooth printer paper lets the stick skate across the top and leaves almost nothing behind, which is the number one reason beginners think they hate the medium. Something around 200gsm or heavier with a visible grain works, and cold-press watercolor paper is an easy, widely available option.
On the sticks themselves, read the label rather than the packaging. Student-grade oil pastels are harder and waxier, closer to a crayon, and they hold a point without bending. Artist-grade soft oil pastels bend at the first touch, lay down more pigment and blend far more willingly, and the colors are noticeably deeper. A small set of eight to twelve soft sticks teaches more than a cheap box of twenty-five hard ones.
Oil pastels are also not soft pastels and not crayons, even though all three get called pastels. Soft pastels are dry powder bound with little or no oil, so they need a fixative and they shed dust. Crayons are waxier still and mostly fill in shapes rather than blend. Oil pastels sit in between: oily enough to smudge, solid enough to hold a line.
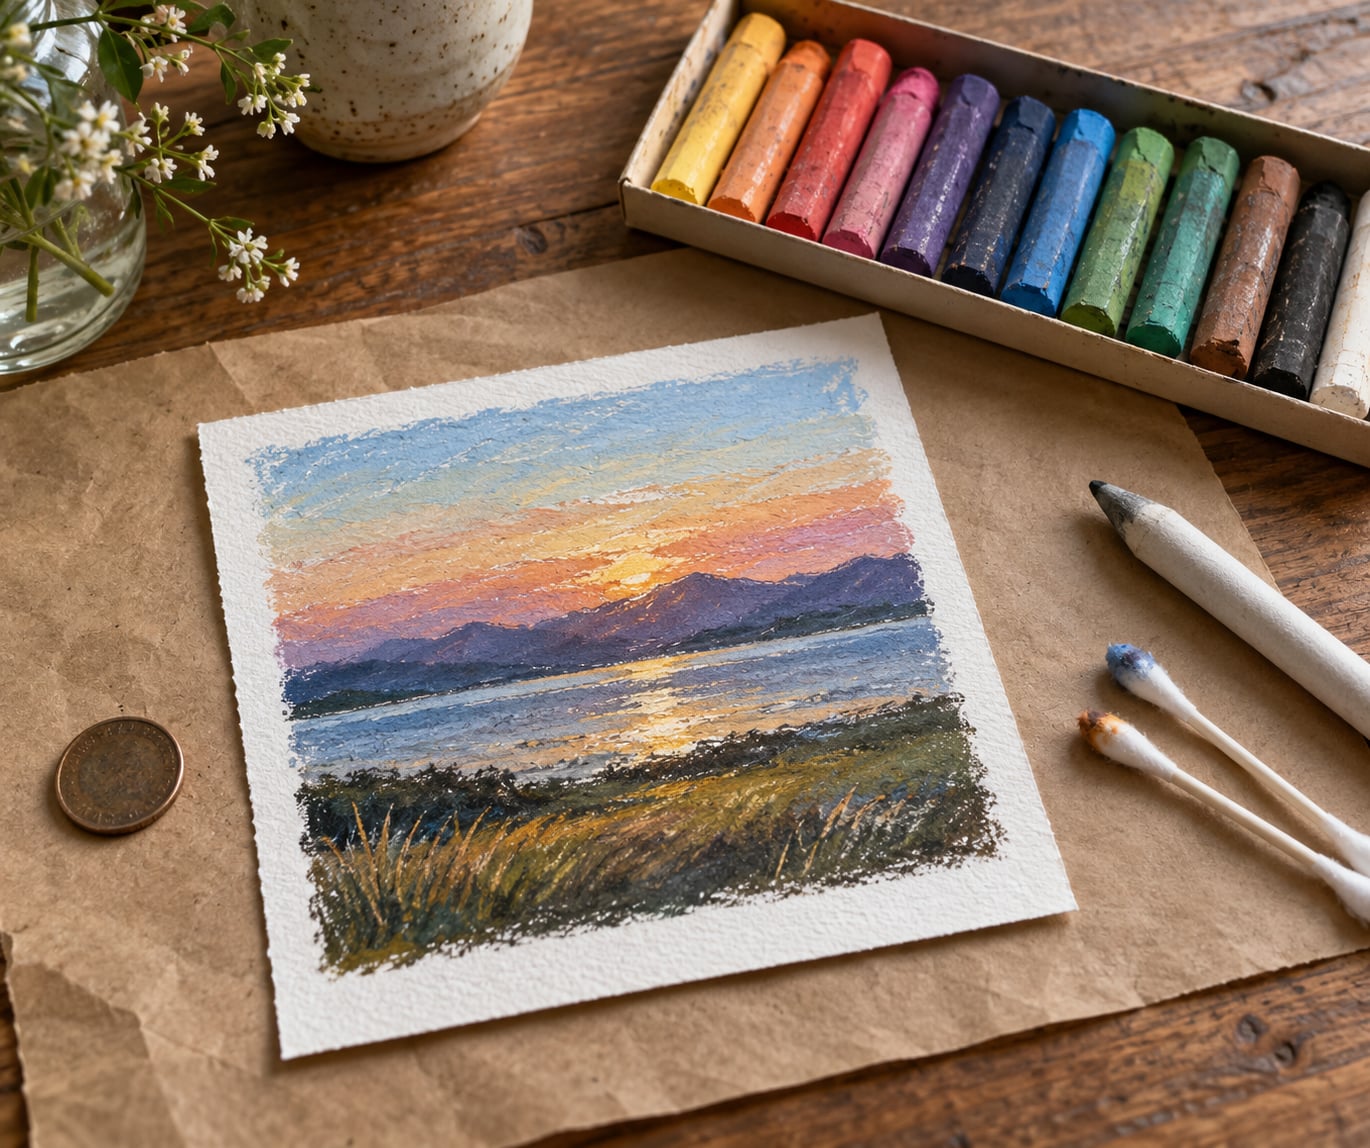
For tools, keep it minimal. A blending stump or tortillion, a few cotton swabs, a scrap of paper towel, a small cloth for your hands, and something to lift color with, such as the tip of a craft knife or a coin held flat. A colorless blender pencil works nicely too, but it is not essential. Keep a cloth for your hands and cover the table, because that is what separates a pleasant first hour from a cleanup job.
Step-by-Step
Work through these in order on one sheet of textured paper, or across several small pieces if you prefer. Each one takes a few minutes.
1. Set Up a Simple Practice Area
Put down a sheet of scrap paper or a plastic tablecloth first, because pigment transfers to hands and clothing almost immediately. Lay out no more than six sticks at a time. Too many colors on the table is how beginners end up smearing everything into a brown patch.
Test each stick on the corner of the scrap paper. The mark tells you how soft the stick is, how much pressure it takes, and whether it grabs the surface. You are looking for a mark with color in the middle of the stroke, not a chalky scratch.
It worked if the test marks look like color sitting on the paper rather than dust sliding off it.
2. Learn a Comfortable Grip
Hold the pastel about two thirds of the way down, not at the very tip. A loose hold, with your wrist doing most of the moving, gives you the short controlled marks that make small shapes readable. Tighter, lower grips help with long confident lines, so change position rather than pressing harder.
Keep the side of your hand off the paper. Resting it smears everything within reach, and that is the habit most beginners need to unlearn first.
It worked when your lines start and stop cleanly instead of fading in and out at both ends.
3. Practice Pressure and Stroke Control
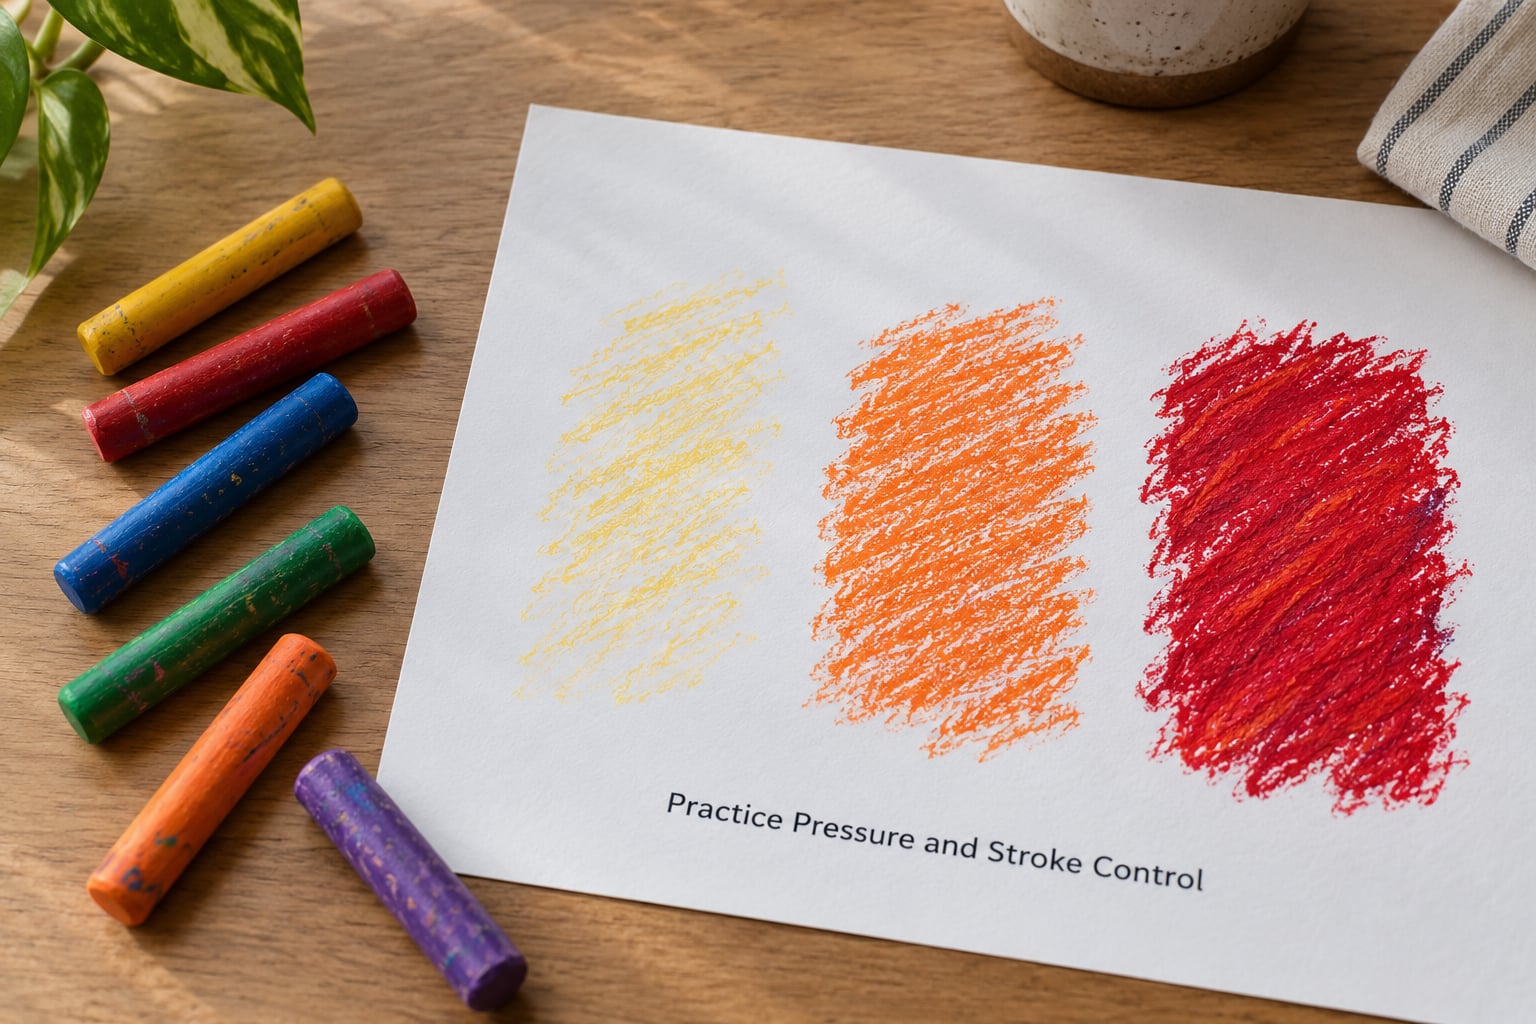
Draw the same line three ways. Light pressure gives a thin, grainy line where the tooth shows through. Medium pressure gives an even, saturated line. Heavy pressure bends the stick, flattens the tip and lays down a thick, raised mark you can almost feel.
On the same sheet, add short strokes, long strokes and hatching, which is rows of closely spaced parallel lines. Hatching darkens a shape without adding another color, and it is a fast way to build shadow when you do not yet trust your color mixing.
It worked if you can produce all three weights on purpose and can see the paper grain through the lightest one.
4. Layer Colors Instead of Mixing Them
Rubbing two colors together on the paper is what turns things muddy. Layering gets you the same result while keeping each hue intact. Lay down a light layer of one color, then a light layer of the next directly over the top, and keep adding passes until the color reads as one.
Press gently for the early passes and firmer only when you need opacity. Heavy pressure on the first layer drags the stick sideways and picks up the paper, which is how a nice shape turns scratchy.
If you want a soft gradient in a sky, lay three or four thin passes with the colors overlapping about halfway each time, then soften the band where they meet with a blending stump.
It worked when your colors stay bright instead of drifting toward grey, which is the clearest sign layering is doing its job.
5. Blend Select Areas Without Turning Everything Muddy
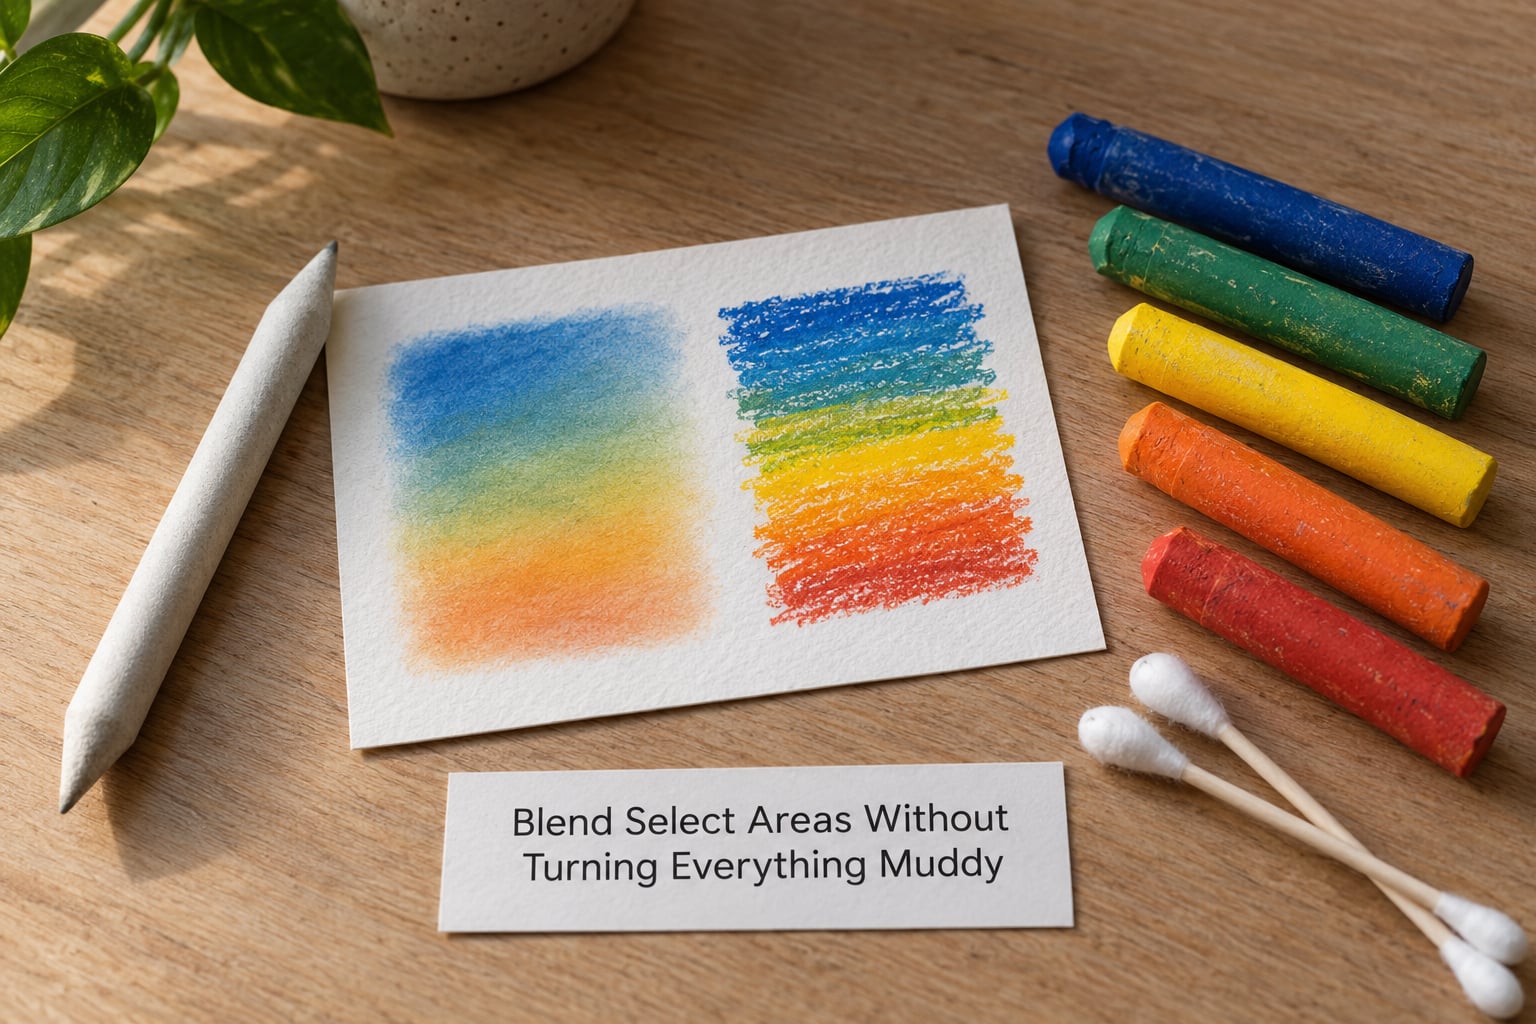
Blending is a tool, not a default. Decide which areas need to be soft, usually skies, skin tones or anything that should flow into what is next to it, and leave the rest alone. Objects with a defined edge look worse, not better, when you smear them.
Use a blending stump for controlled work in small areas, a cotton swab for larger flat patches, and a fingertip only for the broadest blends. Scrape the tool against the scrap paper between colors so you are not dragging one hue into the next, and keep a clean cloth handy because your hand will pick up everything you touch.
When something resists blending, three things are usually to blame: not enough pressure, a cold stick, or paper that is too smooth. Warm the stick between your palms for a few seconds and try again before you assume the pastels are faulty.
It worked if the blended area shifts gradually from one color to the next with no visible band or streaks.
6. Add Highlights and Dark Contours
Since oil pastel is opaque, highlights come from removing color rather than adding white paint. Once a shape is fully layered, scrape gently across it with the flat tip of a craft knife or a coin held on its edge. The paper underneath comes back as a fine bright line. This is called sgraffito, and it works best on hills, hair, water and grass.
For darker accents, press hard with a deep brown, dark blue or black rather than a pale color. Hold the pastel on its side for a broad outline and on its edge for a thin one. Small dots pressed with the stick tip read as texture in grass, foliage and water.
It worked if your highlights are clean lines of paper rather than smudged white smears, and if your darks sit on top of the layers instead of under them.
7. Complete a Simple Beginner Project
A short landscape or a sun-and-cloud scene uses every technique above and stays small enough to finish. Lay your drawing out first in a light pastel, sketch roughly, then fill in sky, then ground, then details.
Layer the sky from light to dark in thin passes, blend only where two colors meet, and scrape back a few highlights across it. Build the ground with hatching and heavier pressure, keep a crisp edge along the horizon, and finish with dark contours on the nearest object. That is your finished piece.
Judge it on three things: colors stayed bright, edges are intentional rather than accidental, and you used at least one scraped highlight. Your first attempt is supposed to look plain. If you can name those three things, the sheet did its job.
Common Mistakes
Almost every frustrating first drawing comes down to one of a handful of fixable habits.
Pressing too hard from the start. Heavy pressure flattens the tip and drags the stick across the grain, so the line goes scratchy and uneven. Fix it by starting every mark at the lightest pressure you can and adding force only at the end of a stroke.
Blending everything. The more colors you physically rub together on the page, the closer they move toward grey-brown. Set a rule for yourself: blend two colors at a time, never four, and leave shapes with defined edges unblended.
Dirty stick tips. A tip that has touched blue will carry blue into your next yellow. Wipe or scrape the tip on the scrap paper whenever you change colors, and use a separate stick for the whites and any skin tones.
Losing your highlights. Once a shape is covered, you cannot paint white back on except by lifting. Work out where the highlights go early, and scrape them at the end rather than blending over them.
Uneven layers. Patches of heavy and light color read as mistakes rather than texture when they are accidental. Keep pass number two as light as pass number one, and check the whole shape from arm’s length before you press harder.
Leaving the work unsealed. Oil pastel never fully dries, so finished pieces pick up dust, stick to other surfaces and rub off on fingers. When the drawing is complete and you are happy with it, spray an oil pastel fixative from about 30cm away in a well-ventilated room. Regular pastel fixatives will haze the color and are not a substitute.
Smudging with your hand. Keep a cloth within reach and use the side of your palm rather than dragging fingertips across the page. This one habit fixes most ruined sheets.
A useful practice routine: five minutes of pressure lines, five minutes of layering two colors, five minutes of blending one small area. Do that on a scrap sheet a few times and the pressure control starts to come naturally.
Frequently Asked Questions
What paper is best for oil pastels?
Choose something textured and fairly heavy, around 200gsm or more, with a visible grain. Cold-press watercolor paper works well because the tooth catches the pigment. Smooth printer paper, copy paper and most sketchbooks with a fine finish will not hold color well, and the stick will slide across the surface without leaving much behind.
How do I fix an oil pastel drawing after it smudges?
You cannot undo smudging, but you can stop it spreading. Put the sheet face up on a flat surface and do not touch the area again. If the pigment is lifting onto other things, dust a thin layer of cornstarch over the spot, leave it for an hour, then lift the powder gently. A light fixative spray will set the area once it is dry.
Can you use water to fix oil pastel artwork?
No. Water does nothing useful with oil pastels because the binder is wax and oil, not gum like watercolor. Wetting the surface only spreads the pigment into a thin, greasy film that will never dry. If you want a softer, more fluid mark, blend the pastel while it is still soft using a stump or cotton swab rather than adding liquid.
Are oil pastels safe for young children?
Non-toxic oil pastels are made for children and are generally fine to use, but they are not edible and the sticks are small enough to be a choking risk for toddlers. Wash hands afterwards, since the pigment transfers easily, and keep clothing and surfaces covered because wax rubs off. Supervise younger children and check the label to confirm the set is certified non-toxic.
What is the easiest first oil pastel project?
A simple landscape with a sky and a horizon line is the easiest place to use every basic technique. The sky gives you a large area for layering and blending, the horizon gives you a crisp edge that teaches restraint, and the foreground is a safe place for hatching and dark contours. A sun-and-cloud scene on a single sheet usually takes twenty minutes.
Start With One Small Practice Sheet
Do this tonight. Pick four sticks, a sheet of textured paper and a scrap of paper for testing.
Draw the same line at light, medium and heavy pressure. Then layer two colors over each other in thin passes instead of mixing them, and blend only one small patch with a cotton swab. Scrape a highlight through it with the flat tip of a coin.
Look at the sheet honestly. That tells you whether your problem is pressure, layering or paper tooth, and each one has a different fix. Once those three moves feel ordinary, put them into a small landscape and you have a finished oil pastel drawing, which is a much better way to learn these oil pastel techniques for beginners than any supply list.