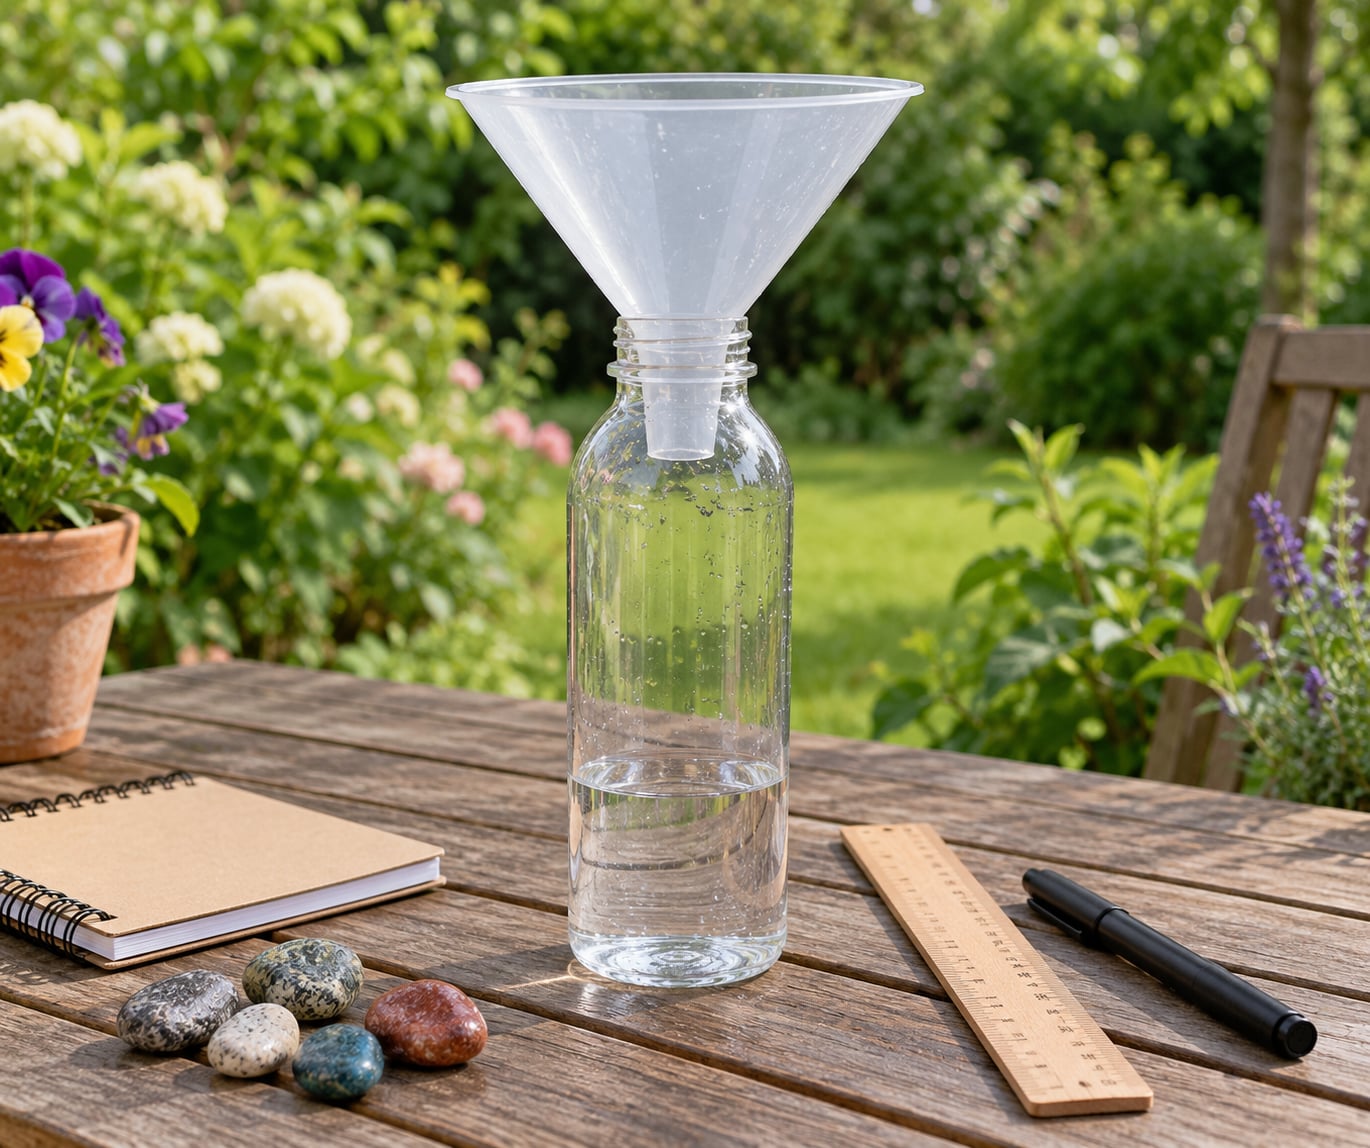
To make a rain gauge with kids, you need a straight-sided clear container, a wide funnel on top, a ruler or tape measure, and a permanent marker for the scale. Cut the bottle, weigh the base, mark the millimetre lines, mount it in an open spot, and read the water after every shower. Most families build it in about 30 minutes with things already in the kitchen drawer.
It is the kind of project where the first rainy day feels like a result. A homemade rain gauge turns a dull morning into real measurement practice, and the numbers your child reads off the bottle are the same kind of numbers a weather station records.
Table of Contents
- What You Need
- Step-by-Step: How to Make a Rain Gauge with Kids
- 1. Choose the container: the first step in how to make a rain gauge with kids
- 2. Make the measuring scale
- 3. Mark the rain level
- 4. Add the funnel and secure the gauge
- 5. Record and reset the gauge
- Common Mistakes
- Frequently Asked Questions
- What container is best for a homemade rain gauge?
- Should I measure rain in inches or centimeters?
- Where should I place a rain gauge with kids?
- How accurate is a DIY rain gauge?
- How often should children empty the rain gauge?
- Can we turn this project into a longer weather activity?
- Conclusion
What You Need
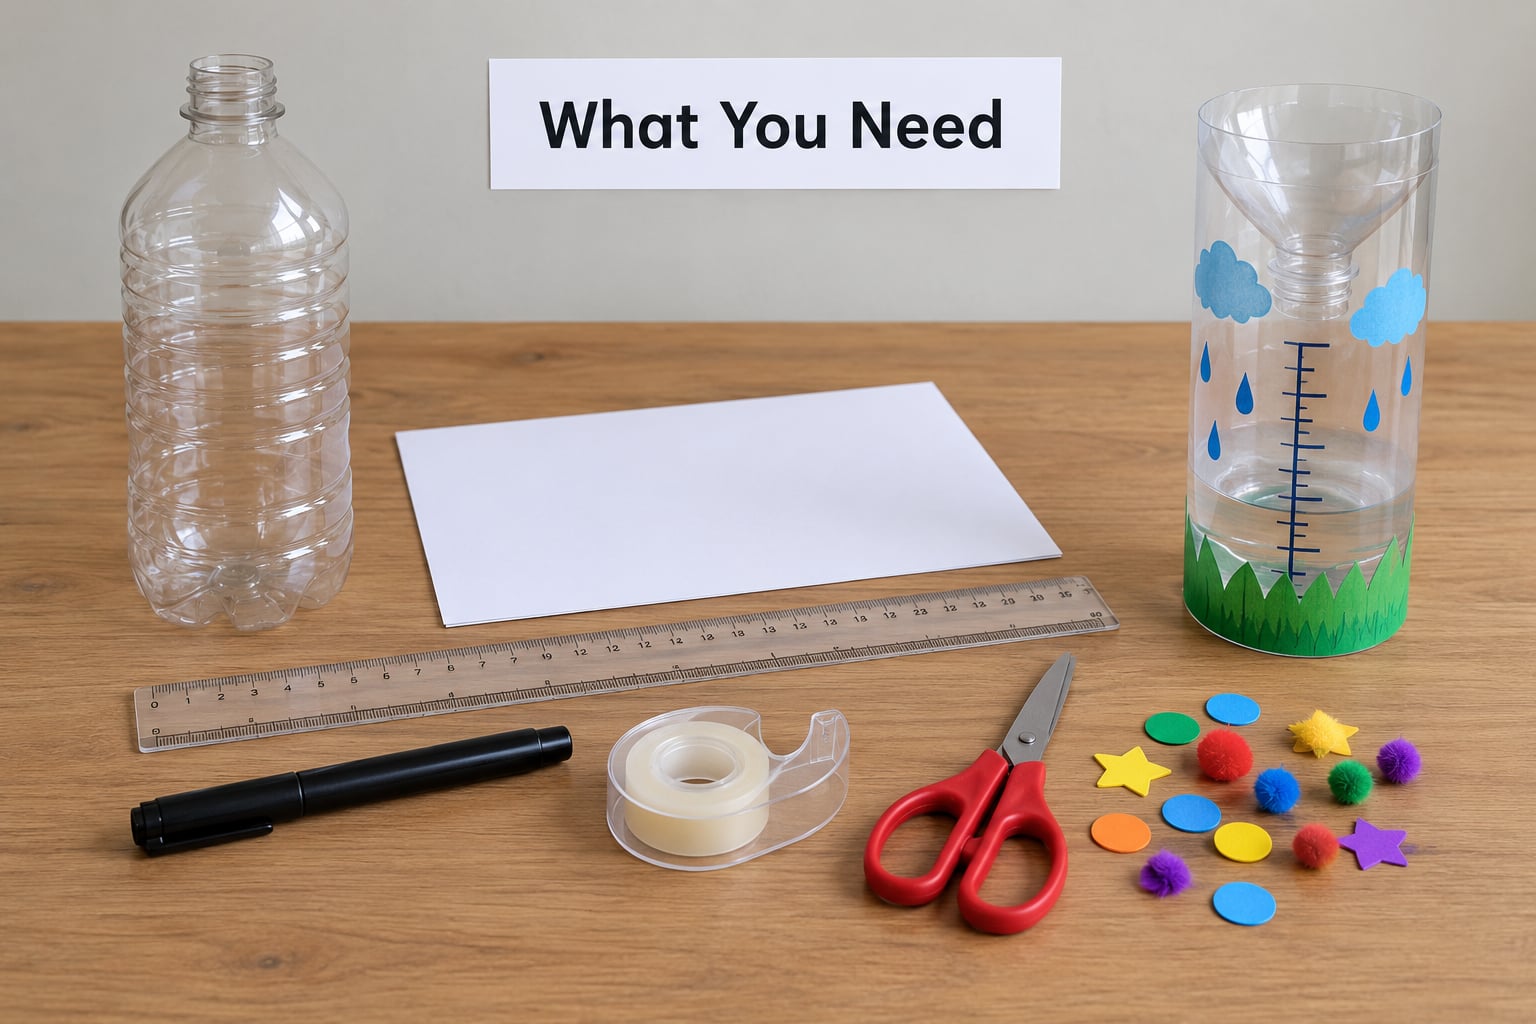
Almost everything comes from a recycling bin or a craft drawer. Nothing here is specialised, which is exactly why this works on a weeknight.
- A clear straight-sided bottle or jar, roughly one to two litres
- A funnel, or cardstock and tape to make one
- A ruler or tape measure
- A permanent marker or waterproof paint pen
- Scissors or a craft knife, plus waterproof tape
- A handful of pebbles, marbles or dry sand for the base
- A small notebook or printed sheet for the weather journal
Substitutions are easy. A washing-up bottle works if the body below the shoulder is straight. A jam jar works if you have a funnel that fits its mouth. For weight, coins in a small tied plastic bag, or even a few screws, sit at the bottom and keep the gauge from tipping in a gust.
An adult should handle the cutting, especially with younger children. Everything else is fair game for small hands.
Container shape matters more than any other choice, because the water level only tells you the rainfall if the walls stay parallel from bottom to top.
| Container | Accuracy | Difficulty | Best for |
|---|---|---|---|
| Straight-sided plastic bottle | Good, if you cut below the shoulder | Easy | Everyday families, older kids can help mark |
| Wide-mouth mason jar | Very good | Easy | Gardens, because it looks tidy outside |
| Tall clear jar | Very good | Easy | No cutting at all, so good for ages 4 to 6 |
| Large test tube | Excellent, fine scale | Needs a steady hand | Older children who want to compare storms closely |
| Large bucket | Fair, hard to read small amounts | Easy but bulky | Adults tracking a whole garden bed |
A bucket catches a lot of water but the scale lines end up far apart, so light drizzle reads as nothing at all. That is fine for an adult watering schedule, not for a child reading a storm.
Step-by-Step: How to Make a Rain Gauge with Kids
1. Choose the container: the first step in how to make a rain gauge with kids
Pick a clear container whose sides run straight up and down for most of its height. On a bottle, that means the wide lower body, so measure your scale below the shoulder where the walls pinch in.
If the walls curve or taper, the same depth of water spreads across less and more space as the level rises, and your reading drifts off. That is the single most common reason a homemade gauge feels wrong.
2. Make the measuring scale
Have an adult cut the top off the bottle about five centimetres below the cap, then turn it upside down so the neck becomes the funnel. Tap the cap back on loosely so nothing can fall in, and leave a hole in the cap for the water to pass through.
Now mark the scale. Hold the bottle upright and measure from the very bottom, not from the cut edge. Draw a bold zero line there, then mark every centimetre upward with a long line, and every half centimetre with a short one.
Write the numbers beside the long lines in permanent marker. If you mark from the top down, the child will spend the whole project subtracting instead of watching the rain.
An adult-only cutting step first, then everyone can mark and number together.
3. Mark the rain level
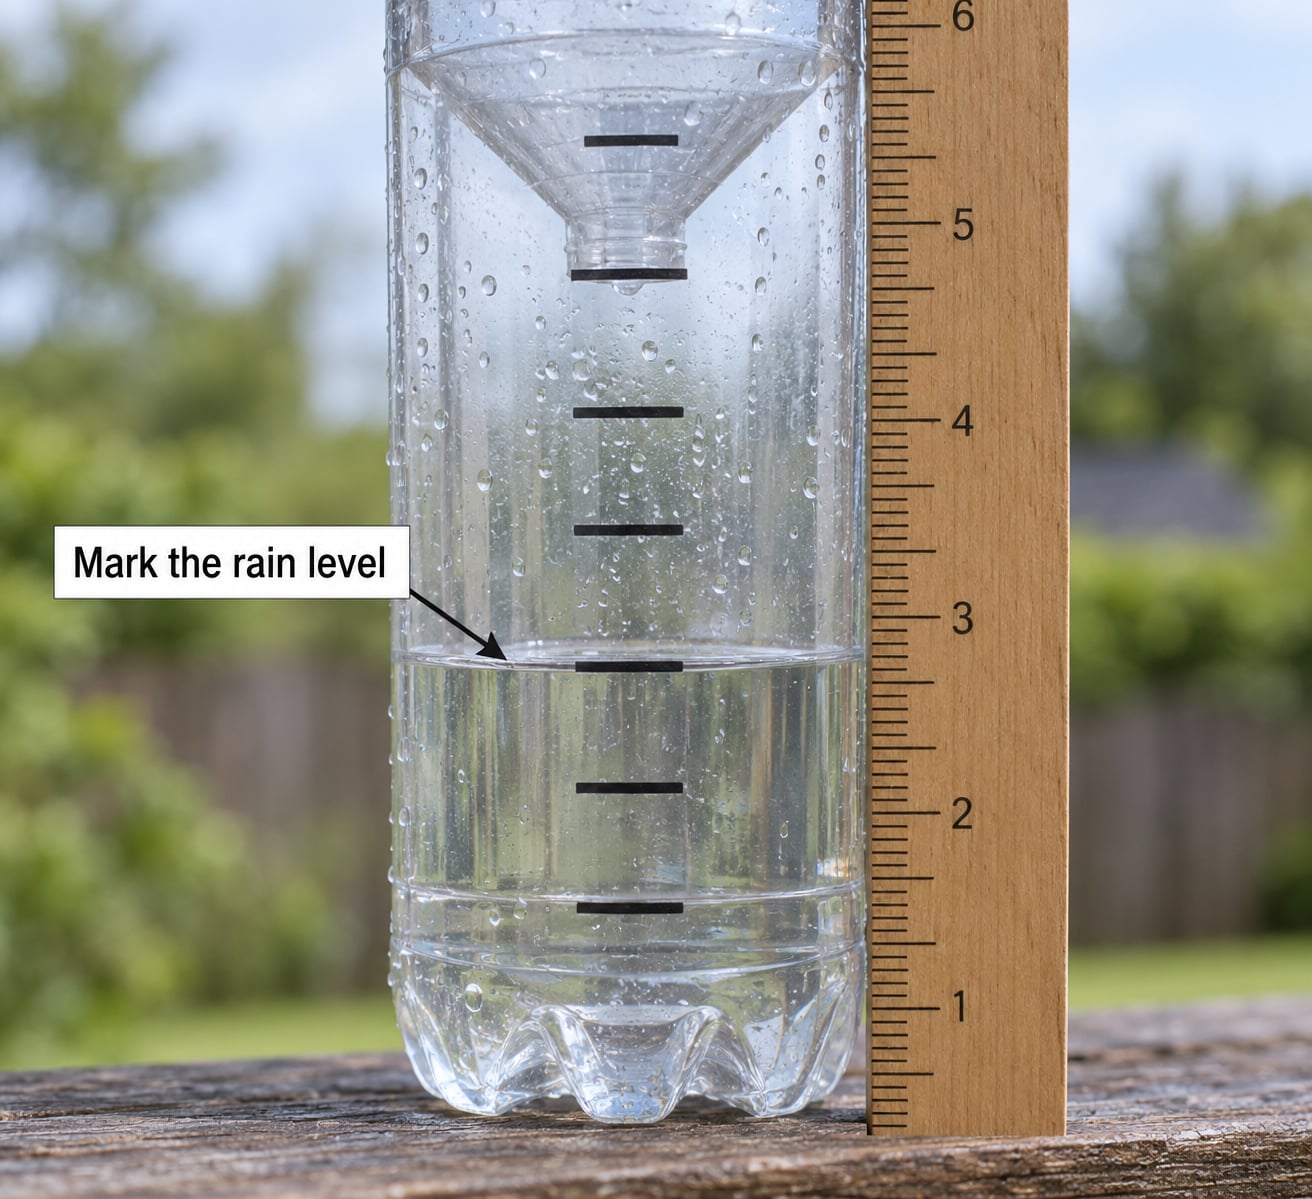
Add pebbles, marbles or sand until the base is covered by a centimetre or two, then check that the bottle still stands without tipping. If you want a flat, stable floor, melt some coloured jelly in a saucer and lay the open bottle upside down into it until it sets.
Now pour a known depth of water in, say five centimetres, and mark that line. A reference line like that gives your child something concrete to check the ruler against, and it makes the scale easier to read later.
Pour the test water out and dry the bottle. From here on, the base weight is not rainfall.
4. Add the funnel and secure the gauge
Drop the inverted neck into the bottle so its rim rests flat against the cut edge and sits inside the straight wall section. If it wobbles, wrap the neck in tape or push a couple of pebbles against it until it stays put.
Tape any seam that drips. A small leak is easy to miss on a cloudy day and then the child blames the gauge, not the tape.
Outside, put the gauge in an open, level spot away from trees, roof edges, walls and sprinklers. If wind has ever tipped a bottle over for you before, wedge it between two flower pots or tie it to a wooden stake pushed into the ground.
5. Record and reset the gauge
After each shower, have your child crouch so their eyes are level with the water, then read the line where the surface meets the scale. Looking down from above bends the light and makes the level look higher than it is.
Write the date, the reading in millimetres and one weather note in the journal. When the reading is done, empty the bottle and wipe it dry, otherwise the next storm arrives already part full.
Over a month you get a proper weather journal, and graphing those daily totals into a bar chart is the natural next step for an older child.
Common Mistakes
Most disappointing homemade rain gauges are fixable, and when a set of them fails, the cause is almost always in the setup rather than the weather. These are the mistakes that turn how to make a rain gauge with kids into a frustrating afternoon instead of a good one.
- A curved or tapered bottle. Cut below the shoulder, or switch to a straight-sided jar. Readings drift otherwise.
- Measuring from the cut edge. Start the zero line at the true bottom of the container or every number afterwards is wrong by a few millimetres.
- No base weight. Marbles, sand, coins in a tied bag or a garden stake keep it upright when a gust arrives.
- A funnel that rocks loose. Seat the neck fully inside the straight wall section and tape the rim where it touches the bottle.
- Placement under a roof edge or tree. Drip from eaves soaks the gauge and leaves blown into the funnel add water that never fell as rain.
- A loose cap or open bottle. Leaves and insects get in, and evaporation quietly lowers the reading in warm weather. Check it weekly, wipe out debris, and let the reading stand rather than topping the water back up.
- Forgetting to empty it. Reset right after writing the reading so the next storm starts at zero.
If it has not rained for days, do a pour test instead. Measure 100 millilitres of water with a kitchen jug, pour it through the funnel and see what the scale reports. The trick is that the funnel spreads the water wider than the container, so a small known volume should produce a much larger reading, which is why an adult should always do this calculation rather than eyeball it.
Frequently Asked Questions
What container is best for a homemade rain gauge?
A clear container with straight, parallel sides works best, and a wide mouth helps because the funnel rim rests flat on it. A jar with no cutting needed is the easiest starting point for young children. A plastic bottle is fine as long as you cut below the shoulder where the walls start to curve.
Should I measure rain in inches or centimeters?
Millimetres and centimetres are used almost everywhere outside the United States, so marking centimetres with half-centimetre ticks works well for school maths. If your child is working in inches, add a second scale in inches and use a conversion ruler. Pick one set of numbers for the journal and stay with it.
Where should I place a rain gauge with kids?
Choose an open, level spot that is clear to the sky and clear of obstacles. Keep it away from roof edges, eaves, walls, trees and sprinklers, since splash and blocked sky both distort the reading. Read the water at eye level, and stake or wedge the container if your area gets windy.
How accurate is a DIY rain gauge?
A careful homemade gauge can land within a millimetre or two of a store-bought one when the container is straight-sided, the funnel is seated flat and the opening is unobstructed. Tapered bottles, loose funnels and a covered opening are what cause big errors. Check yours once with a measured volume of water before you trust the numbers.
How often should children empty the rain gauge?
Empty it as soon as the reading has been written down, ideally the same day after every storm. In hot weather check it every few days for evaporation, insects or debris, and wipe it dry before the next rainfall. A quick weekly glance keeps the journal honest without turning it into a chore.
Can we turn this project into a longer weather activity?
Yes, and it is the part children remember. Build two gauges in different spots to compare a shady yard with a sunny one, log readings hourly during one storm, or graph a month of daily totals into a bar chart. Comparing your numbers with a nearby official station makes the whole thing feel like real science.
Conclusion
Start with the scale. Put the first mark at the true bottom of a straight-sided container, mount it somewhere open to the sky, and record the reading the very next time it rains. Once that first number goes in the weather journal, keeping the habit going is usually the easy part.